Manual
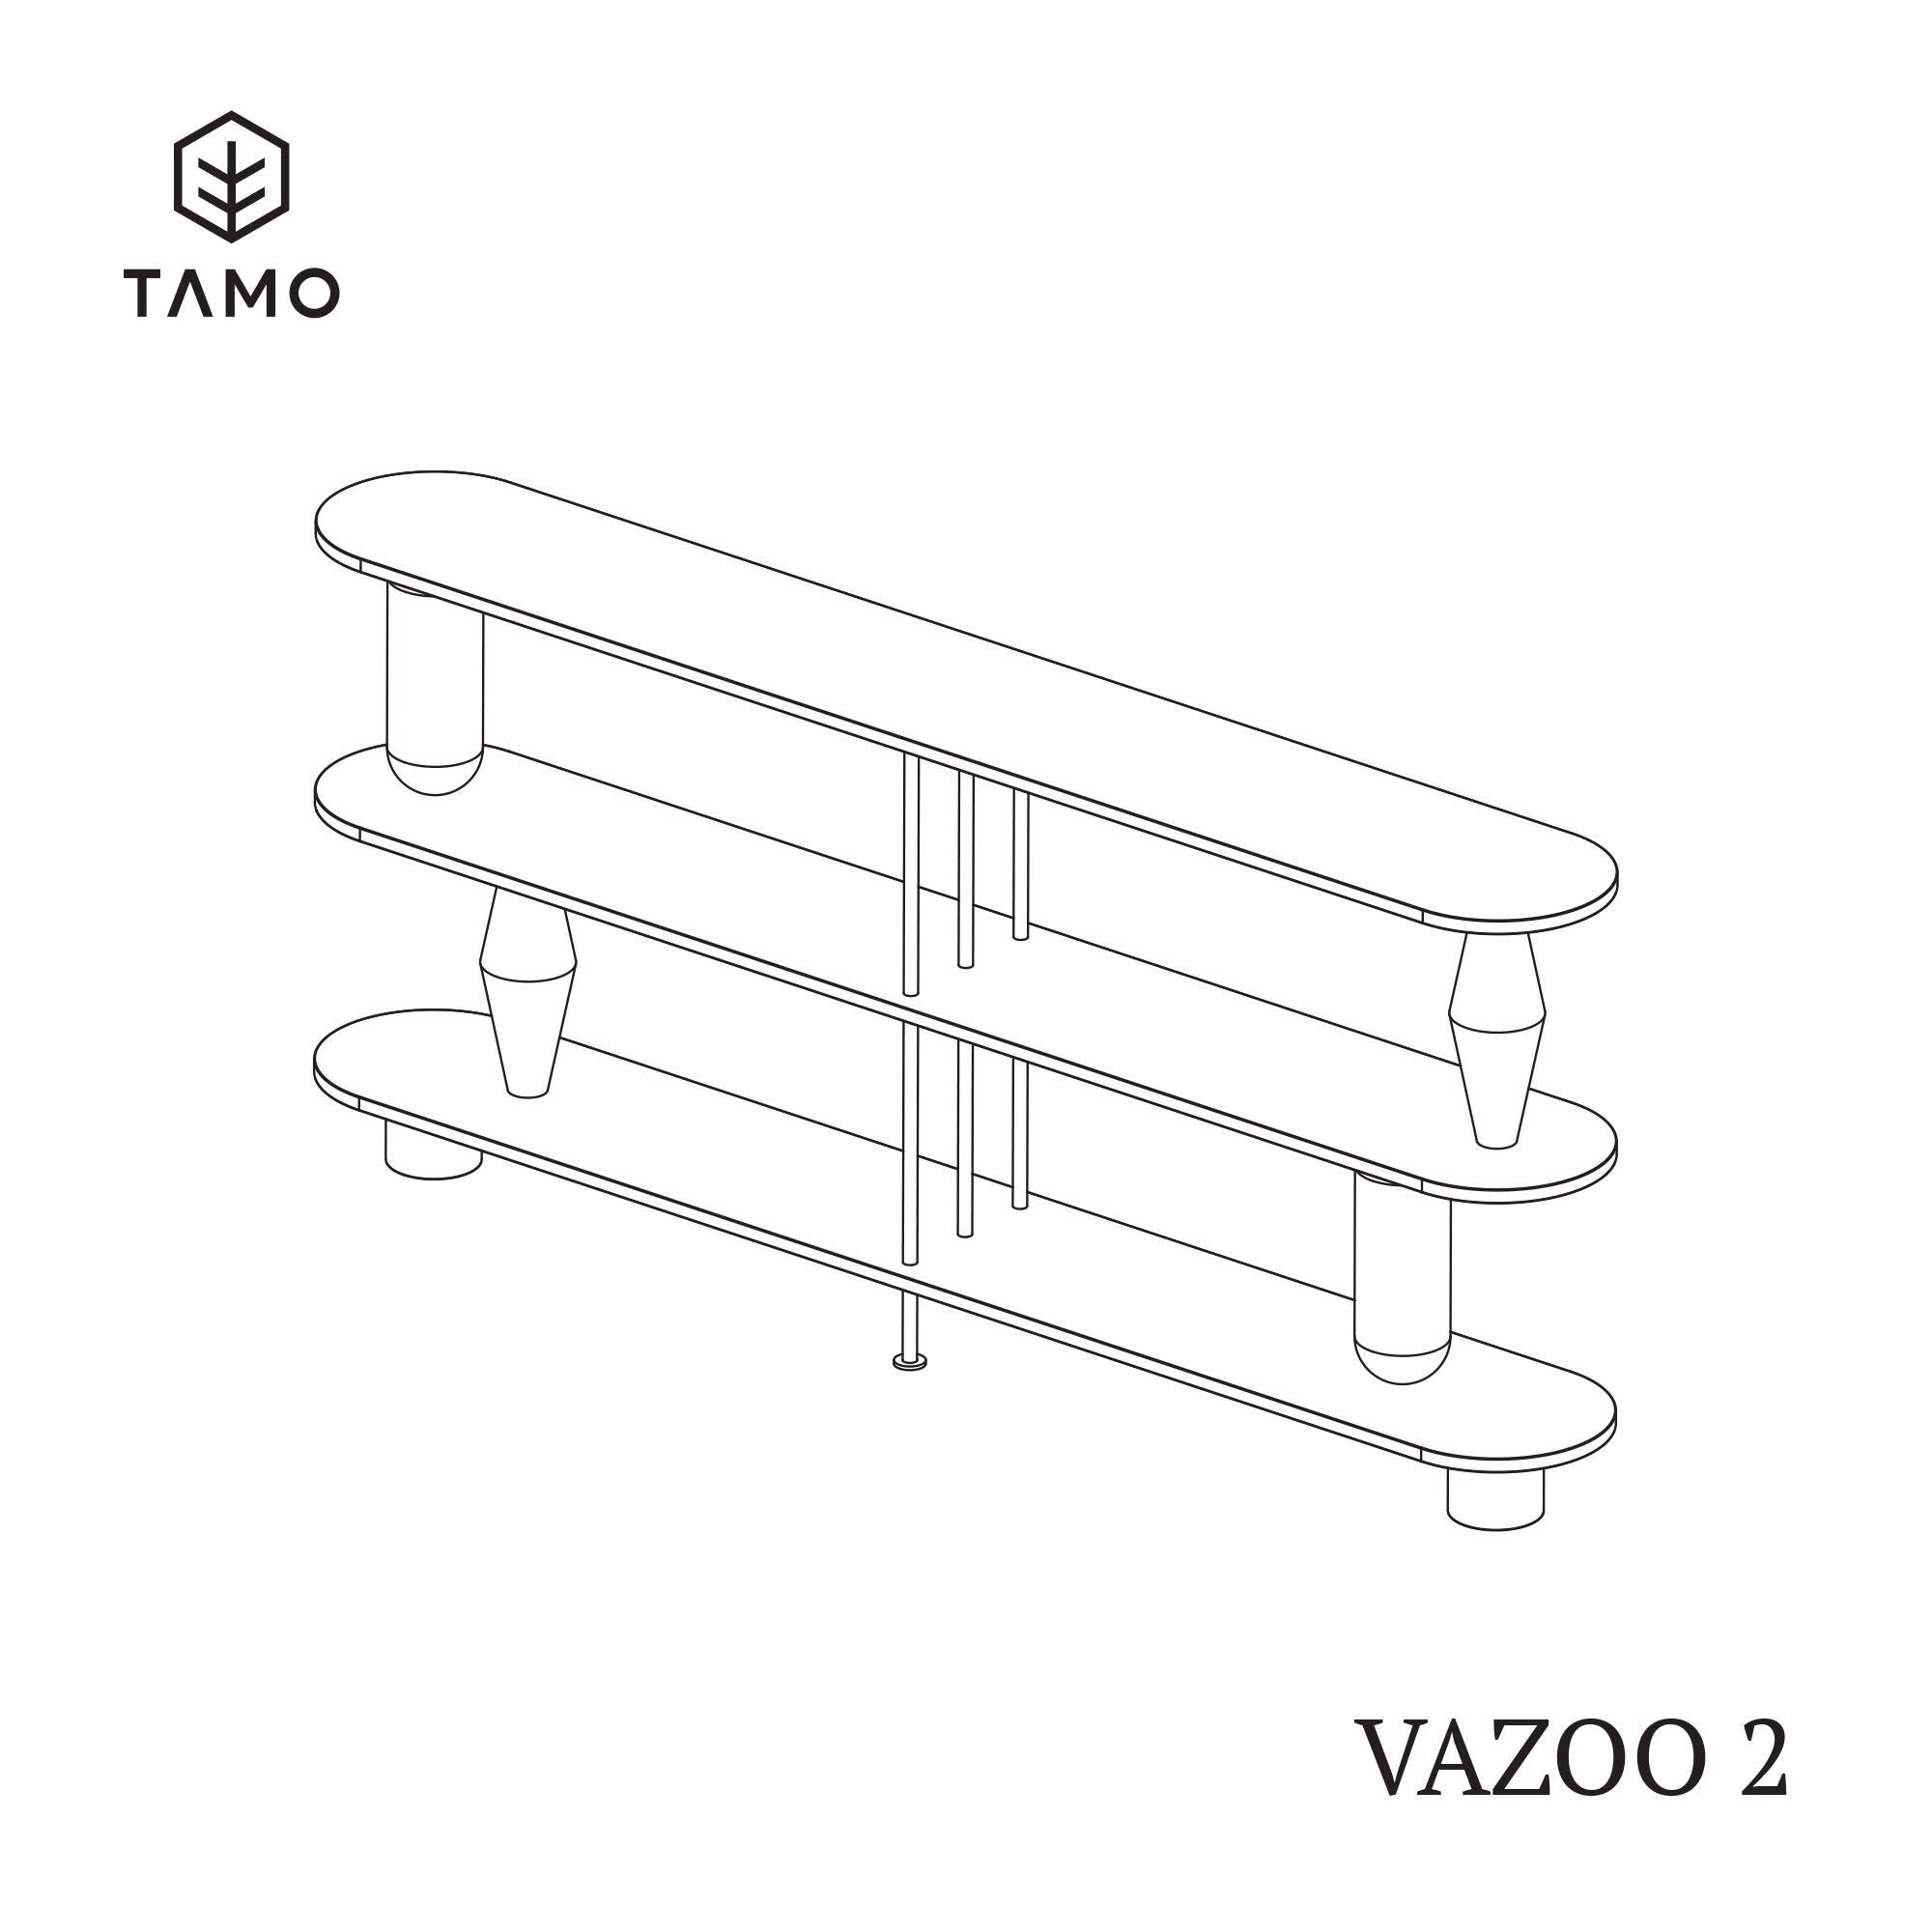
VAZOO 2
Follow the instructions below.
START
Prepare a place to assemble the VAZOO 2 shelf. Make sure you have enough space for comfortable turning and the surfaces you will use are clean. We recommend using a carpet or blanket on which the parts can be safely assembled.
STEP 1
Unpack all parts. Arrange them so that you have an overview of all the parts.
STEP 2
Assembling the VAZOO 2 shelf is very simple. In most cases, you can assemble our shelf without using additional tools and it should take you no more than 20 minutes.

STEP 3
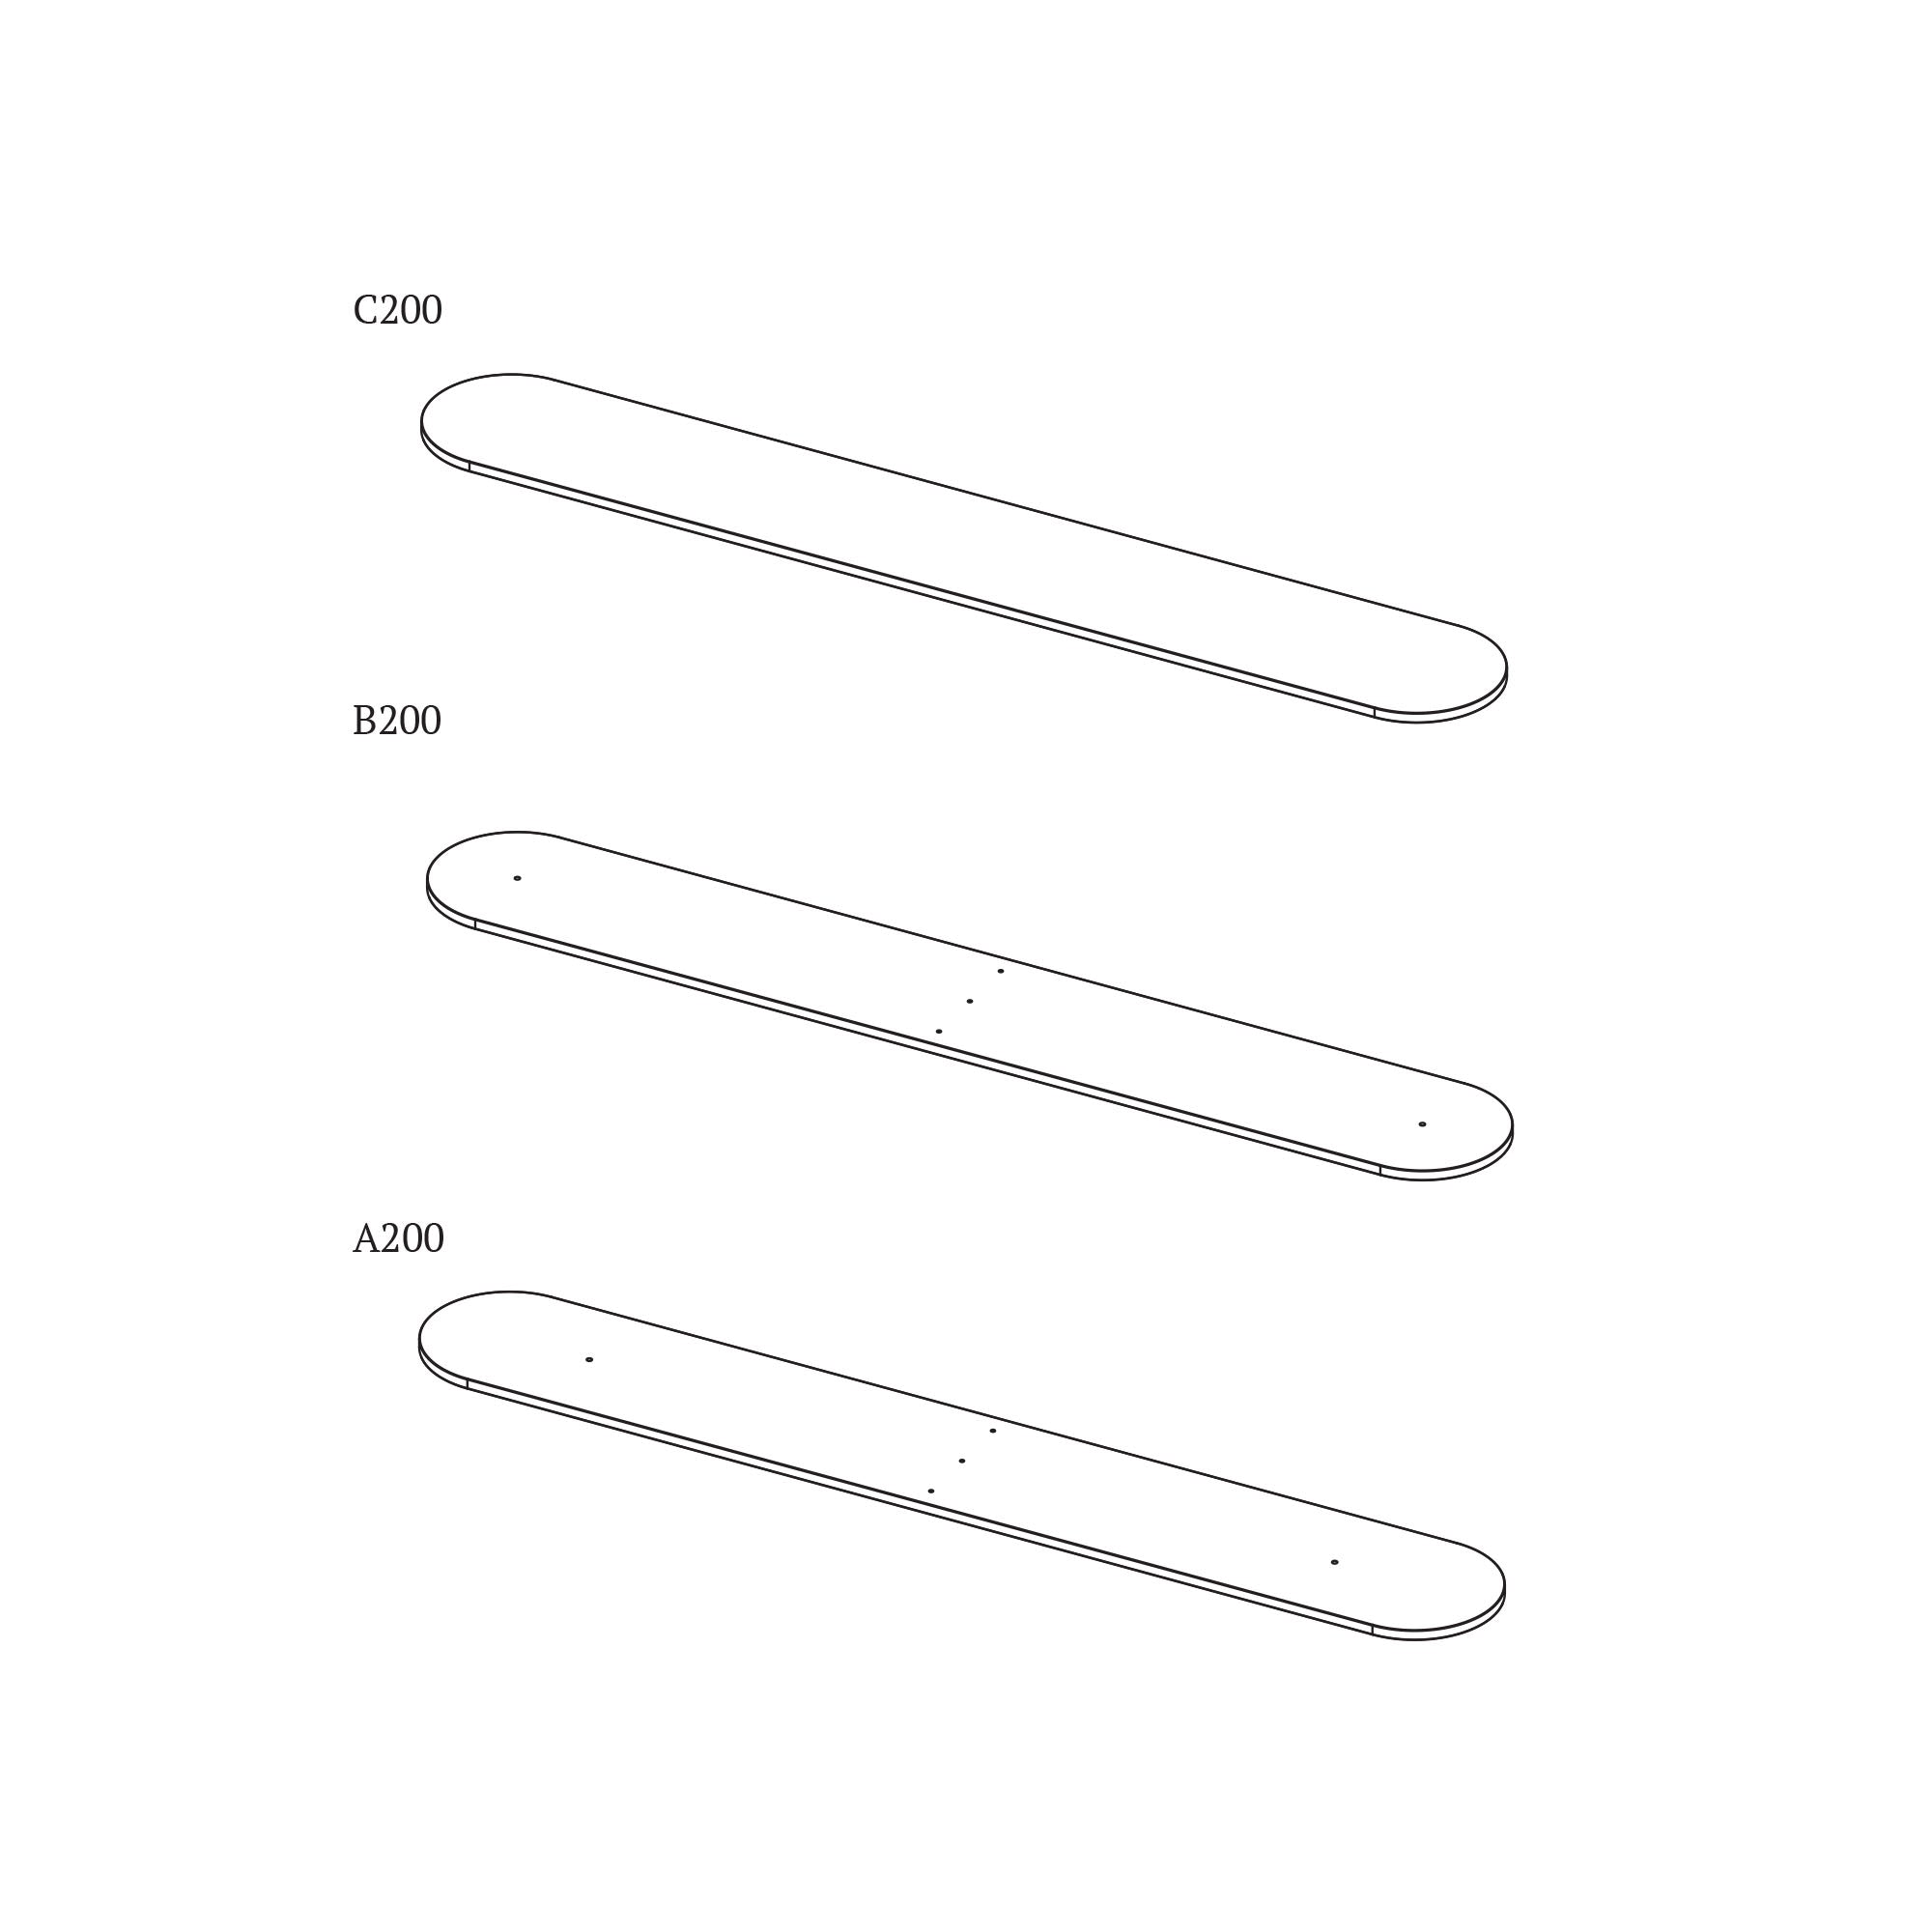
Start with the countertop, which will be the top element of our shelf. On one side, the top is smooth and without holes.

STEP 4
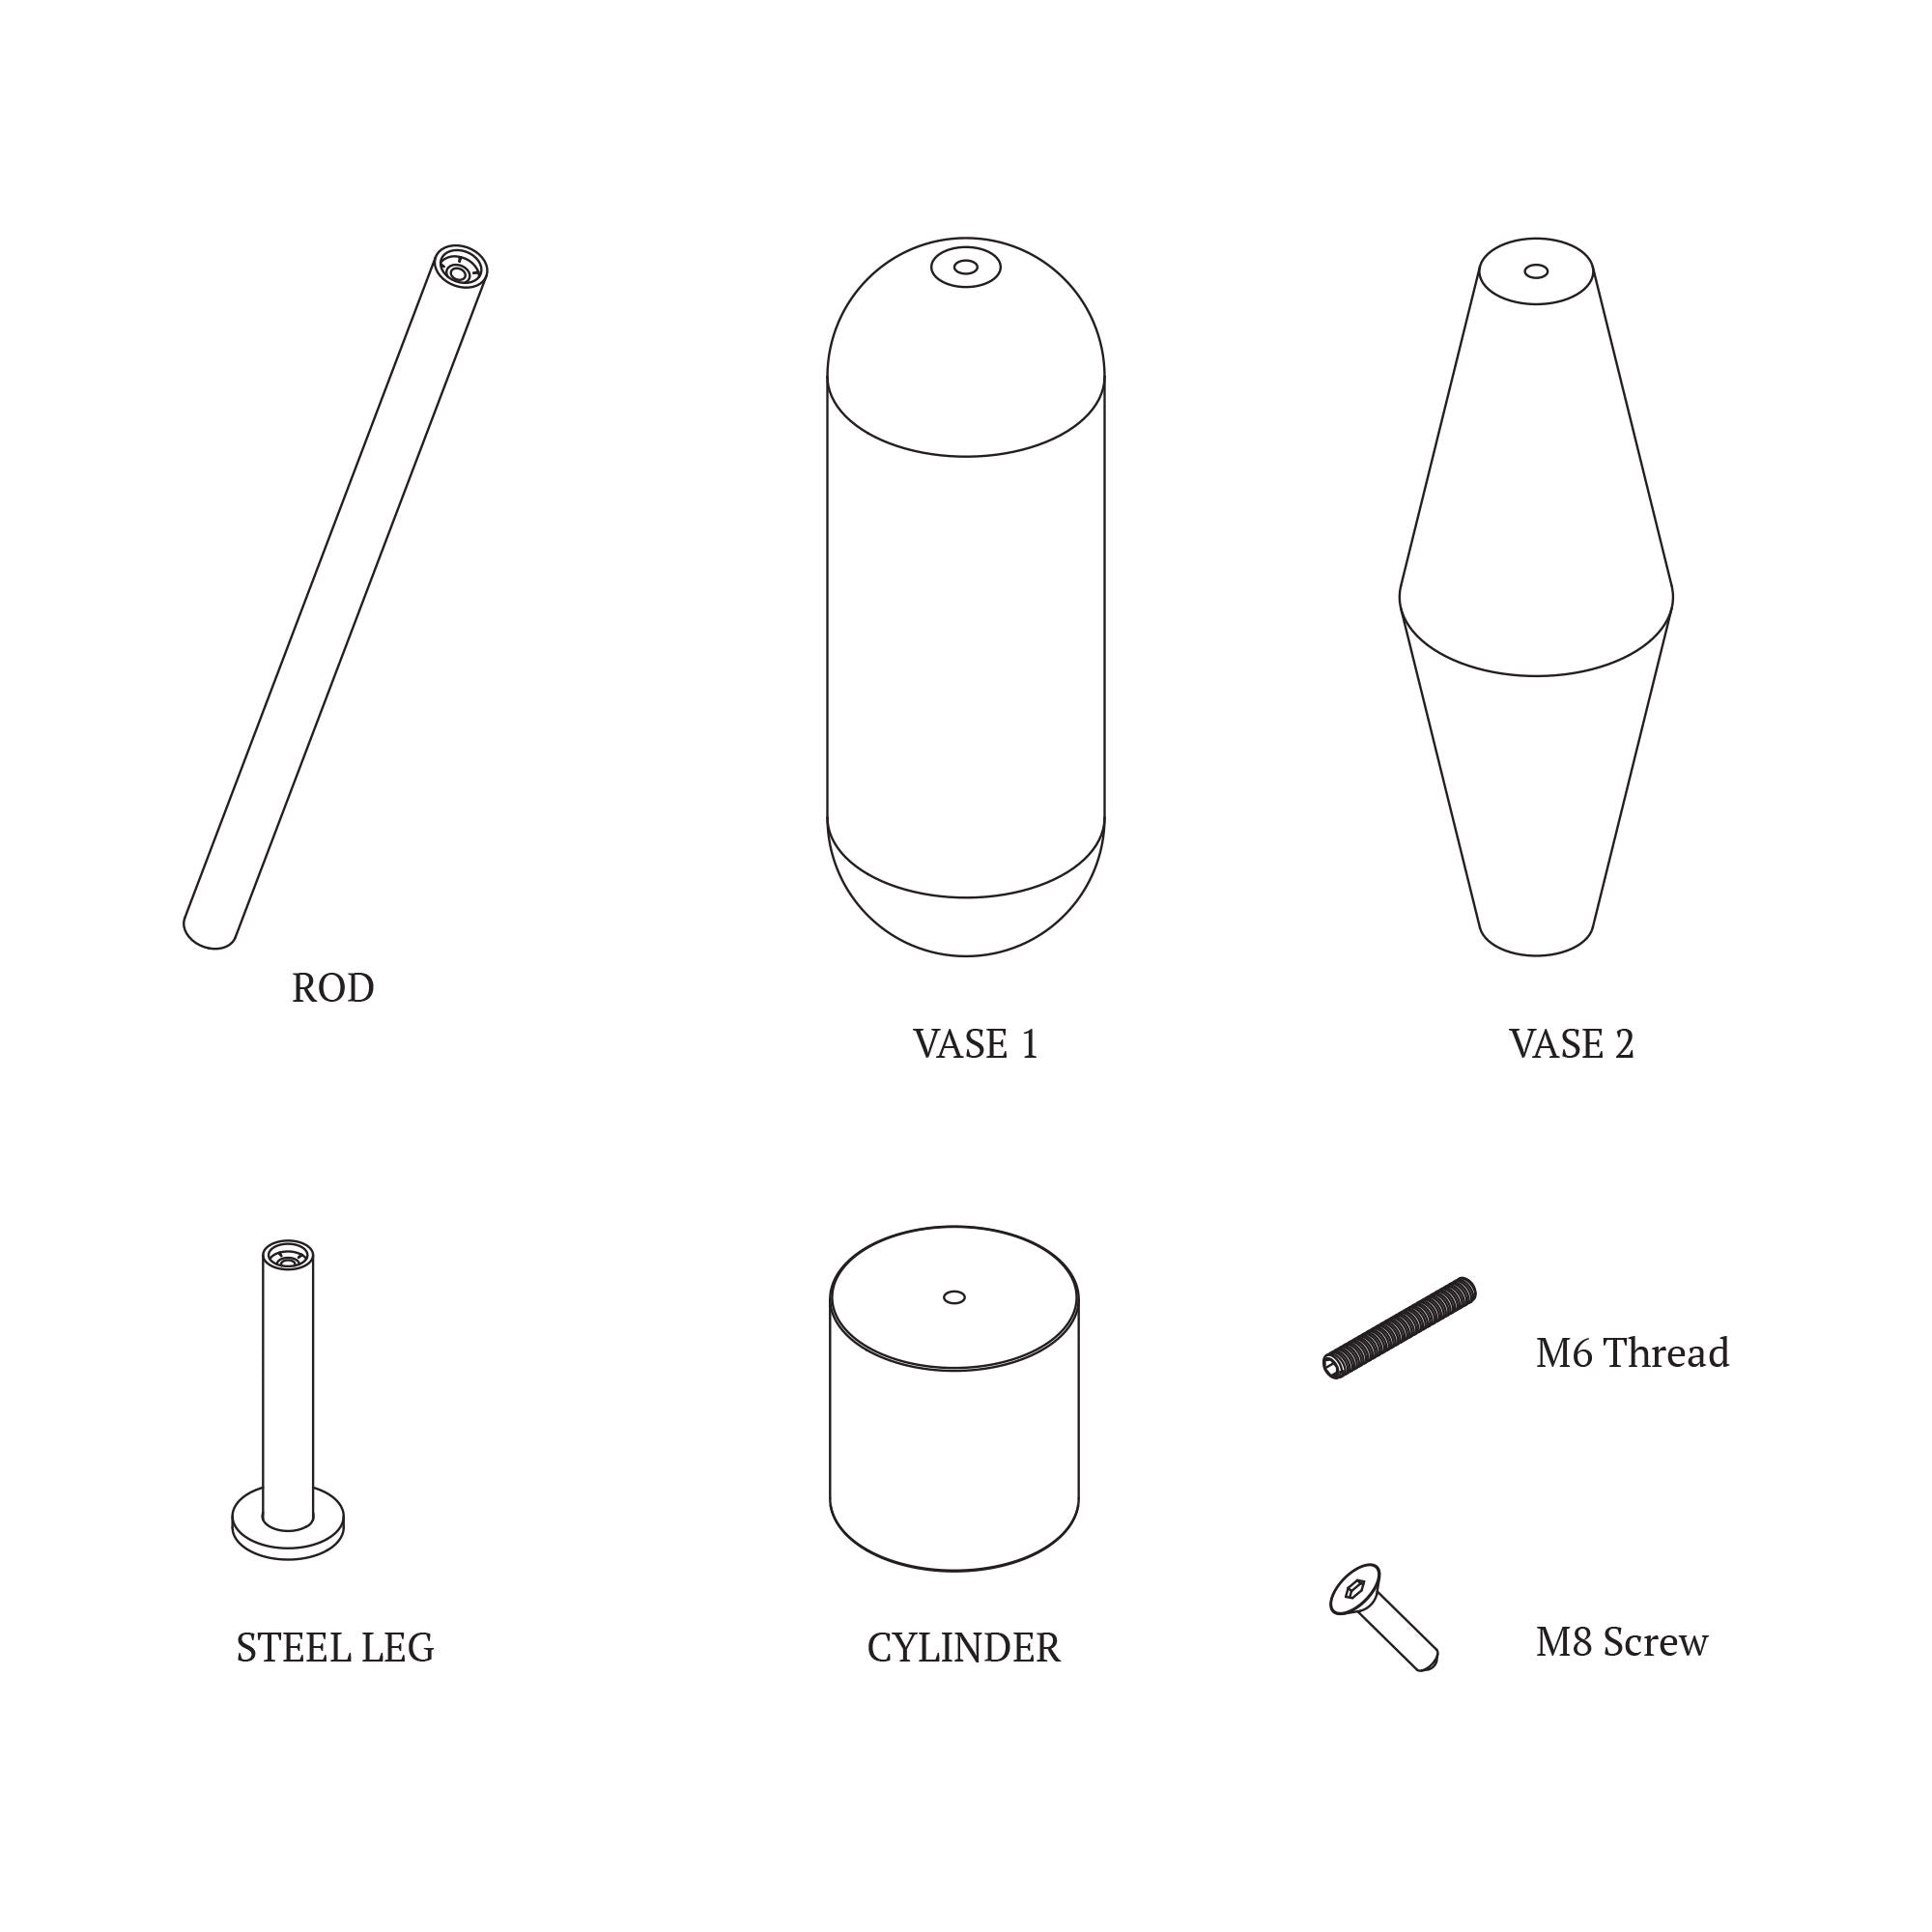
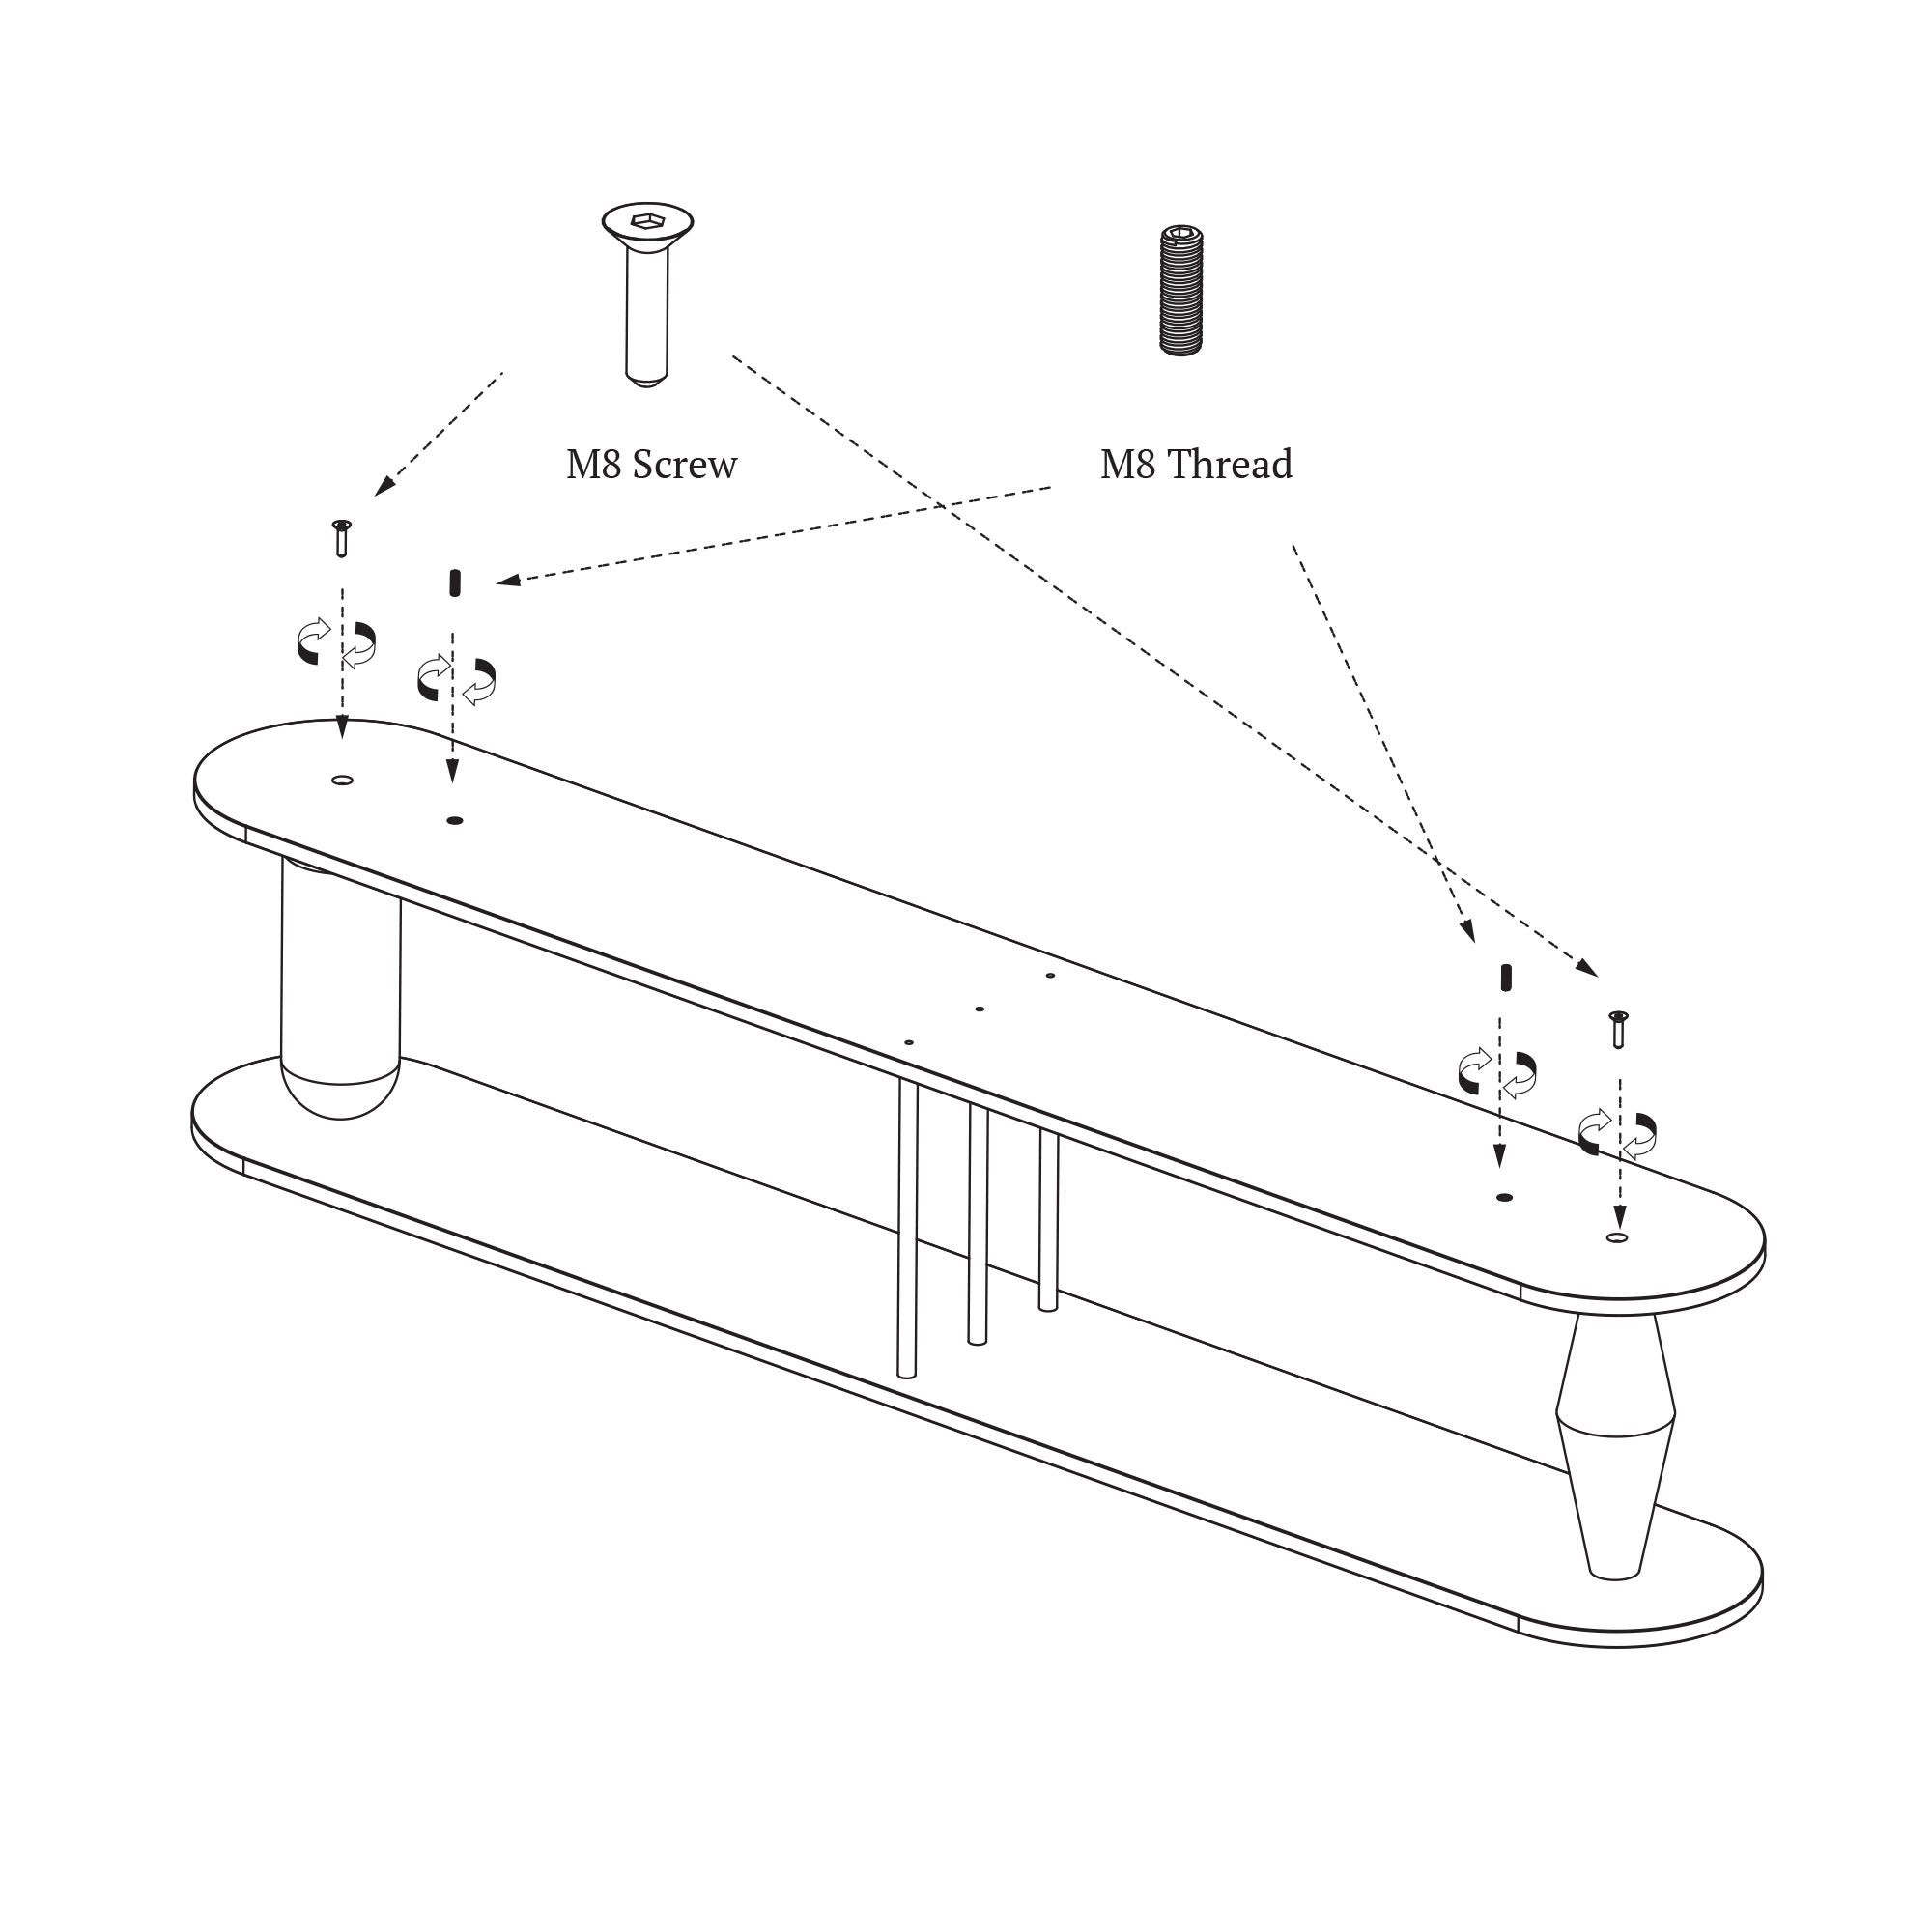
Screw the threaded studs into the appropriate holes. You will need 2pcs. pins with M8 thread and 3 pcs. pins with M6 thread. Of course, the ones with a smaller diameter are M6.
STEP 5
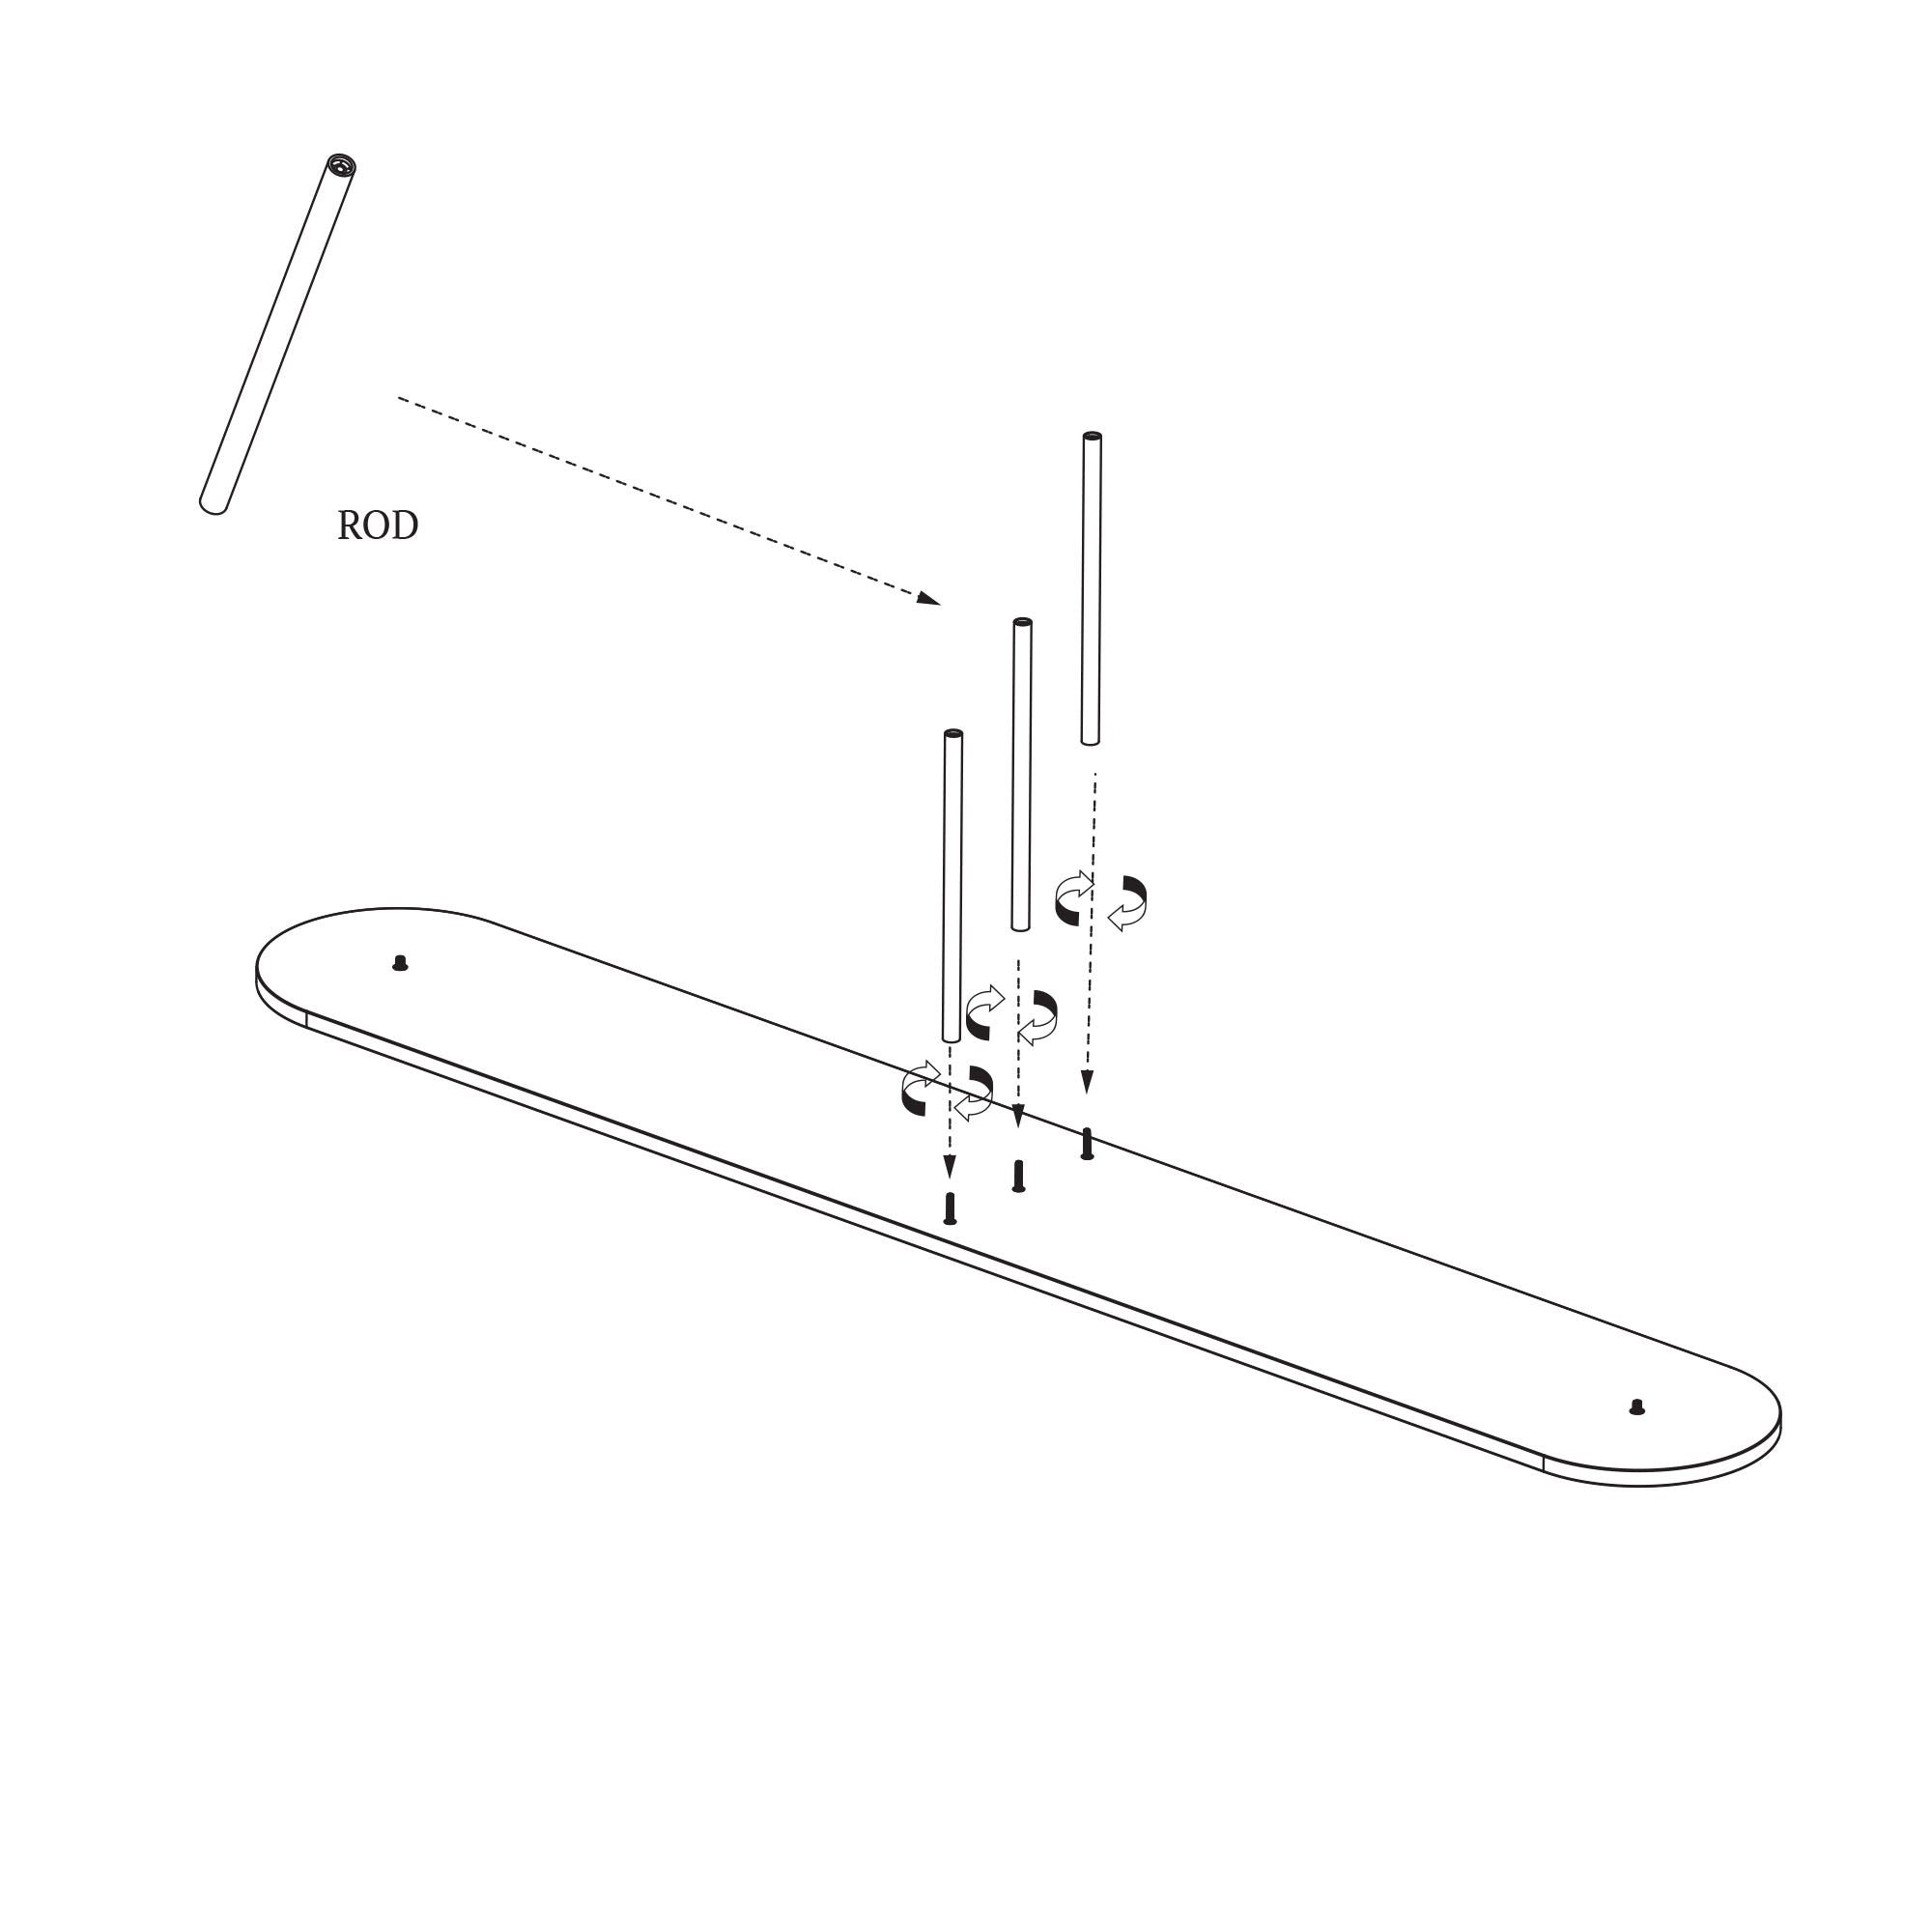
Screw 3 pcs. steel pipes for the protruding threads in the central part of the countertop.
STEP 6
Take two pieces of your choice that you want to be on the highest level of the shelf and screw them onto the protruding threads. We suggest that the vases be mixed. This is when the shelf looks the most impressive.
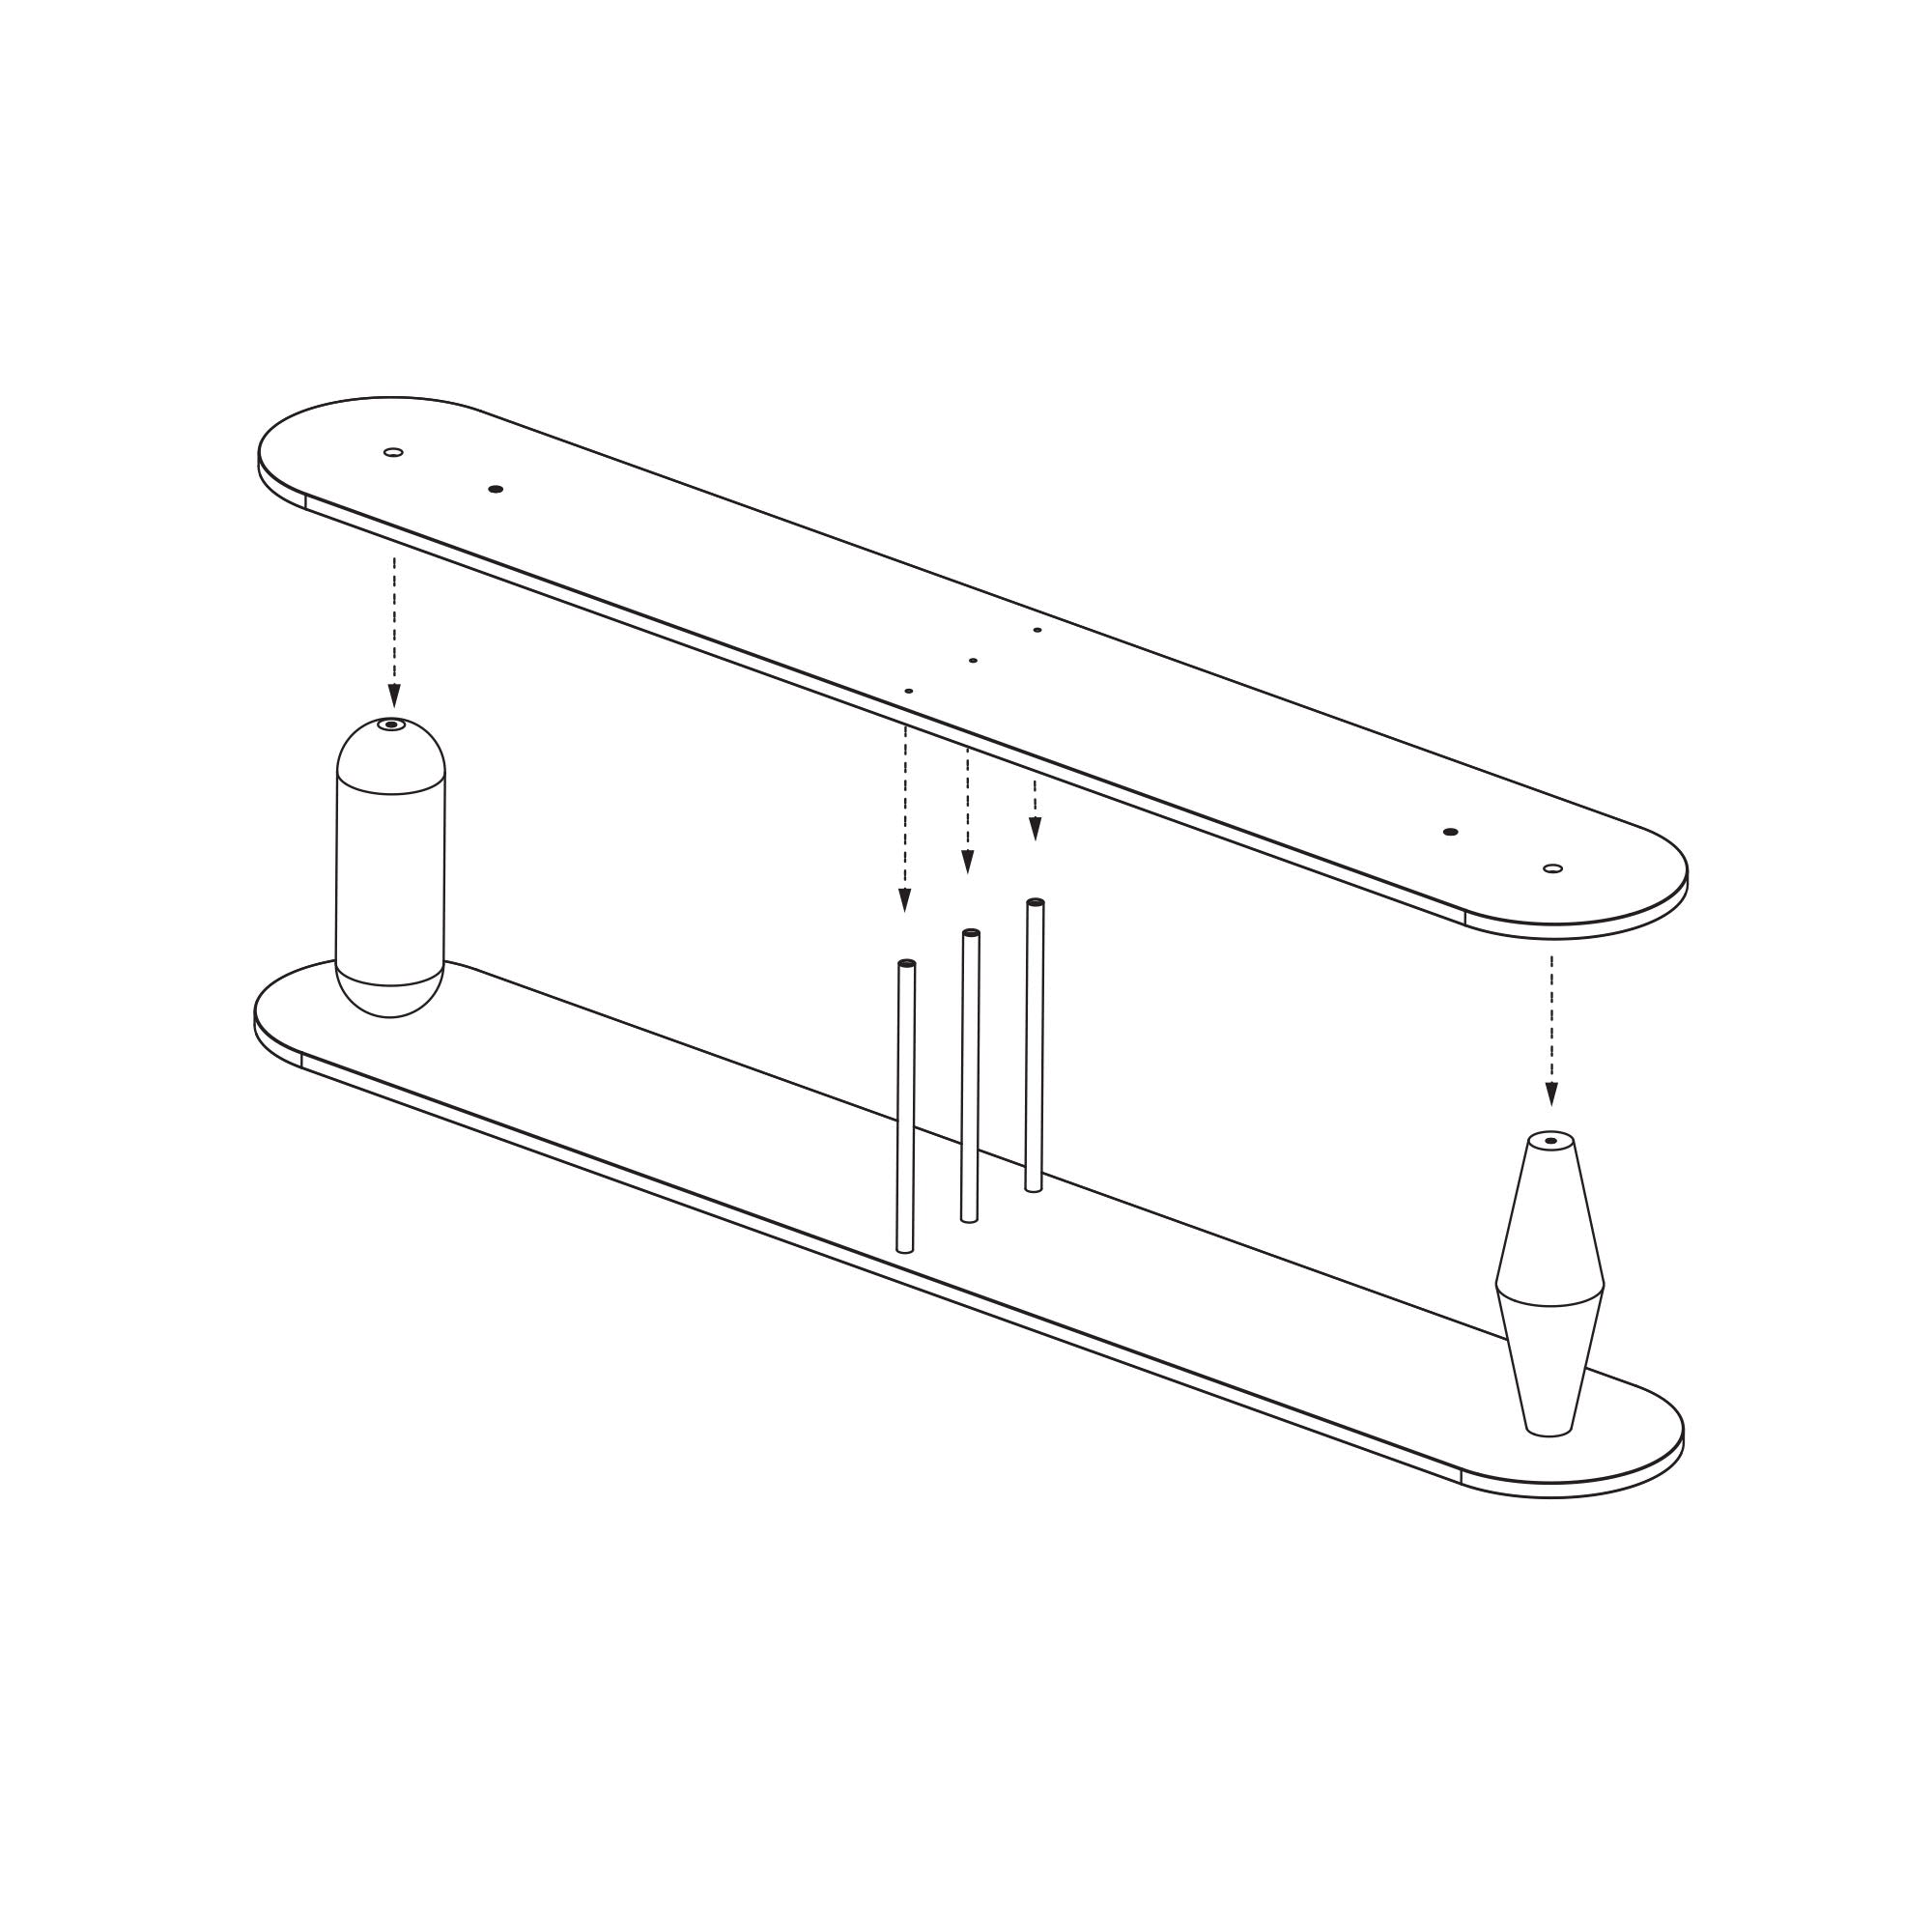
STEP 7
Take another tabletop (middle) and place it on the blocks and protruding bars to fit the holes.
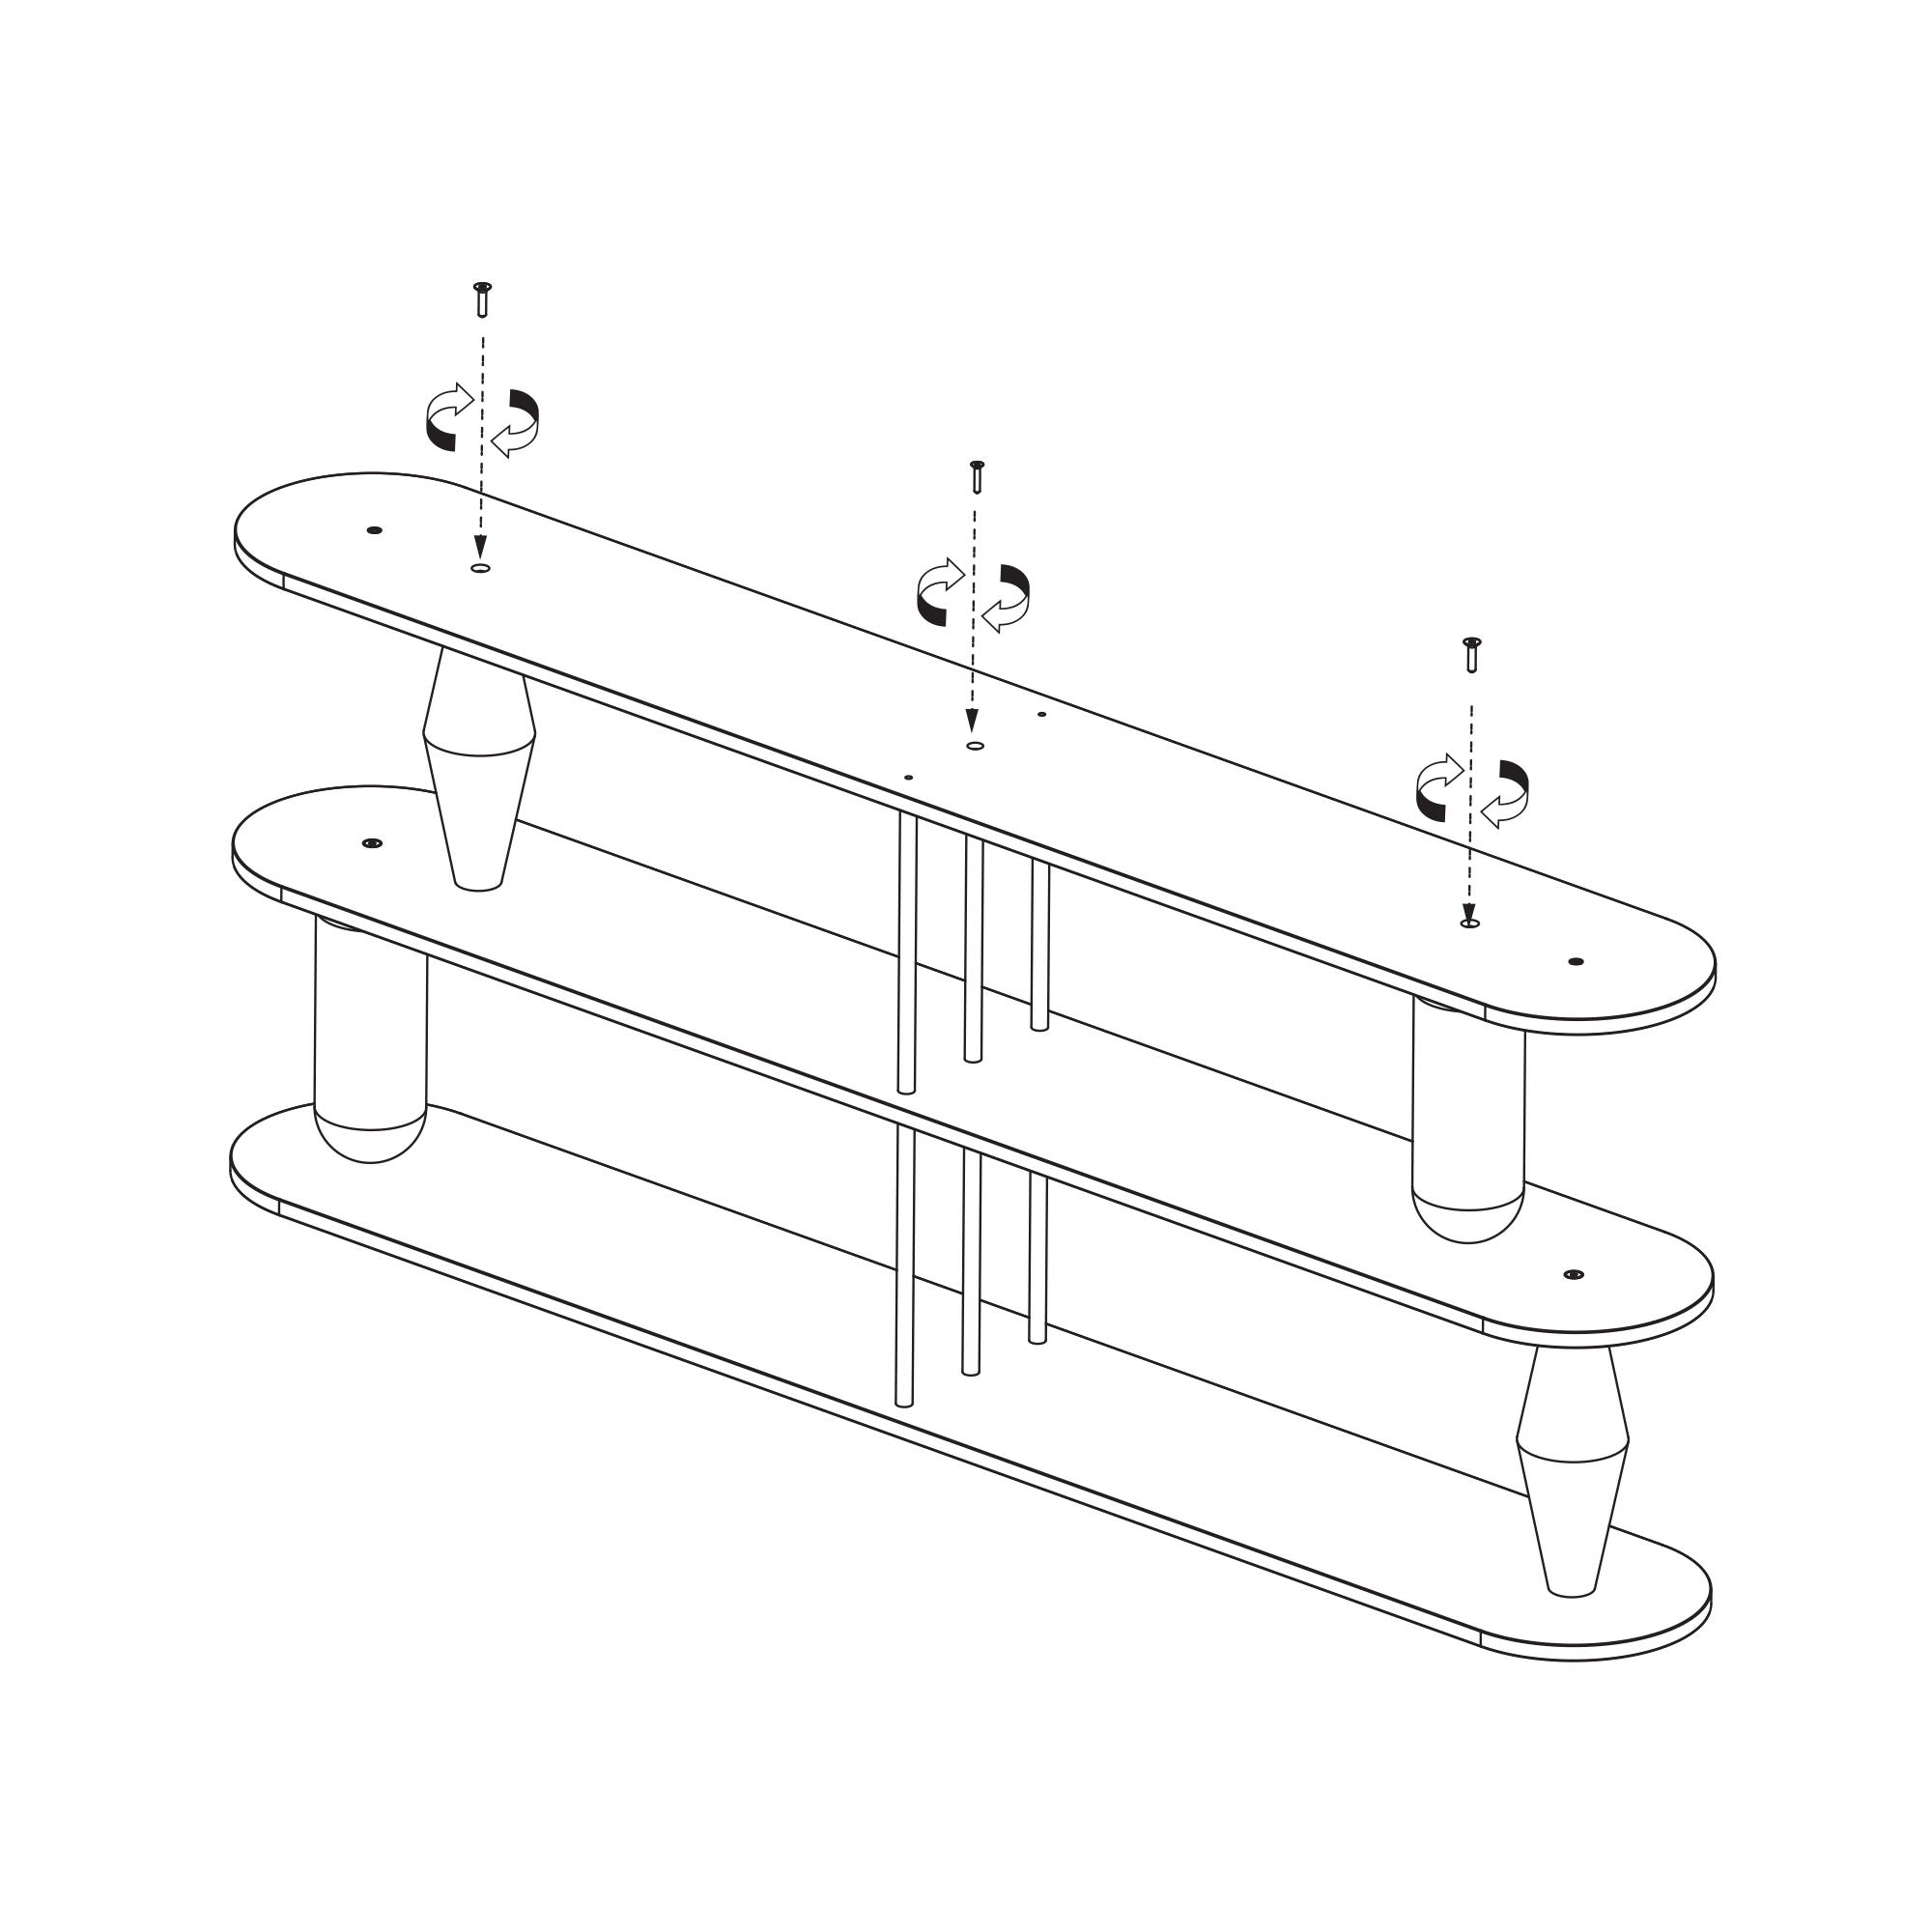
STEP 8
Then, once the countertop is in place, install the screws and threaded studs indicated in the illustration above.
STEP 9
Screw the pieces onto the protruding threads in the indicated place.
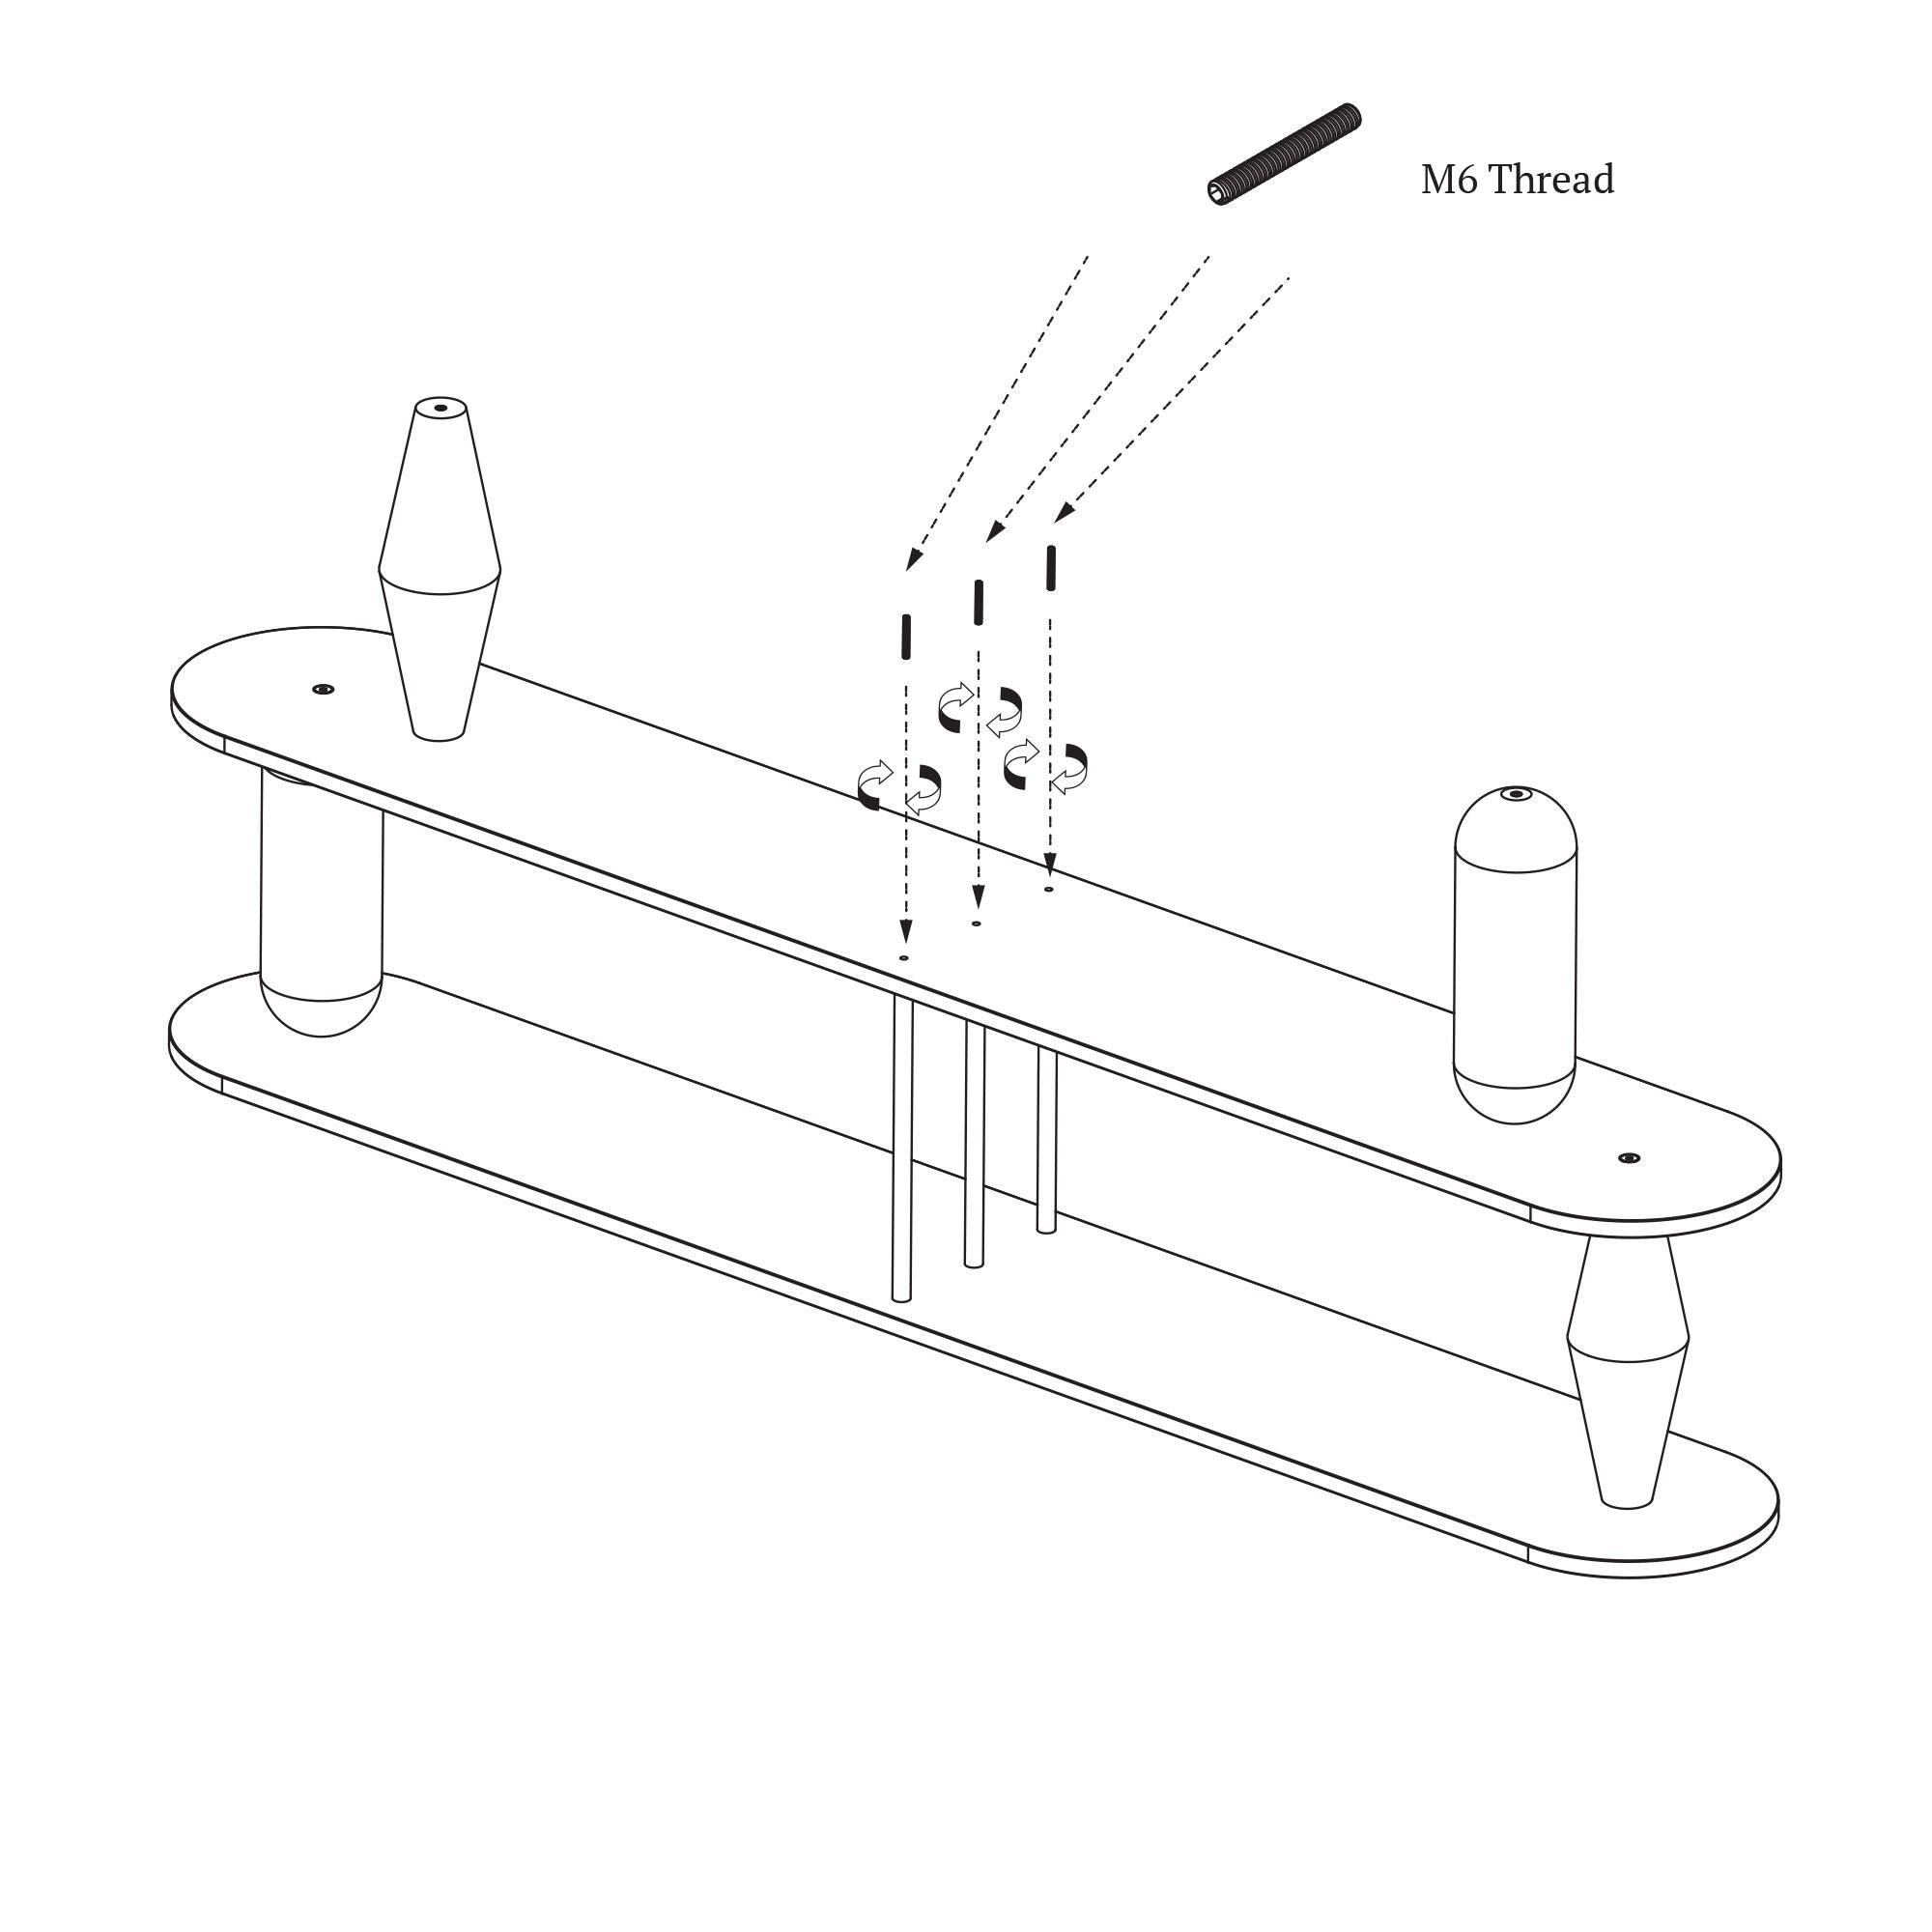
STEP 10
Now prepare the threads for screwing on the next threaded pipes. You will need three threaded studs for this. Screw them into the holes so that they stick out at a similar height. Preferably around 10mm-15mm.

STEP 11
Screw on 3 tubes. for protruding threads.

STEP 12
Place the last countertop on the solids in such a way that the holes match the solids and tubes below. *In the case of a VAZOO shelf with more shelves, repeat the steps from step 7 to step 11.
STEP 13
Secure the table top with screws. Use two M8 and one M6 screws to screw into the tube.

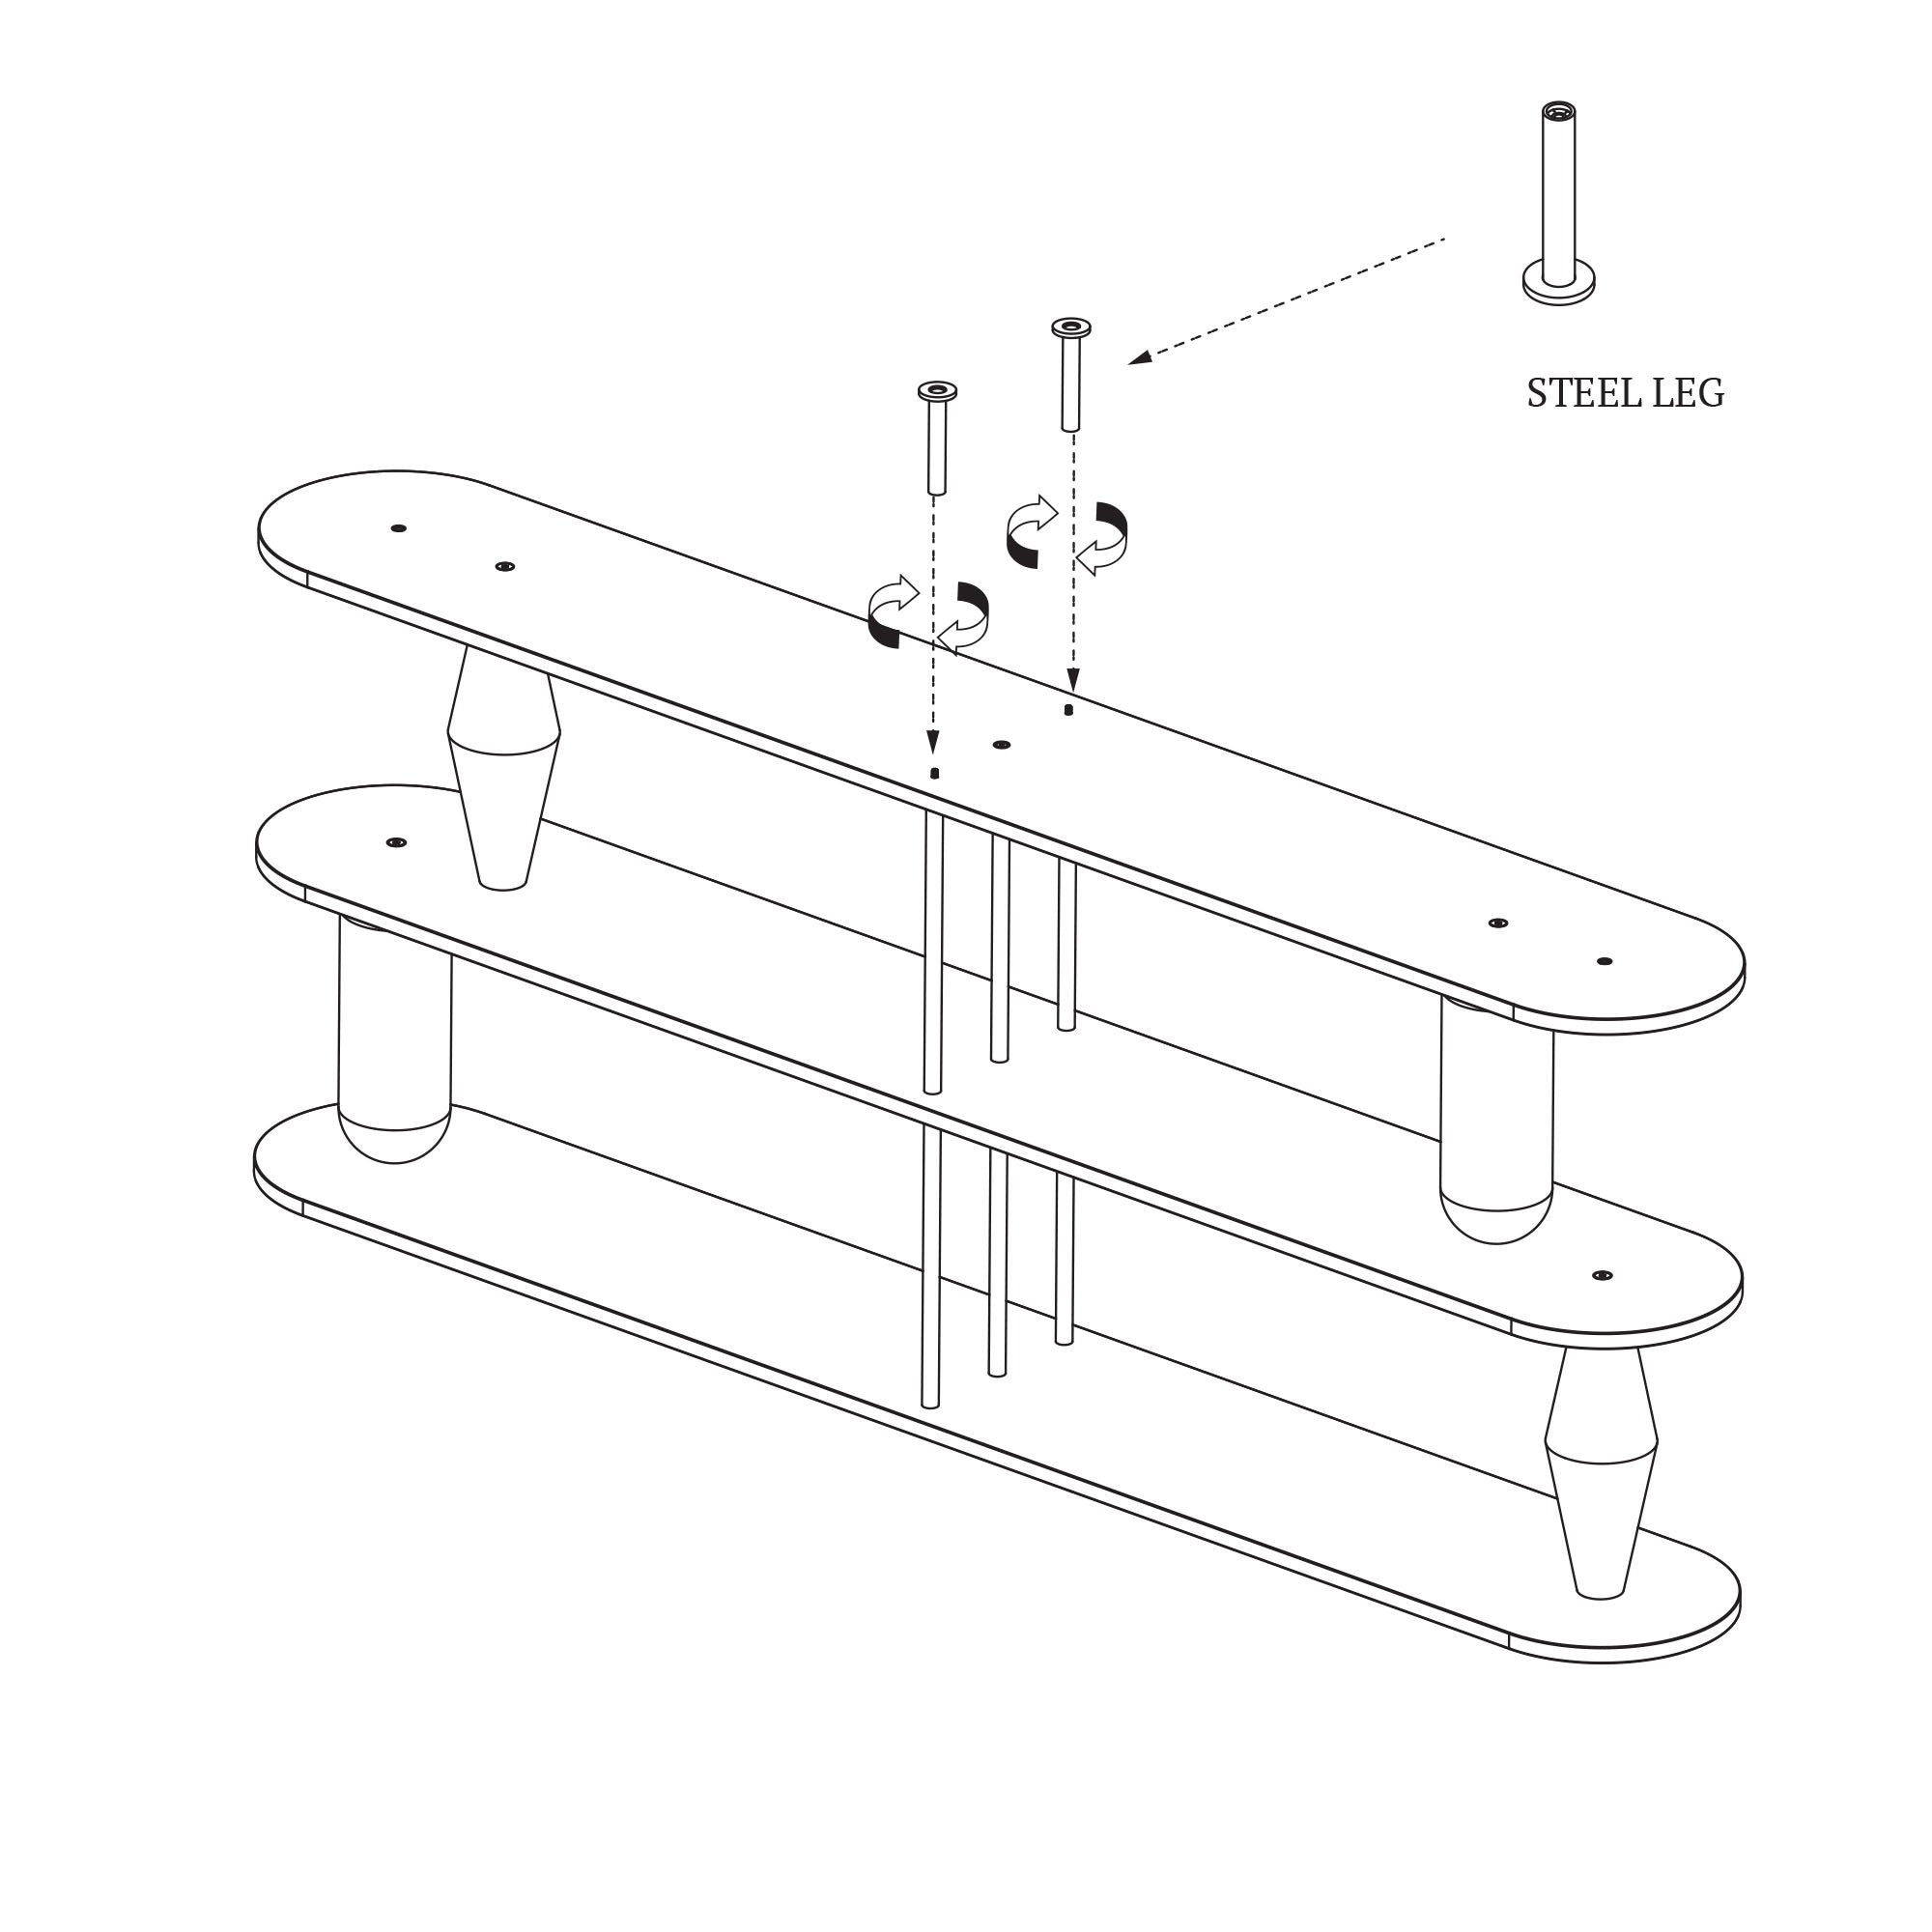
STEP 14
Now it's time for the threaded pins (2 pcs.) which you will screw into the extreme holes located in the middle of the countertop. We will use them to screw on the steel legs. Try to ensure that the threads protrude by about 10-15mm.
STEP 15
Screw the steel legs onto the protruding threads.
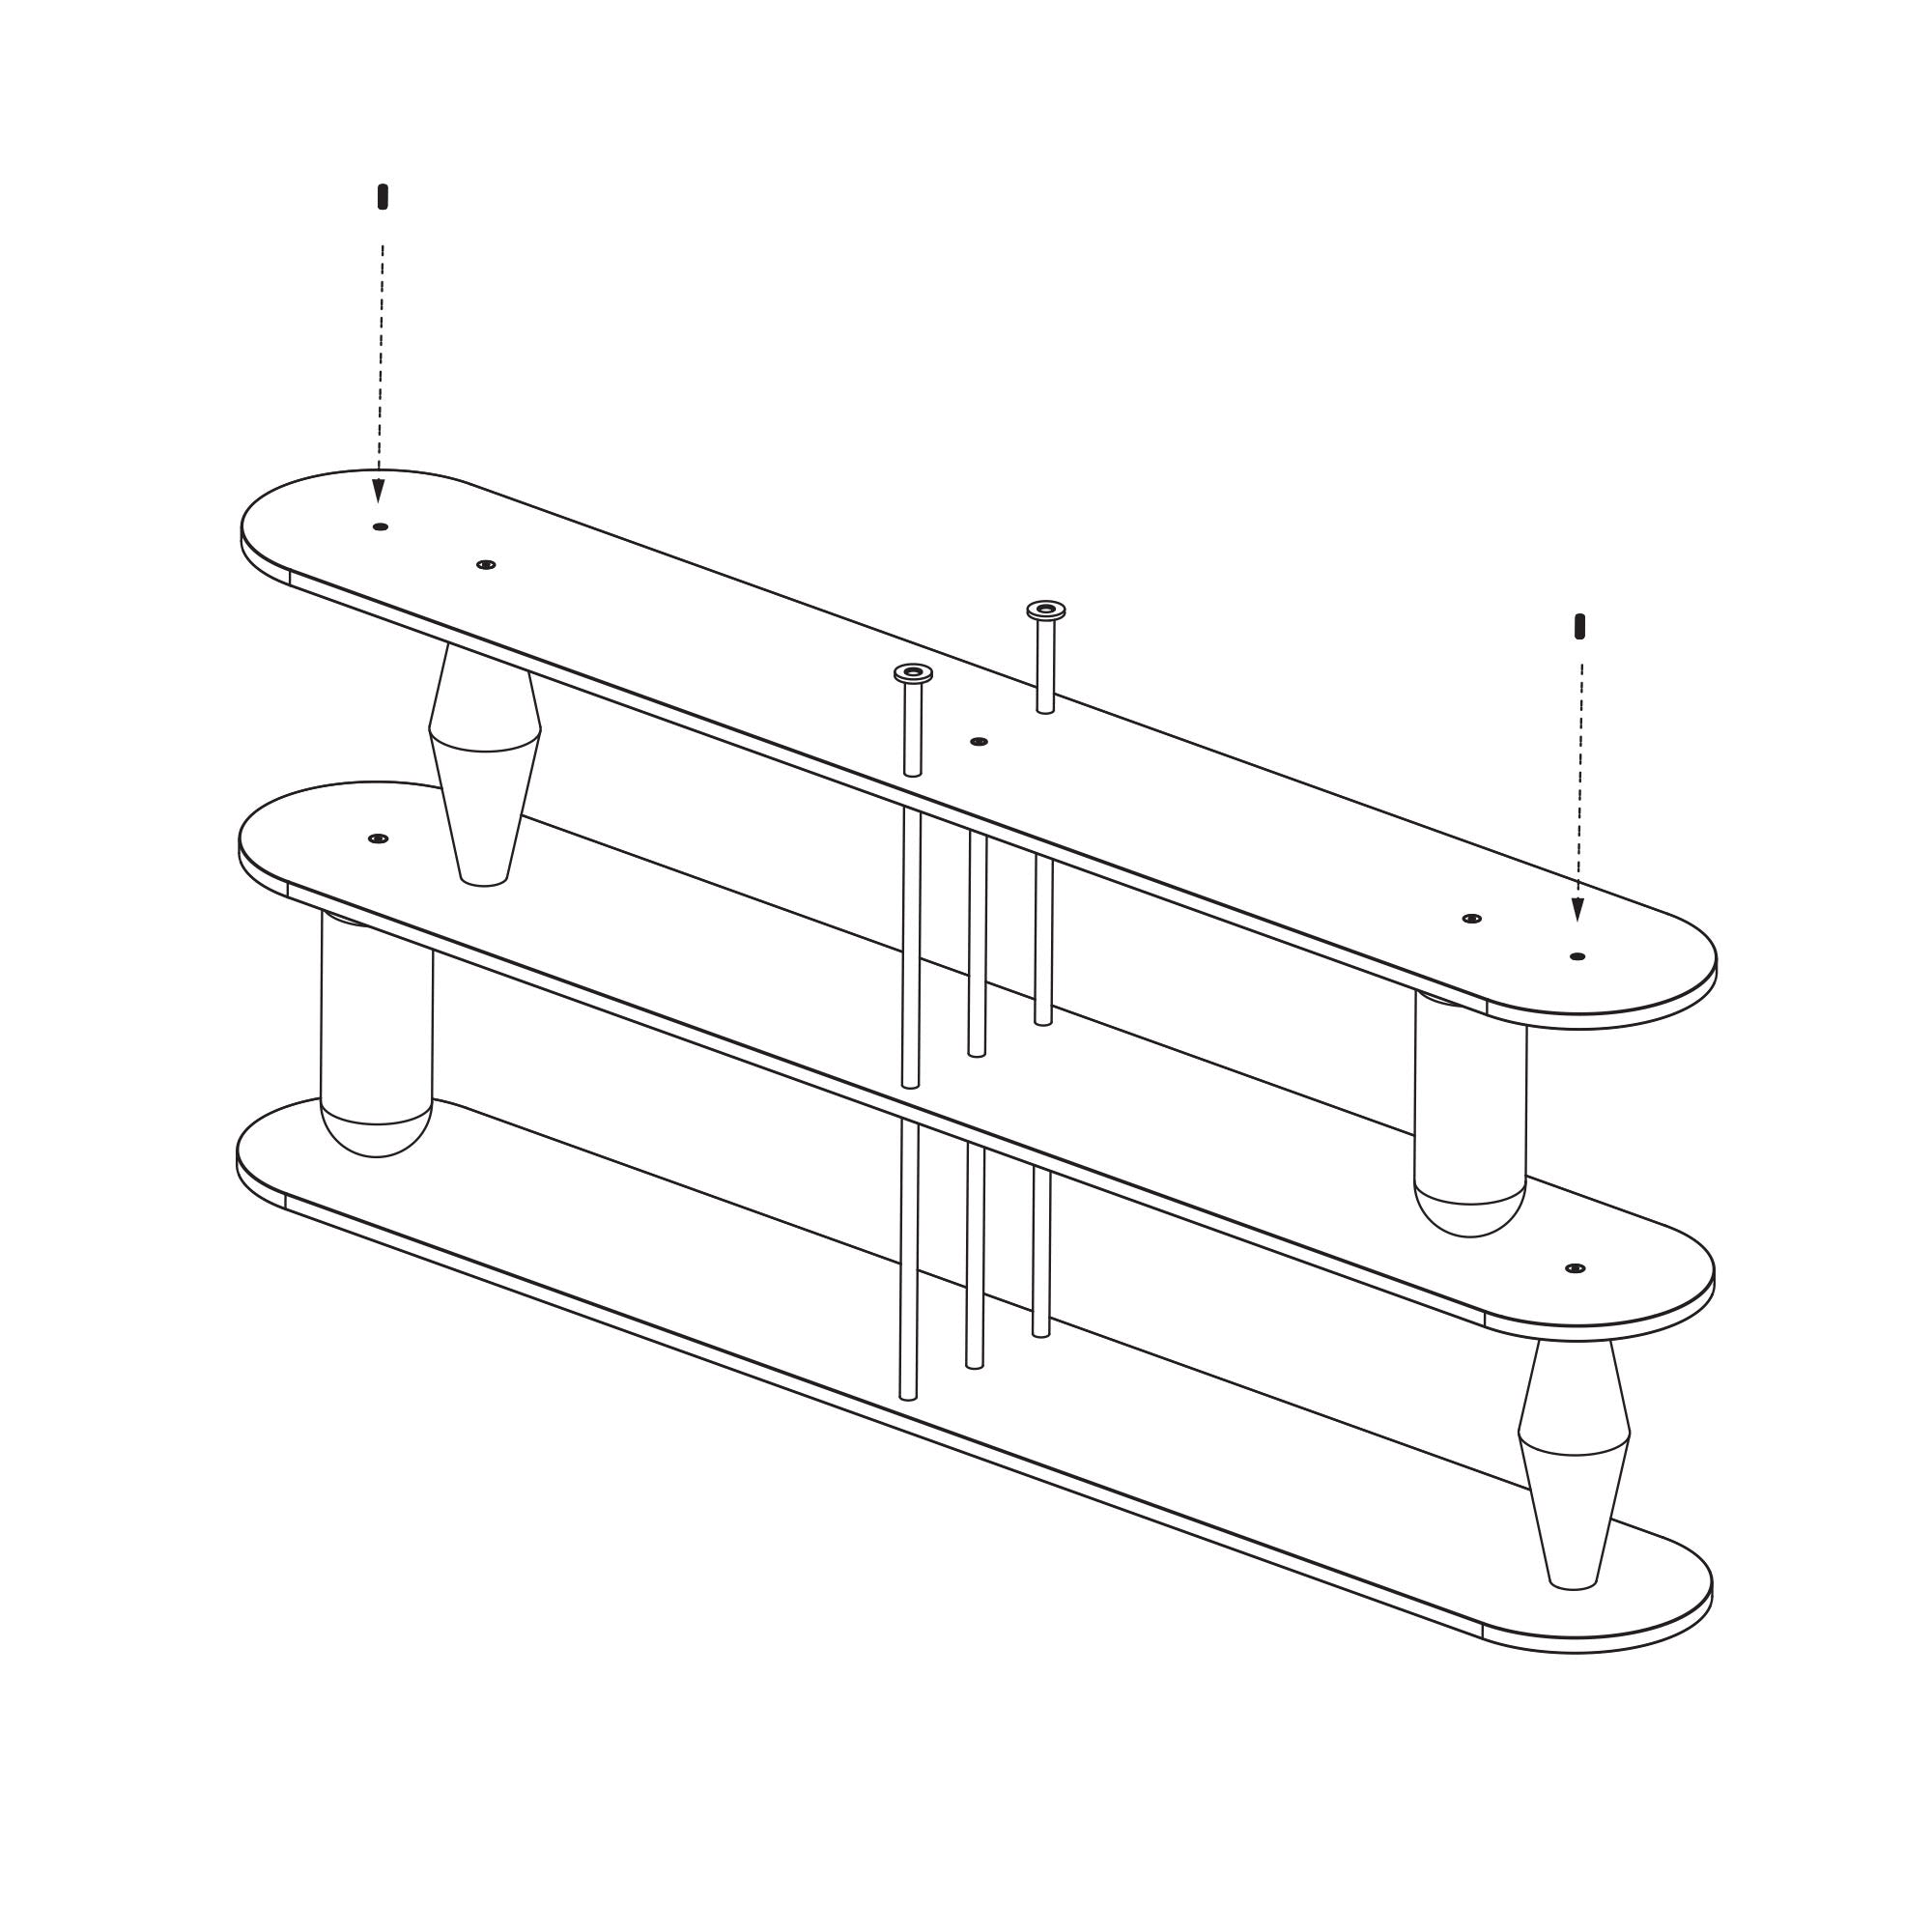
STEP 16
Place the M8 pins remaining in the set in the extreme holes of the table top. Screw them in so that they stick out by about 10-15mm.
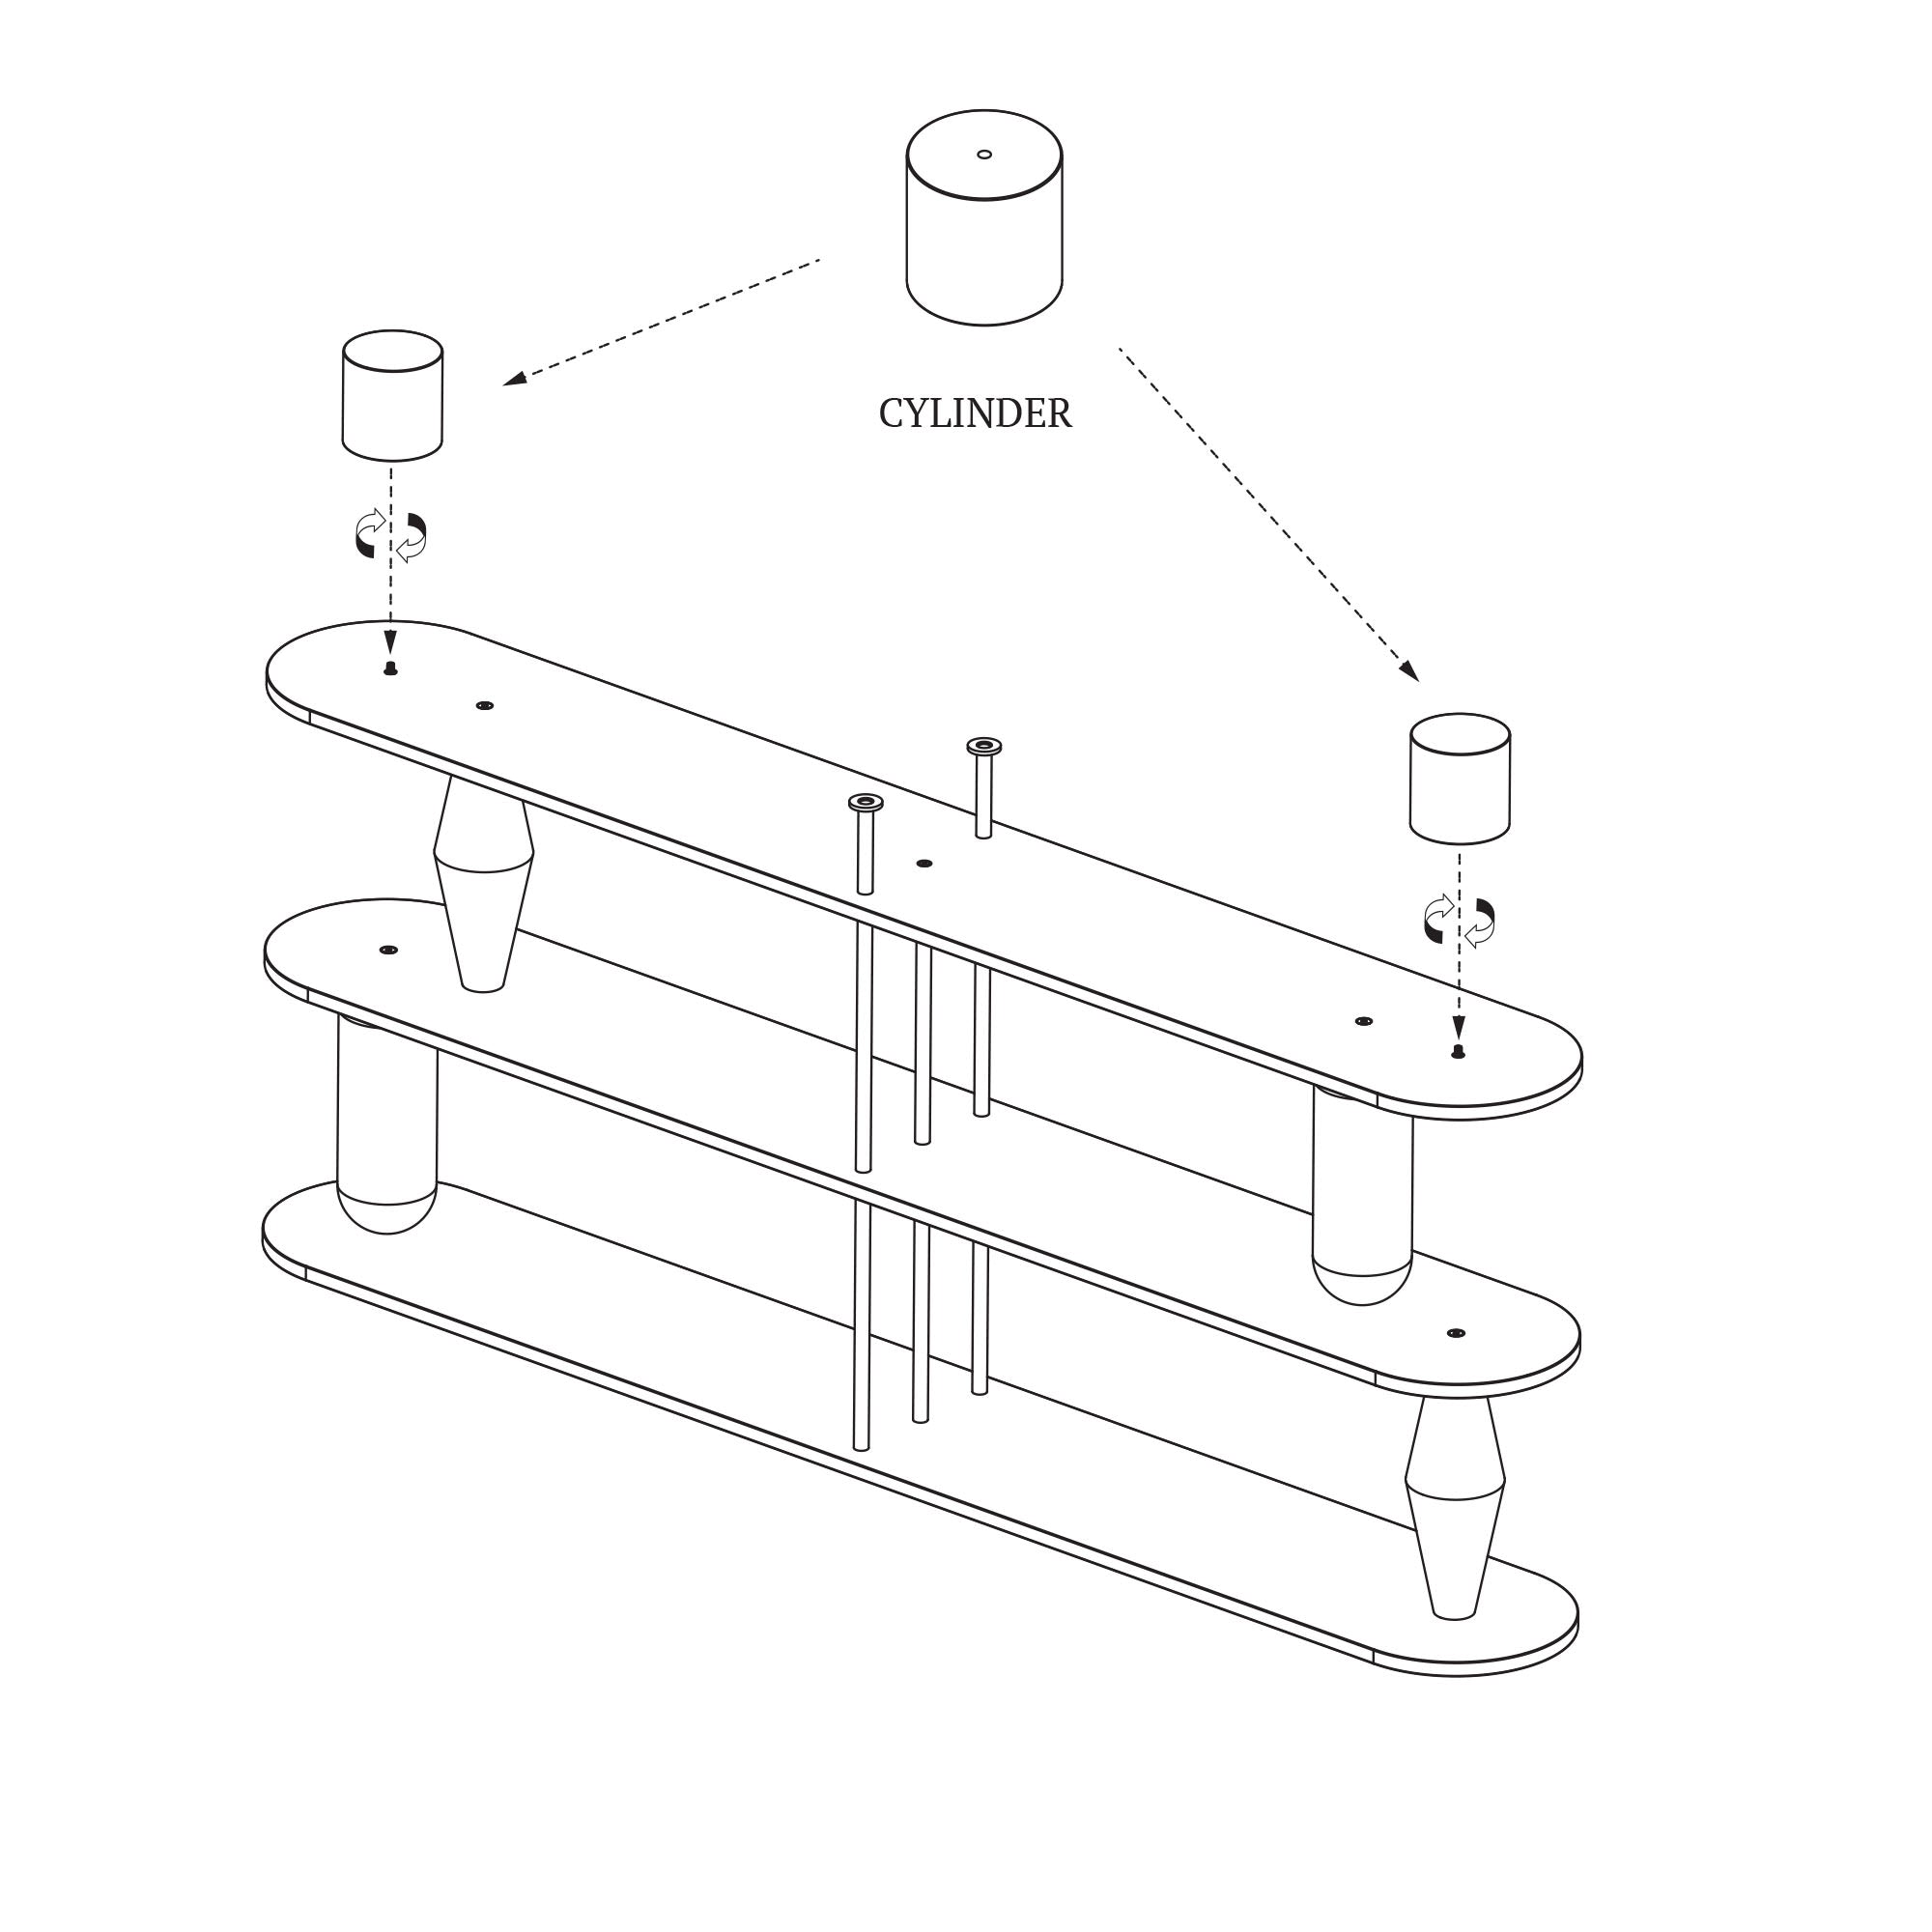
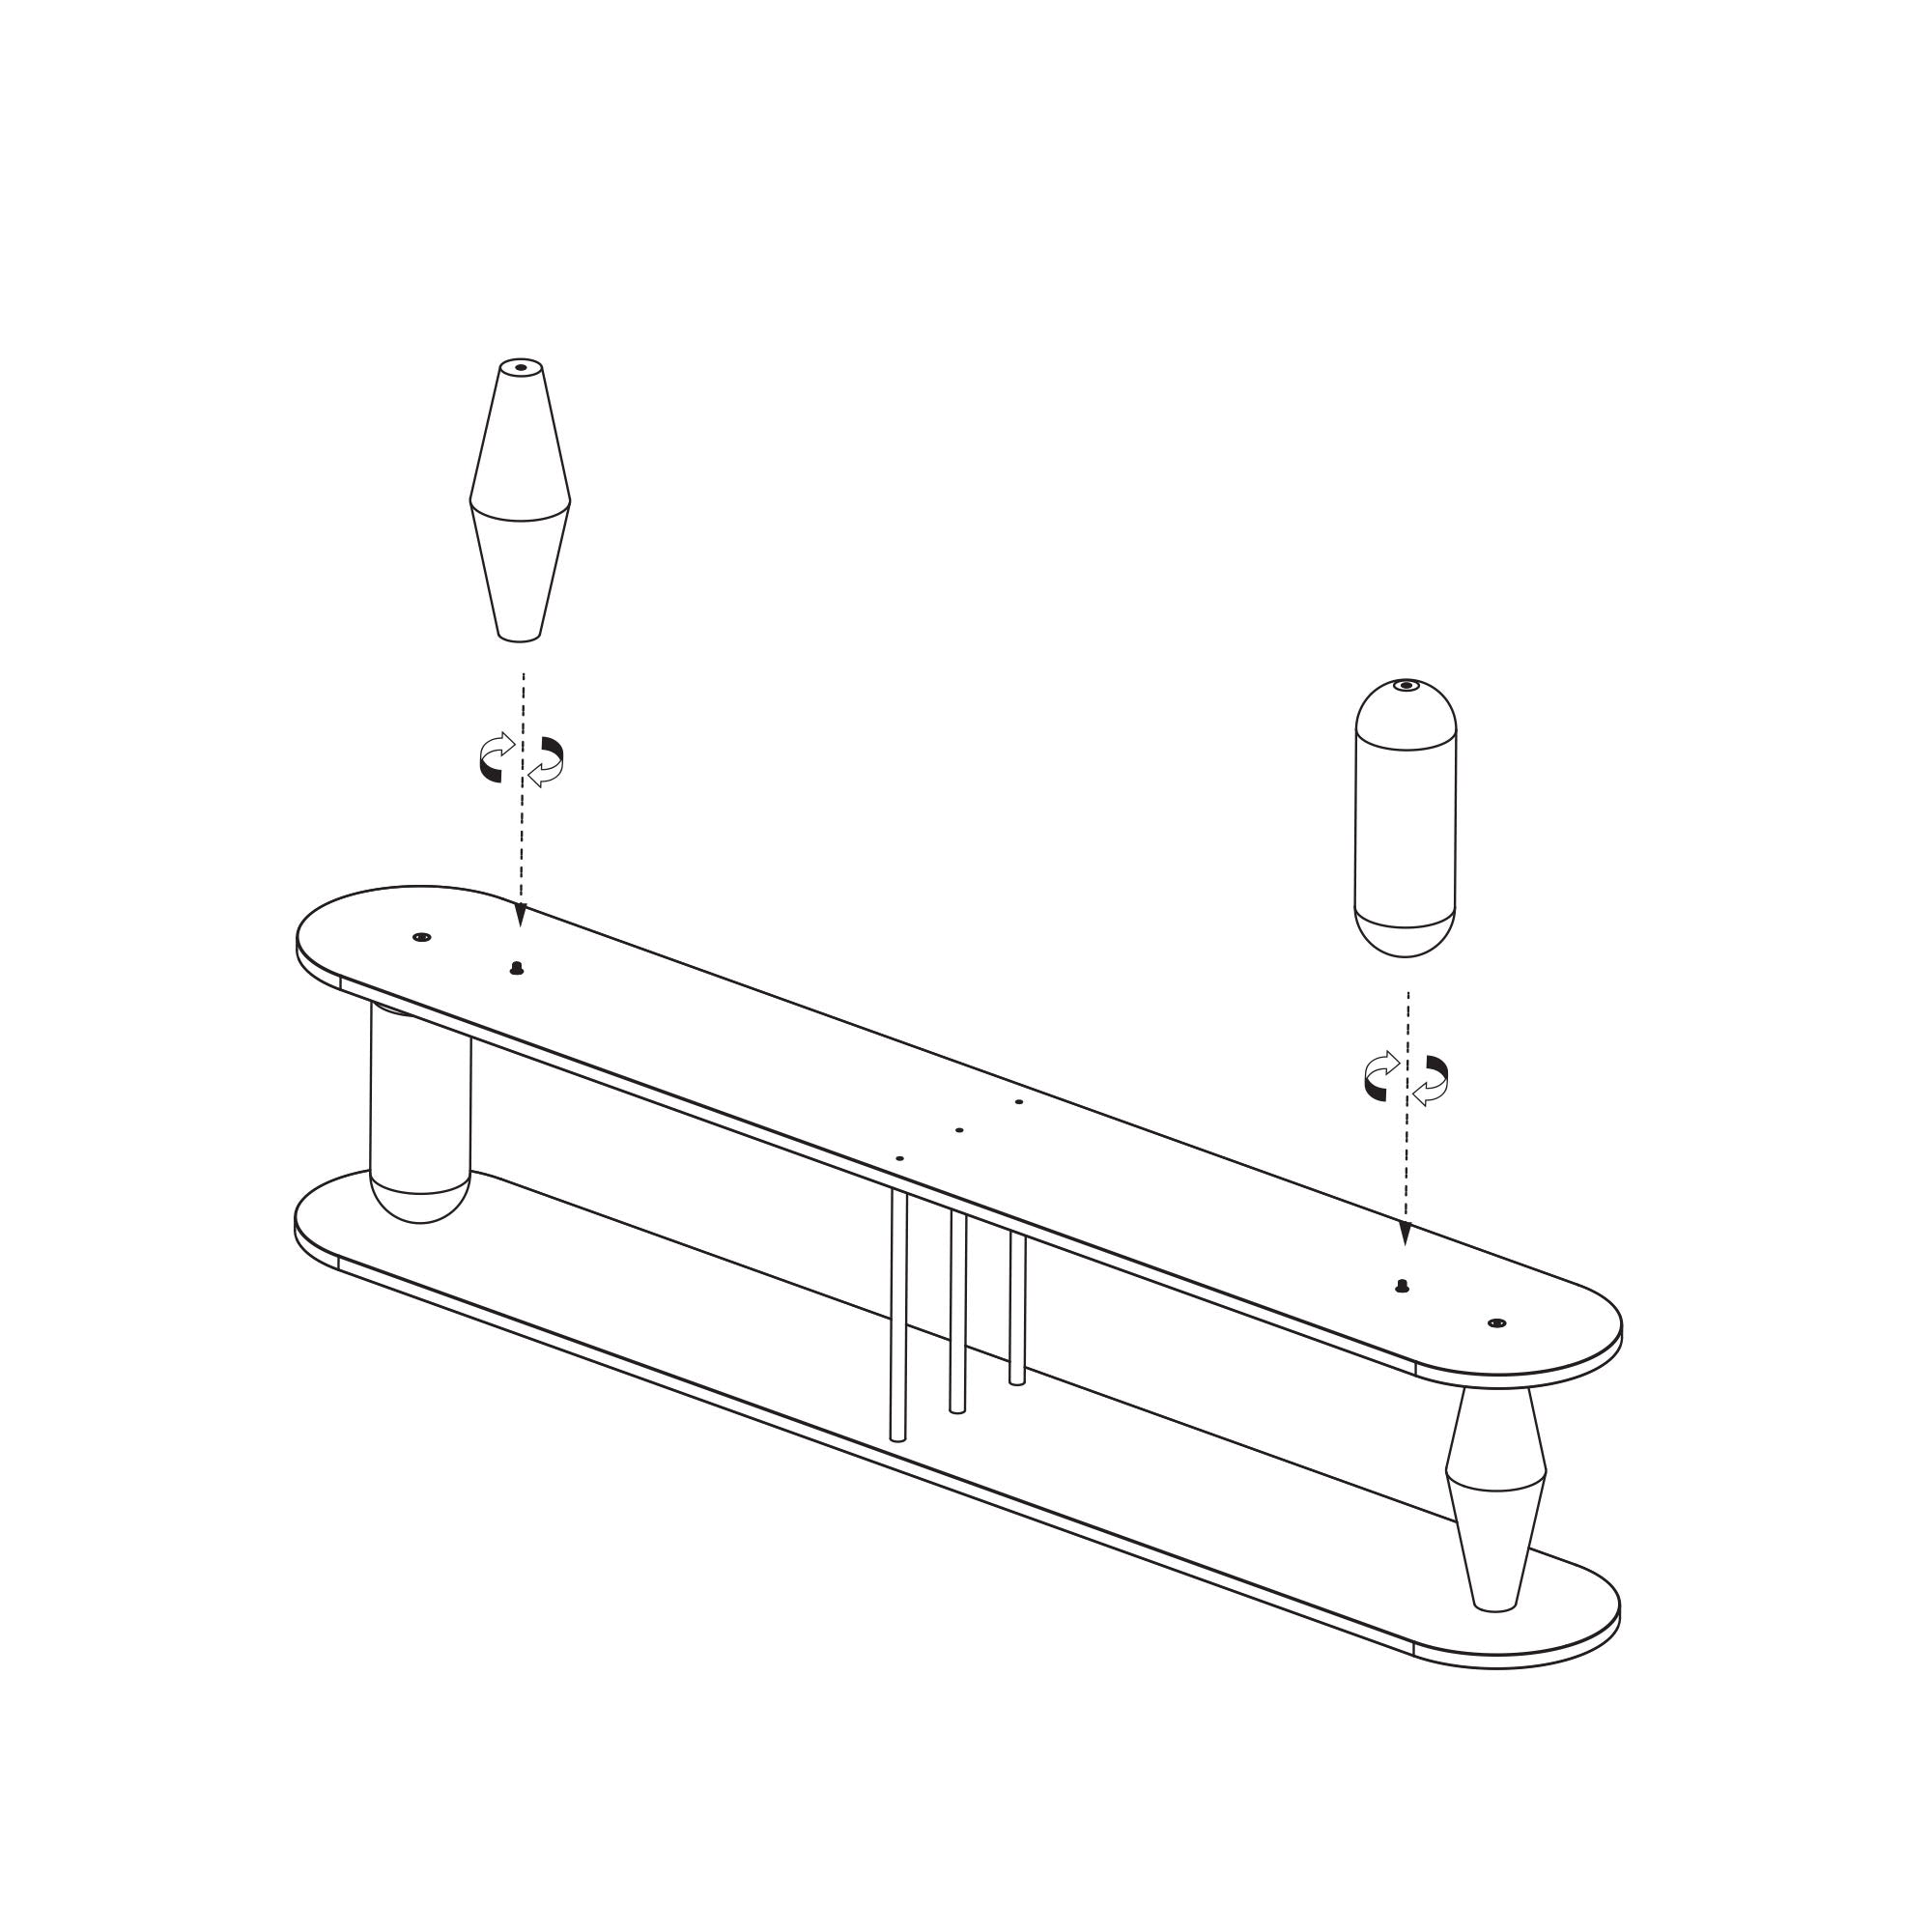
STEP 17
We still need to screw on the wooden cylinders as the end legs of our shelf. Cylindrical solids have threads embedded on one side. Screw the shapes onto the protruding pins.
STEP 18
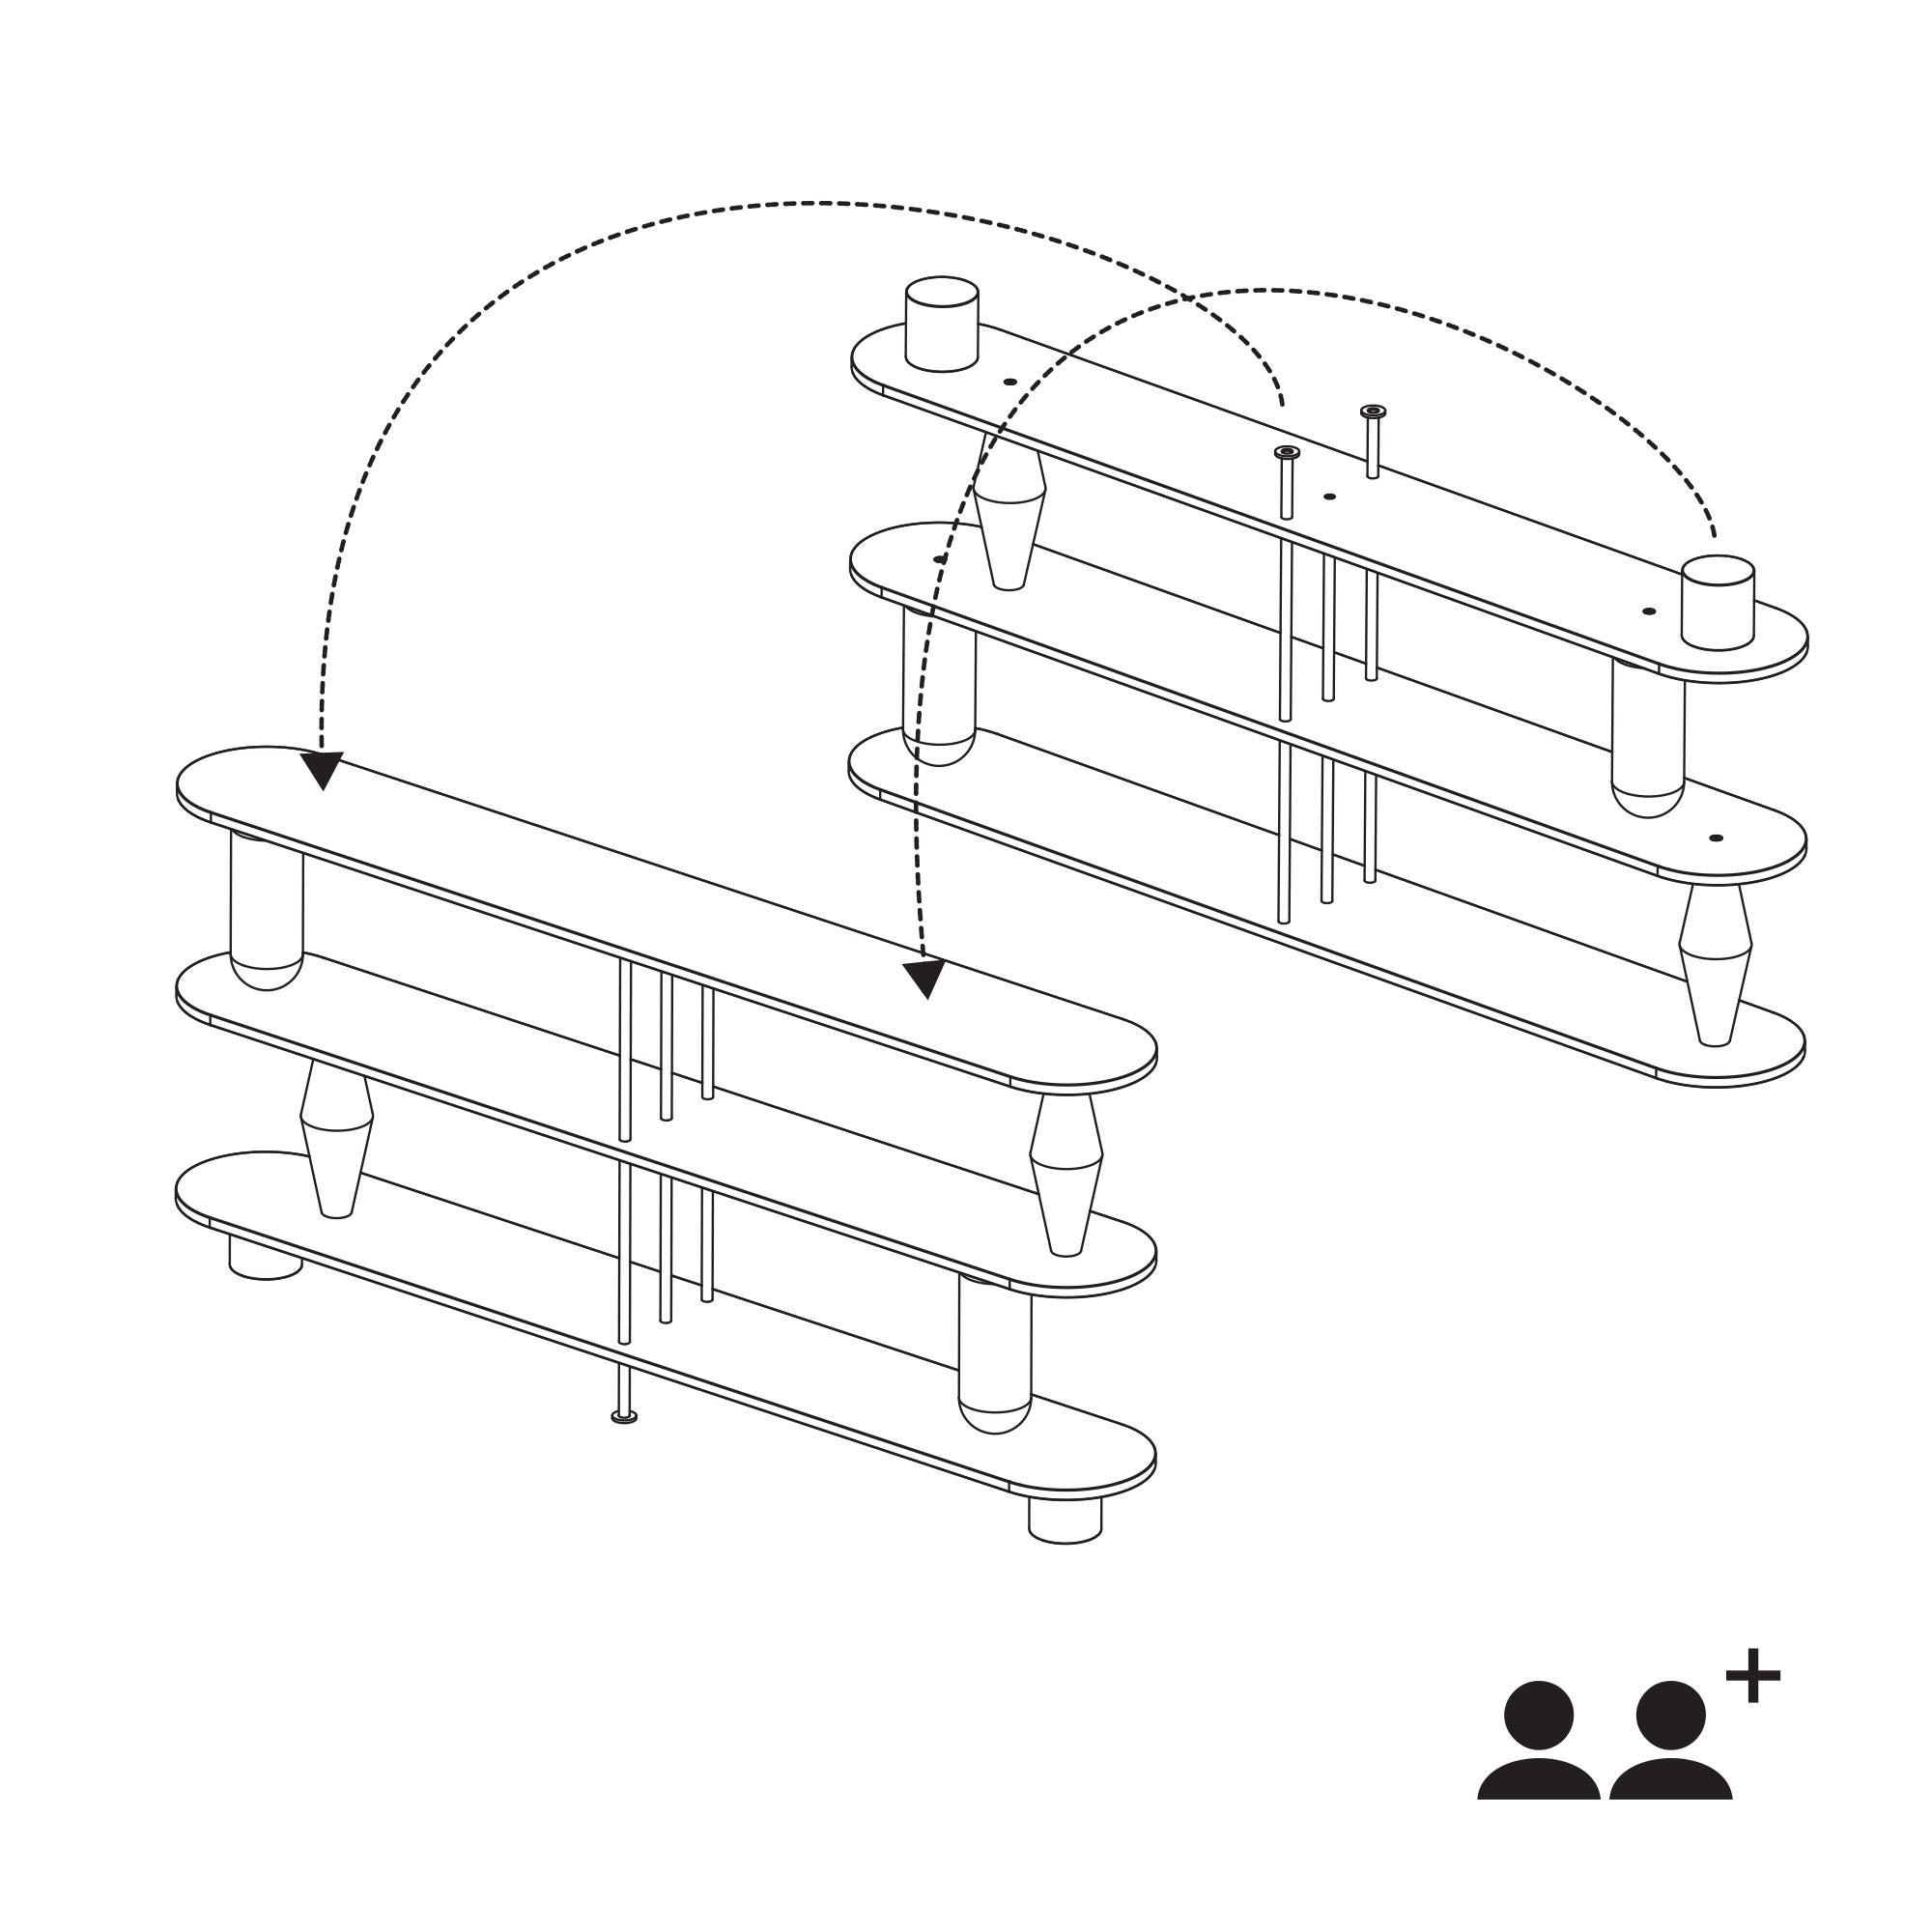
The last step is to rotate the shelf. Be sure to ask someone to help you. Although the shelf itself is not very heavy, we recommend turning it with the help of at least 1 additional person. When turning, hold the countertops to avoid damaging the threaded connections.
STEP 19
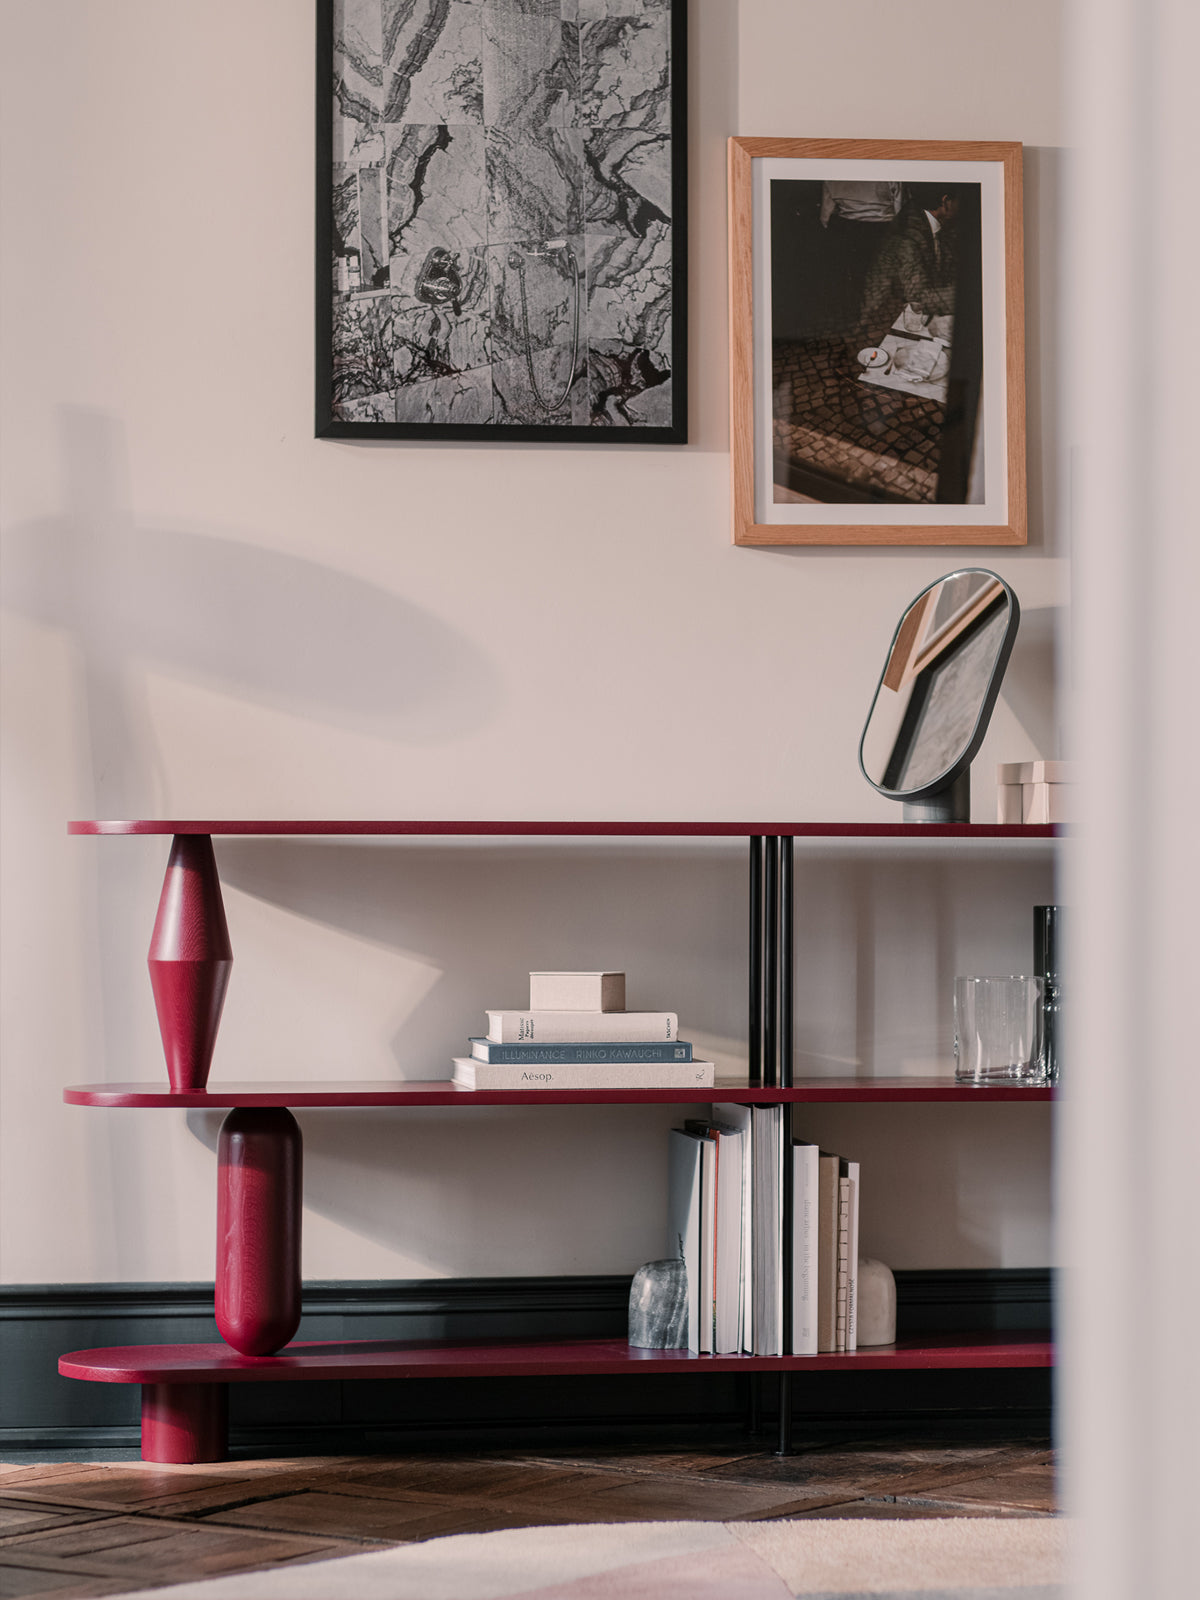
The VAZOO 2 shelf is fully assembled. Place it against the wall and don't forget to attach it to it. The set certainly included fasteners that you could use to secure the shelf. We recommend doing this. Select the expansion plug to suit the type of wall and screw the connector to the countertop in an inconspicuous place from the bottom of the countertop. Designate the wall mounting locations after placing the shelf in a suitable place under the wall. After securing it against tipping over, the shelf is ready for use.
VAZOO 2
VIEW