Manual
MIZU
BEGINNING
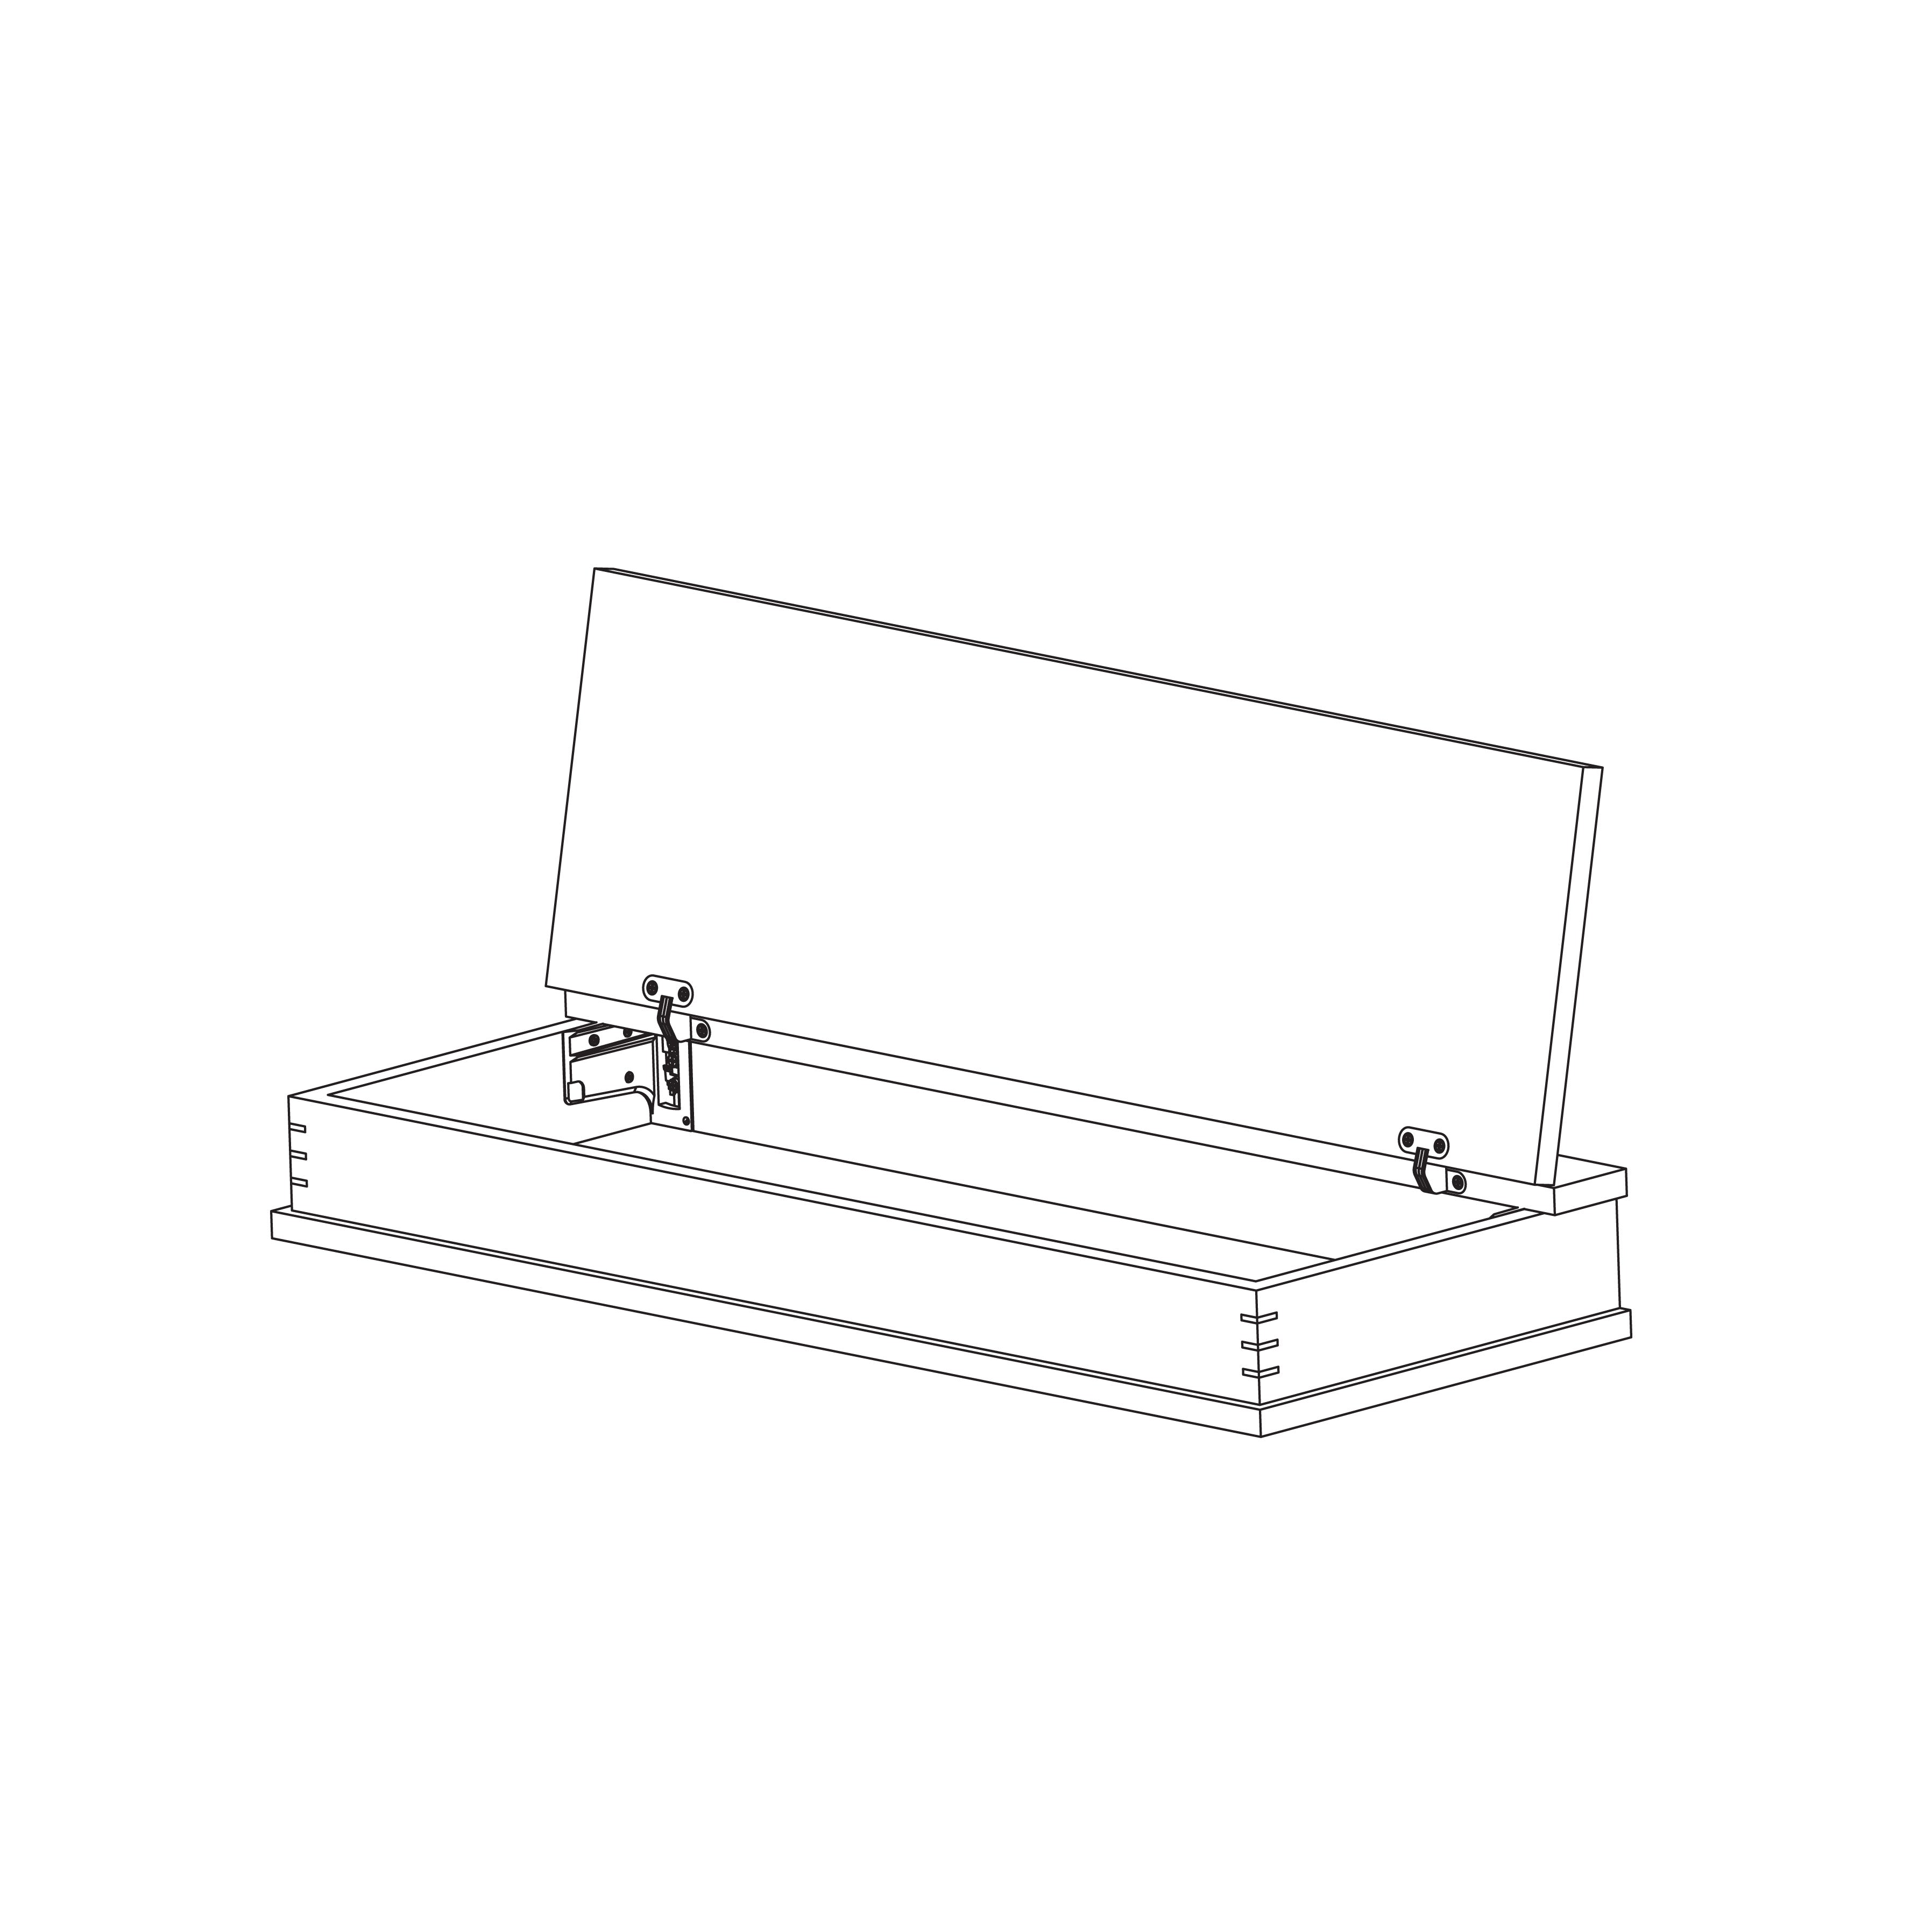
Prepare a place to unpack the MIZU console. Make sure you have enough space to comfortably arrange the items and the surfaces you will use are clean. We recommend using a carpet or blanket on which the parts can be placed safely.
STEP 1
Unpack all parts.
STEP 2
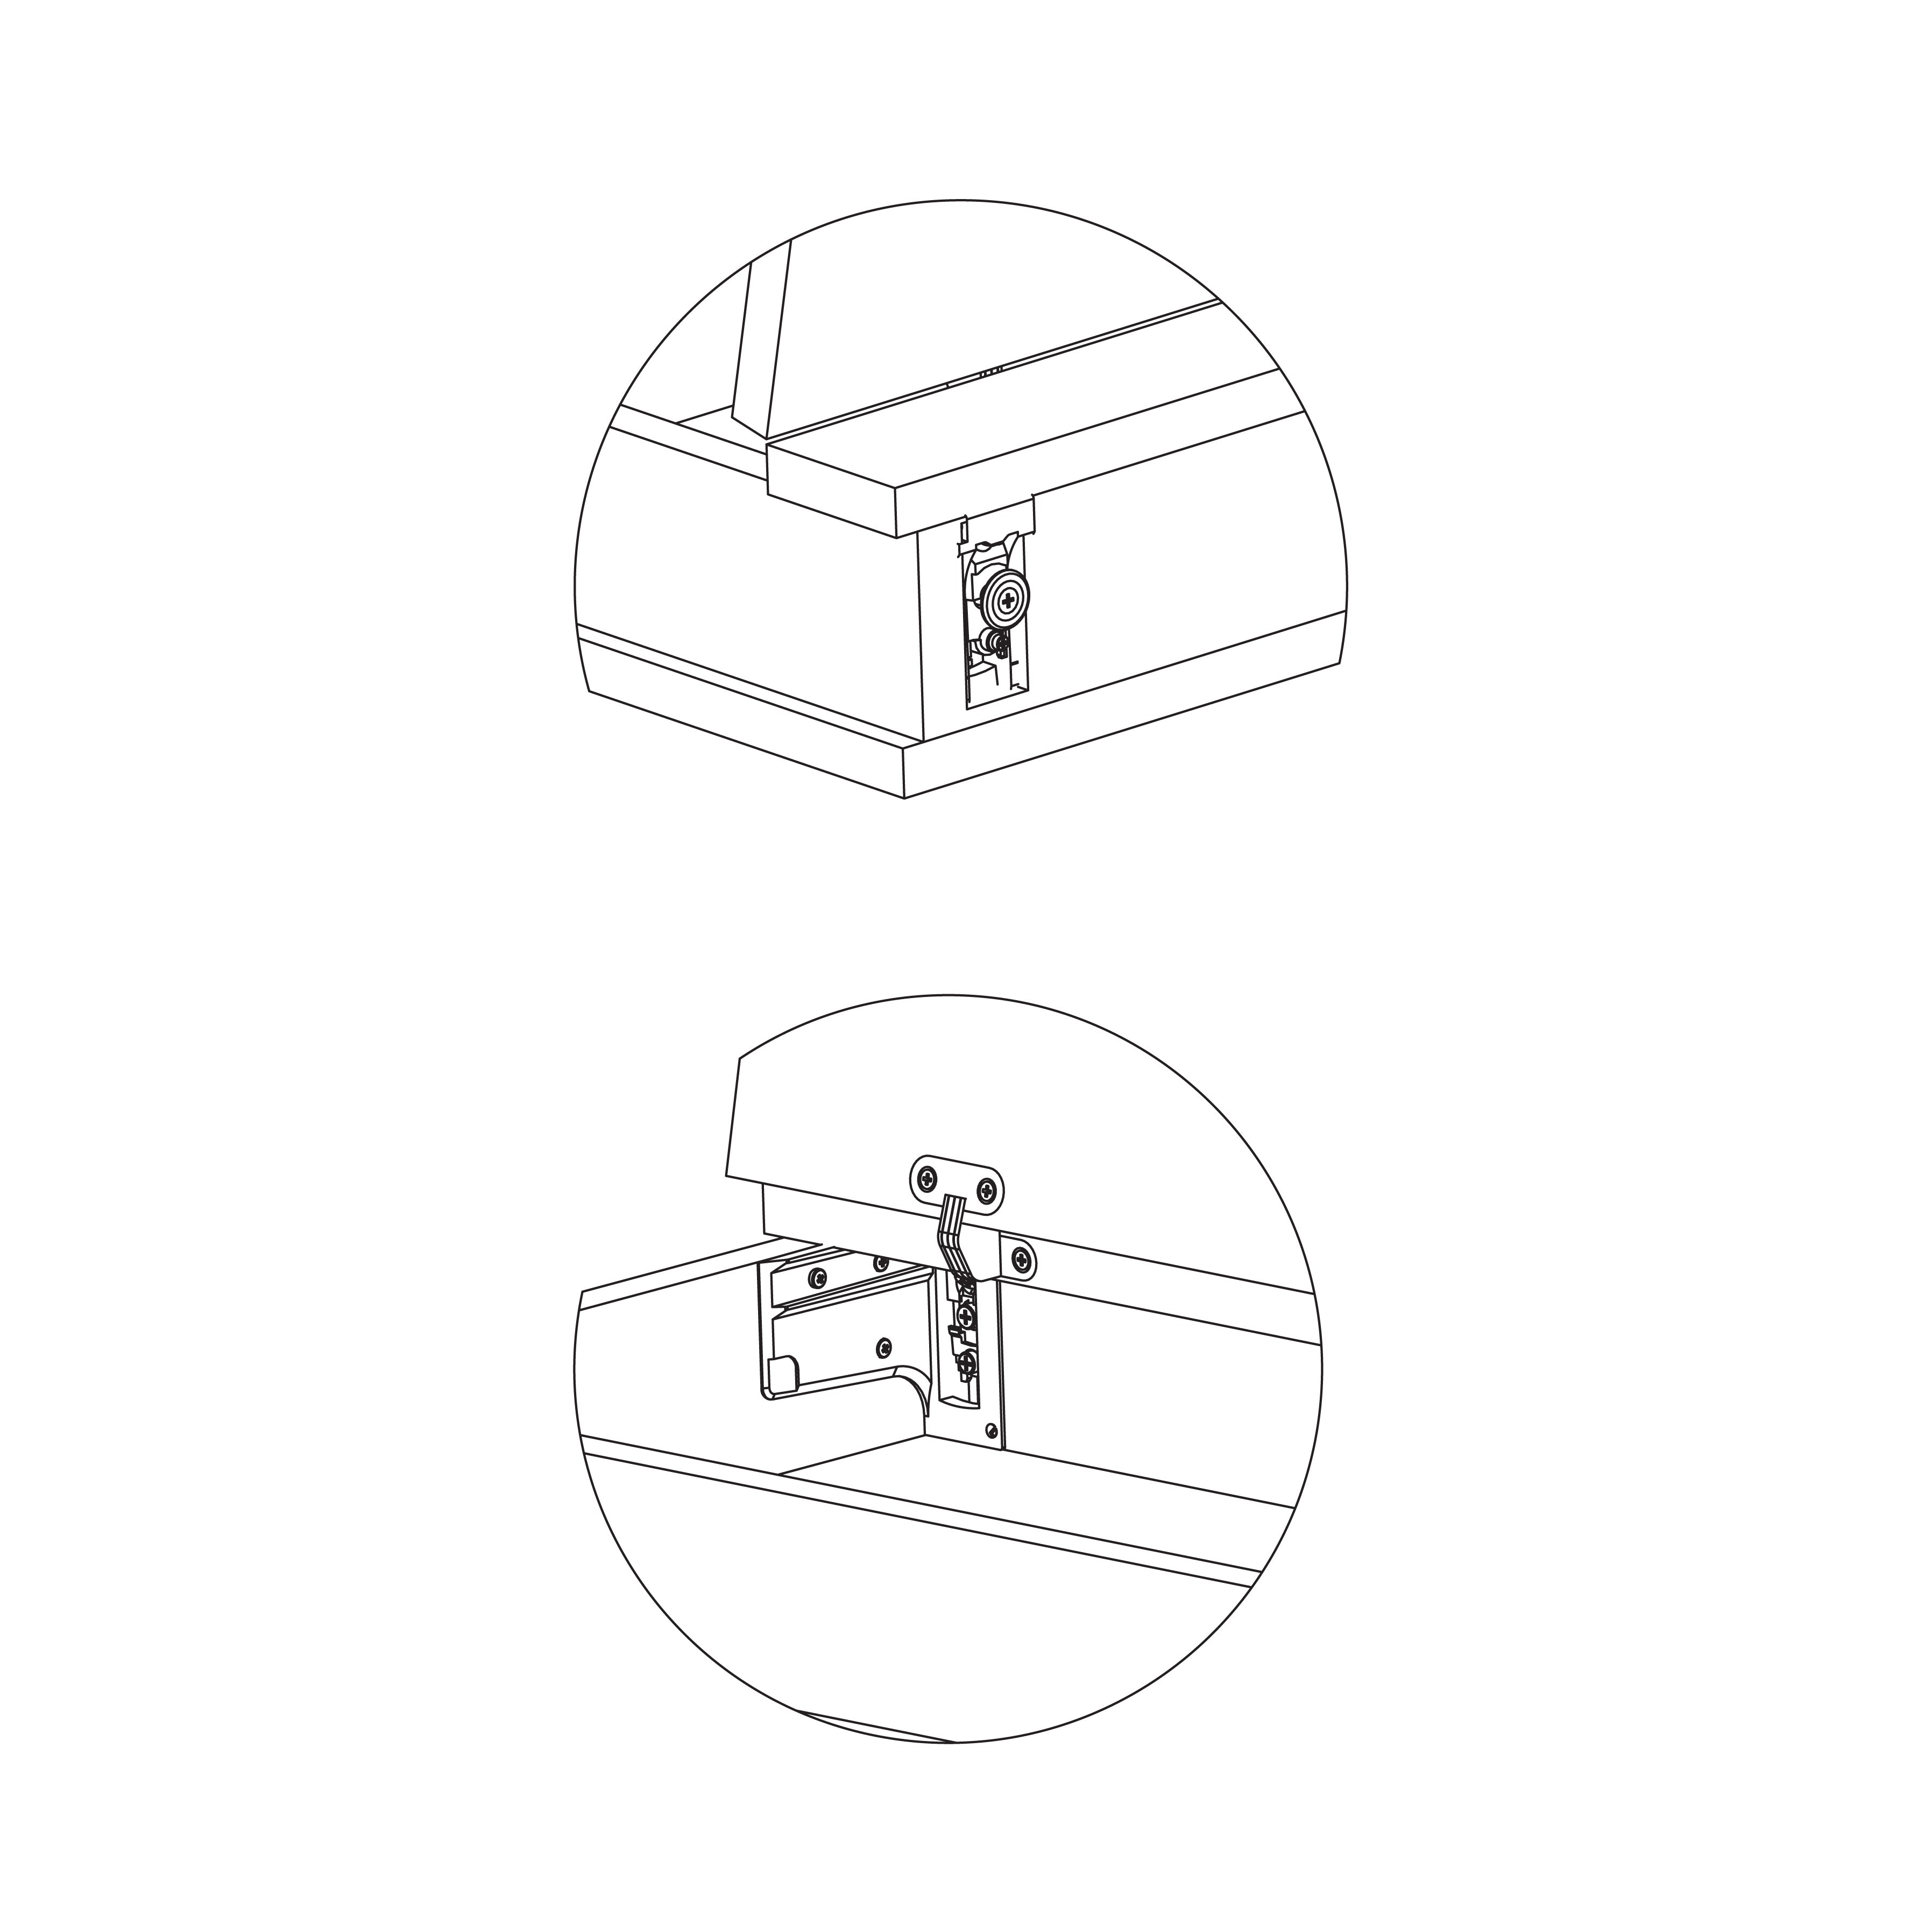
Take a look at what the assembly elements look like. The MIZU product is equipped with a Ferramenta Italiana holder that allows a comfortable and strong connection to the wall. Thanks to this, you will be able to precisely and permanently mount the MIZU at the appropriate height.
STEP 3
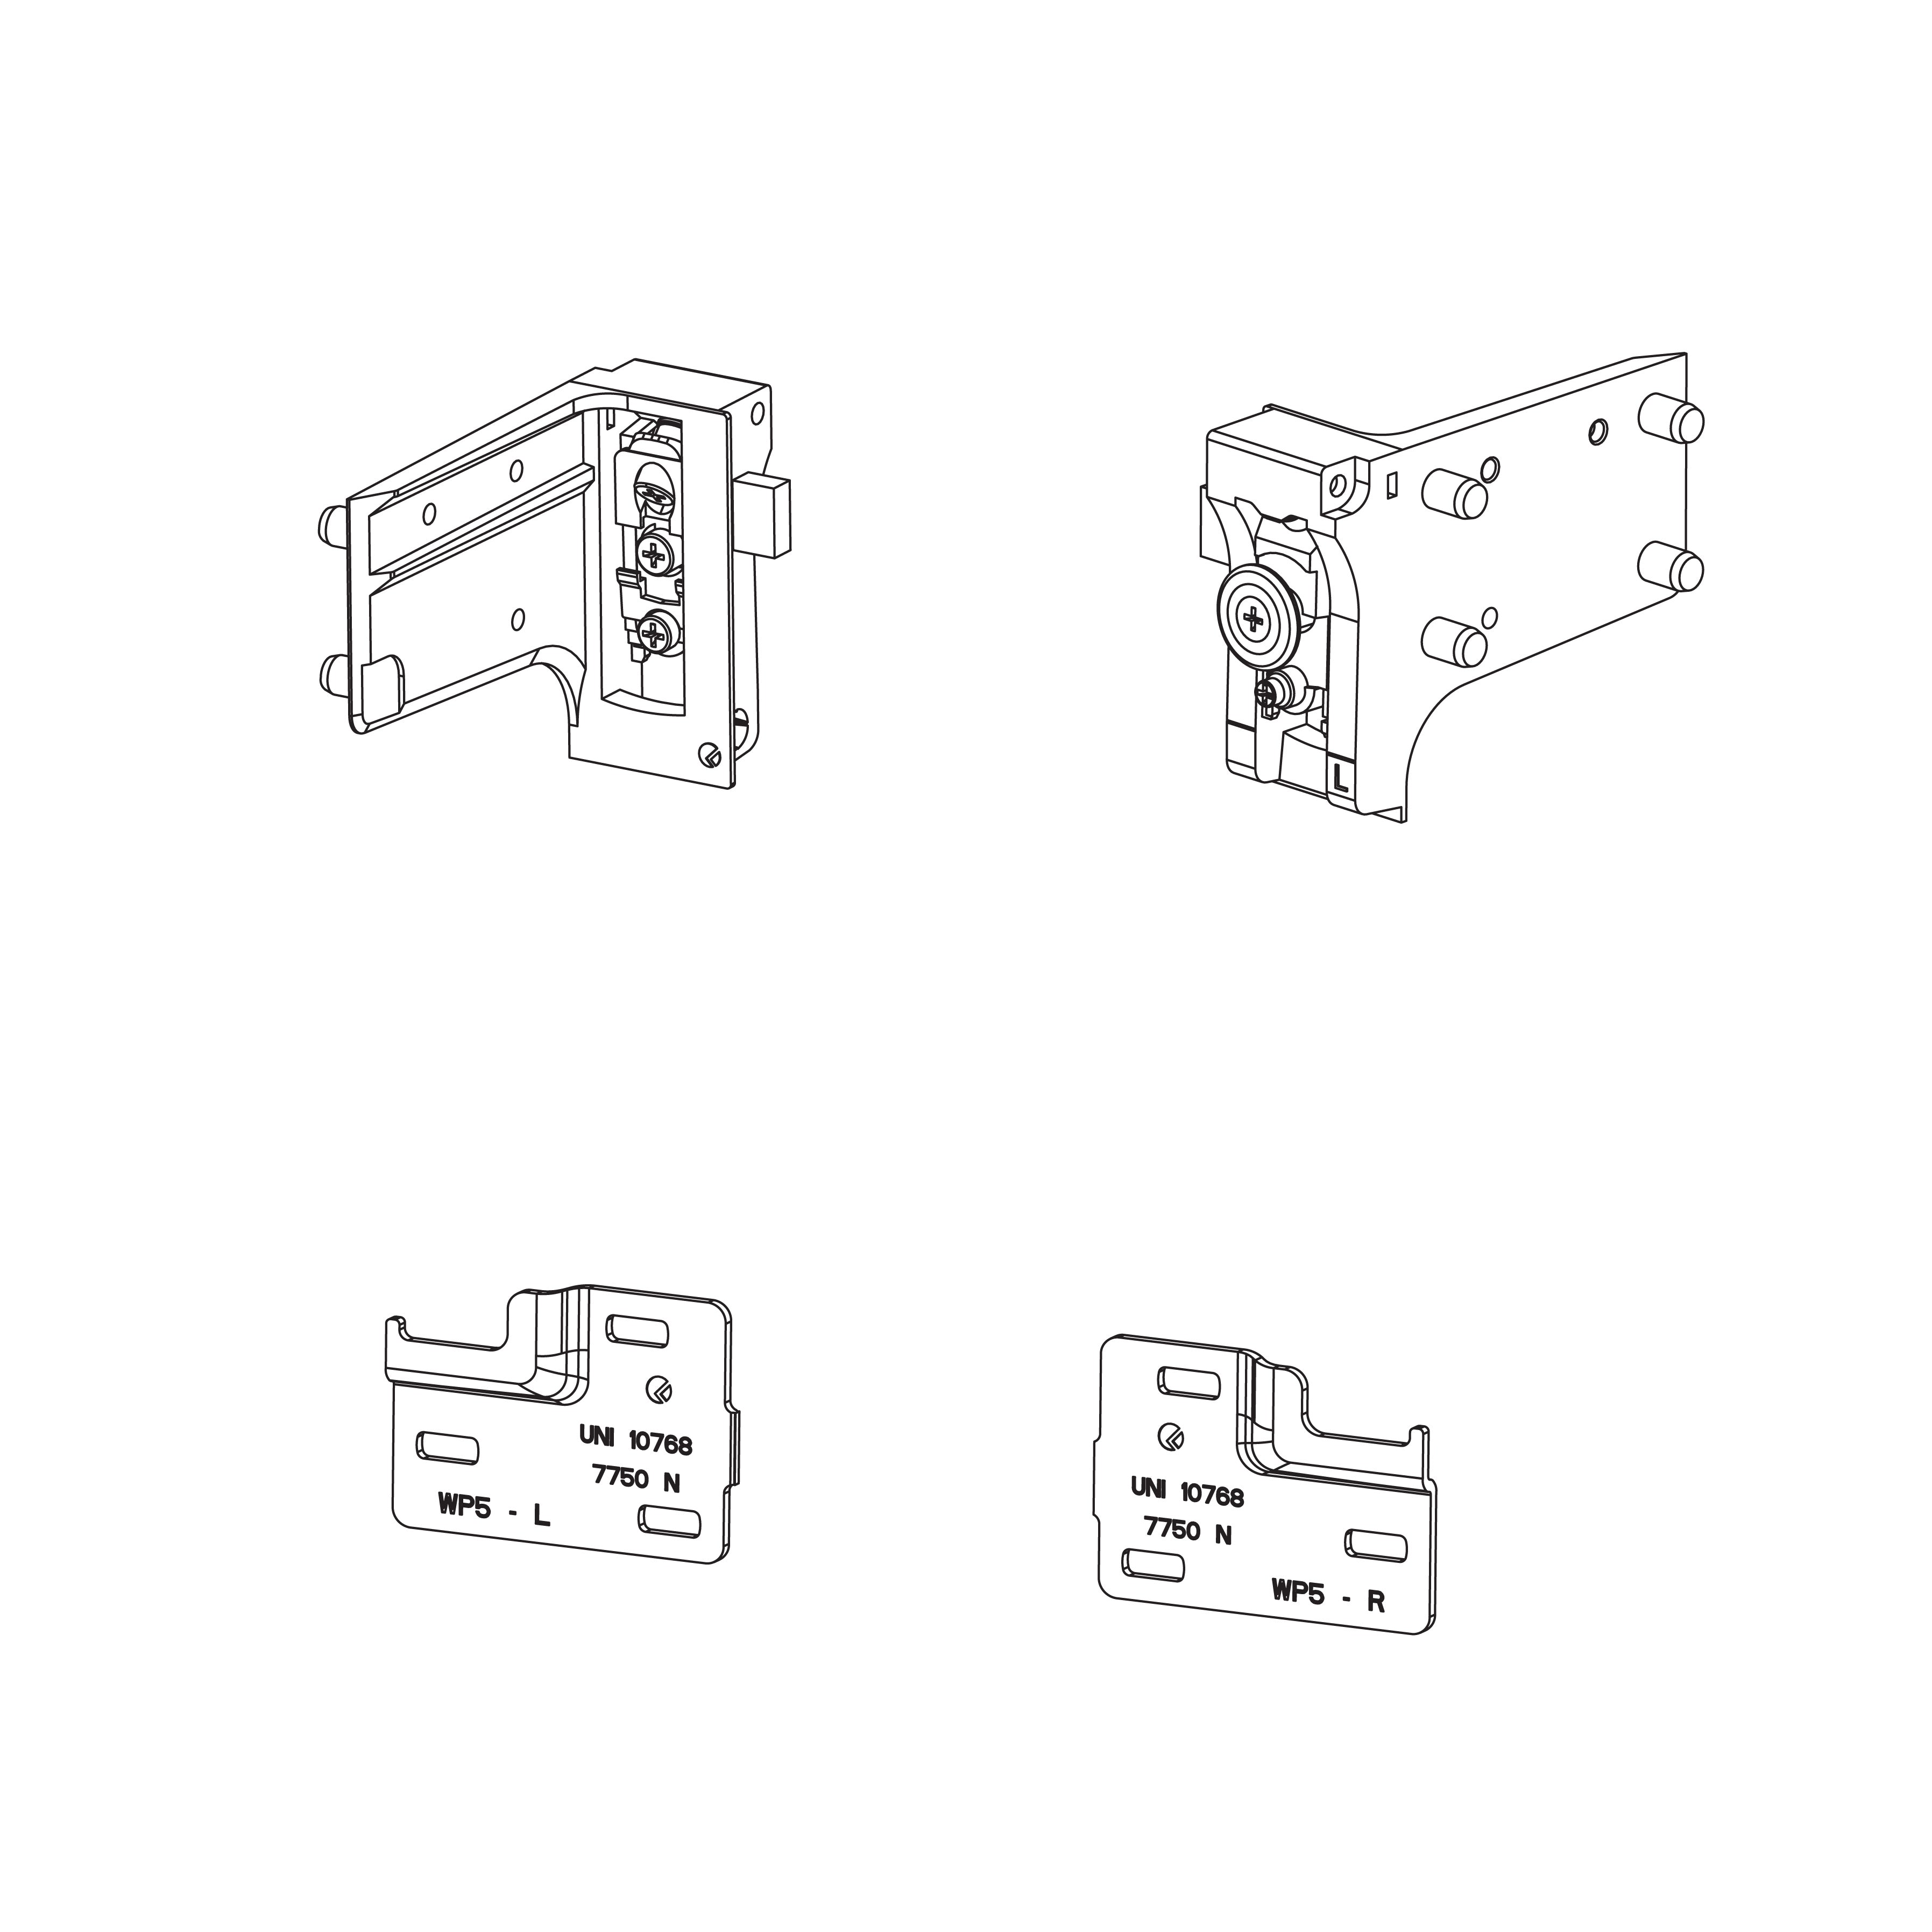
The set of such a holder consists of adjustable elements built into the MIZU and sheet metal hangers that you will need to mount on the wall.
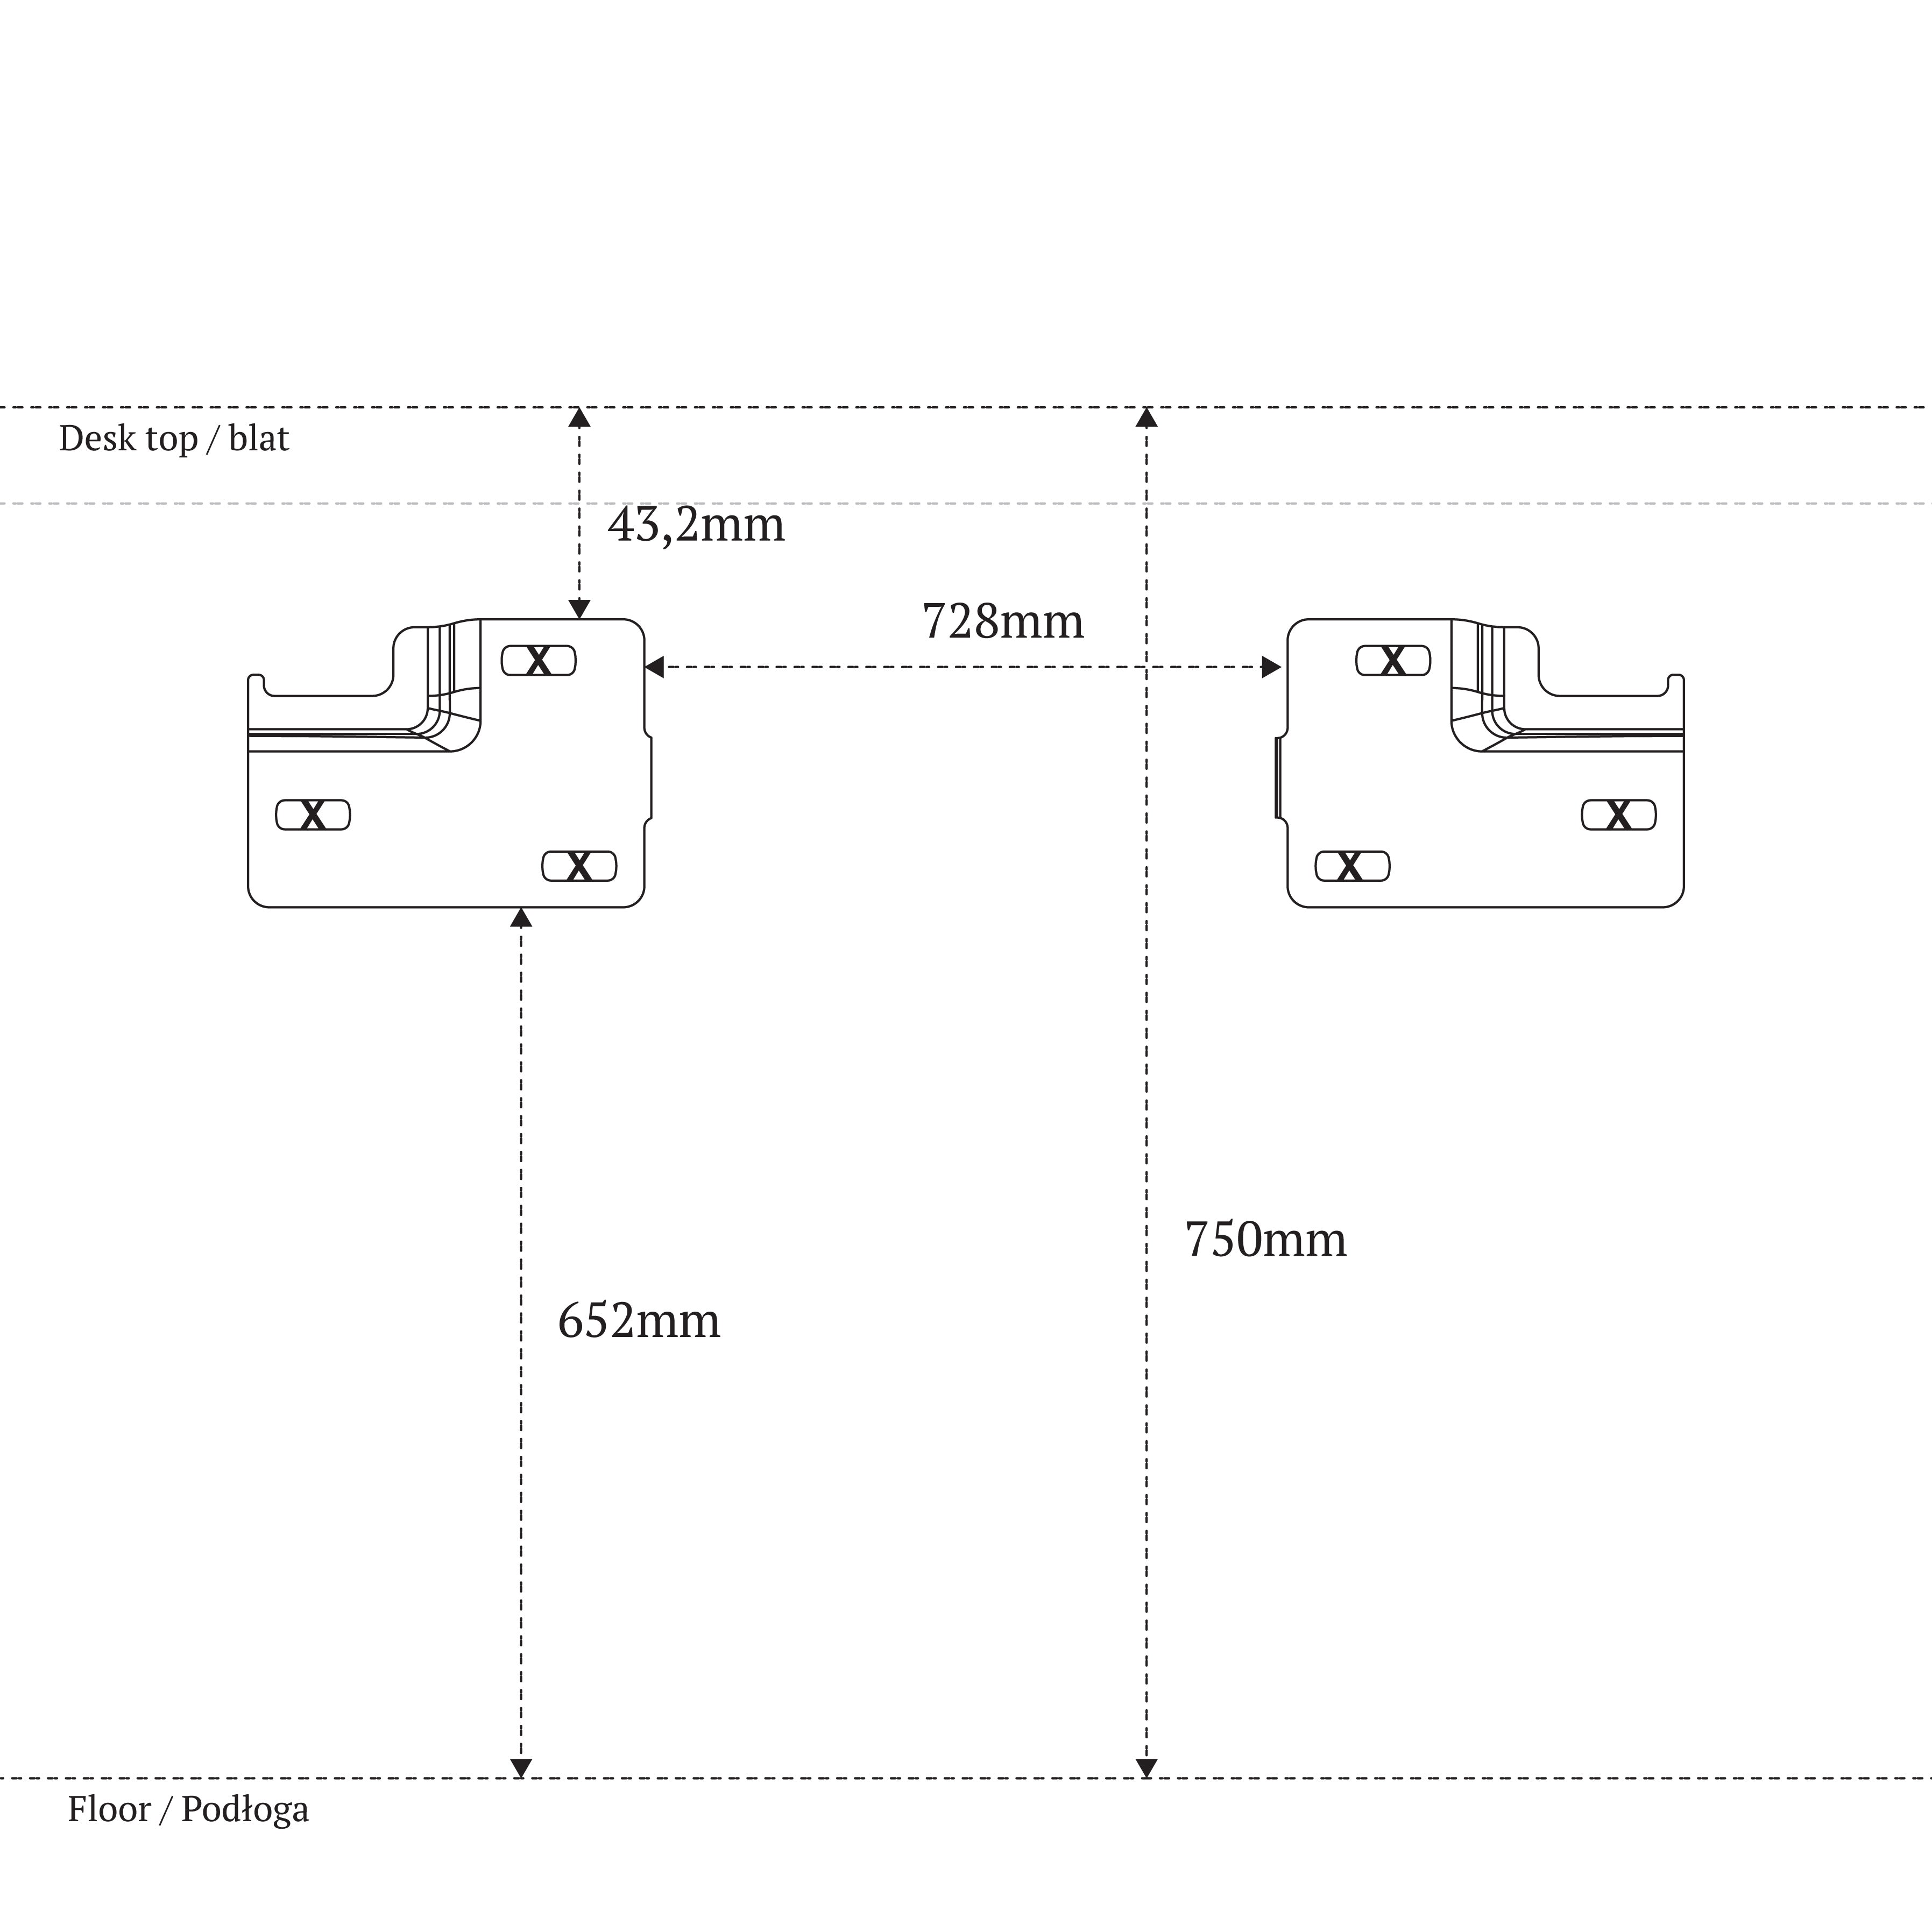
STEP 4
Install the hangers on the wall according to the attached instructions. Thanks to this, you will be able to hang MIZU at a height of 75 cm. Please note that the dimensions are given up to the edge of the sheet.
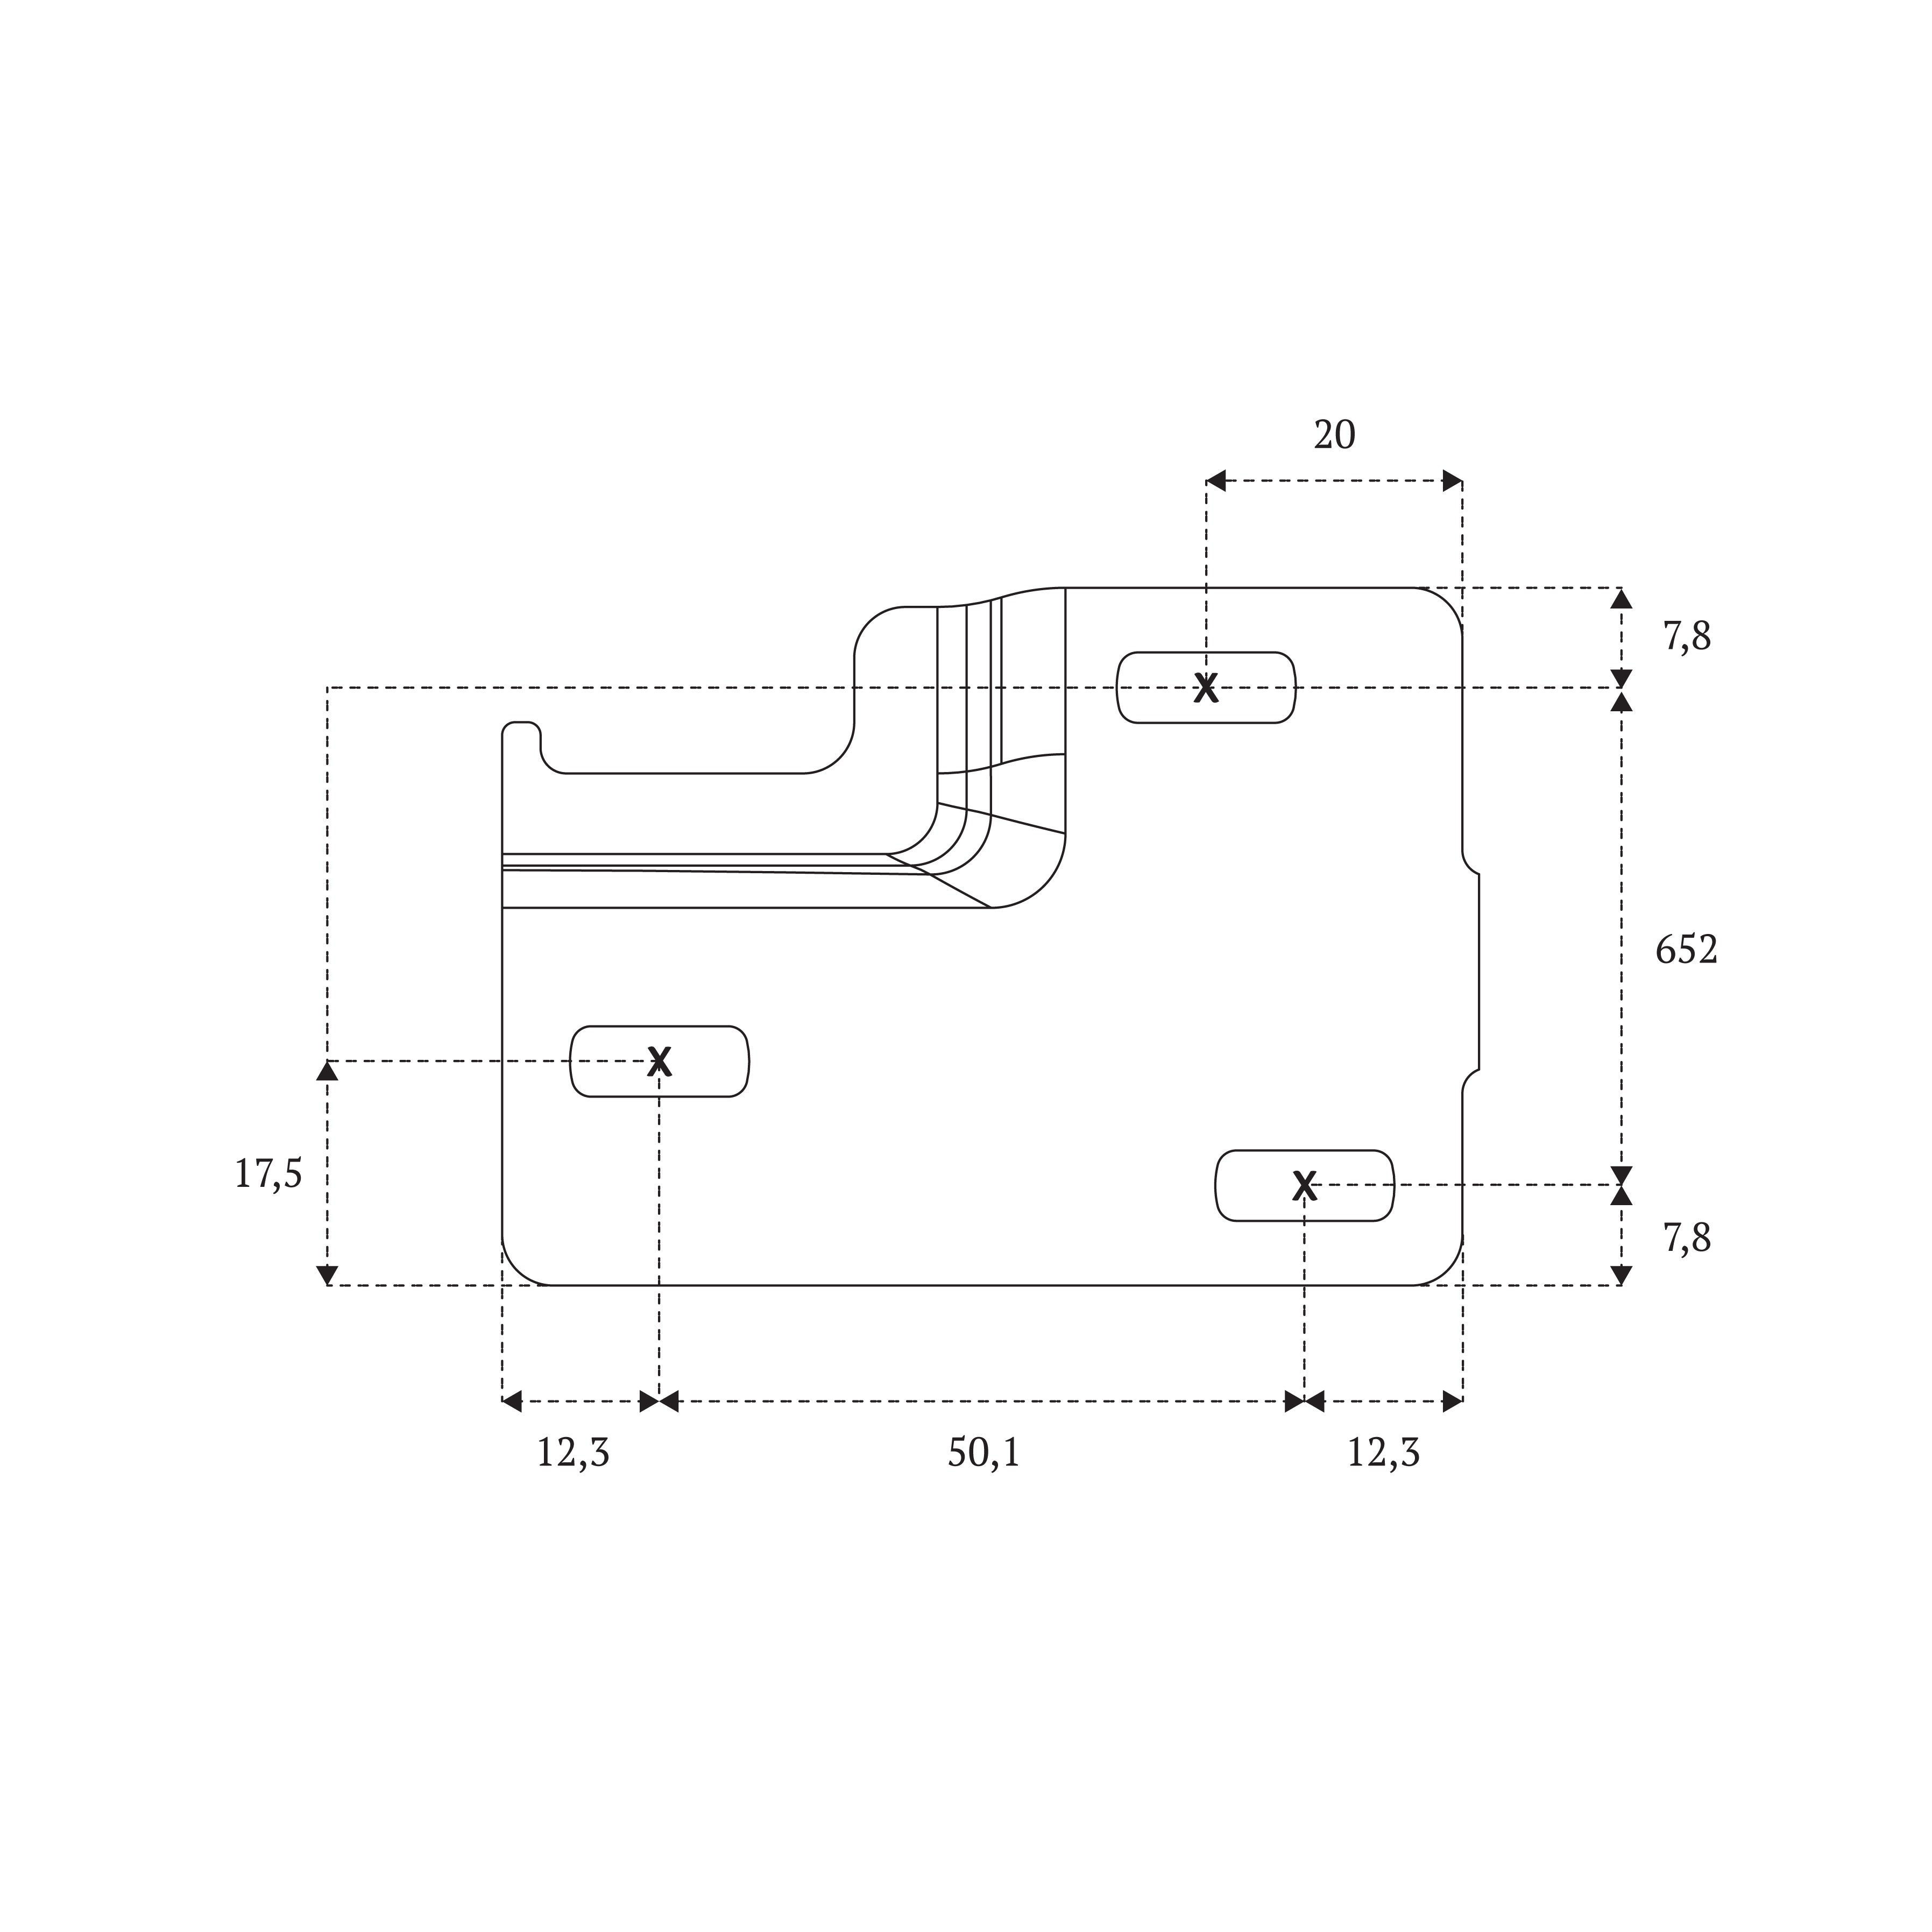
STEP 5
The mounting plate has the following dimensions. Make marks in the places marked with "x" and then drill holes in them. Match the dowels and screws to the type of wall. The dowels and screws included in the set can be used for solid, concrete or solid brick walls.
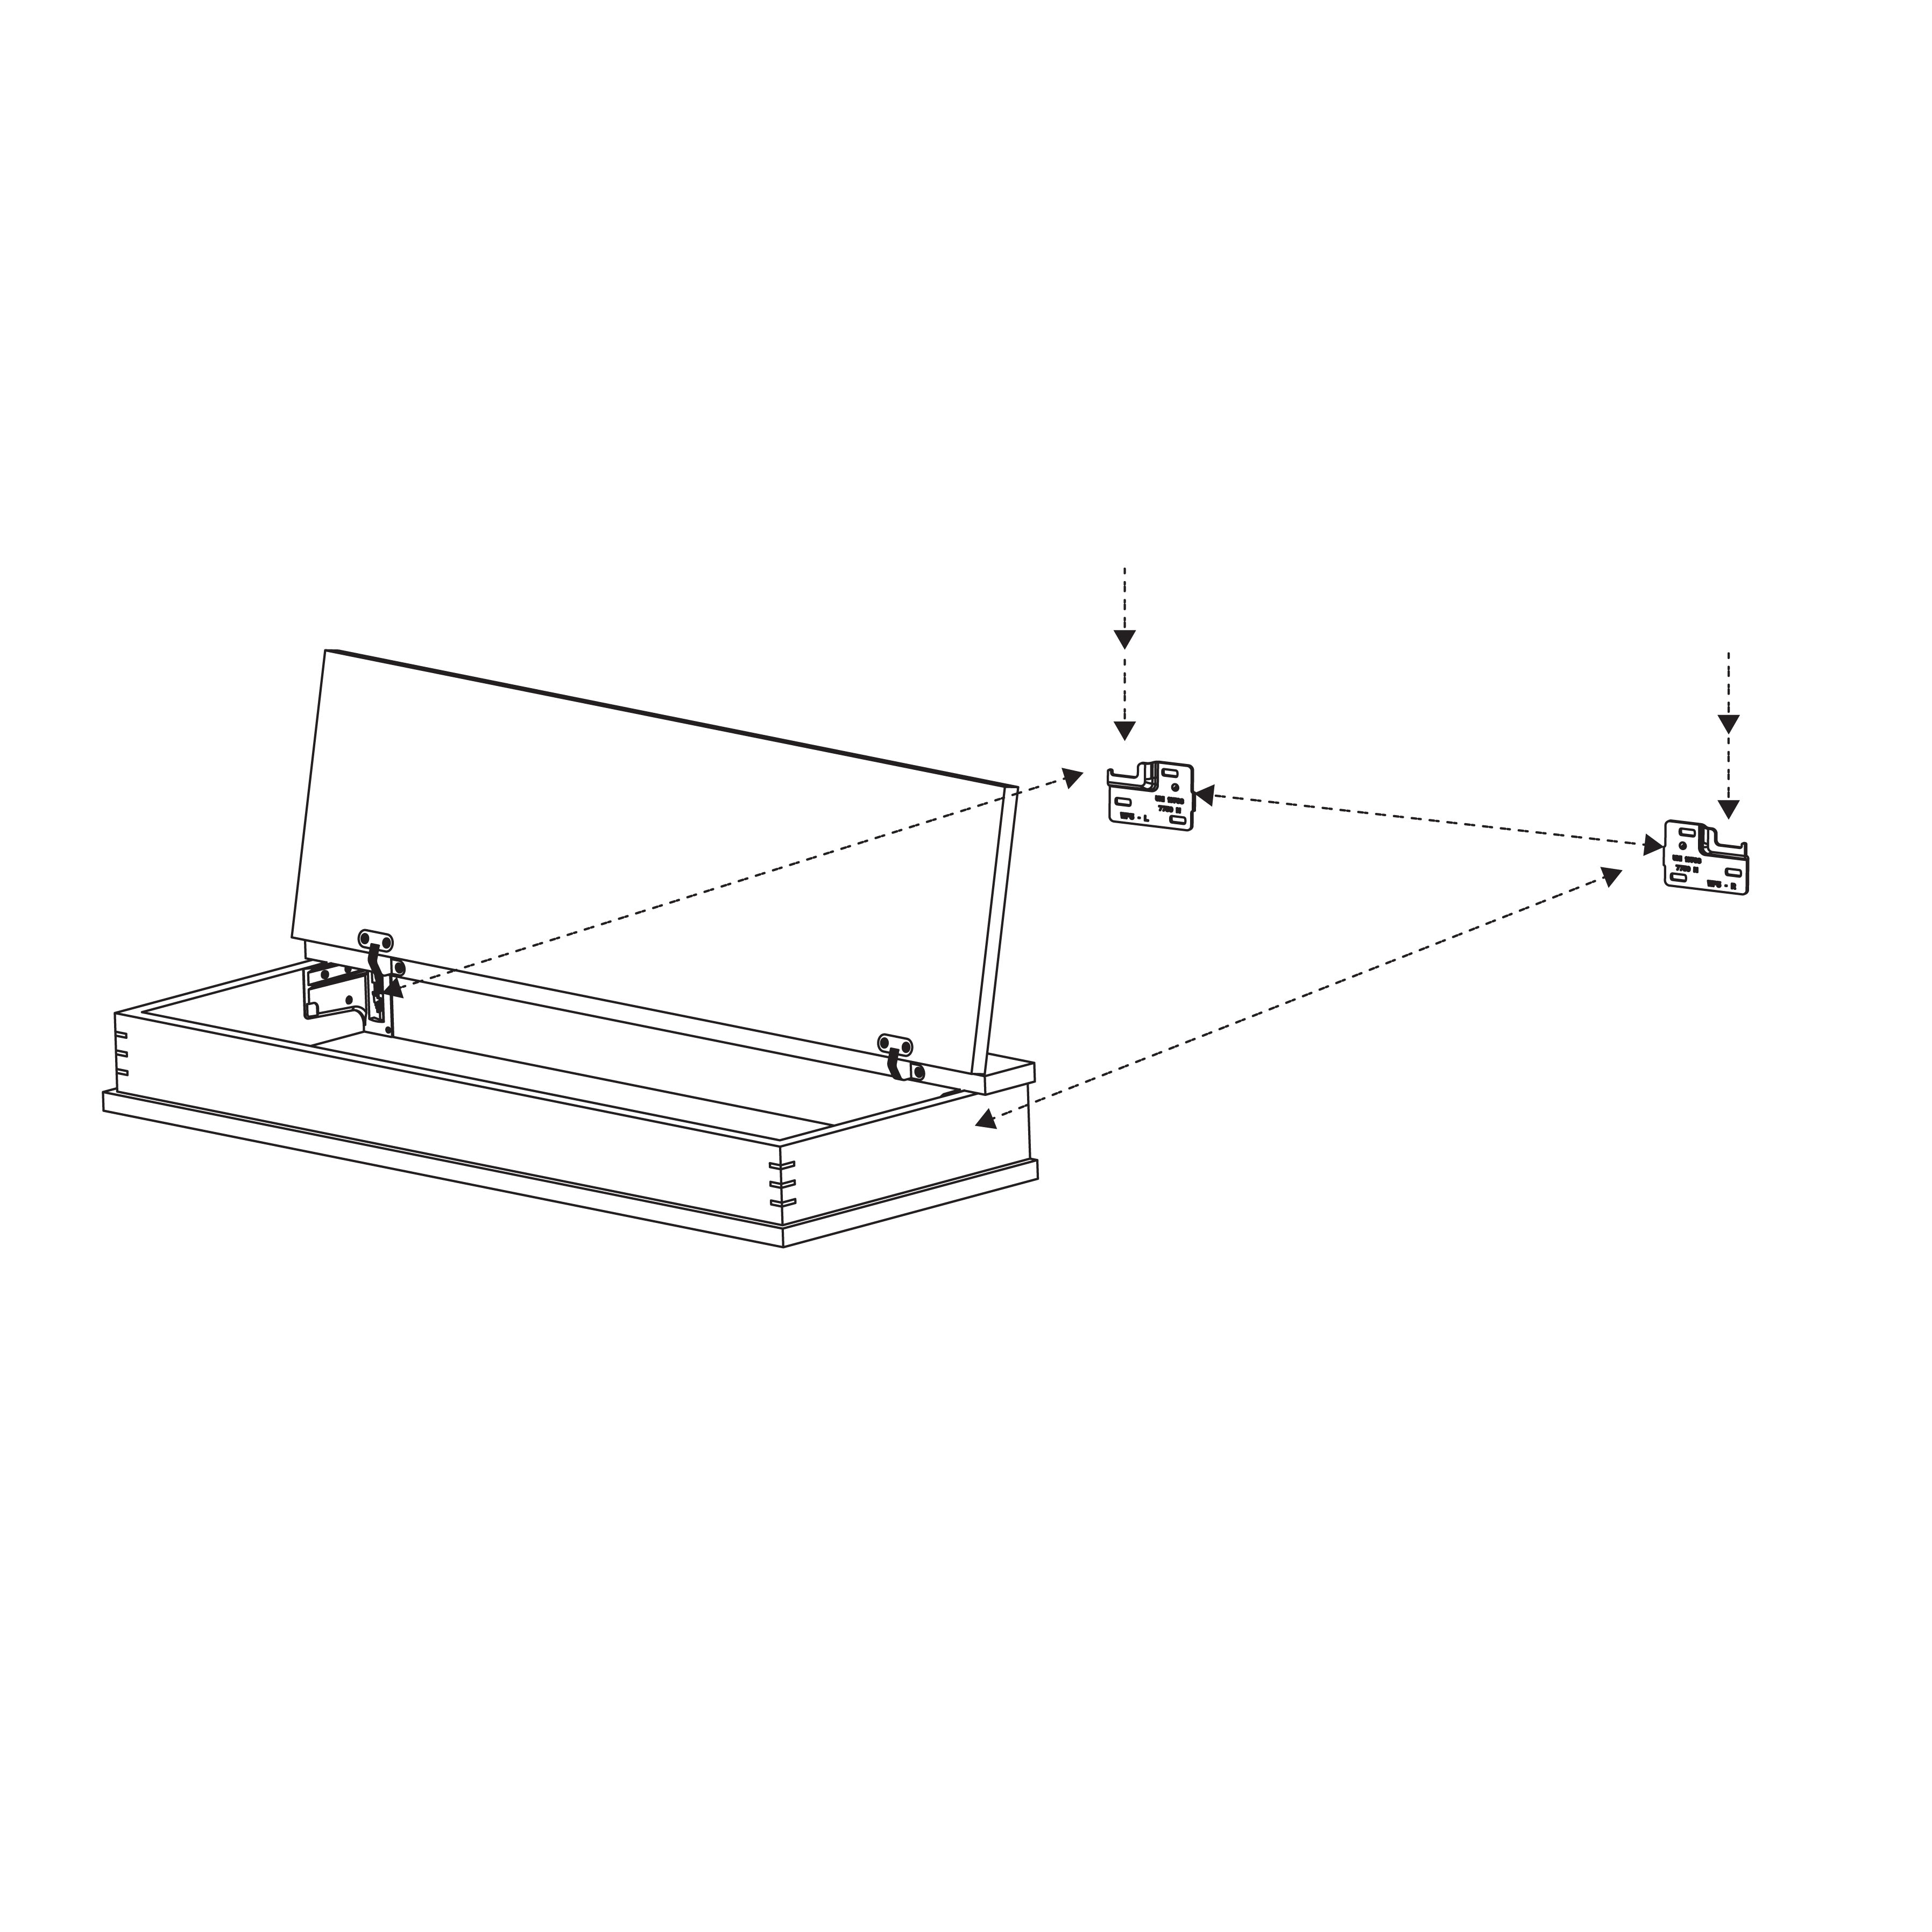
STEP 6
After installing the hanger sheets on the wall, you can hang the MIZU on the protruding round slings. Remember to make sure that the slings inside the MIZU are as far as possible from the wall. Use a "posidrive" screwdriver to adjust the distance. After hanging, unscrew the slings to tighten the MIZU to the wall.
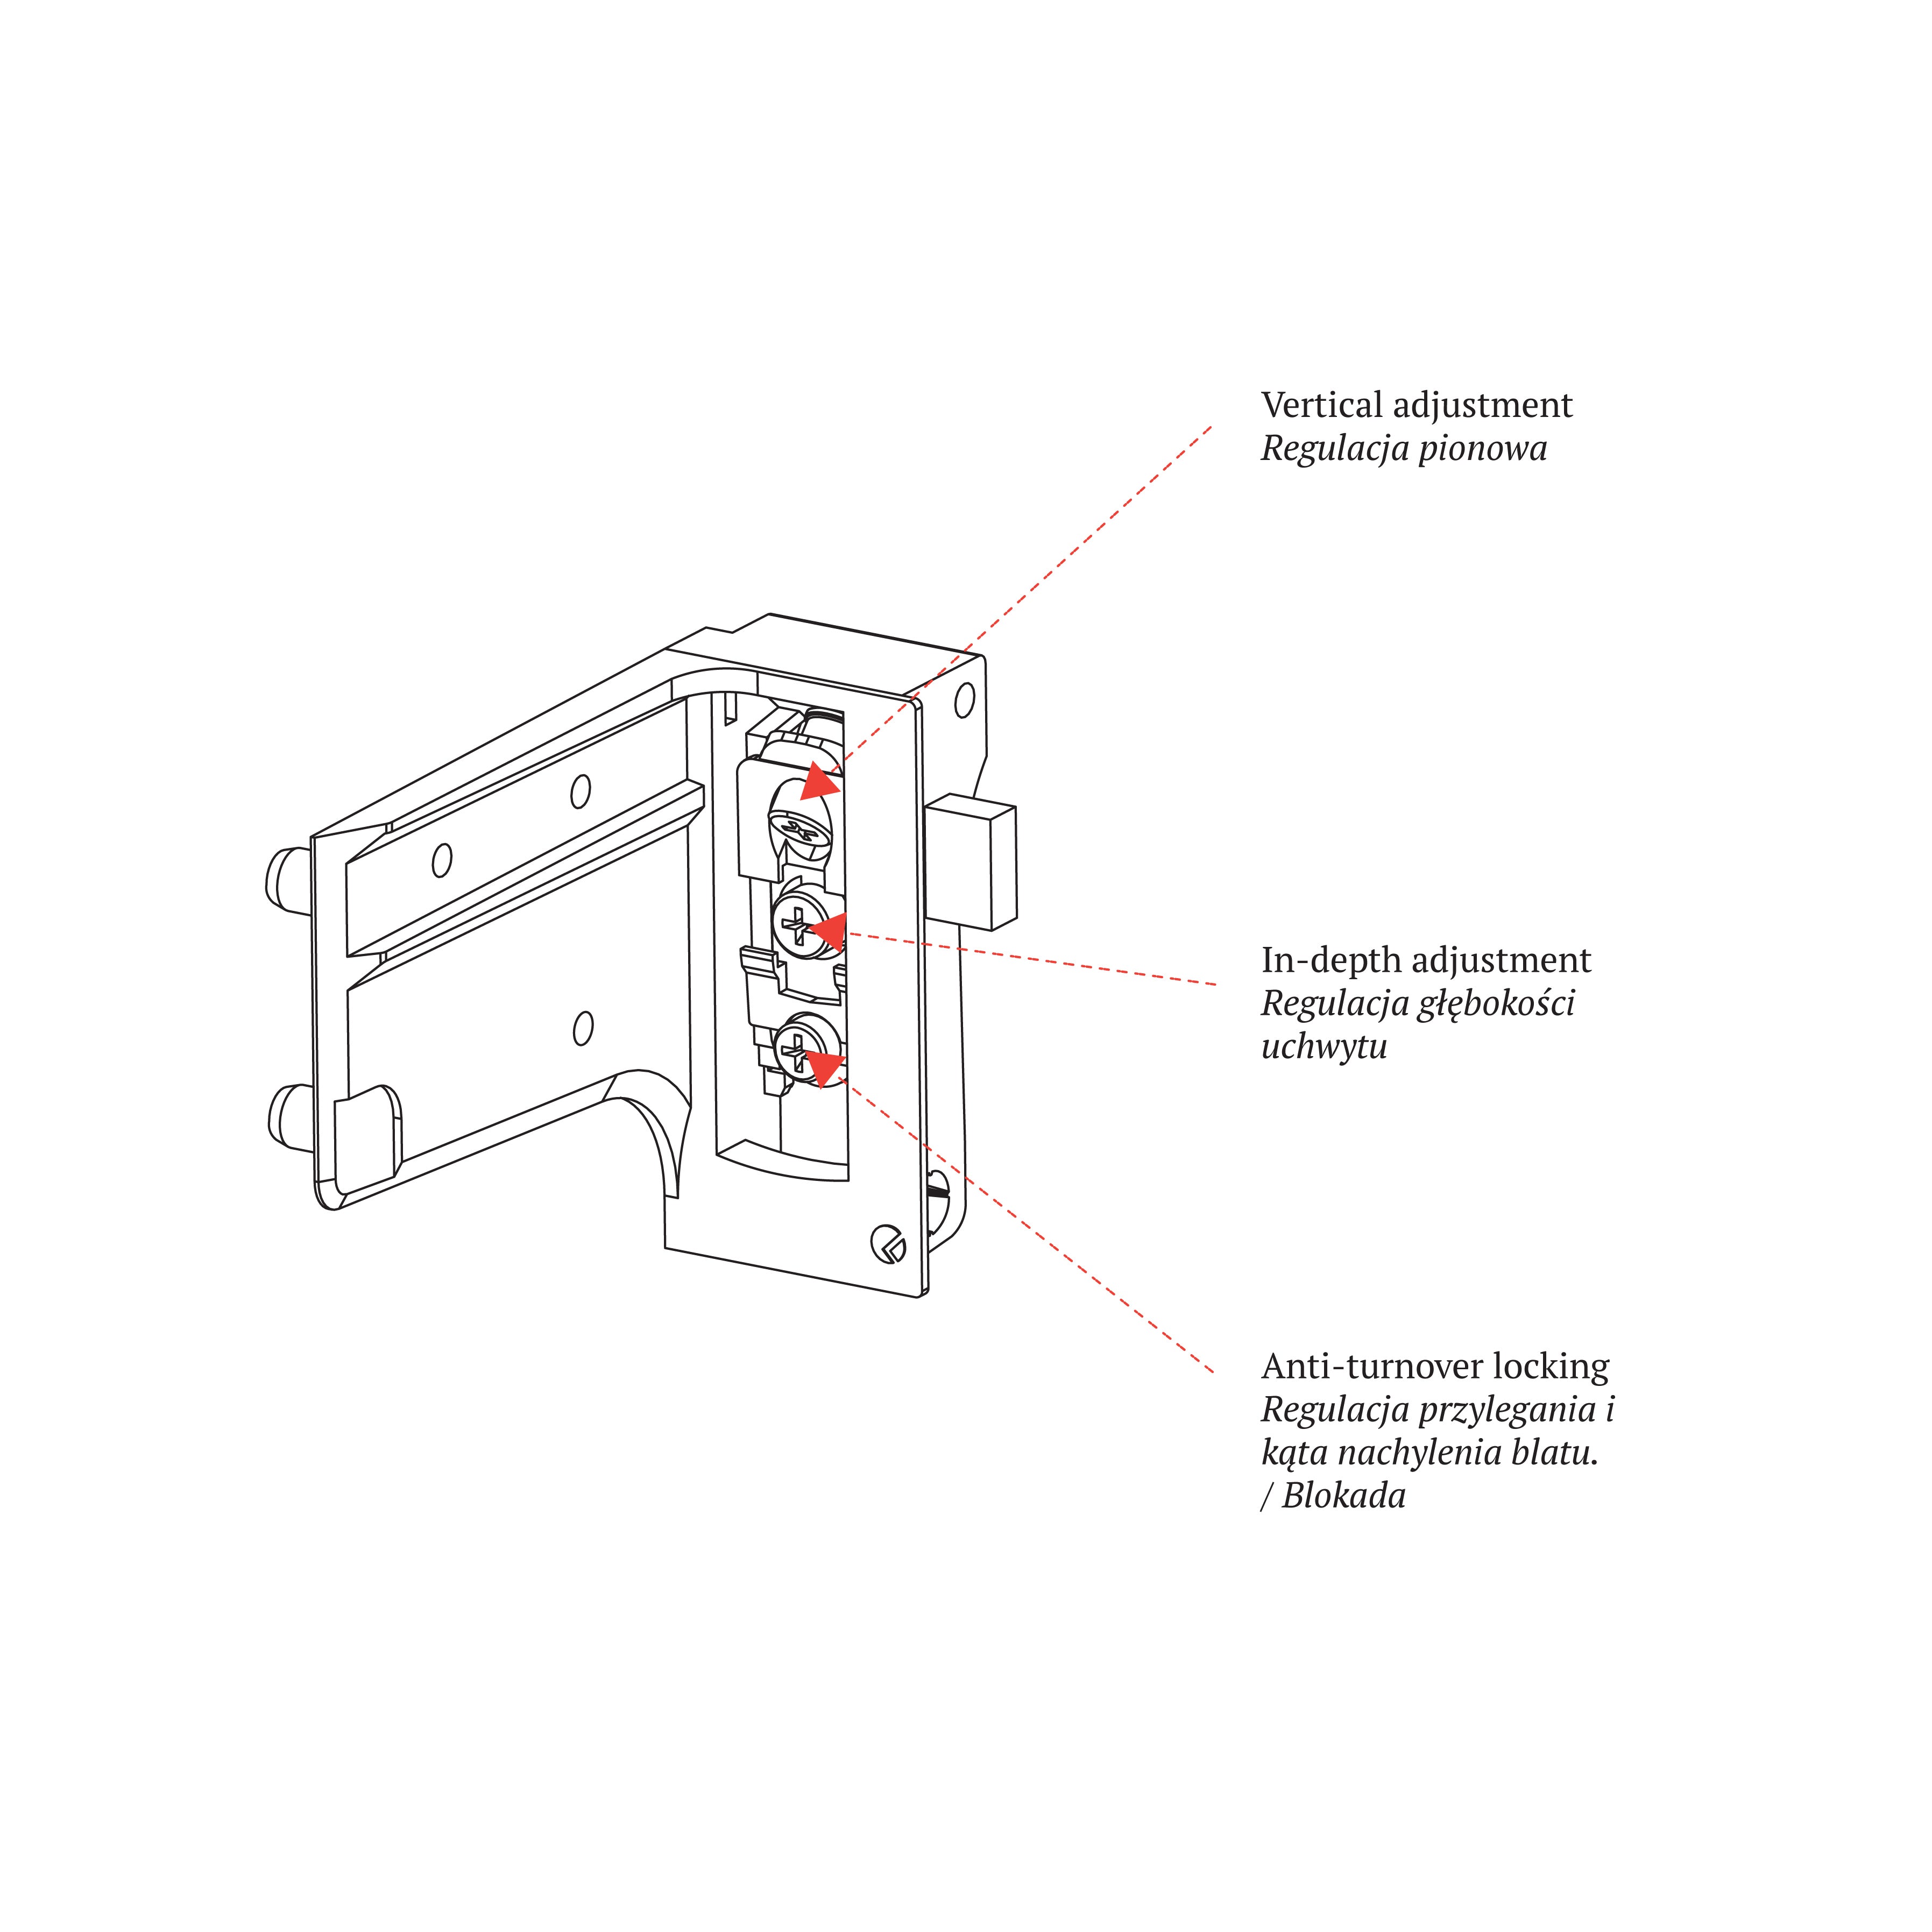
STEP 7
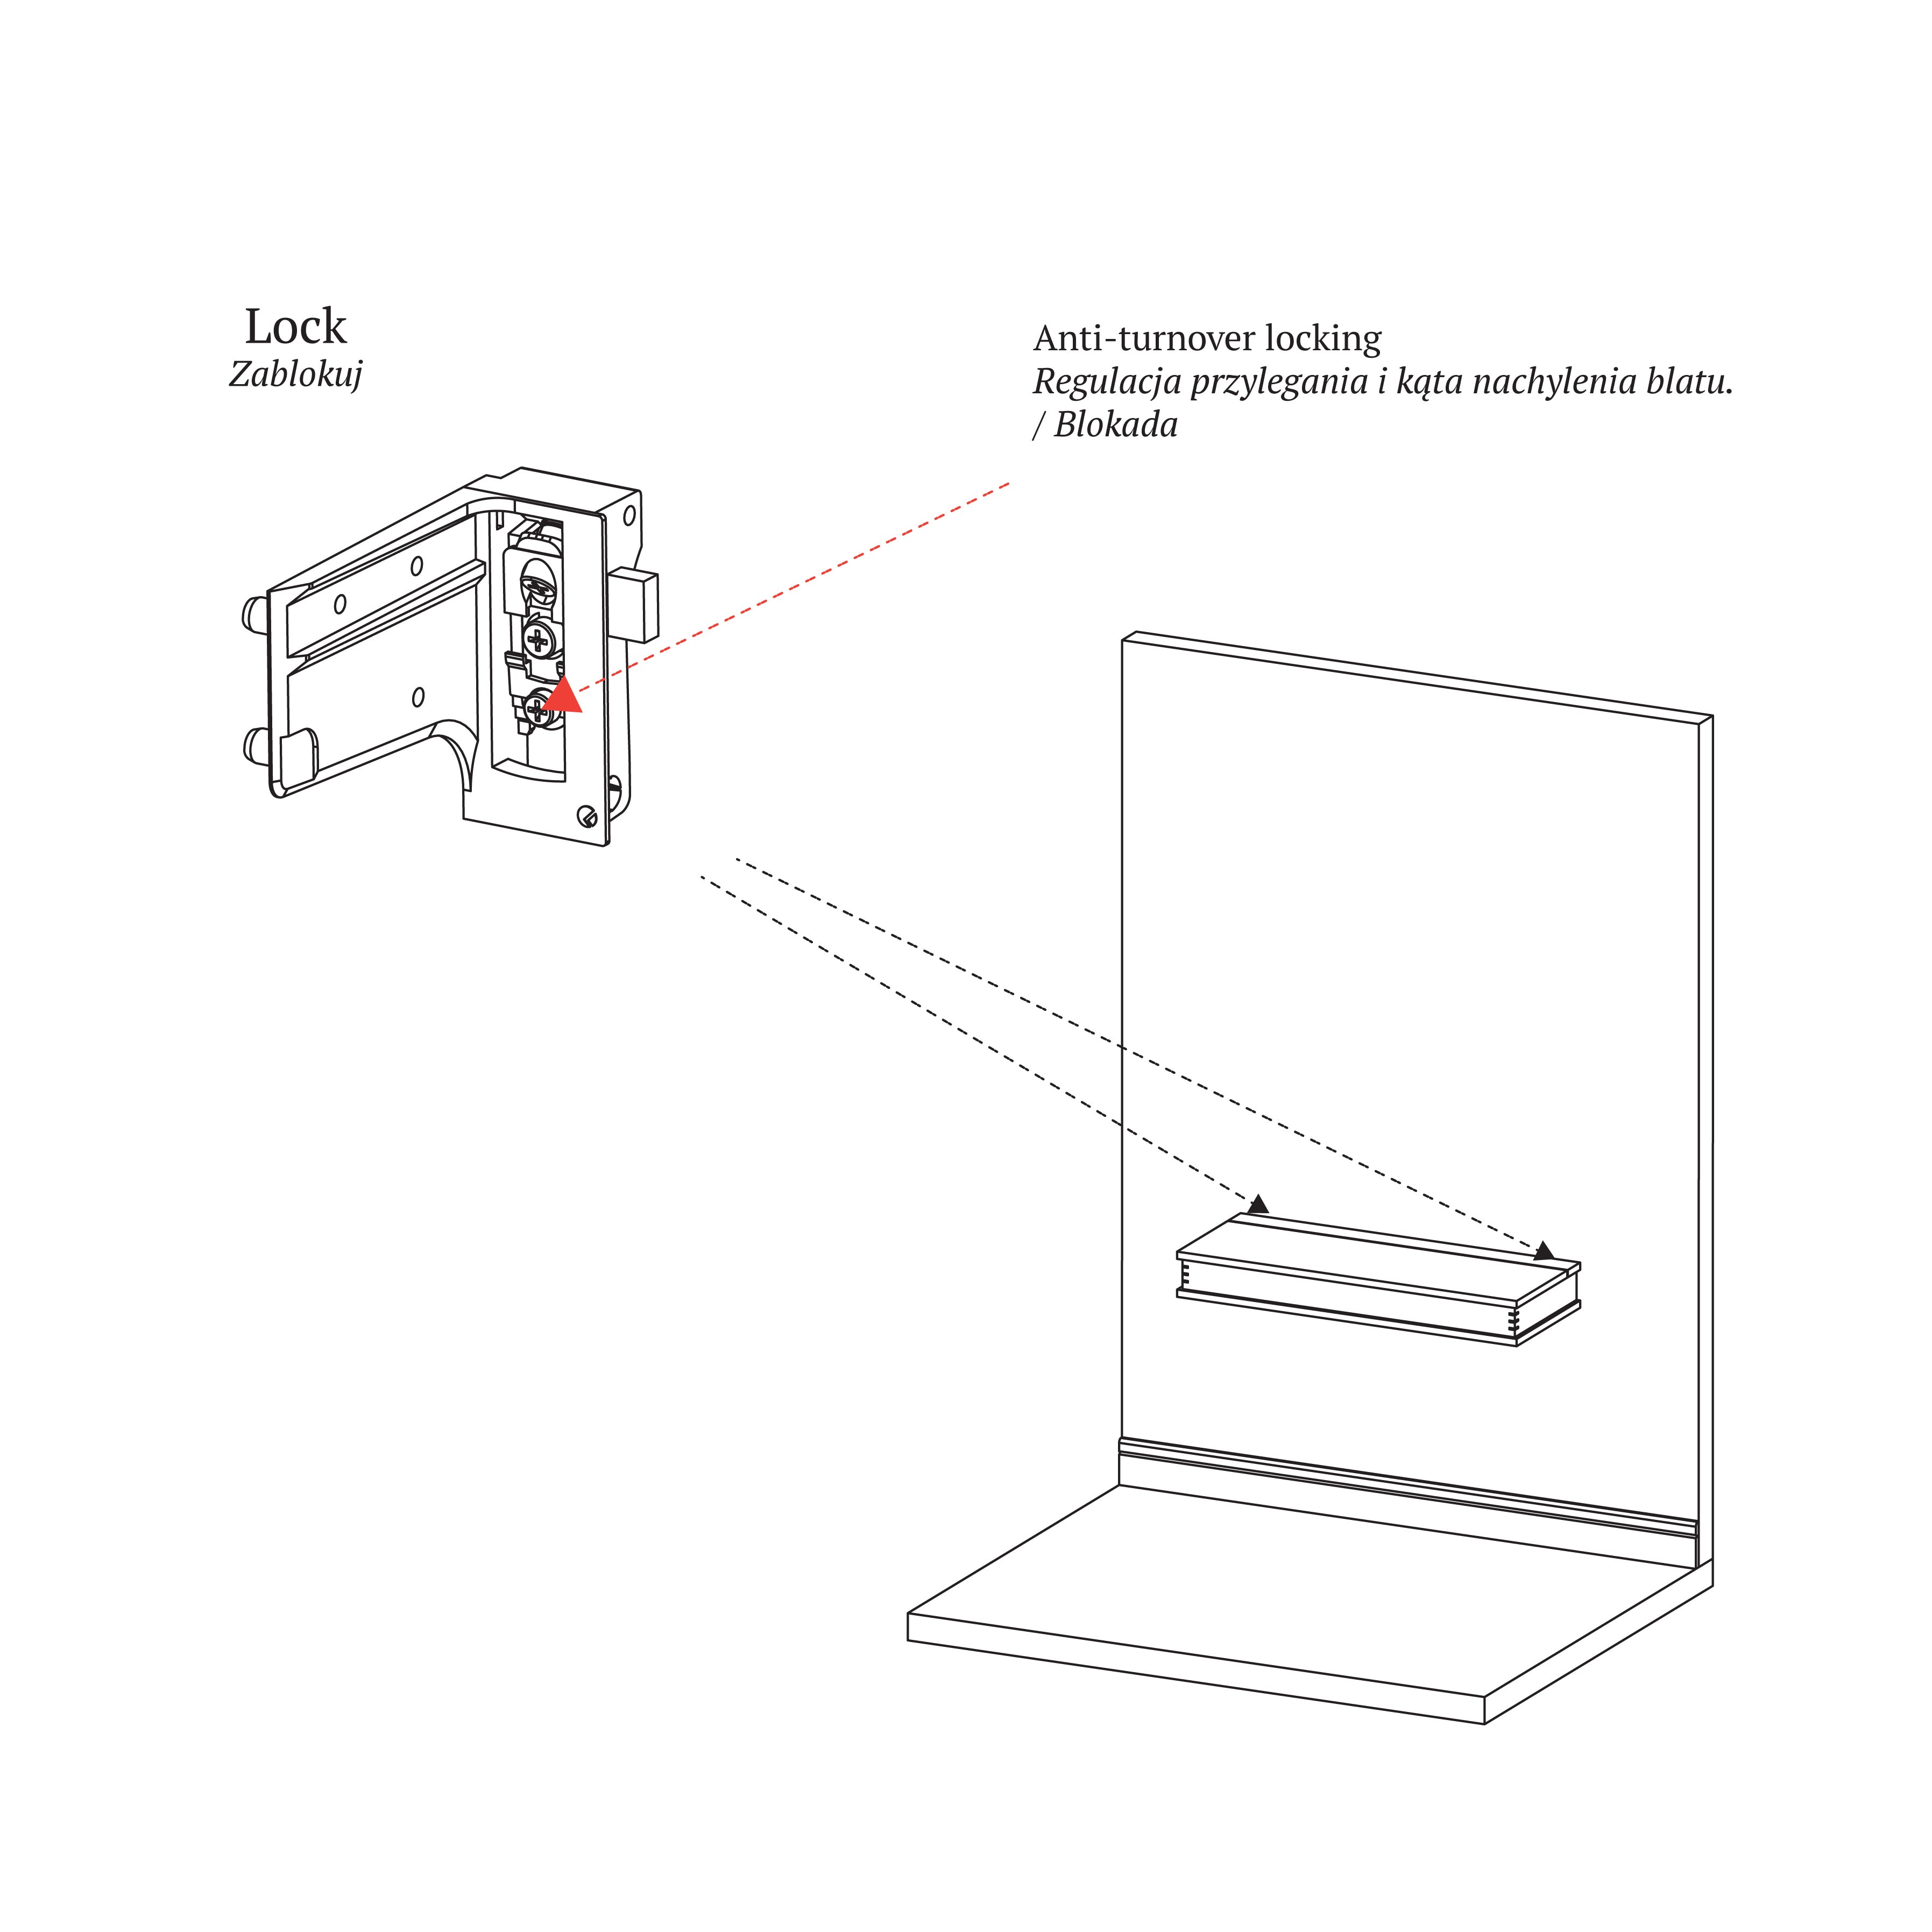
The illustration shows information about the functions of the individual adjustment screws.
STEP 8
After tightening the MIZU to the wall and making sure the surfaces fit well together, we can lock the bracket, securing the desk from slipping out of the hangers. Use the function screw indicated in the illustration to do this.
STEP 9
Done. You are now ready to use MIZU. If you have additional questions about using or caring for the product, please contact hello@tamo.design or visit Care & Use
MIZU
VIEW