


Manual
VAZOO
The bookcase you want to assemble requires a few steps that you can easily perform.
BEGINNING
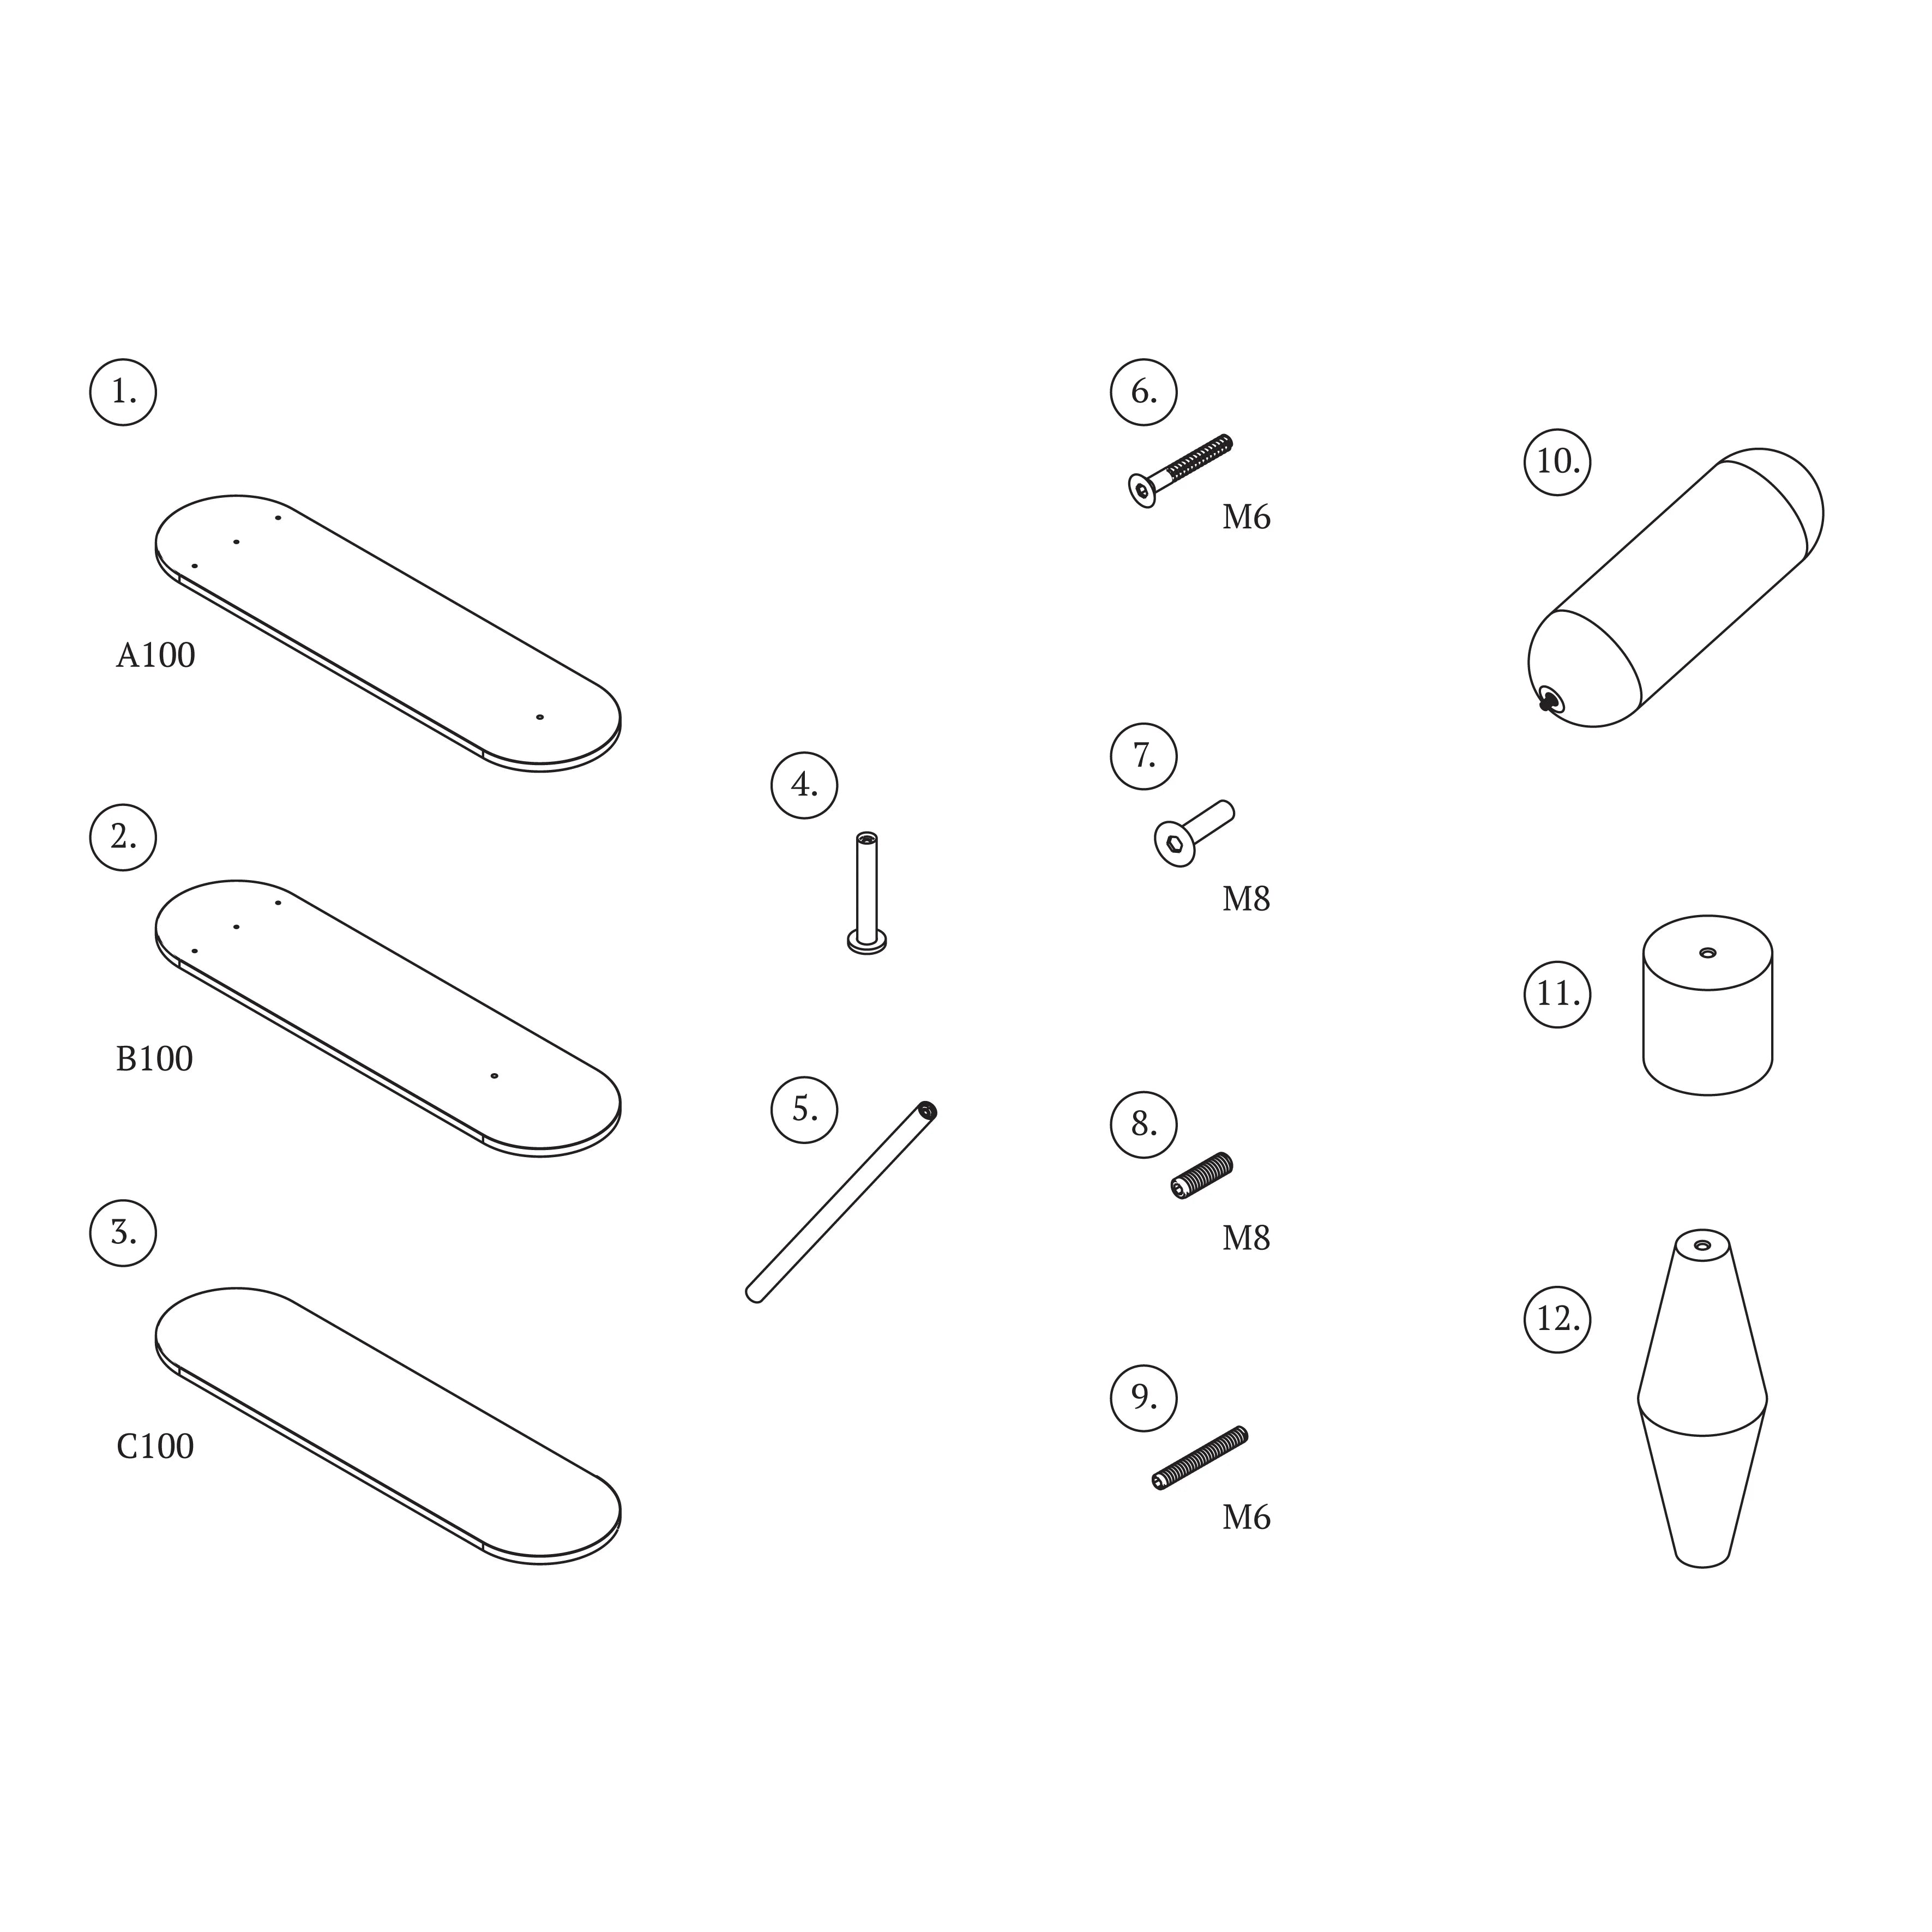
Prepare the tools for assembling the VAZOO rack. To efficiently assemble the bookcase, you will need: screws and an Allen key included in the package.
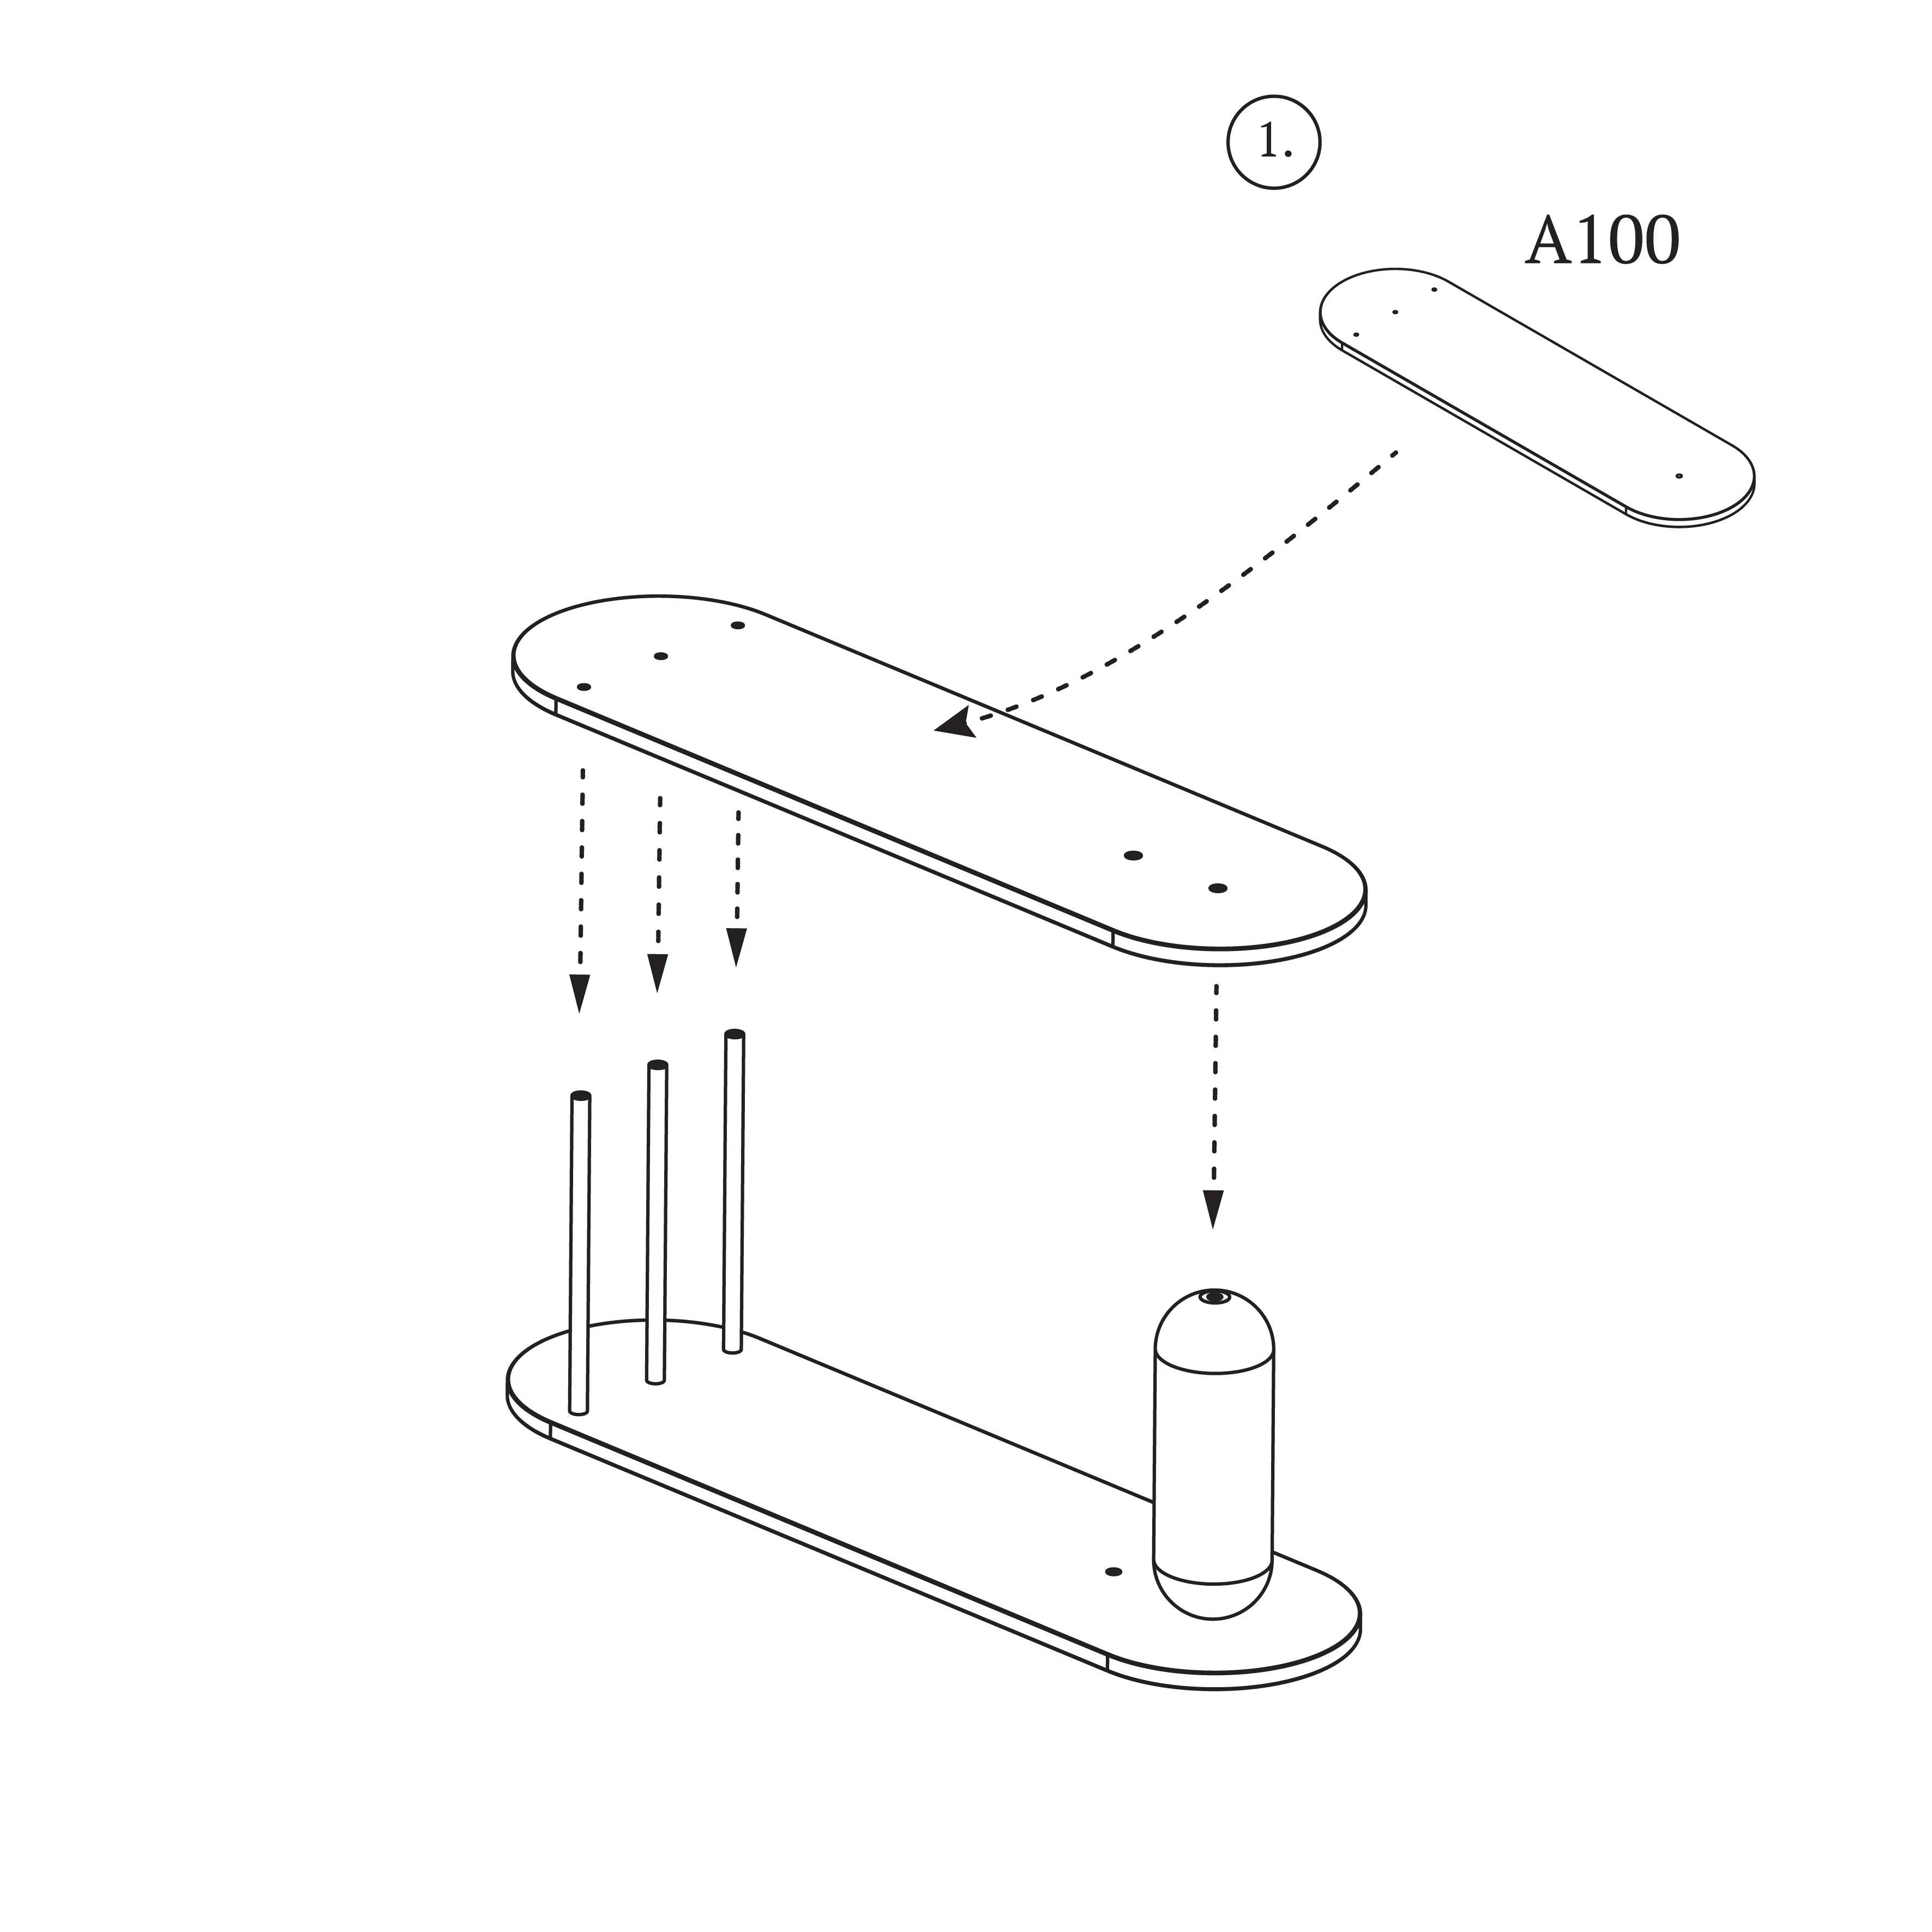
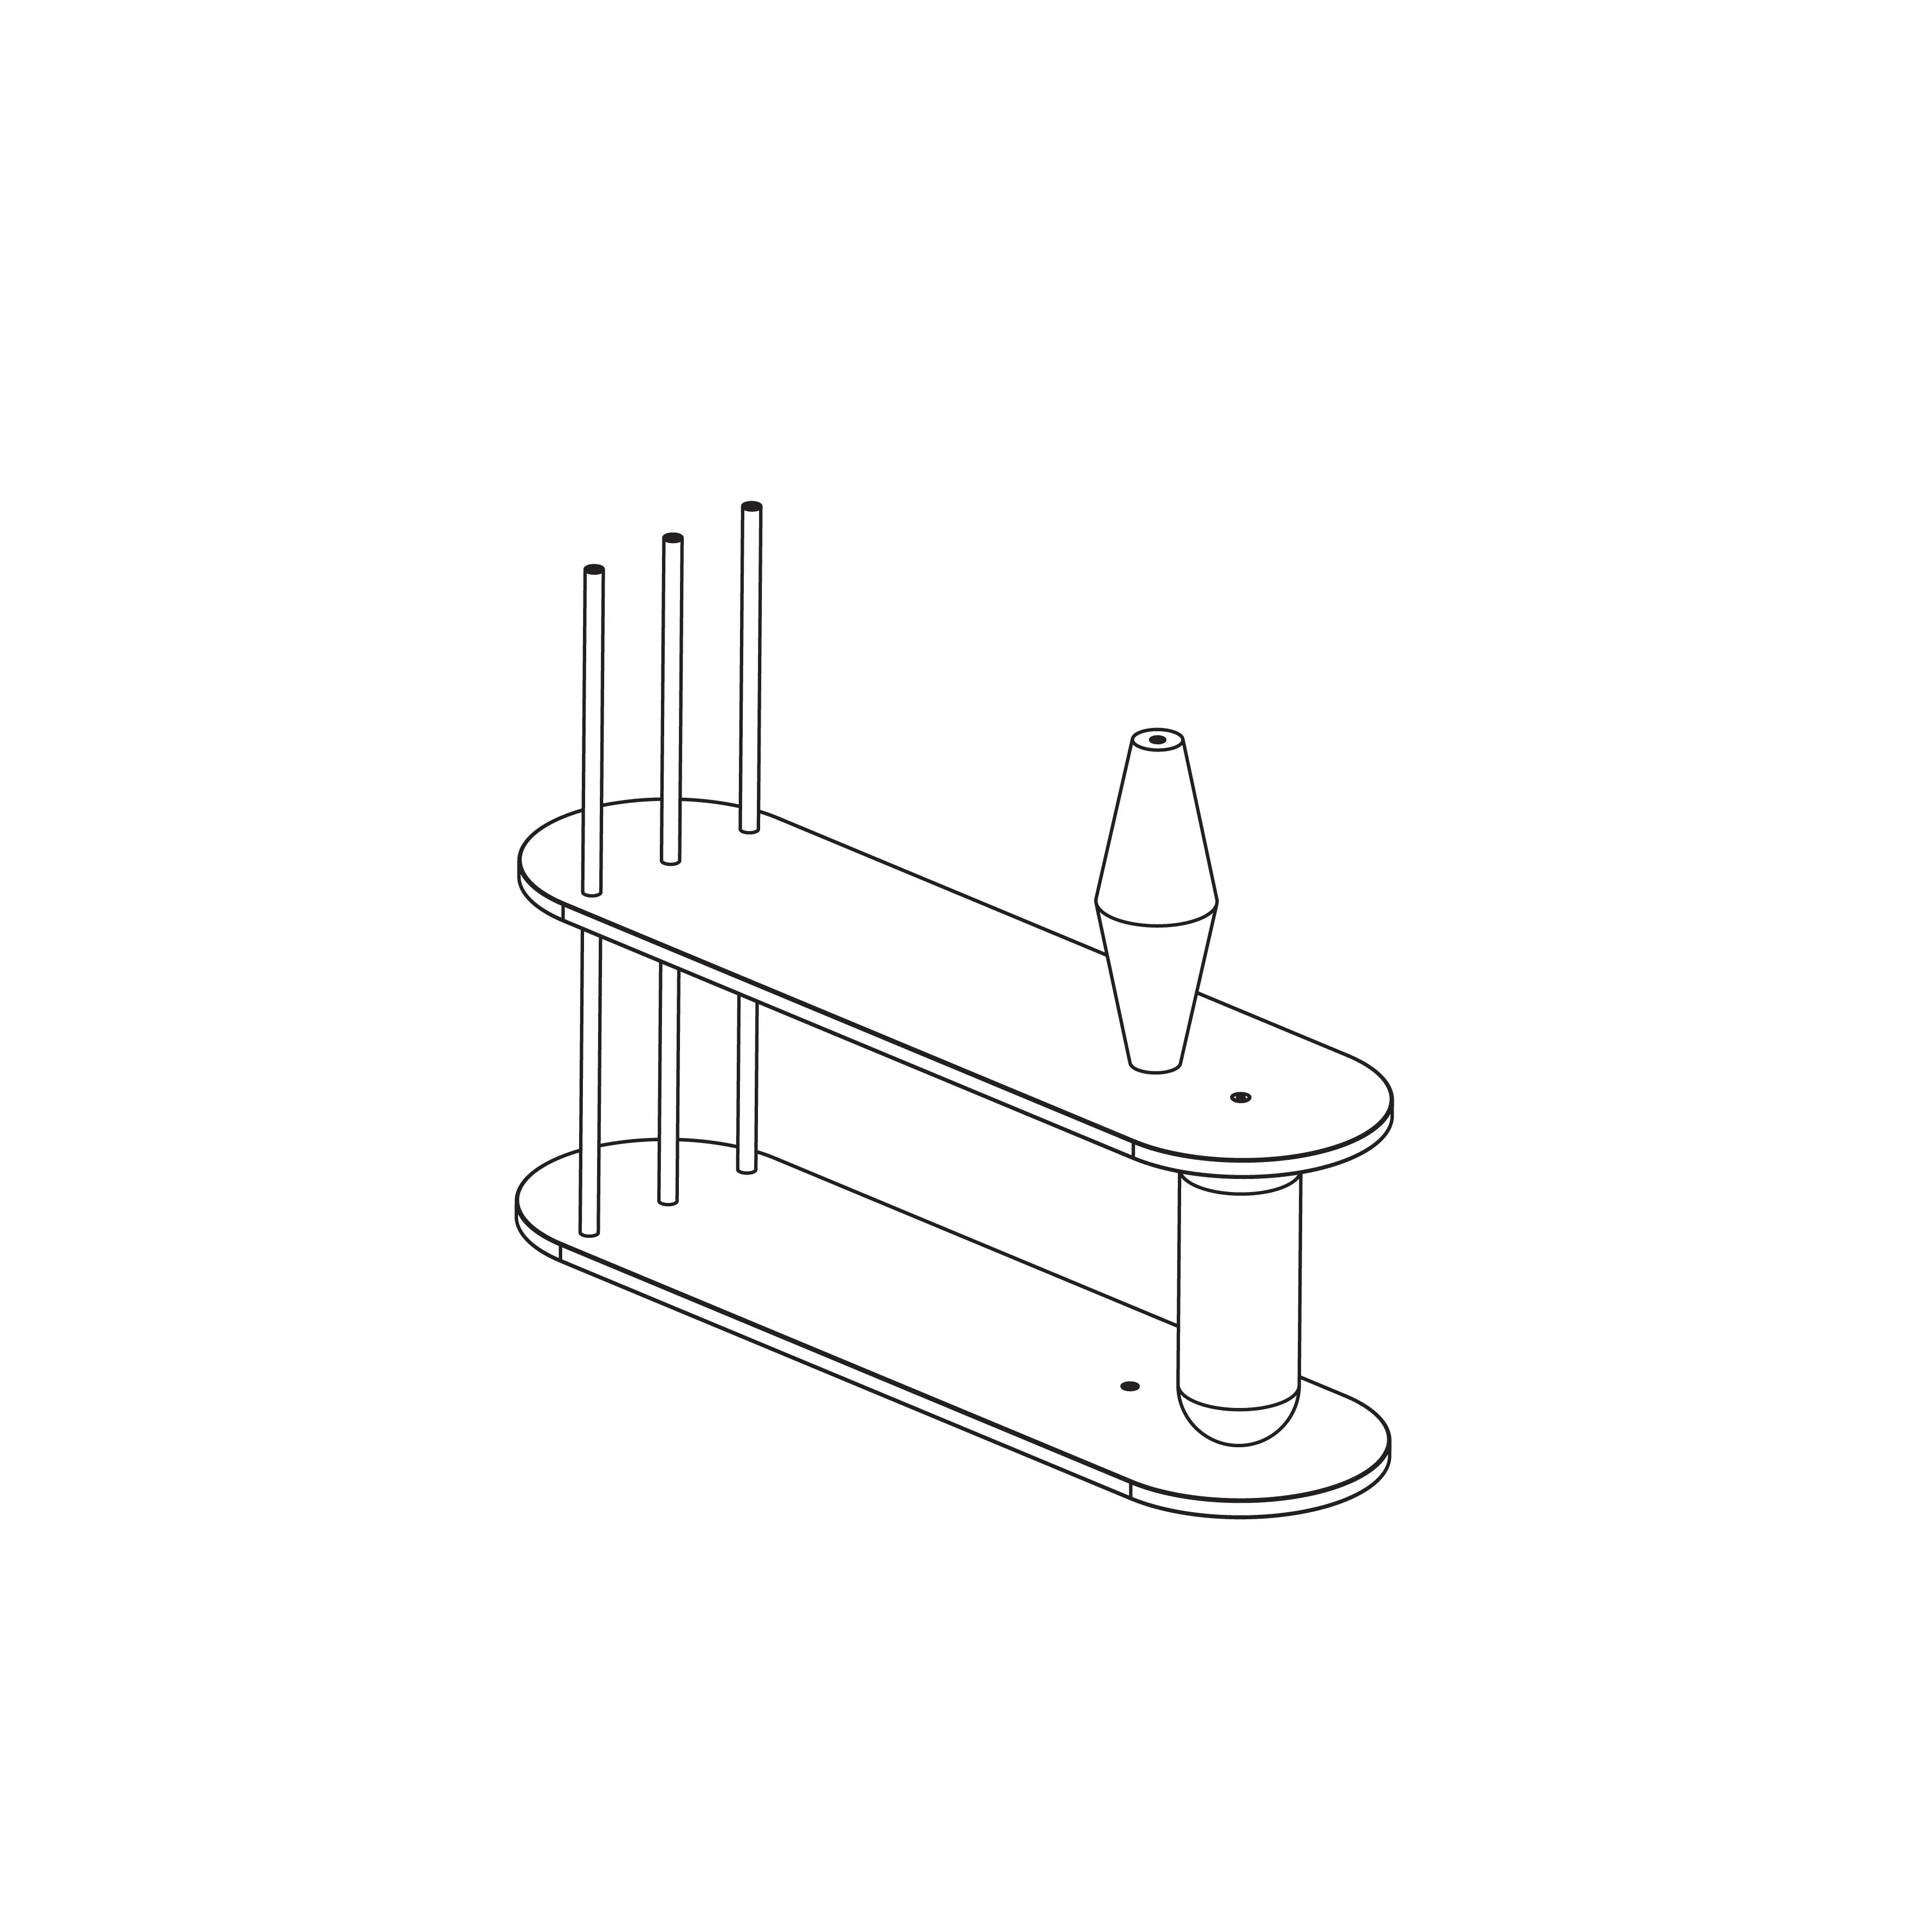
STEP 1
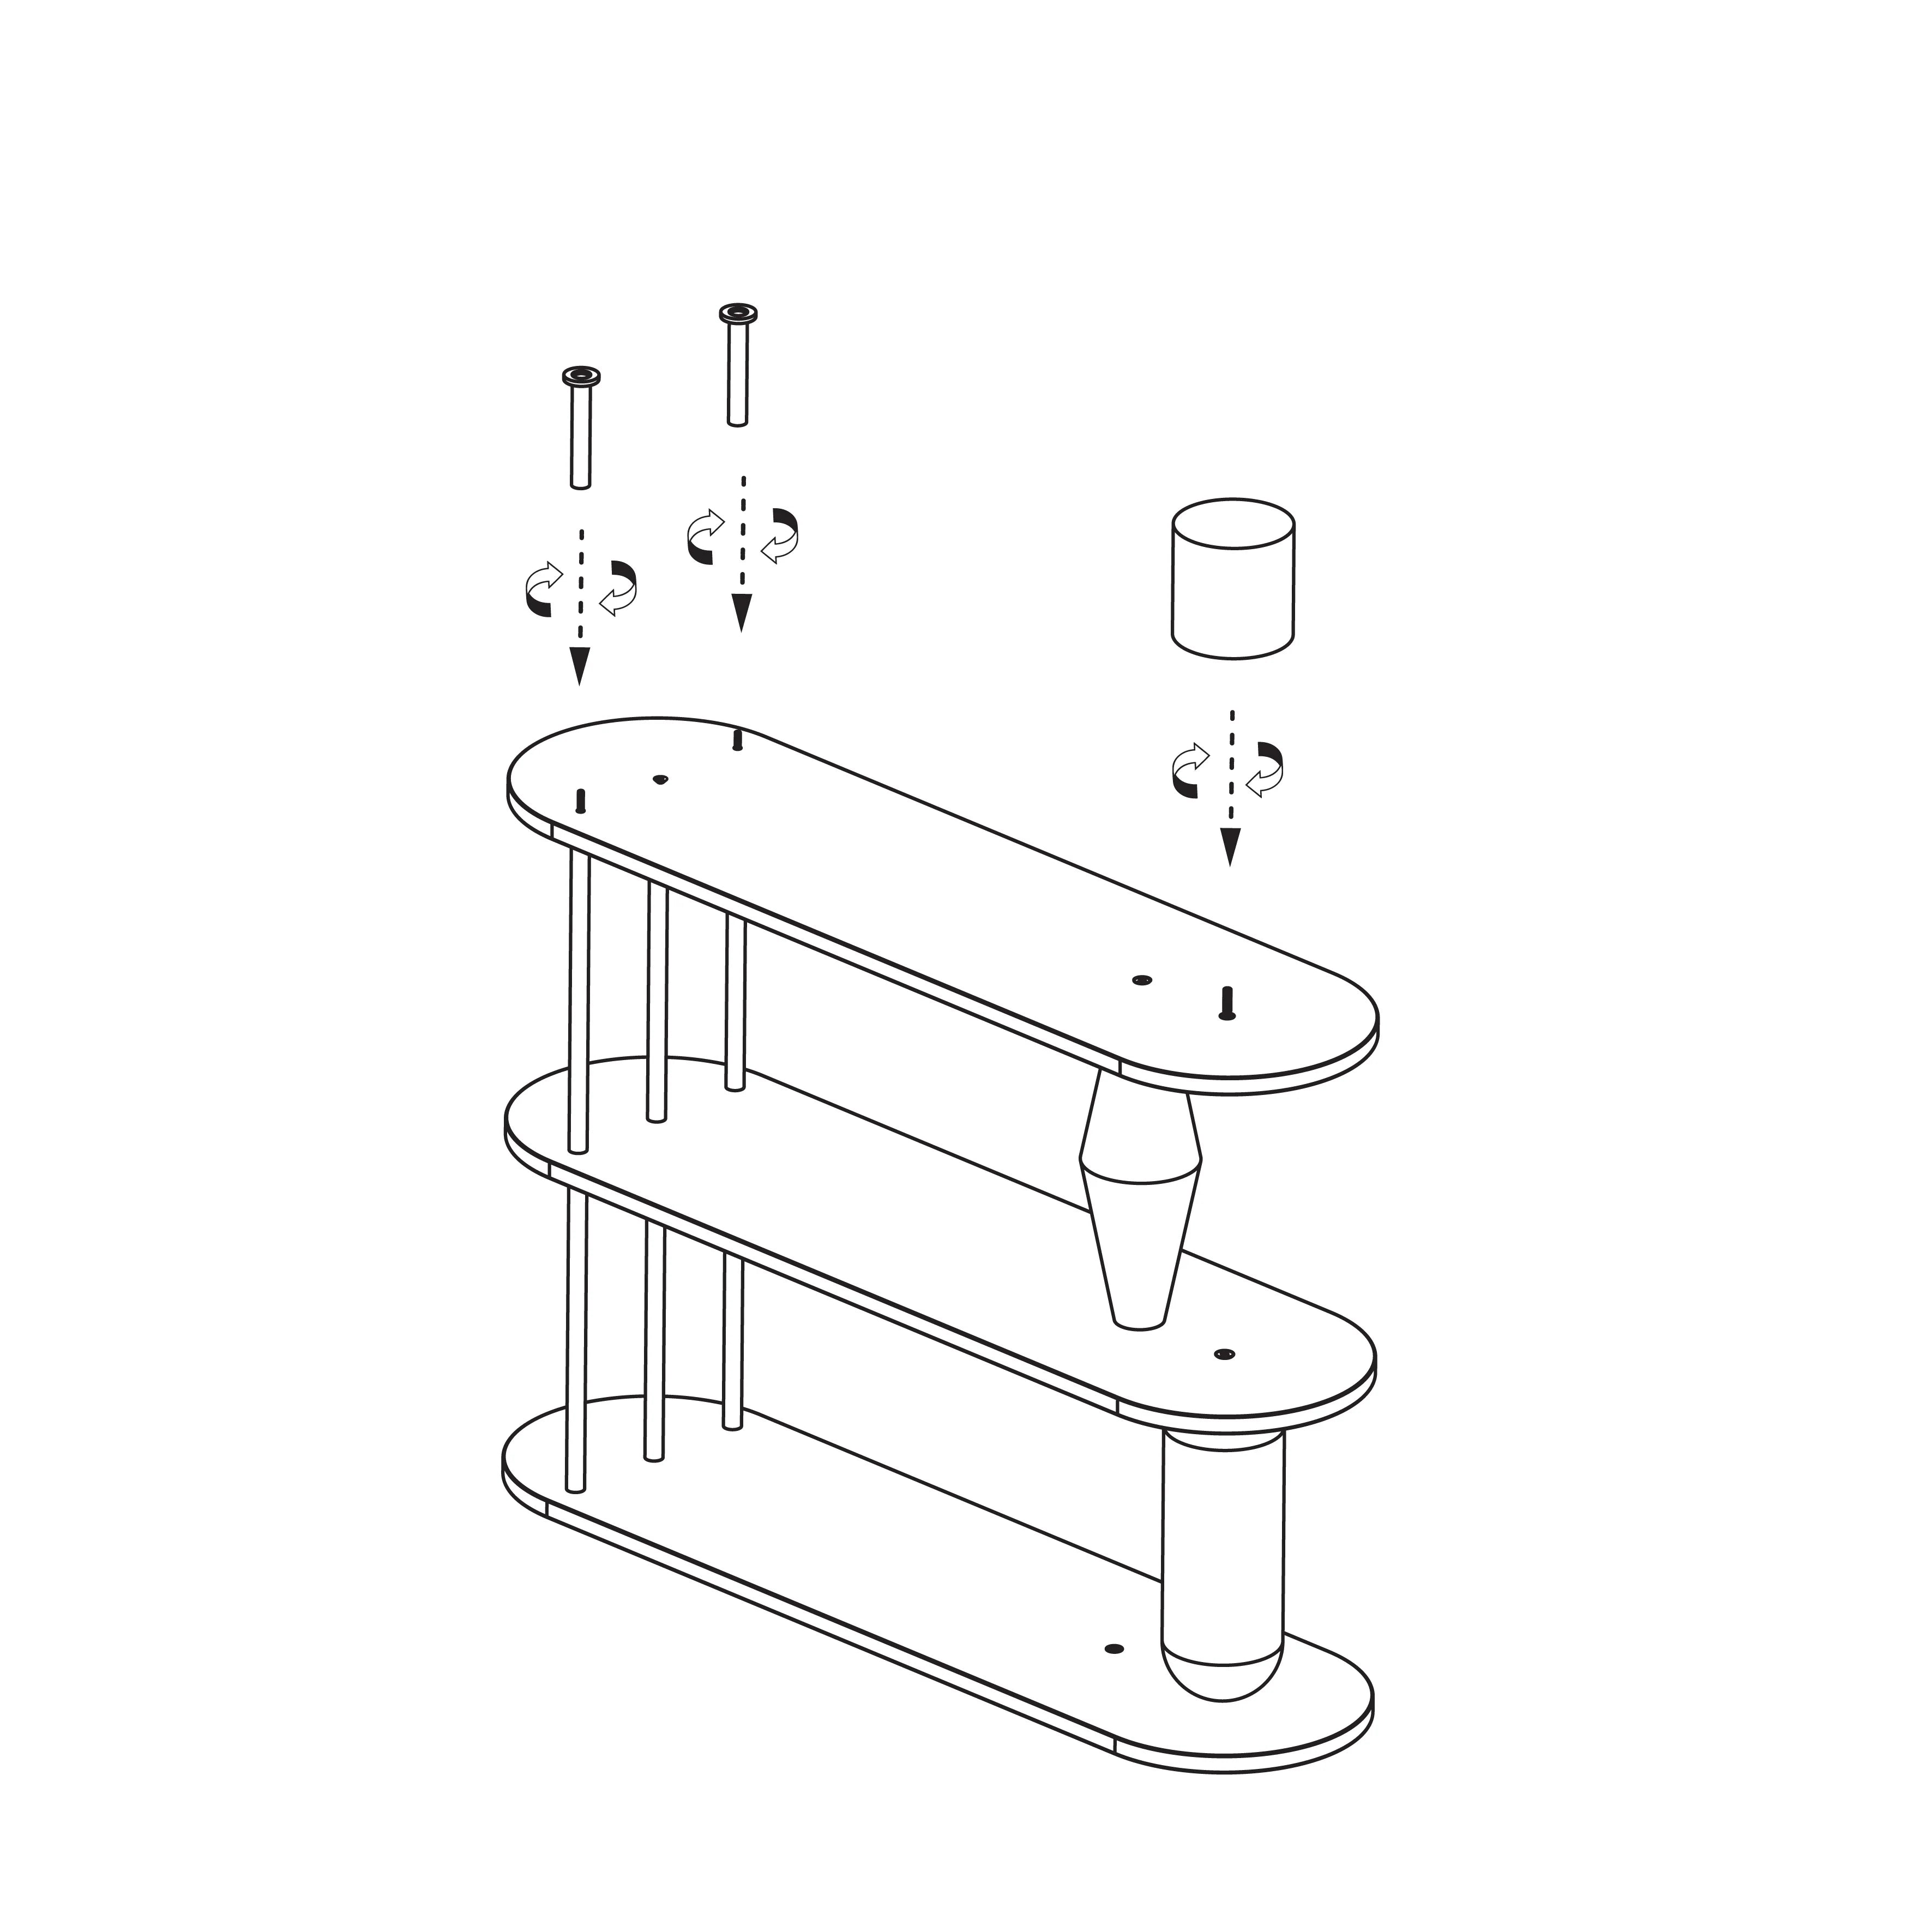
We start the assembly by placing the first worktop on a smooth and clean surface. It is best to prepare a place for yourself on an even floor and cover the assembly place with a blanket. You can also do this on a vacuumed, clean carpet.
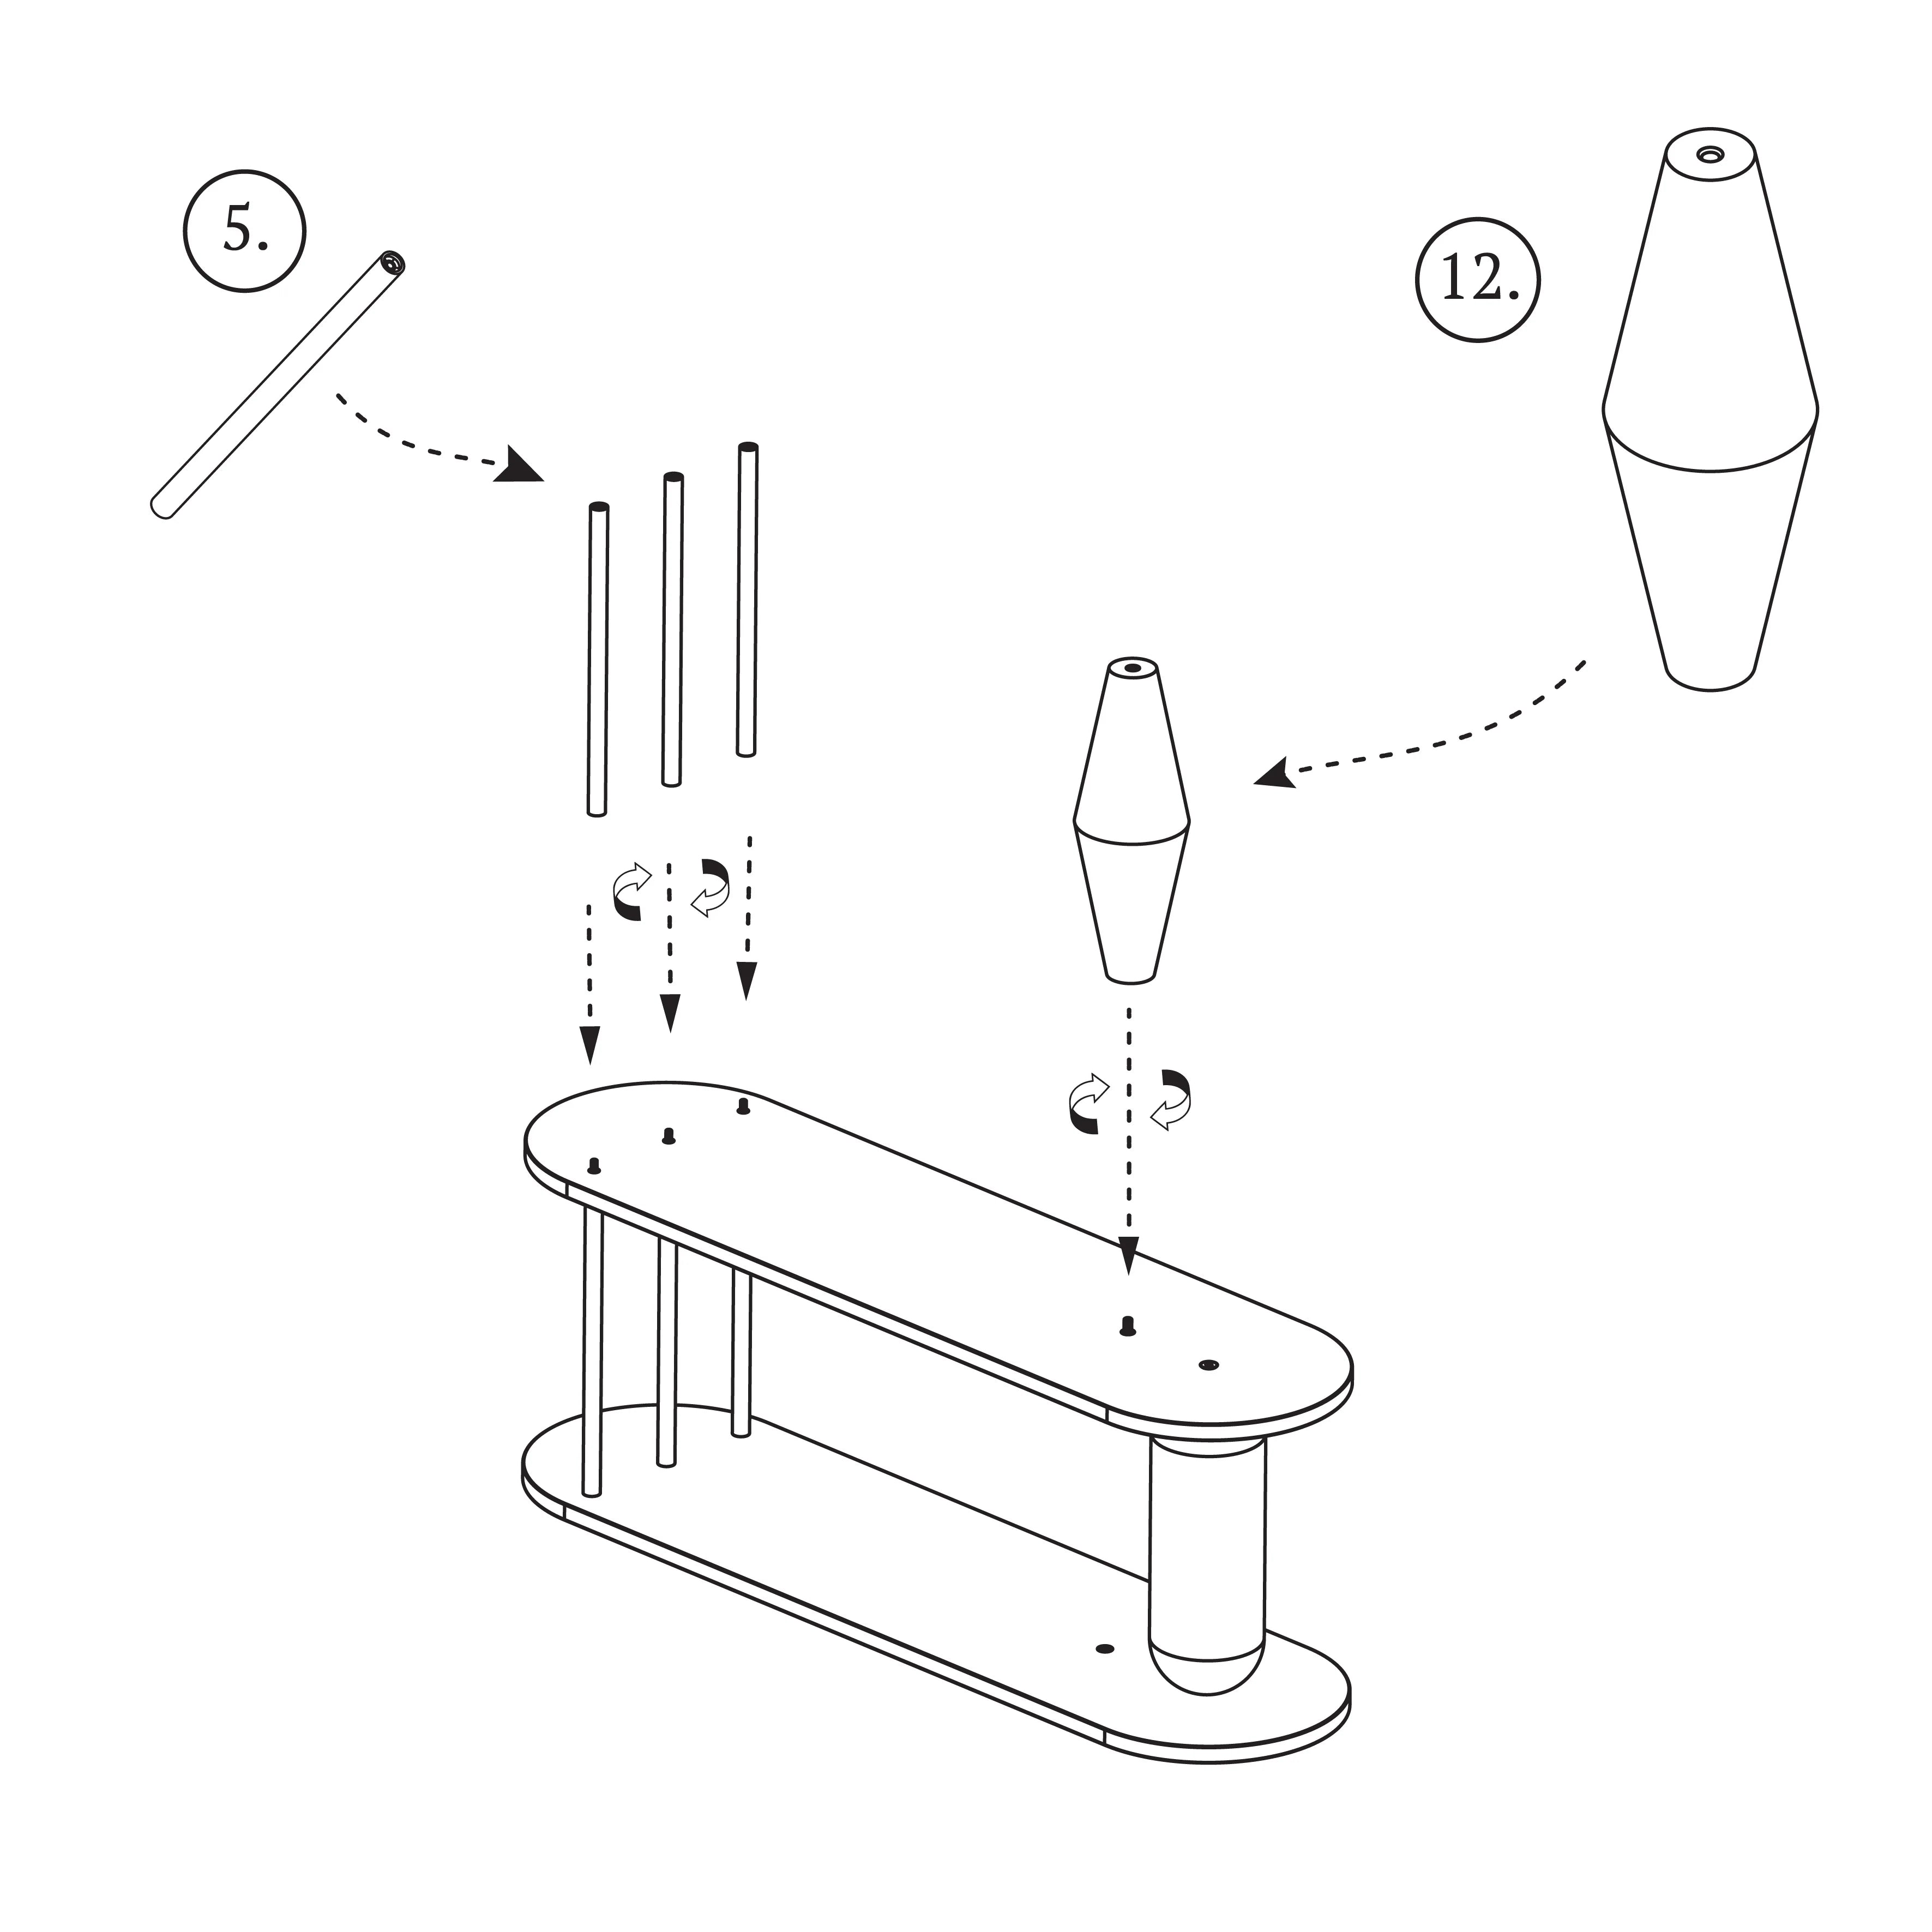
STEP 2
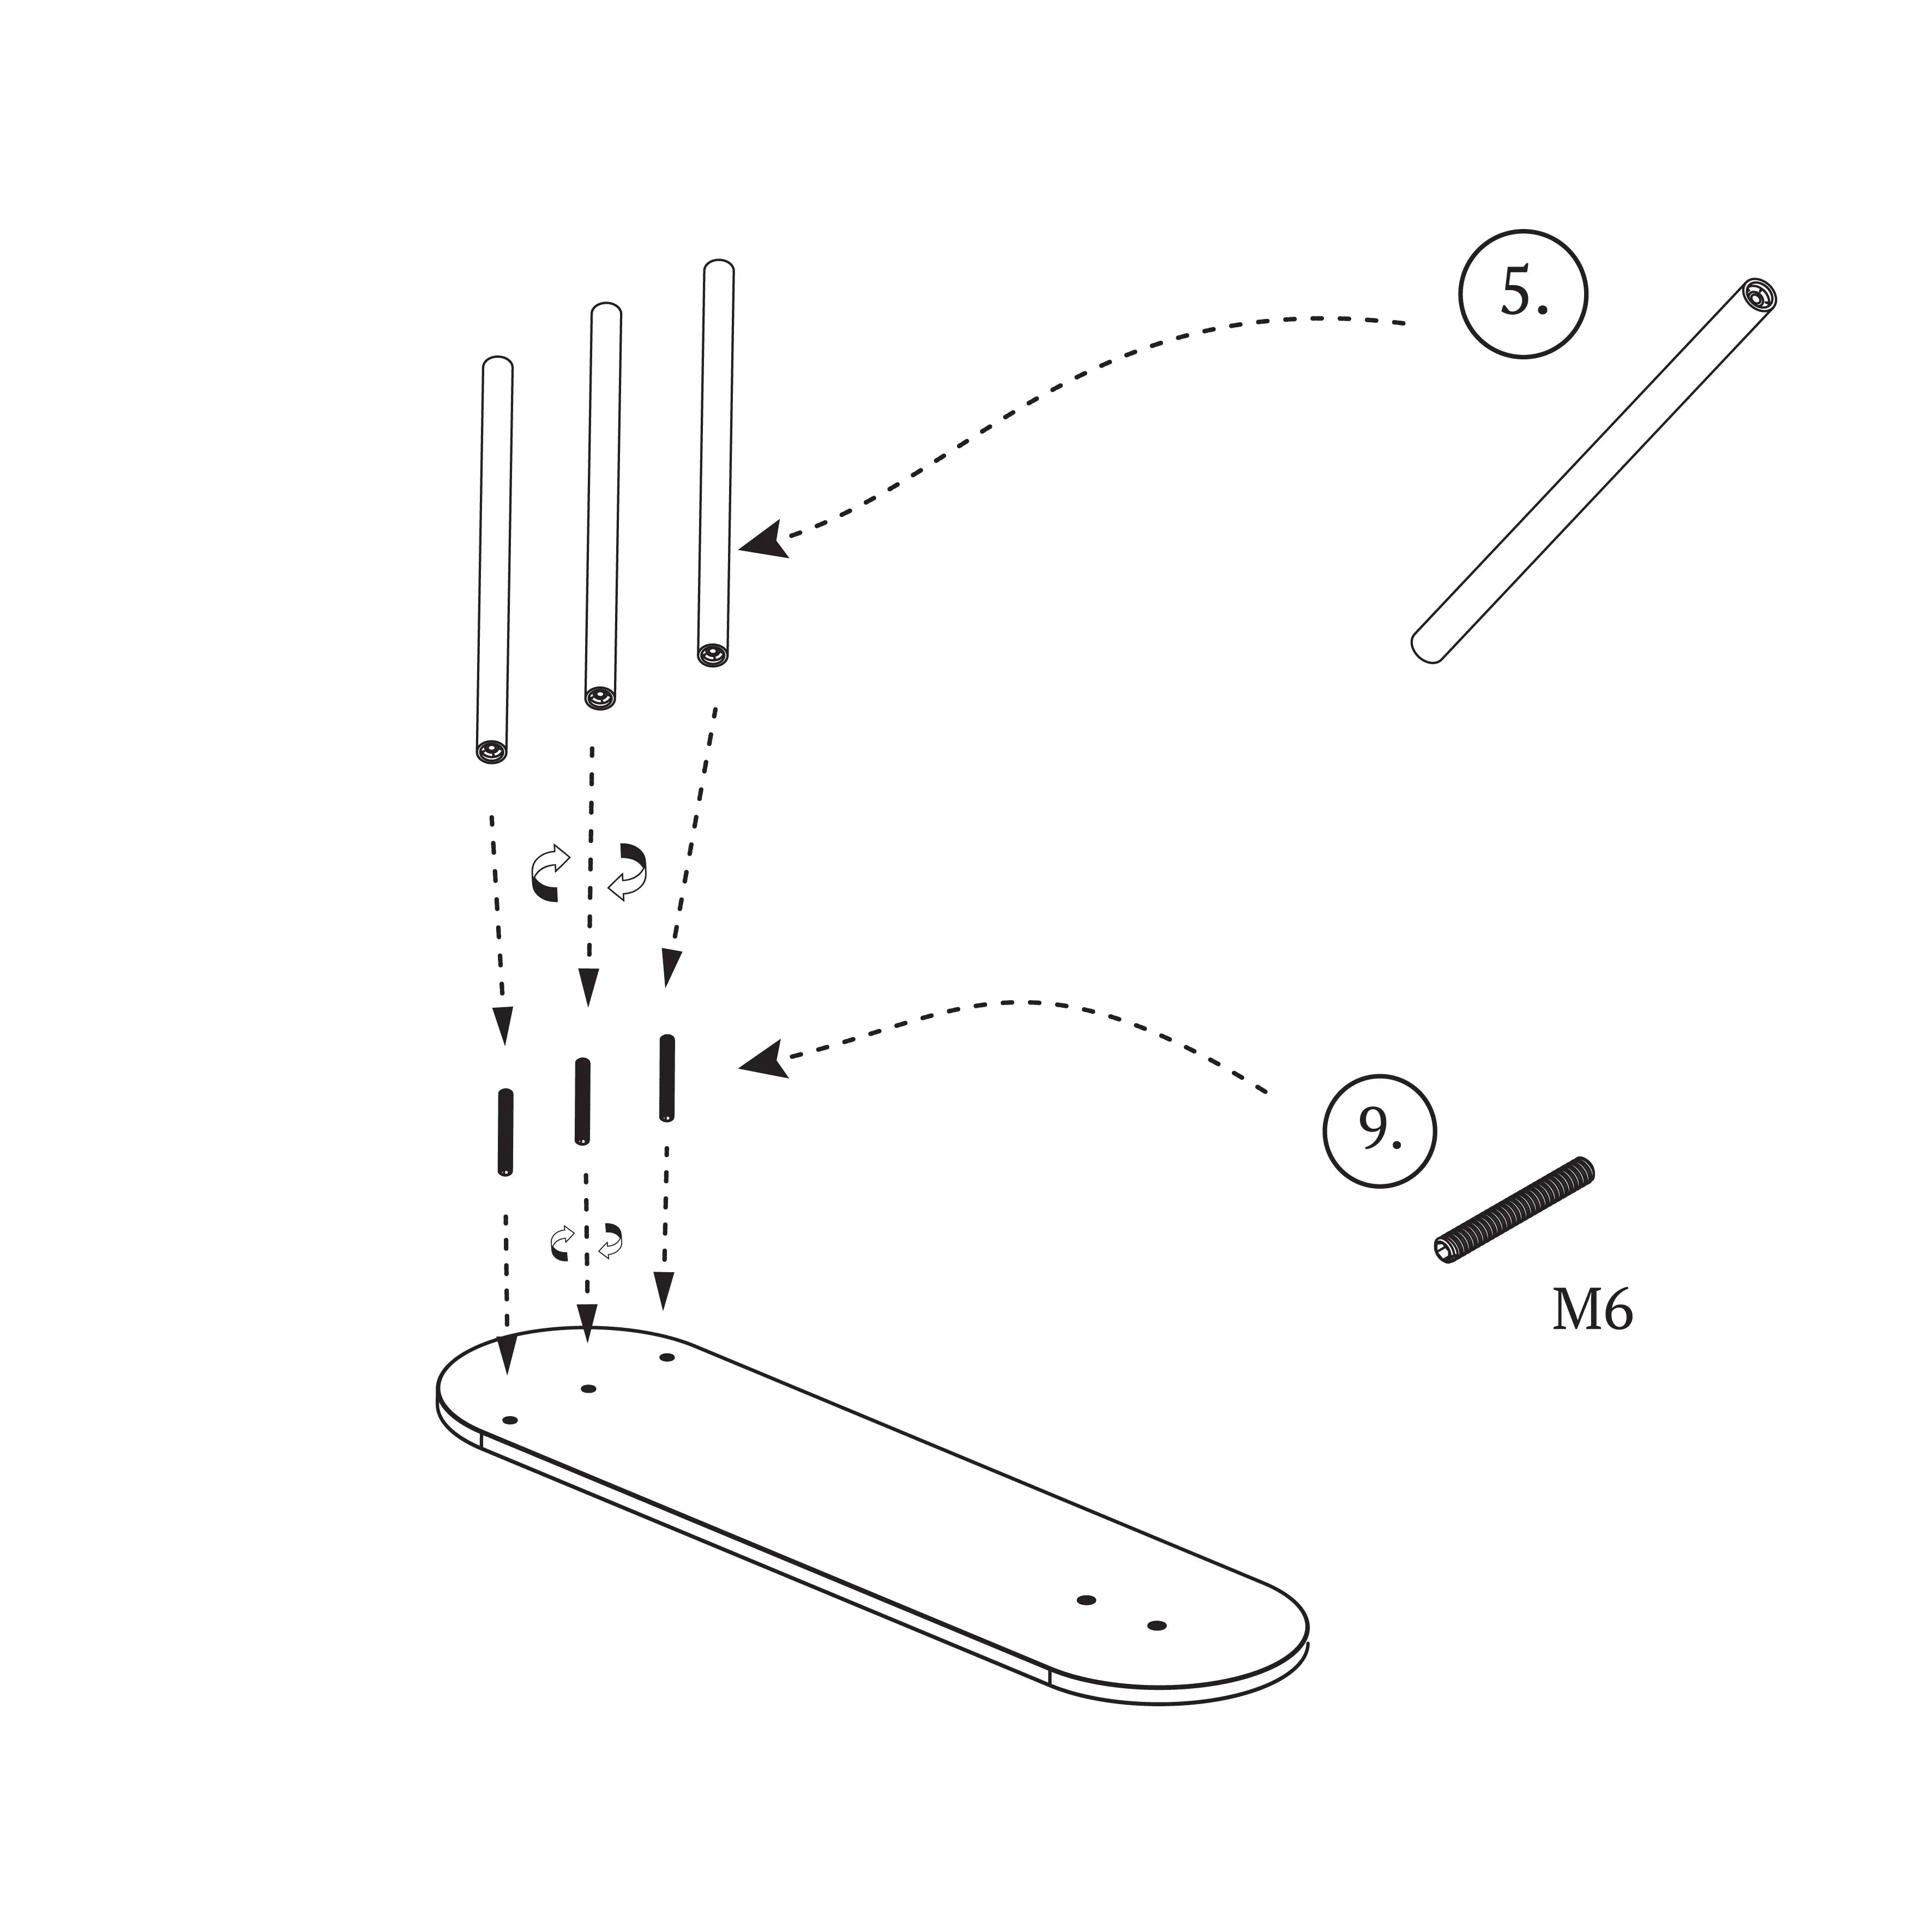
First, insert the threaded pins into the holes with the threaded sockets. They are shown in the picture with the number 9. After the pins are inserted, screw the first three tubes with the number 5.

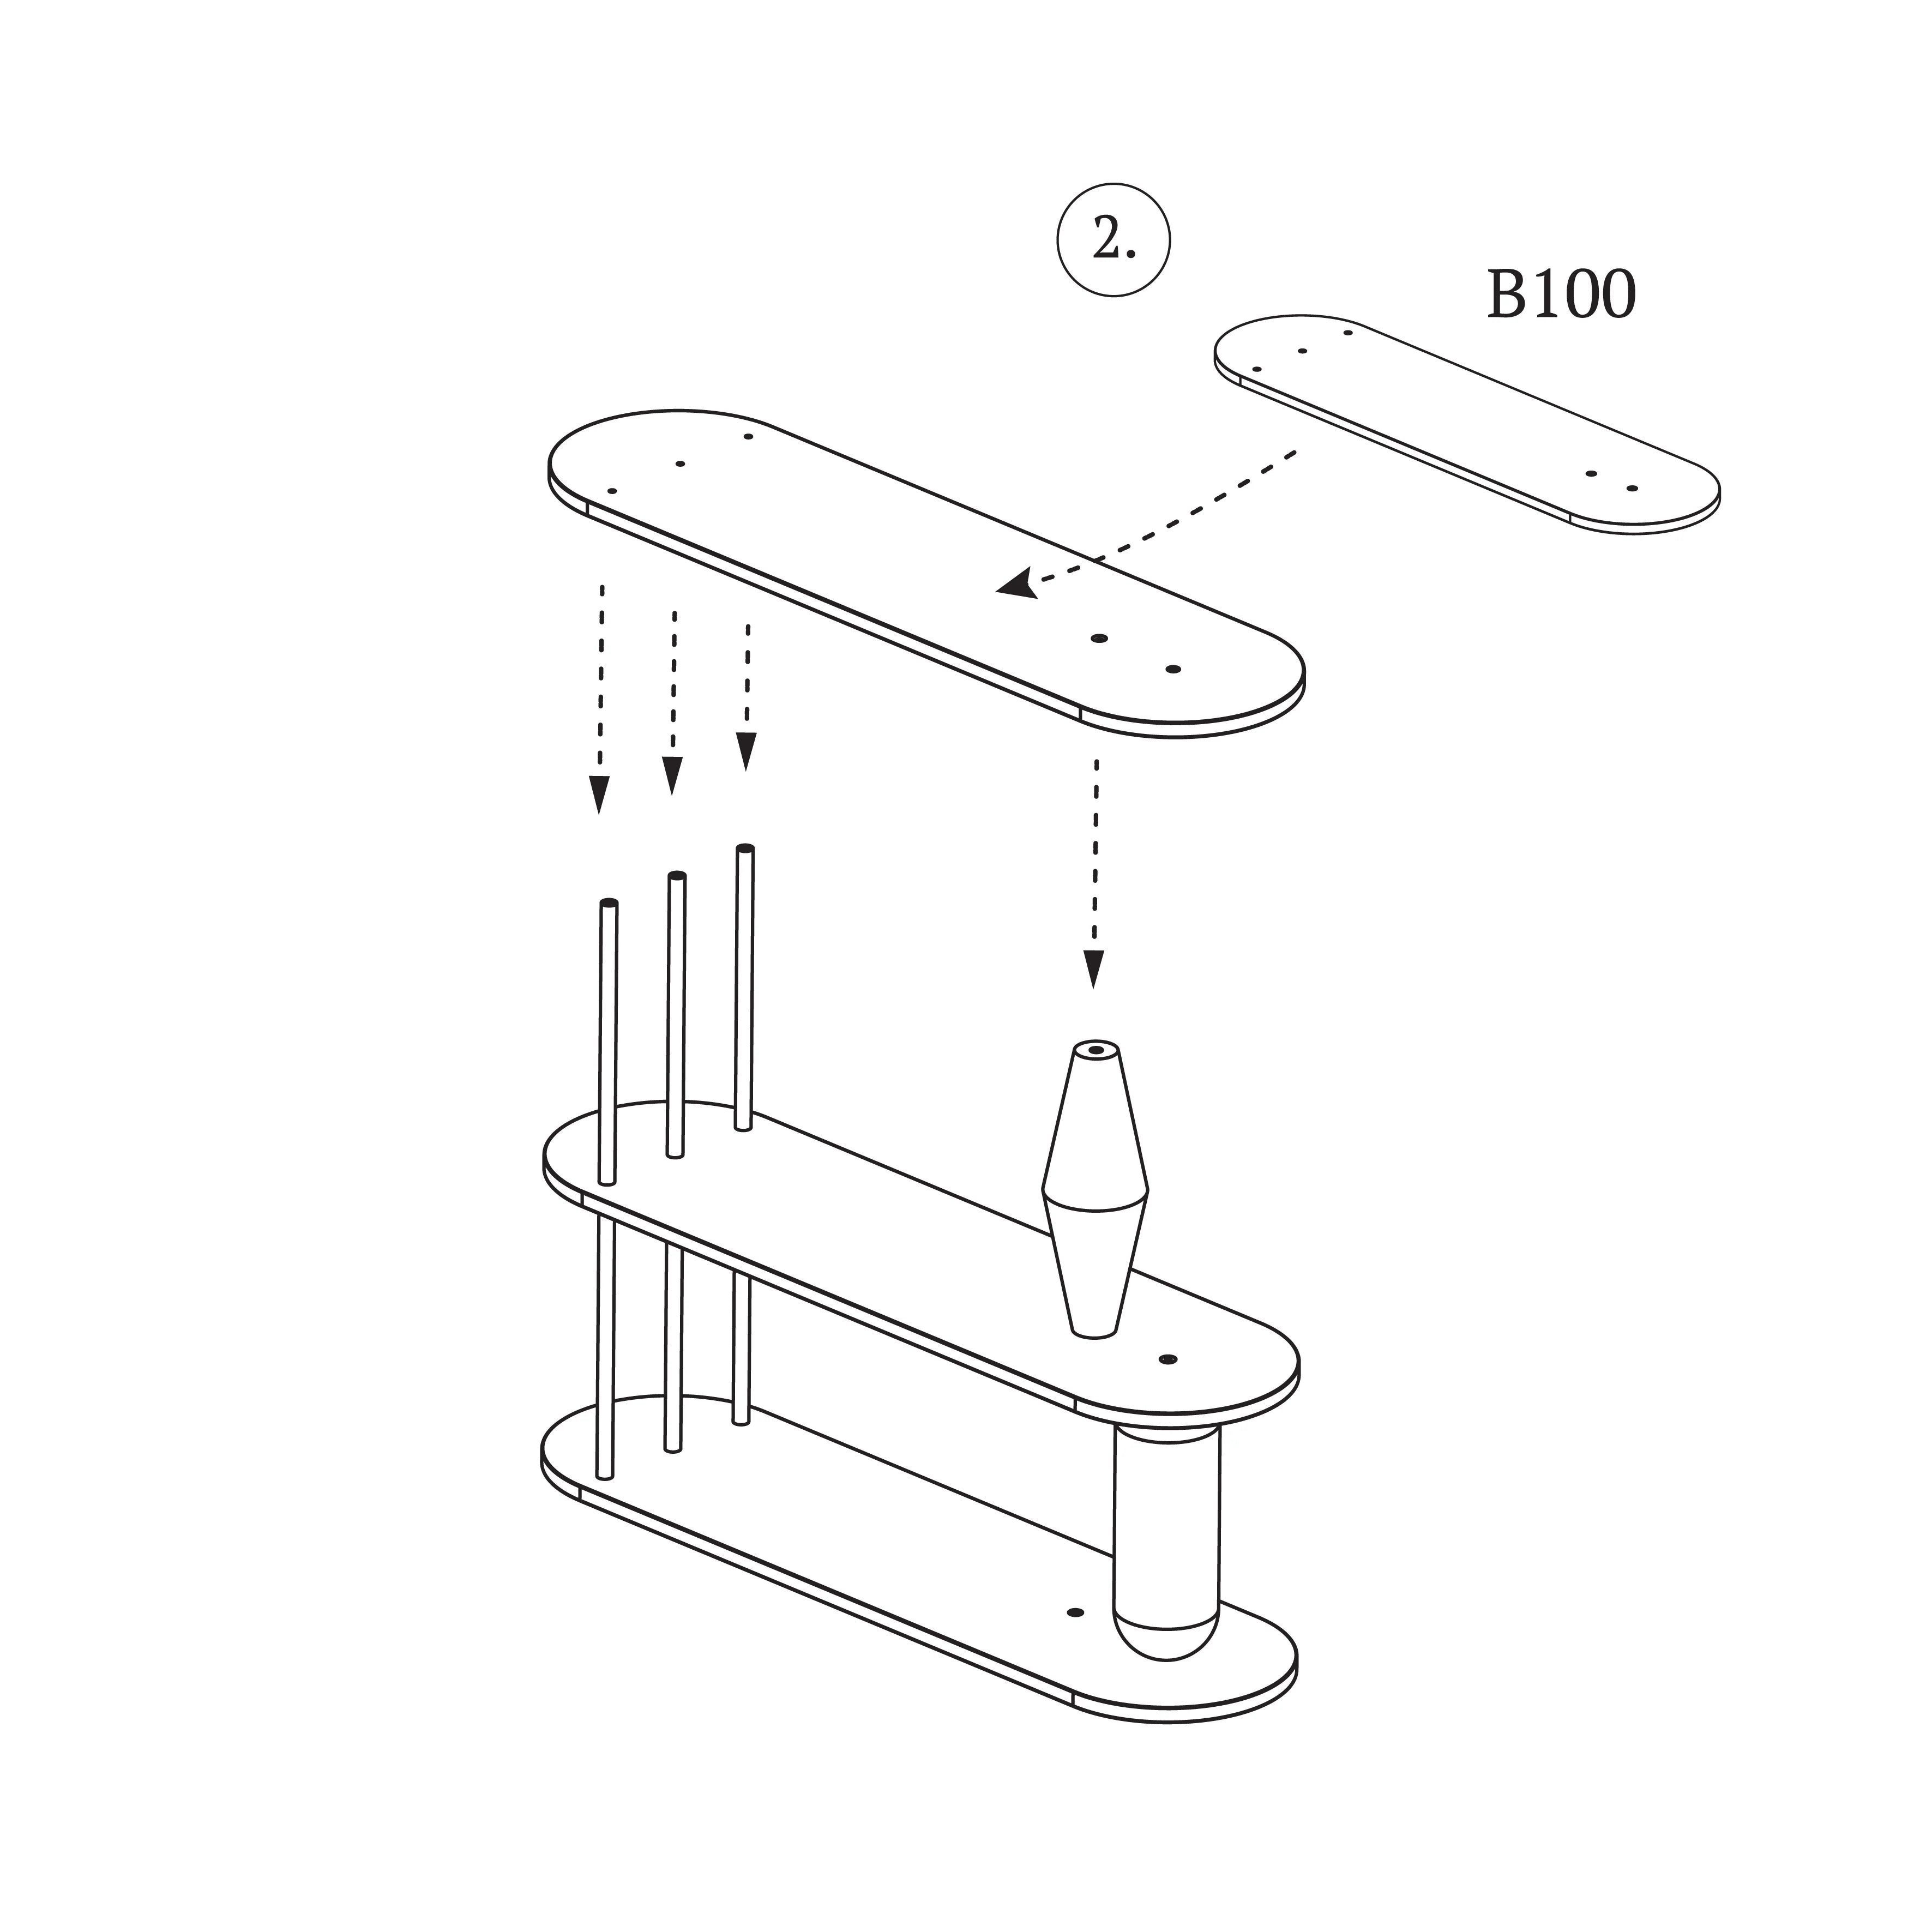
STEP 3
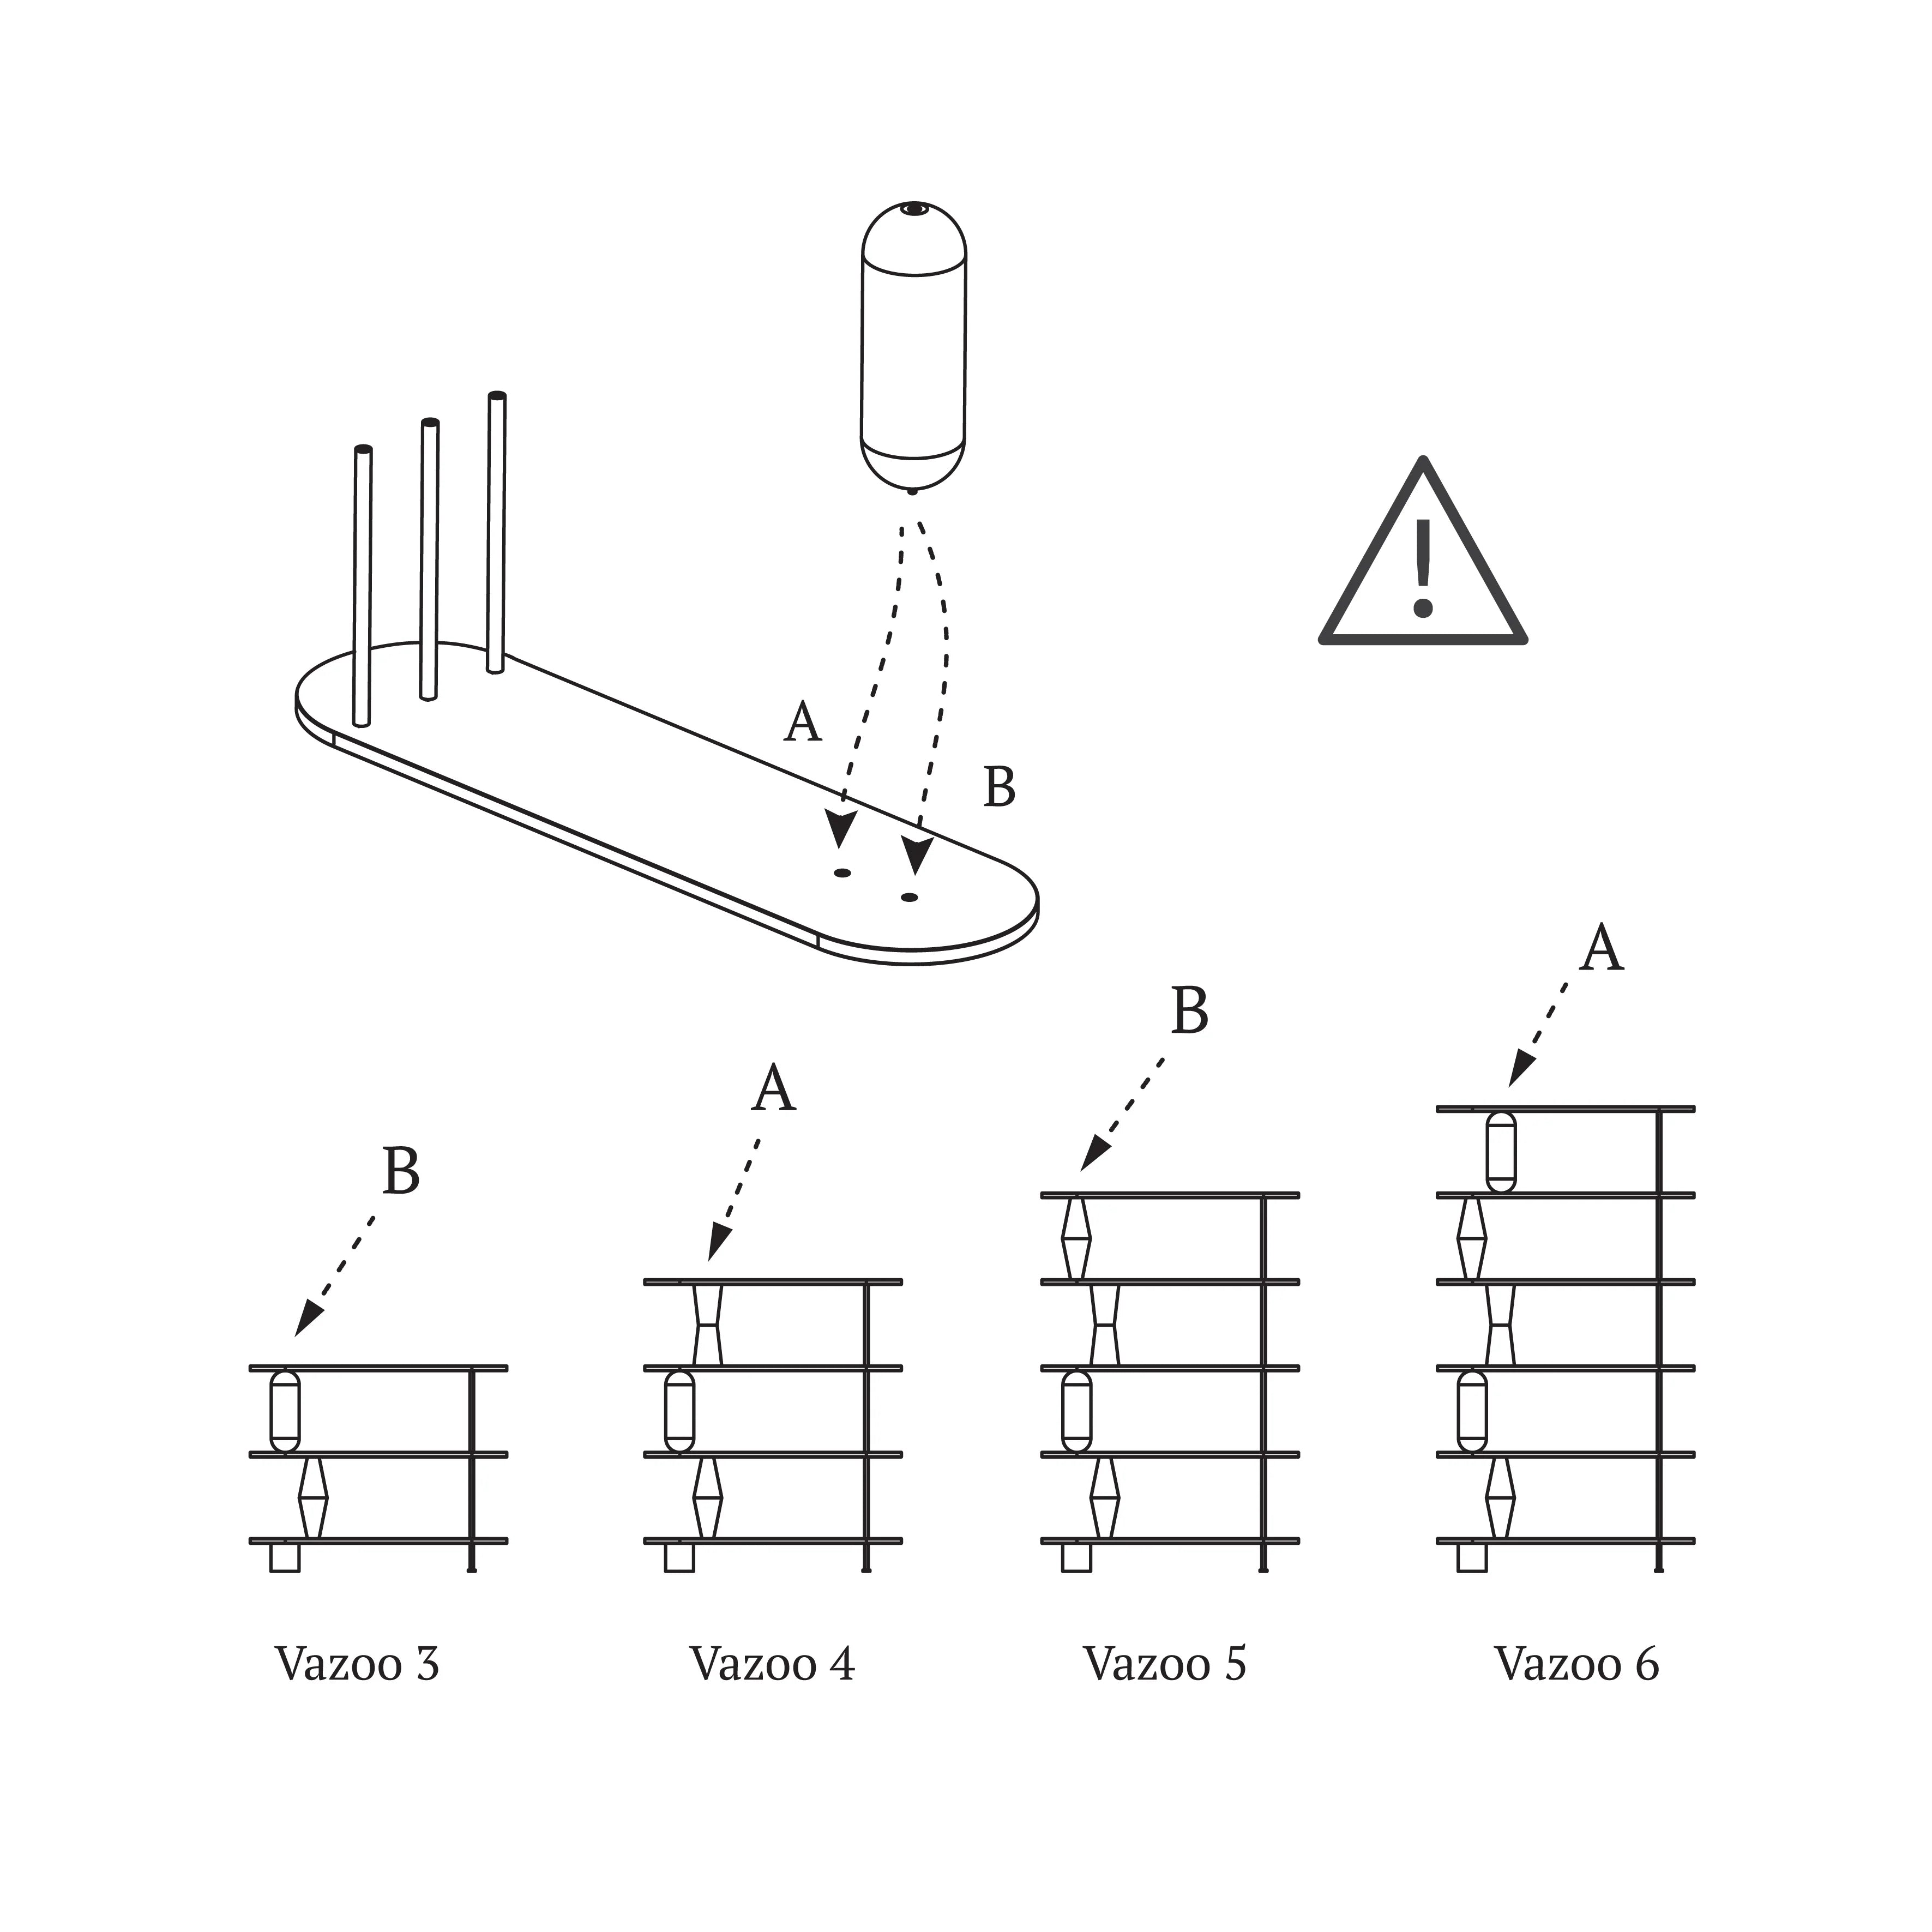
Next, select the turned solid that you want to place at the very top of the rack and screw in an M8 threaded pin with no. Then, depending on the version of the rack, you have to choose where to screw the block. To make this decision, see the next drawing.
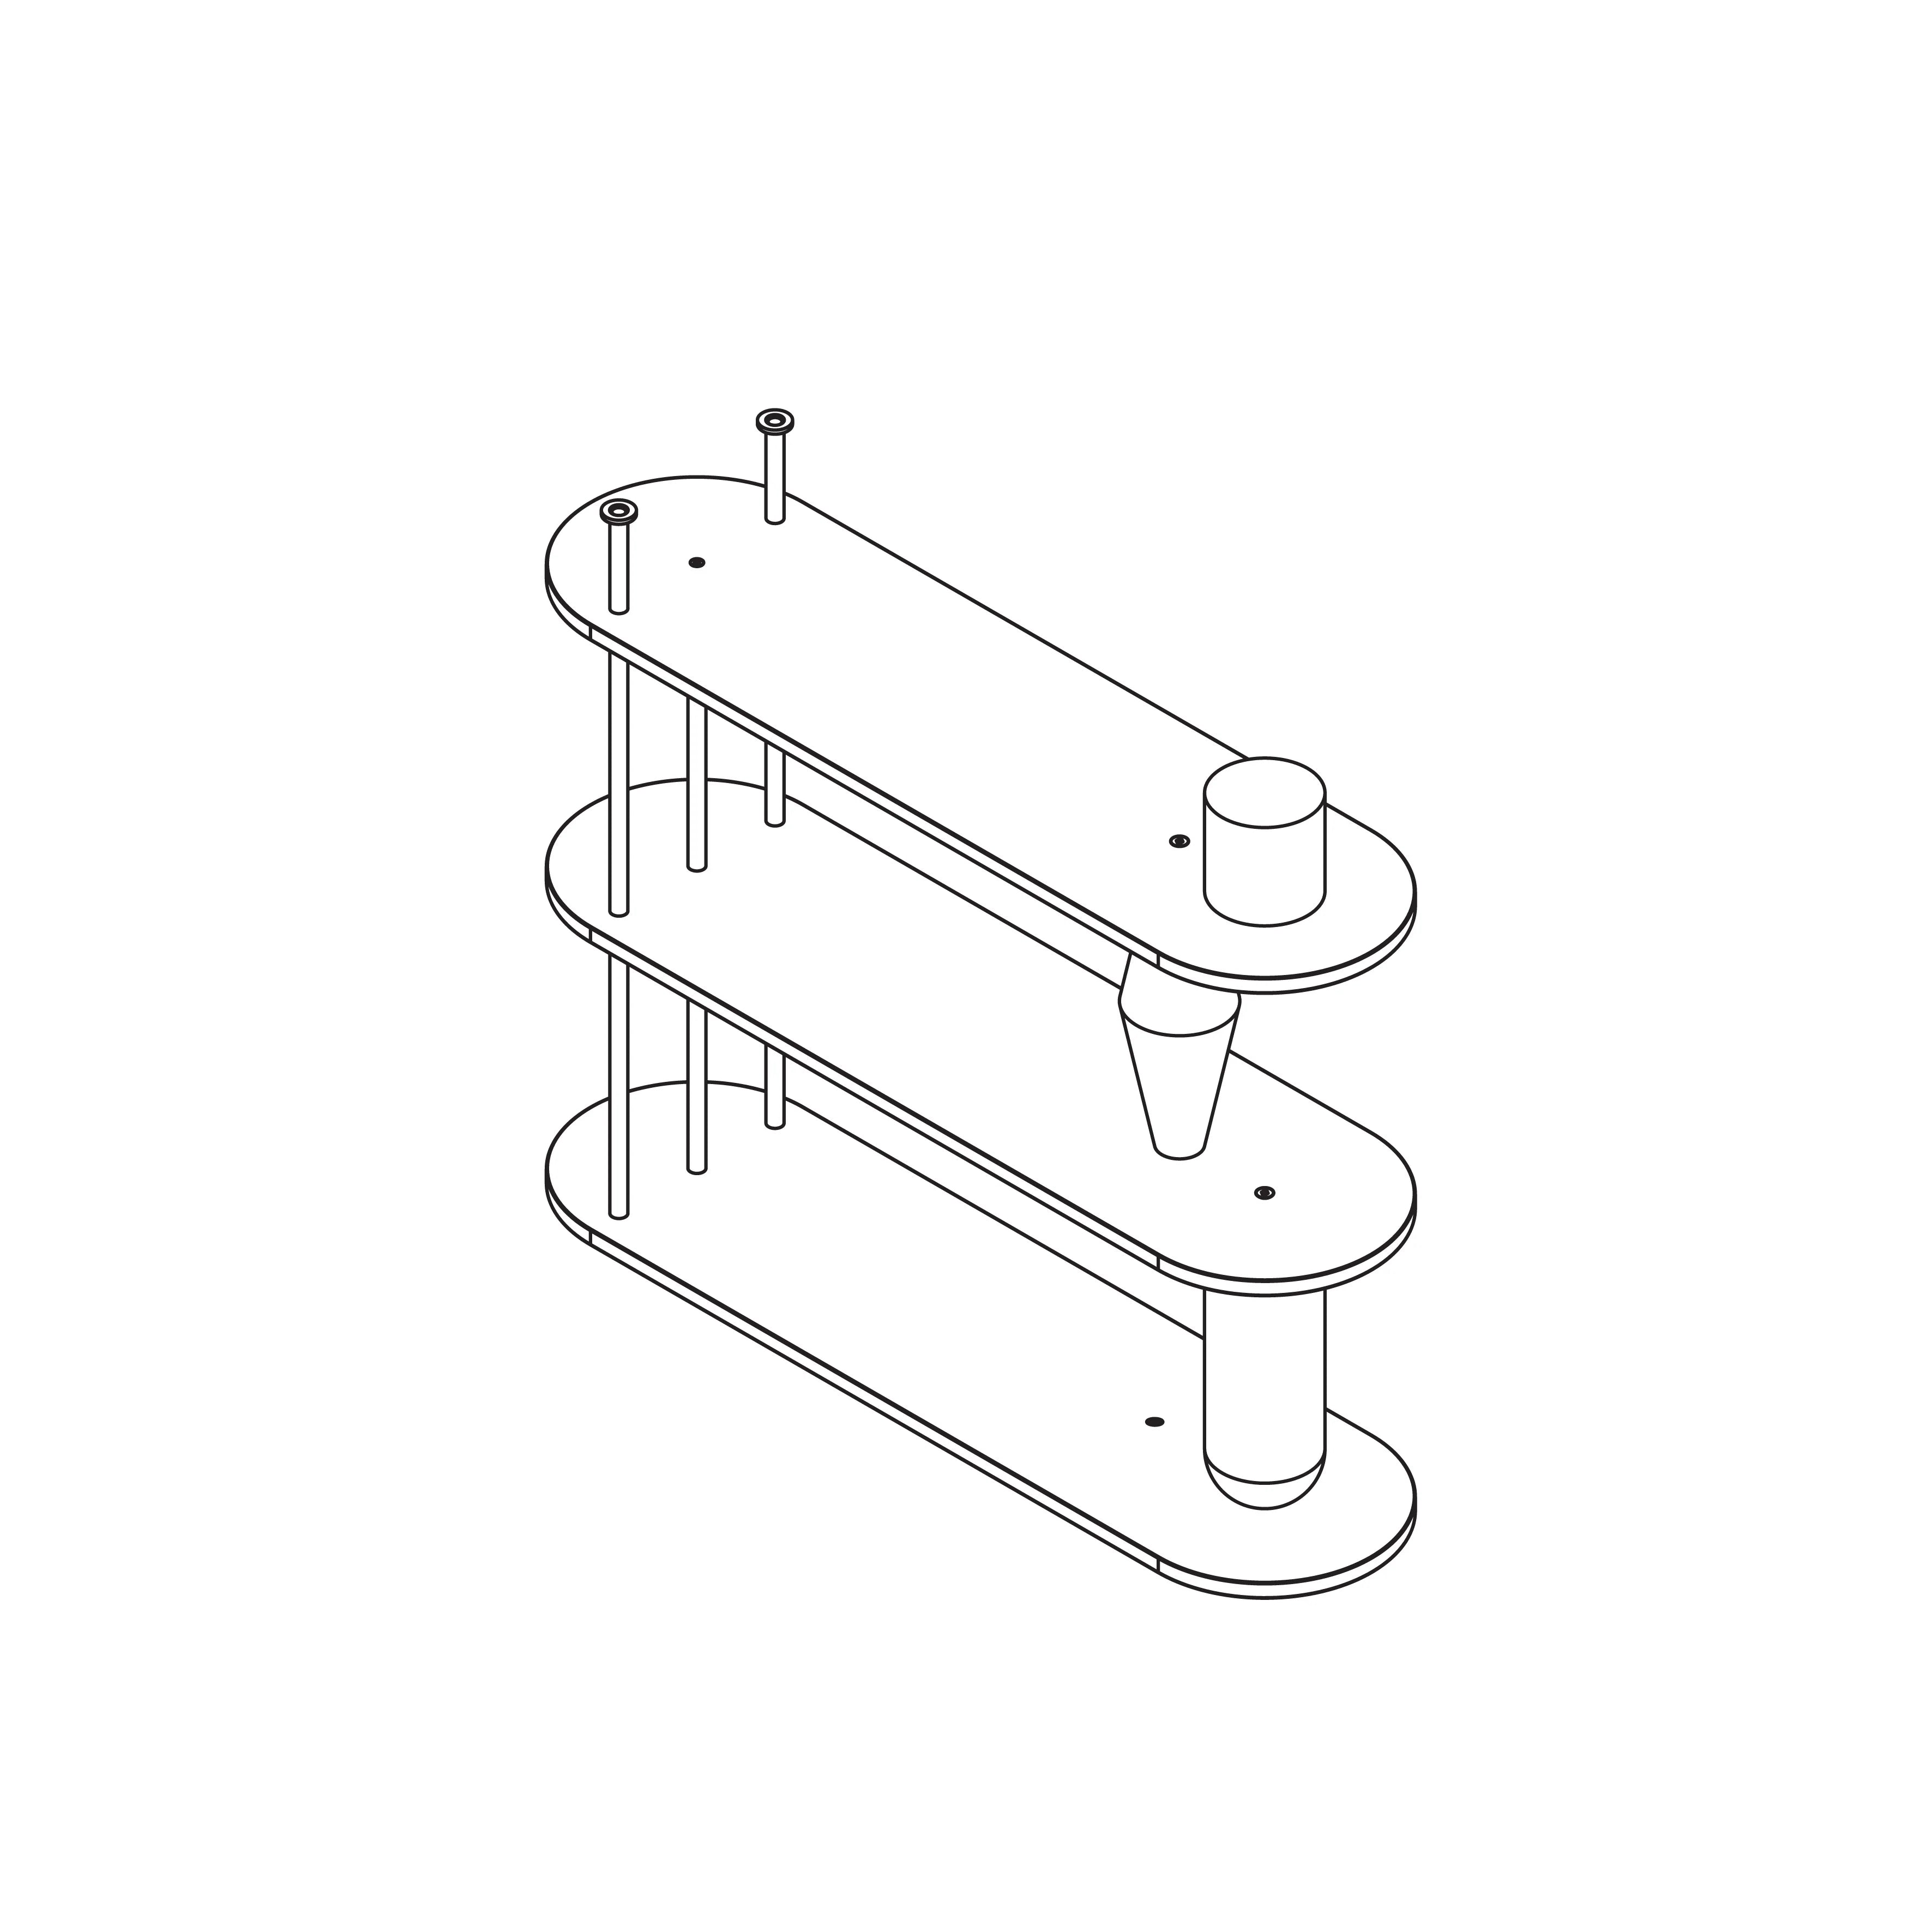
STEP 4
Solids in individual versions of the VAZOO rack are located either on the outside or on the inside of the shelf. If your bookcase has an odd number of shelves, e.g. VAZOO 3 shelves or VAZOO 5 shelves, it will be the outer side. For an even number, it is always the inner side. This principle is well illustrated in the figure above.
STEP 5
After screwing the block, it's time for the next shelf. (Shelf A100 with number 1) Place it so that the holes line up with the holes in the block and tubes.
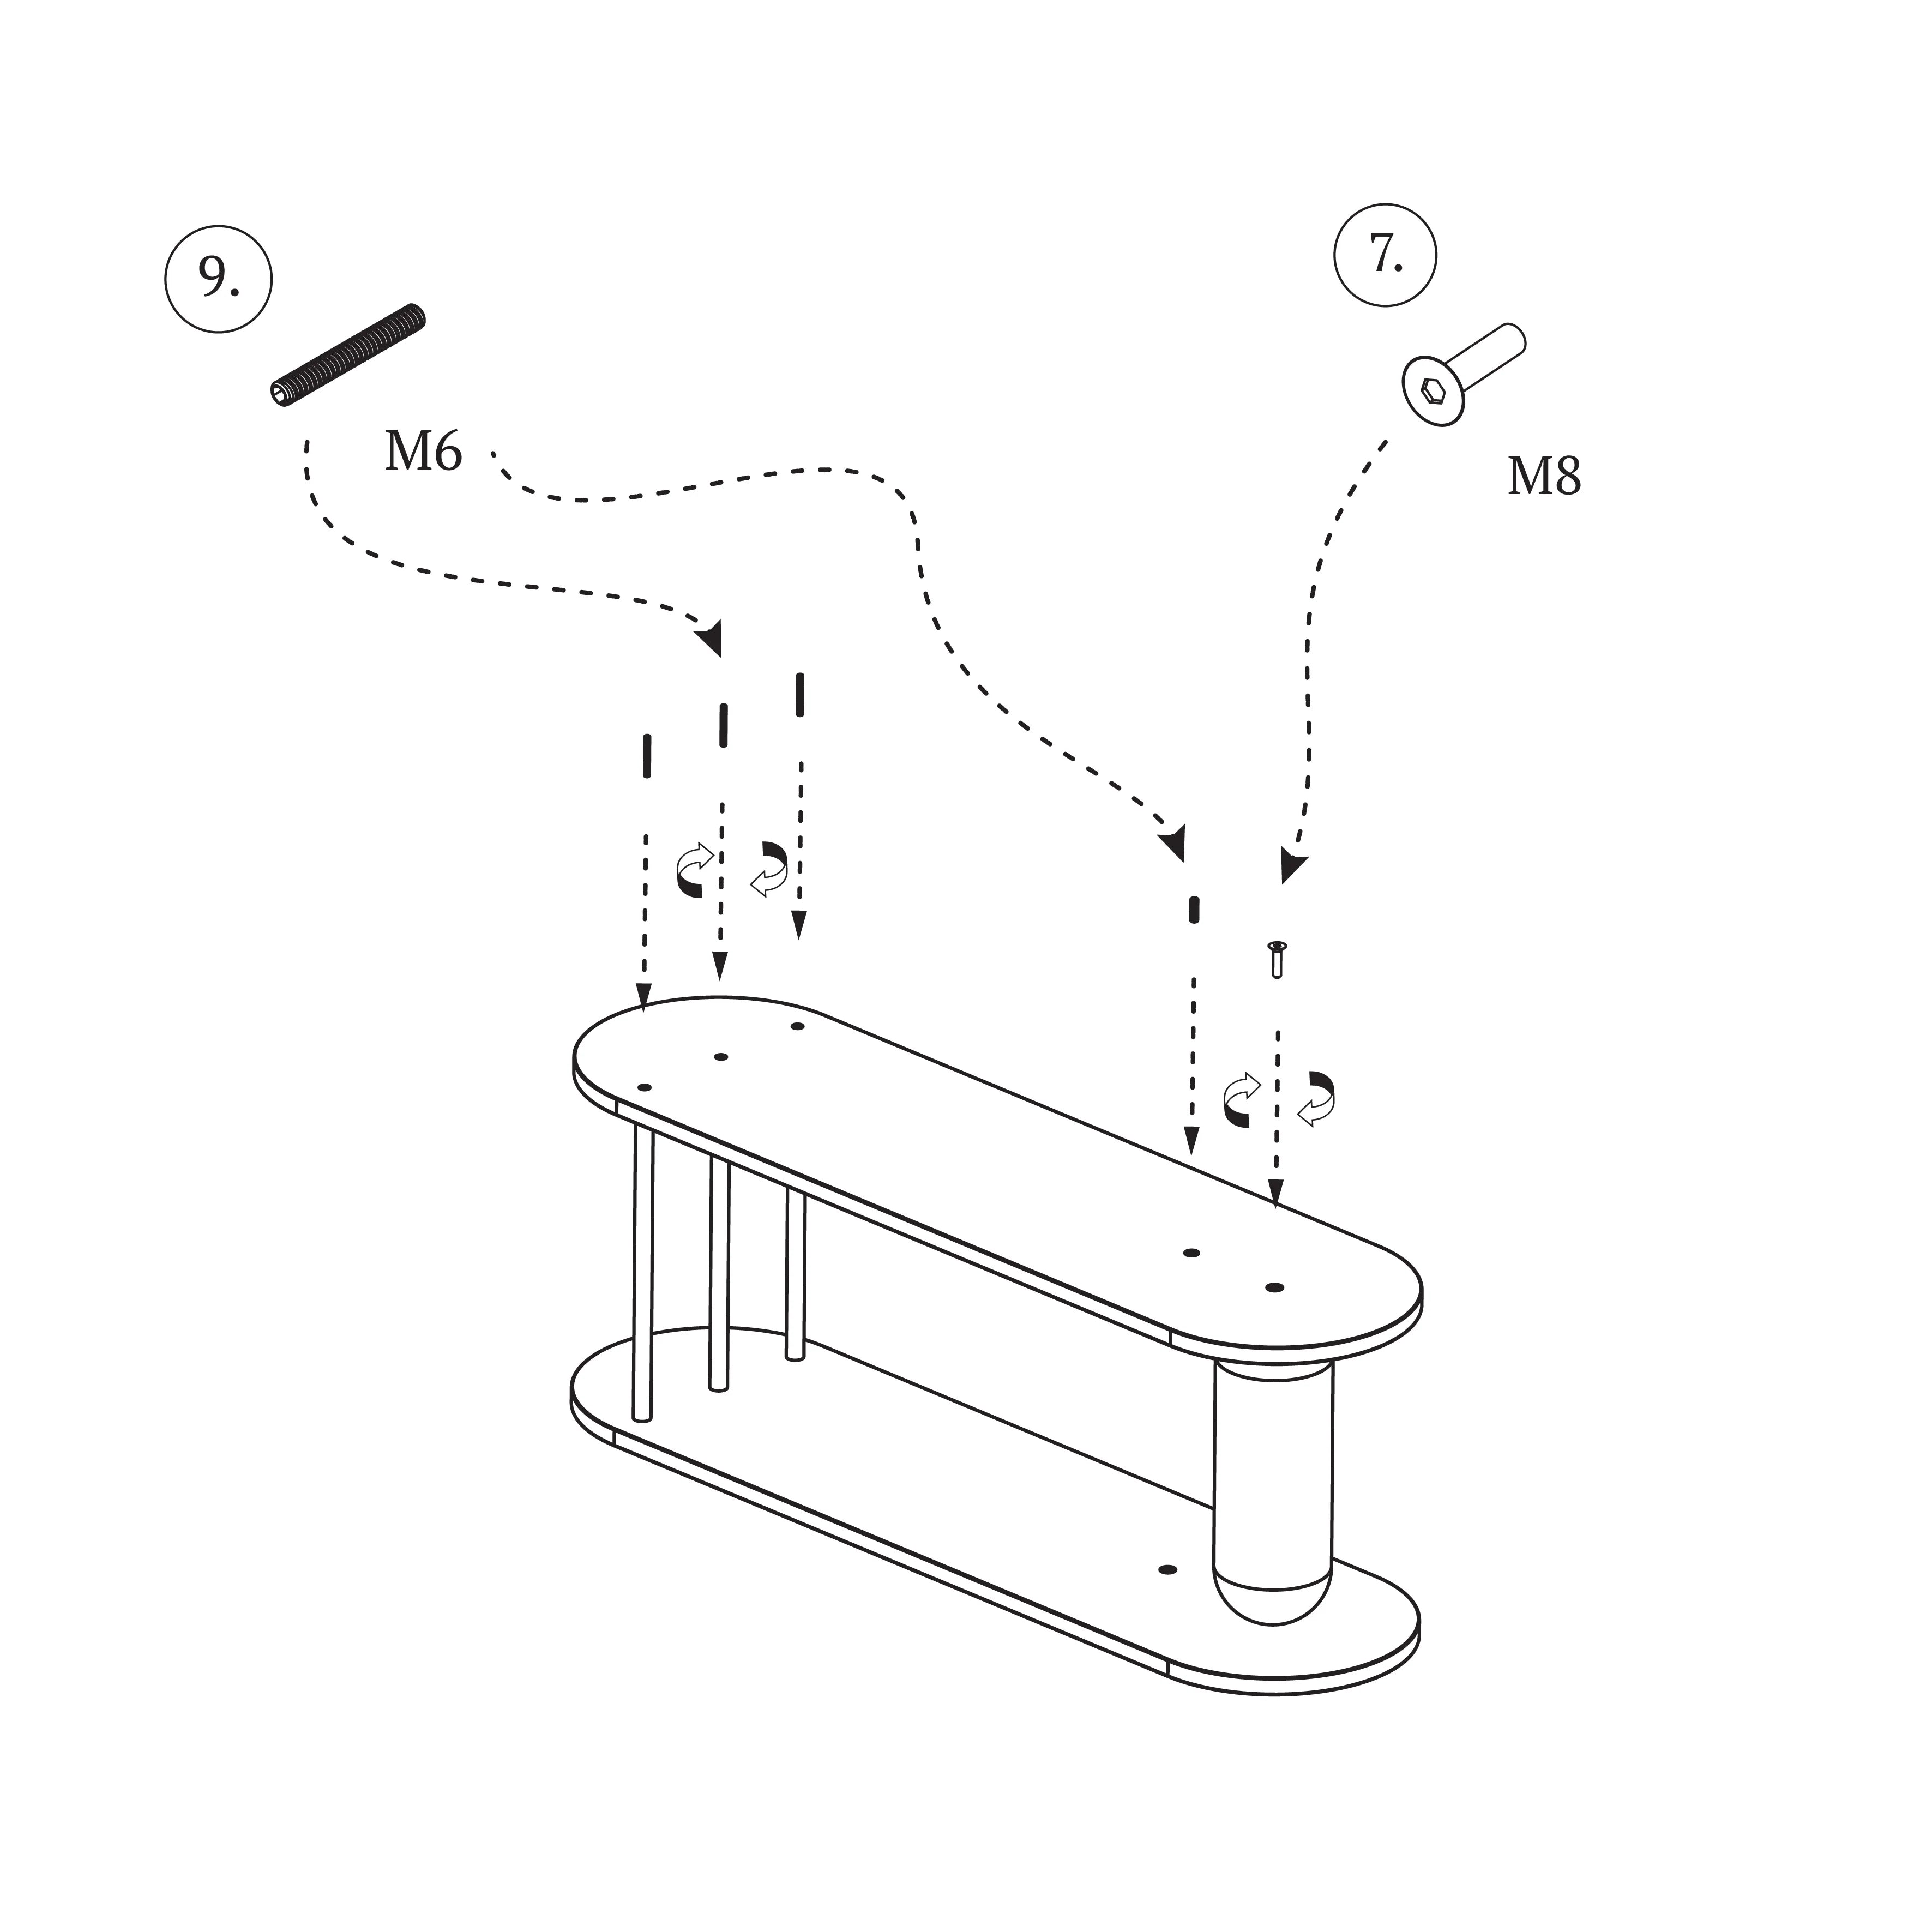
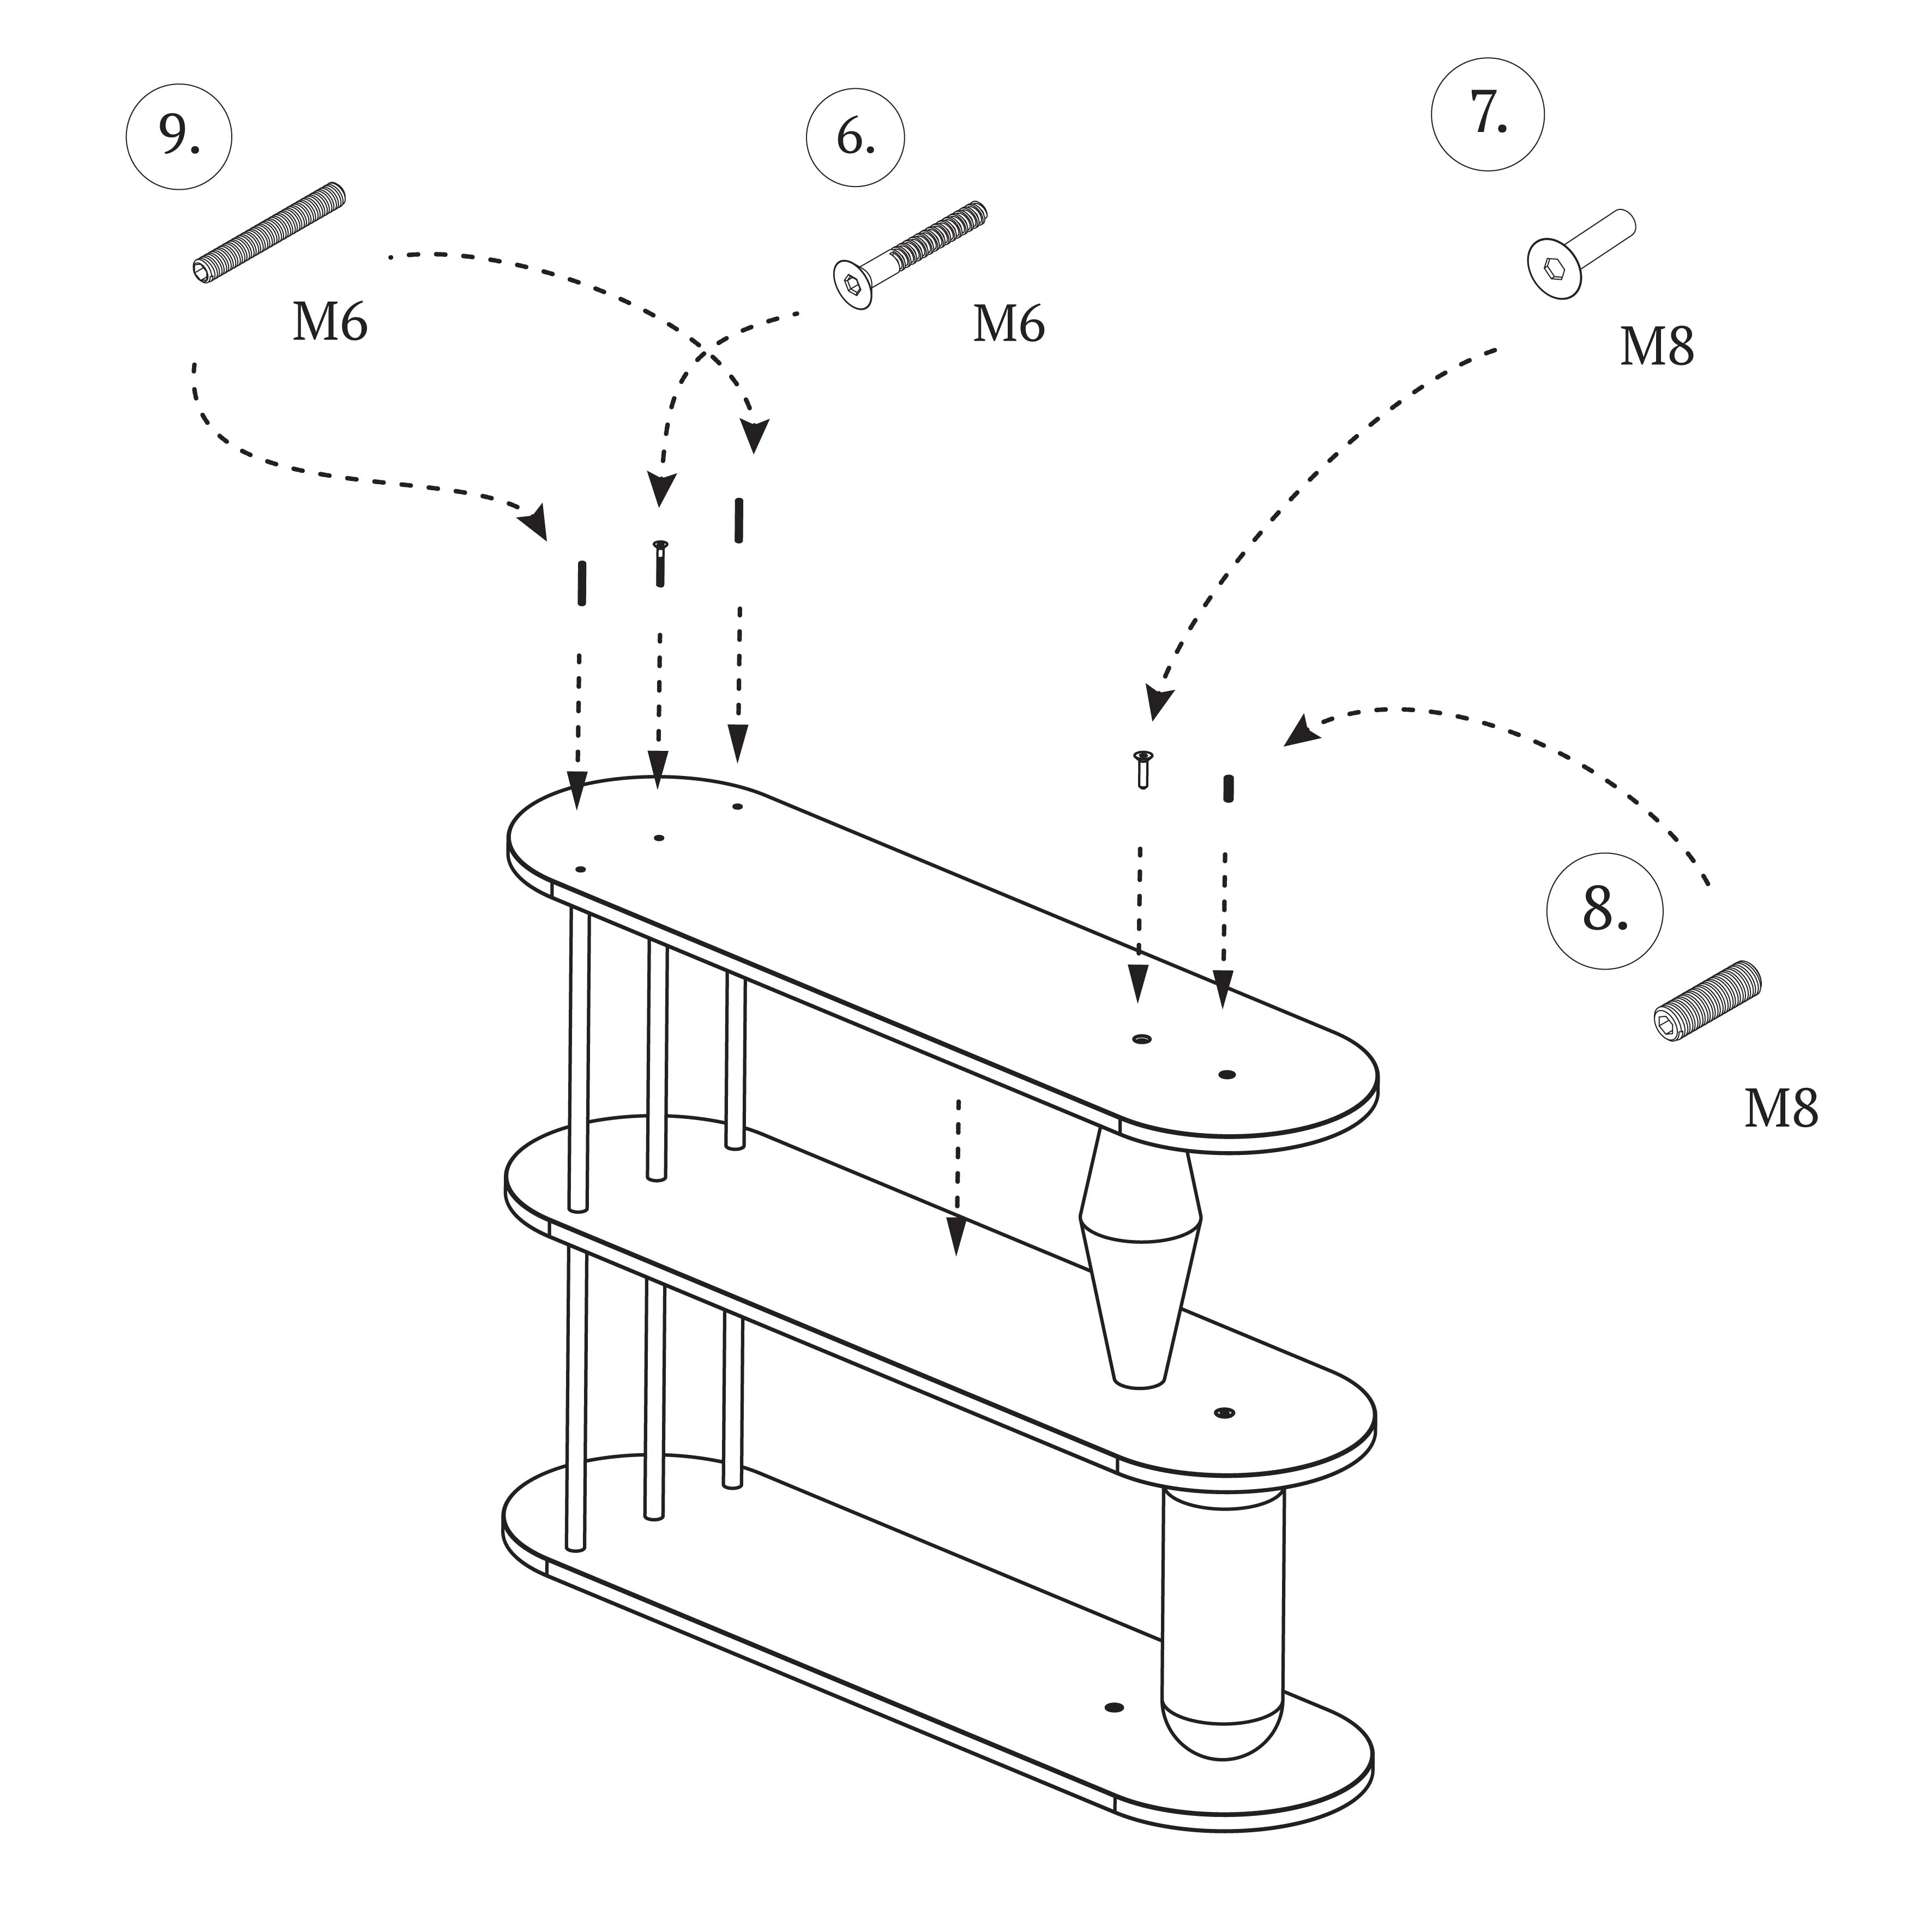
STEP 6
Insert the M6 threaded pins (no. 9) into the hole and turn them so that they protrude about 15mm above the table top. When you feel resistance when screwing in, you can use an Allen key. On the turned body side, install the M8 screw (#7).
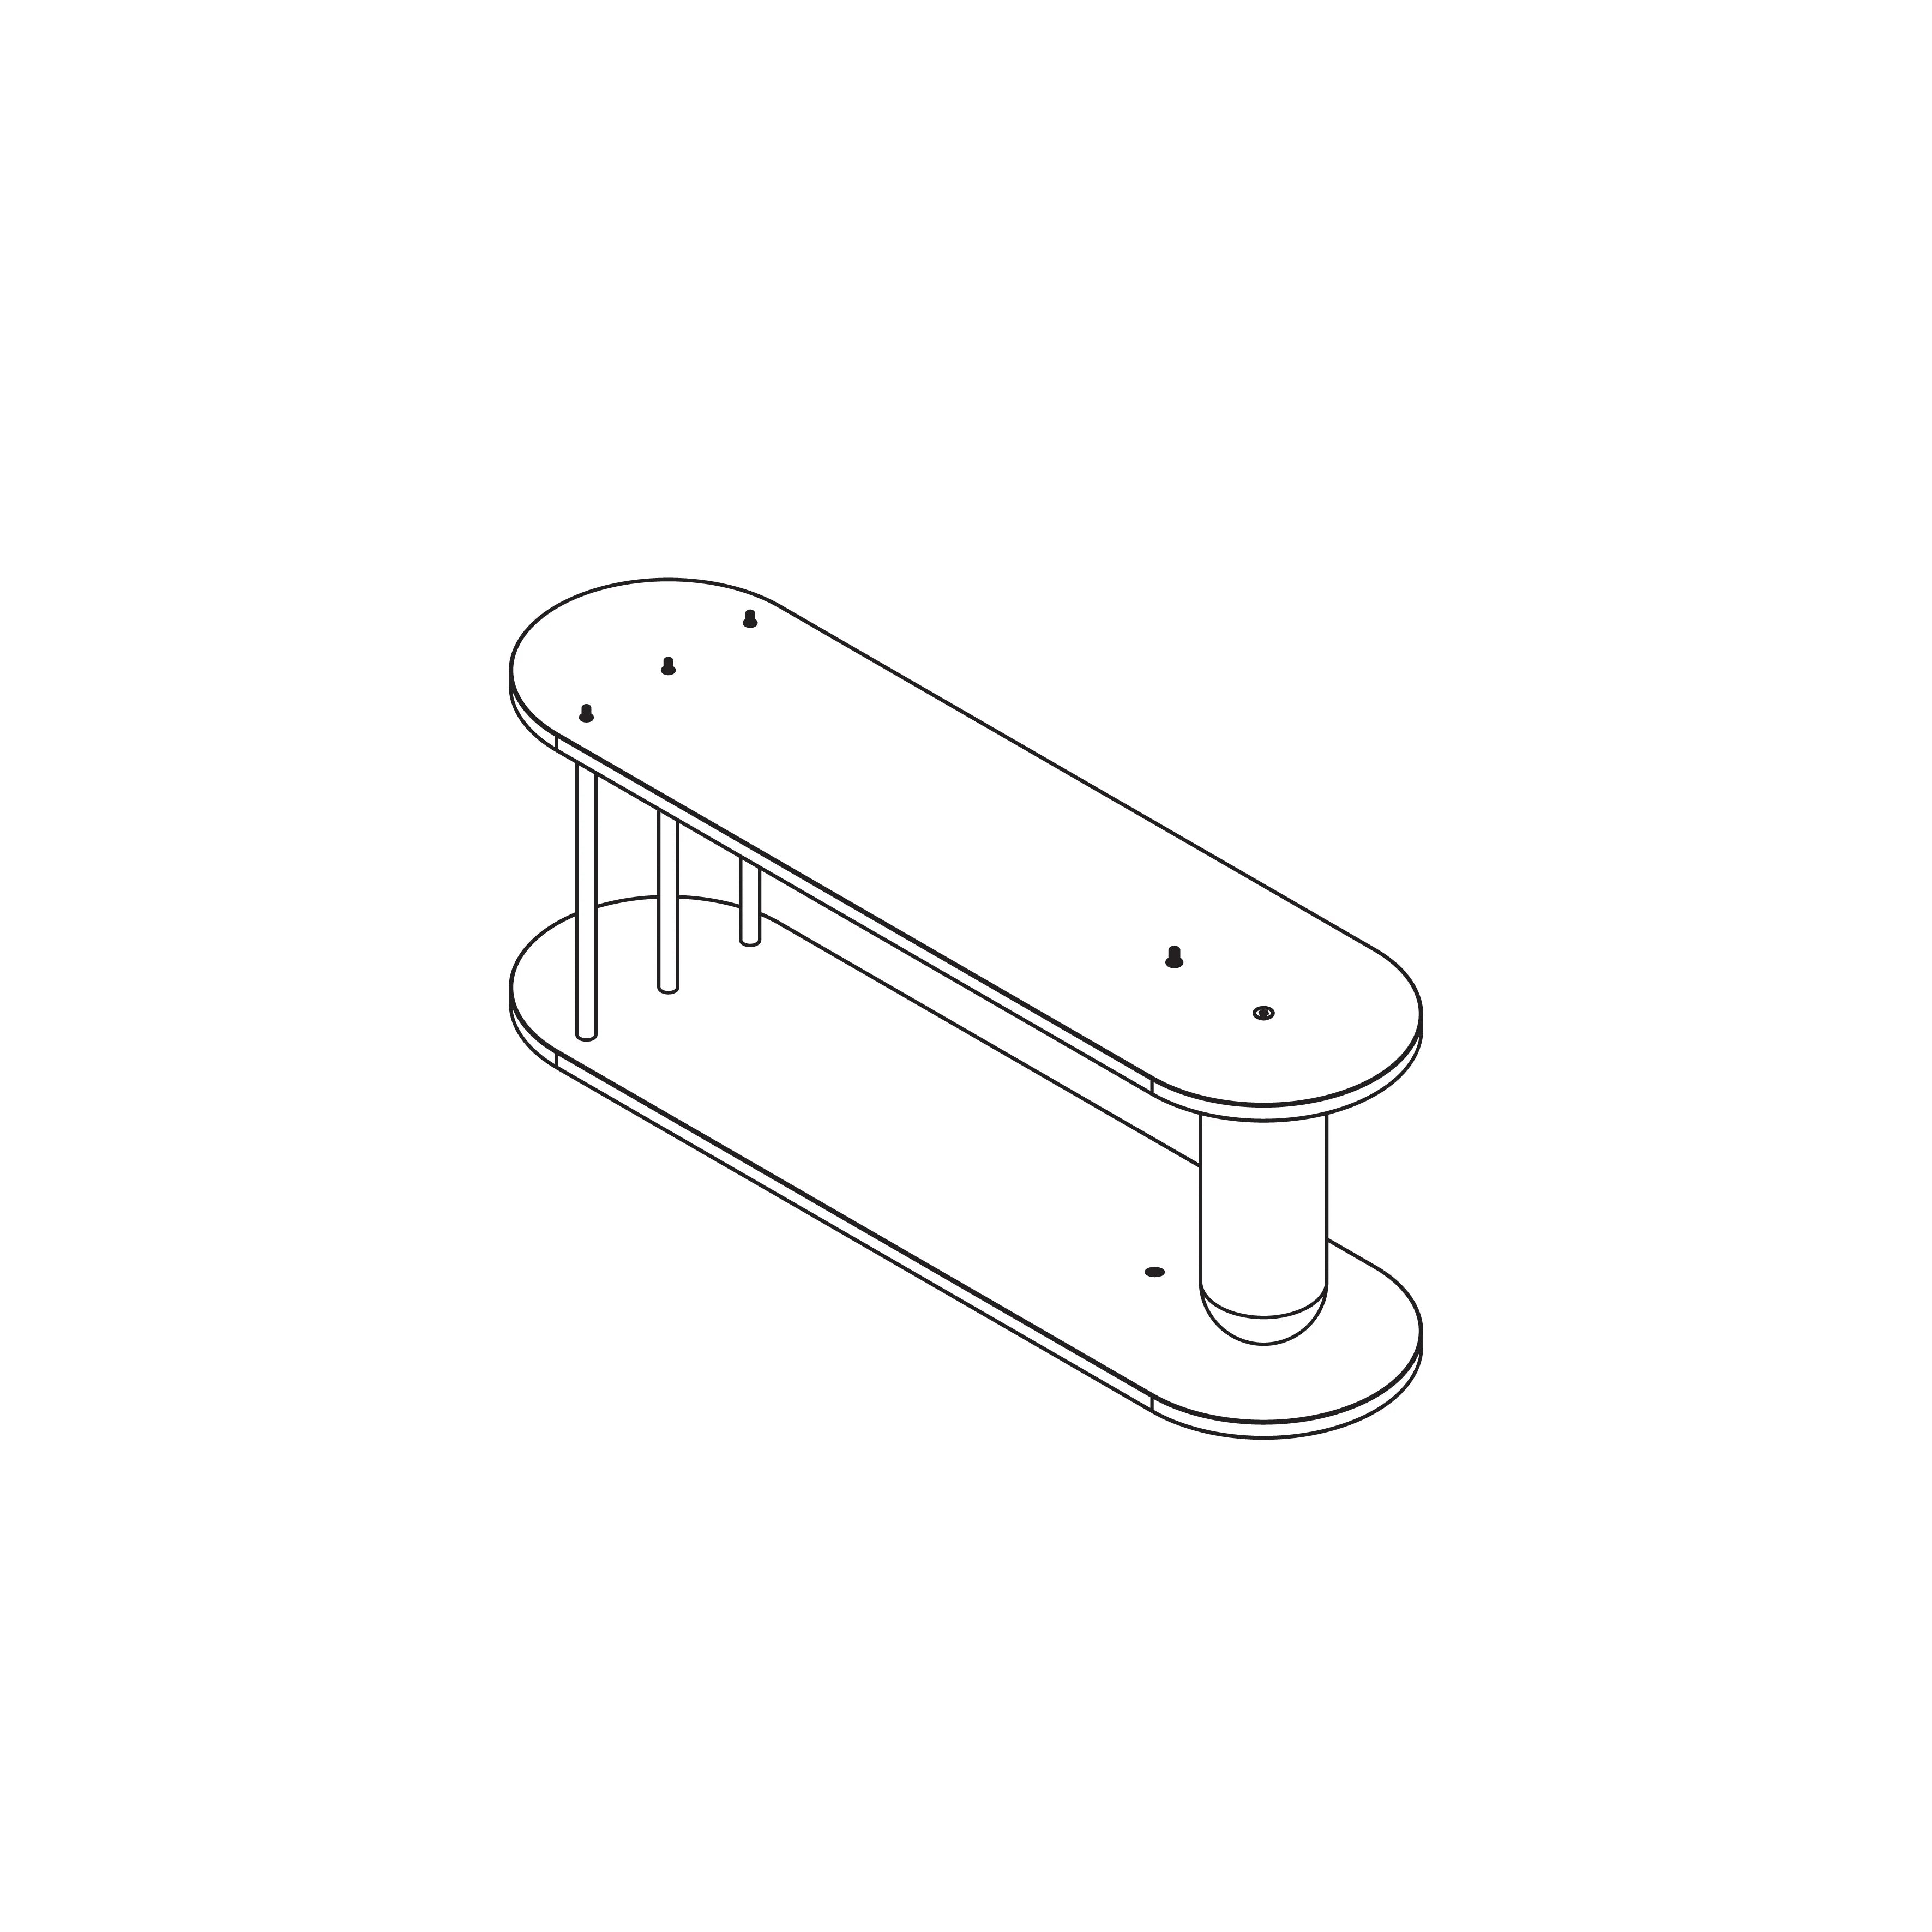
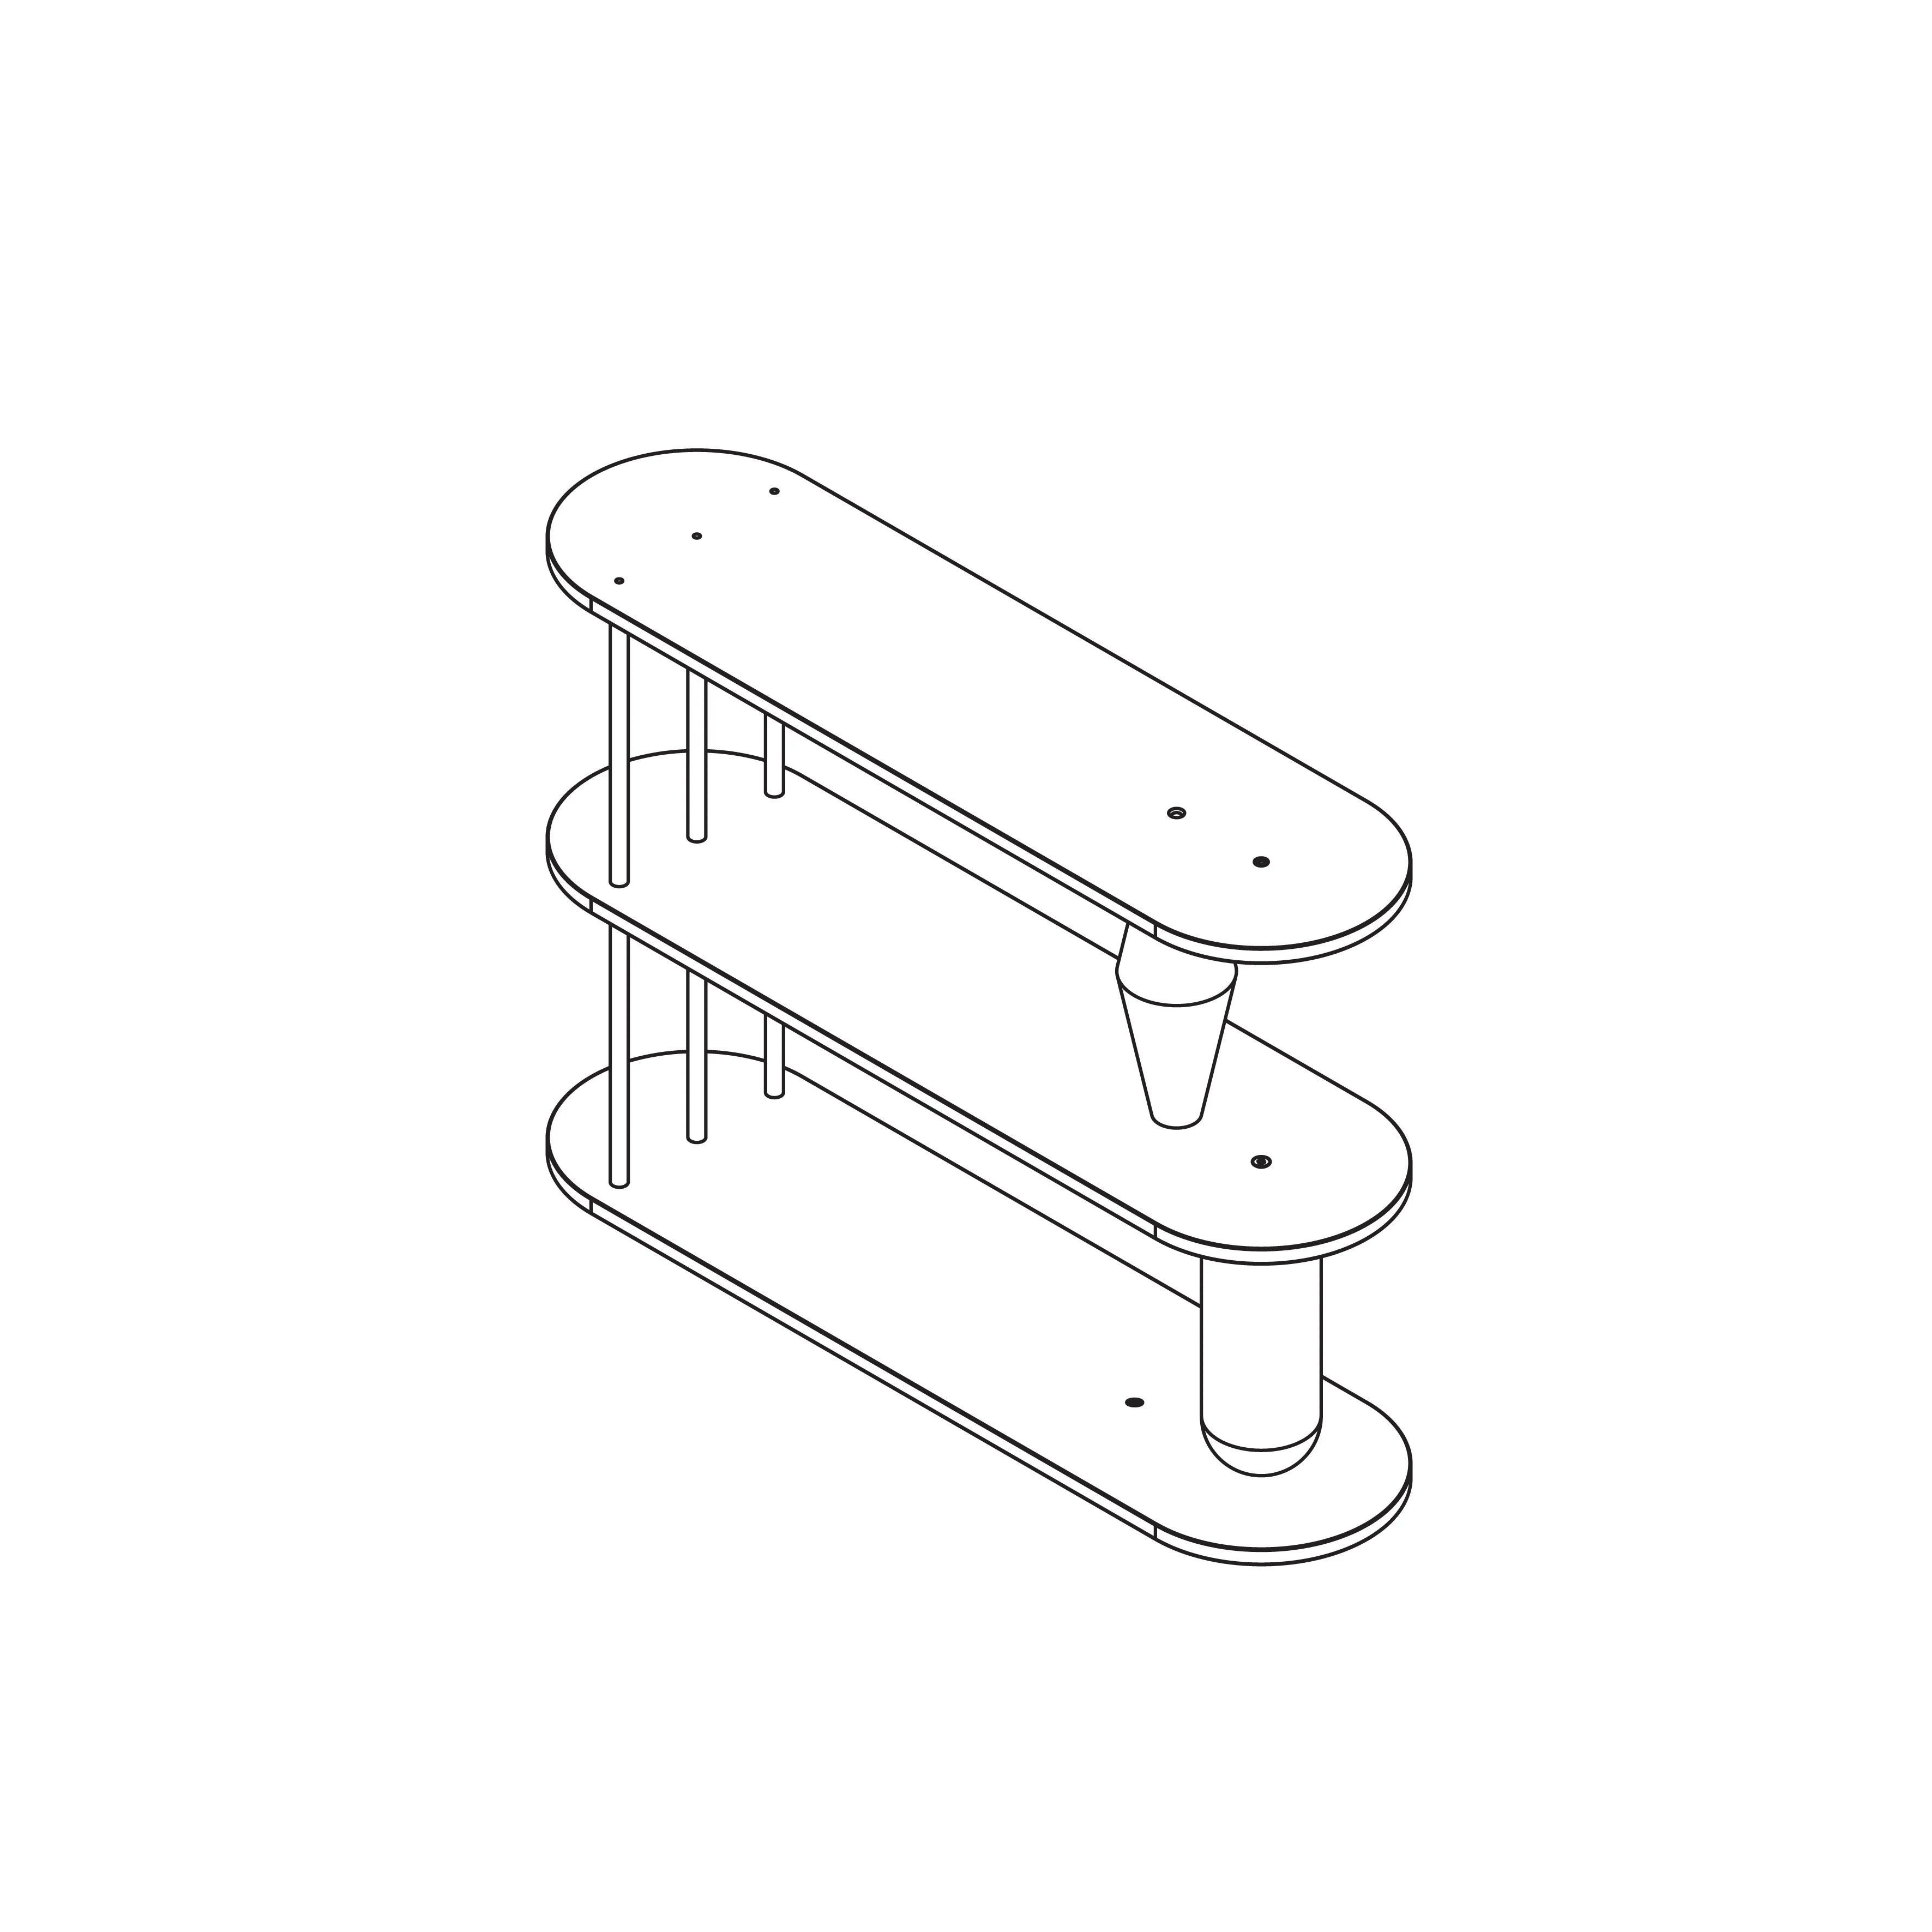
STEP 7
After screwing in the screws and pins, our set should look like this.
STEP 8
Similar to the previous step, screw the threaded tubes to the protruding threads. You can do it manually. Do the same with the solid. Try not to use excessive force when screwing the blocks. This may cause the element to be torn out or the threaded socket in the material to twist.
STEP 9
Make sure that the components fit together properly and are tightened.
STEP 10
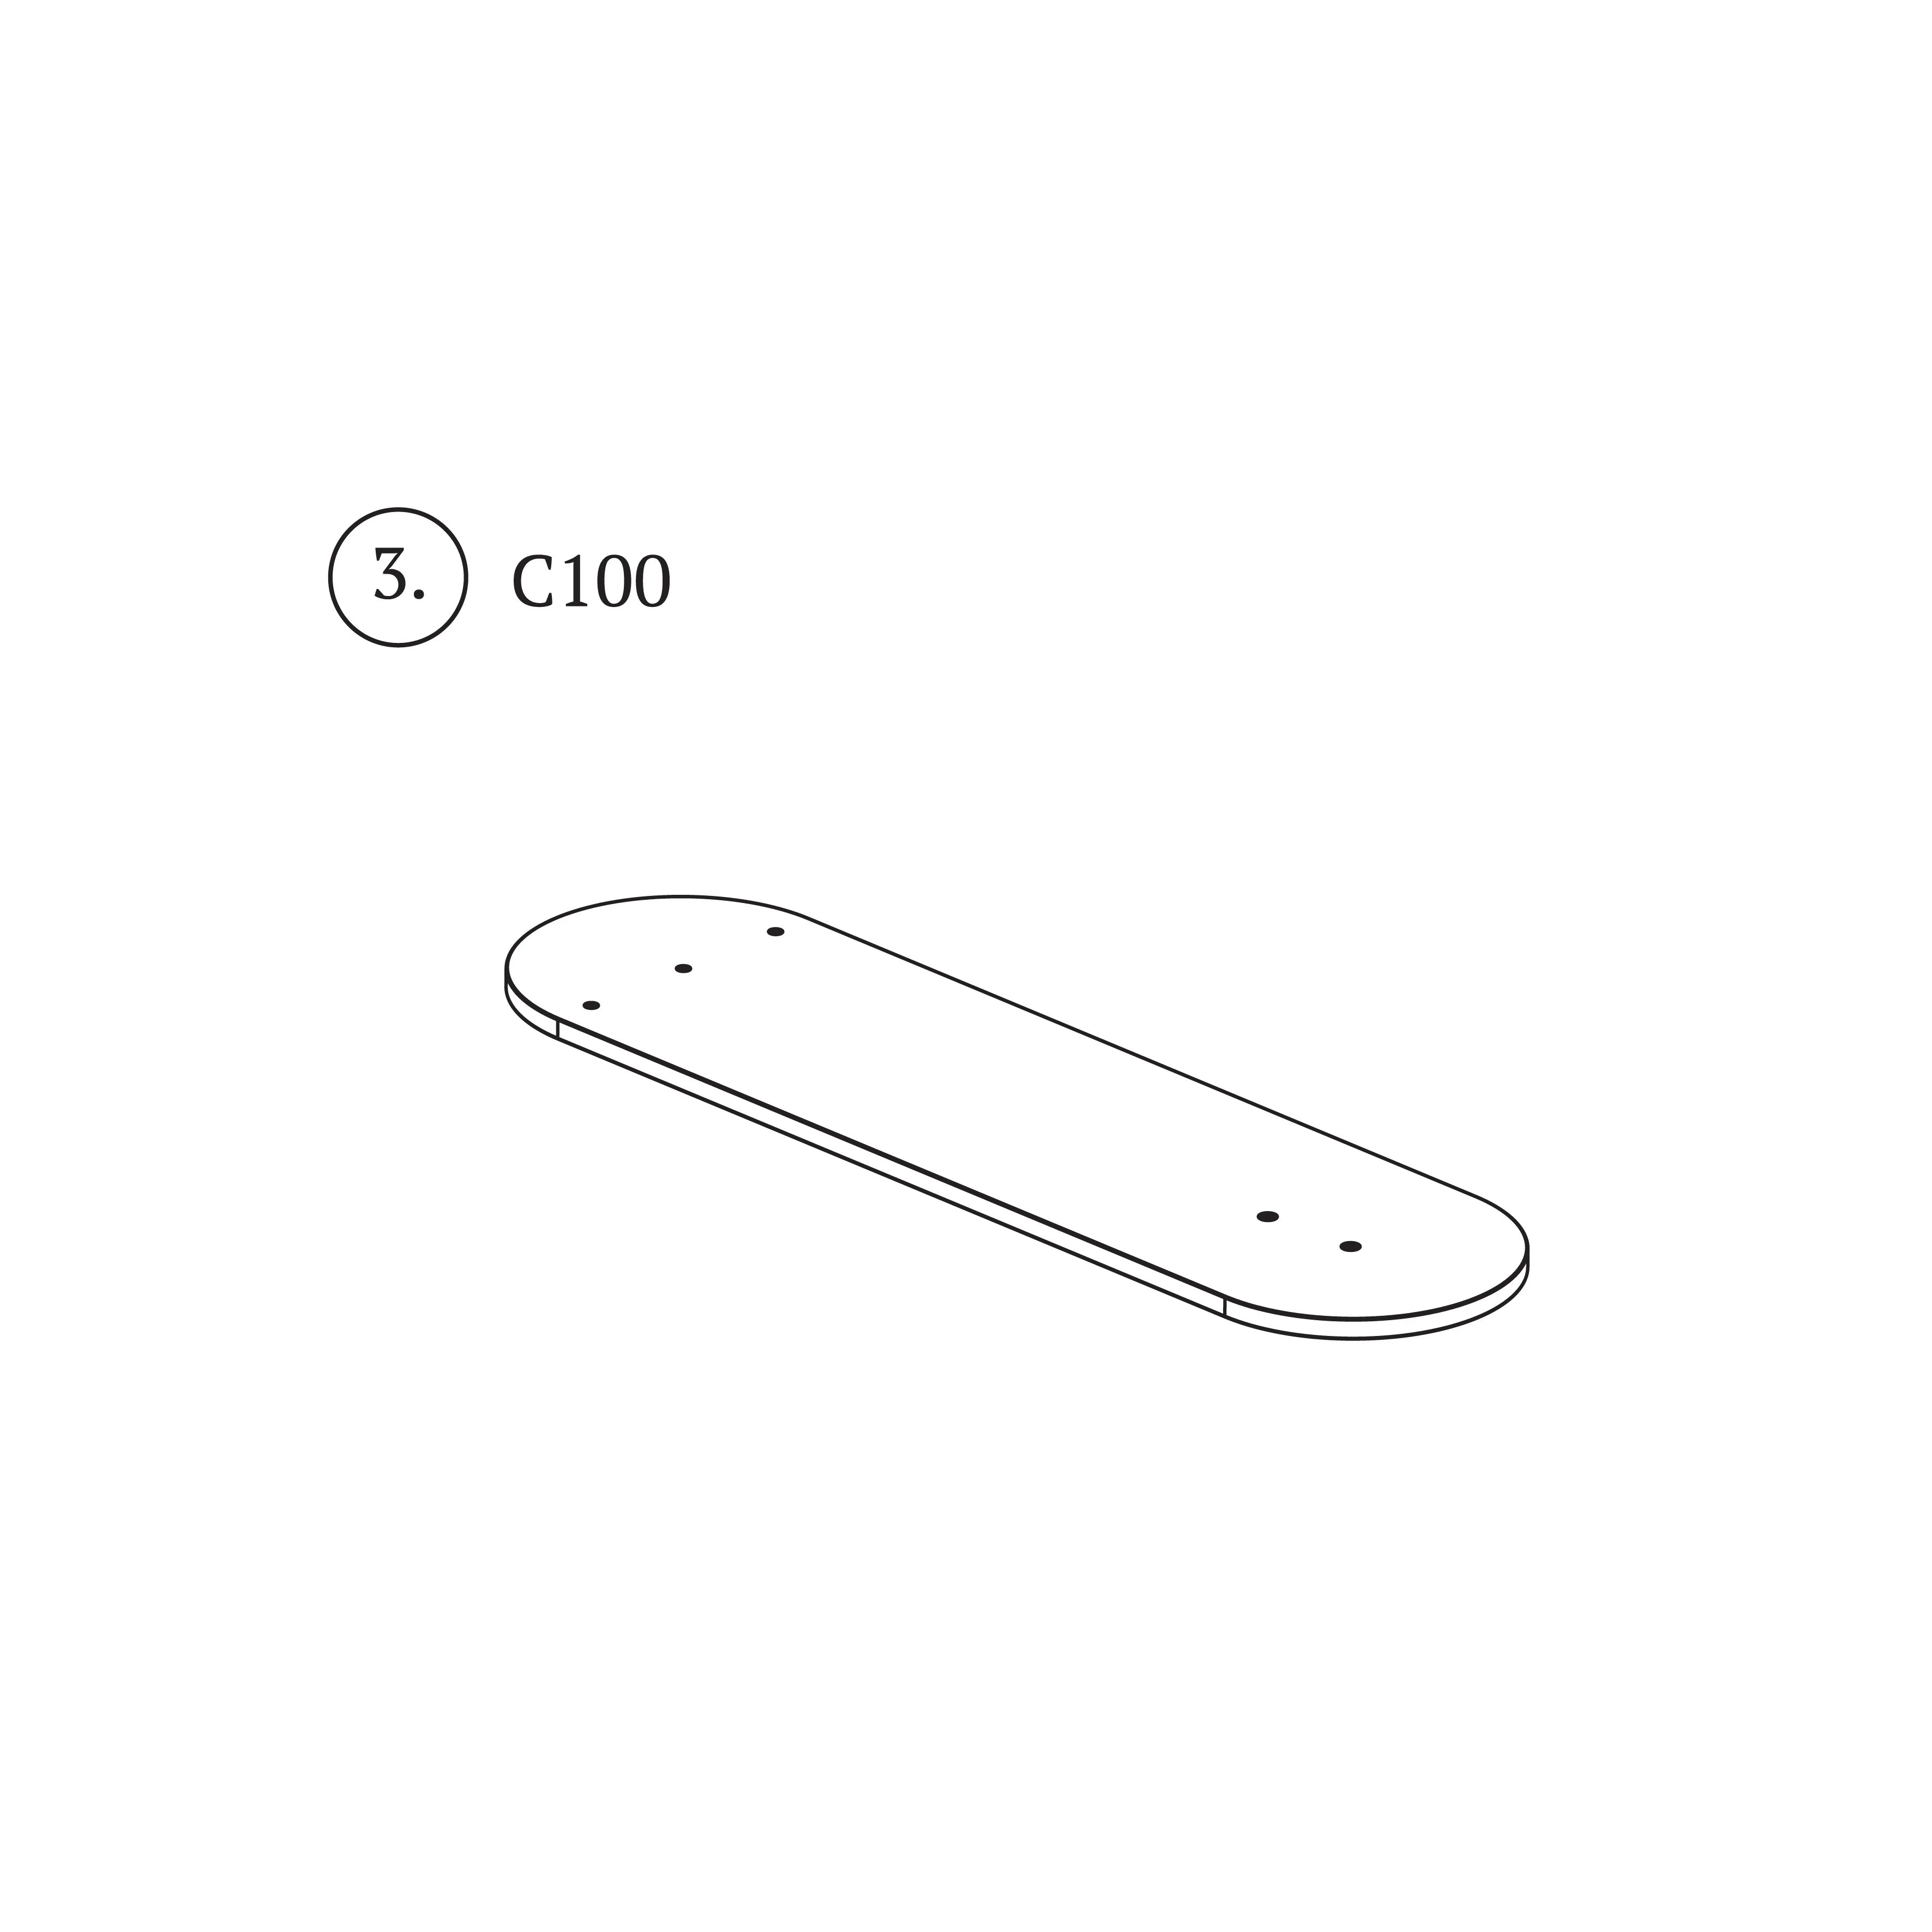
The next shelf (B100 with no. 2 - it will be our bottom shelf) put on the bolted elements.
STEP 11
Make sure the holes on the shelf line up with the holes in the shelf.
STEP 12
Follow the same steps as when installing the previous shelf. Insert pins and screws into the indicated holes. Leave the protruding pins so that you can tighten the next elements of the assembly to them.
STEP 13
The legs of the rack and the turned body of the base should be screwed onto the protruding pins.
STEP 14
The shelf is almost ready. You just need to check whether there are no moving parts in the entire assembly and whether everything is tightened well. Then prepare a place to turn the shelf onto its legs. Ask someone for help.
STEP 15
By grabbing the tops of the rack, we can turn it around. The bookcase should stand against the wall and as a manufacturer we recommend fixing it to the wall. Prepare a place to set it properly. Fixing to the wall should be done on your own.
STEP 16
Ask someone to help you hold the slat to the shelf at this point. In this way, you will be able to precisely determine the distance between the slats and mark the drilling locations. Remember to mark the top and bottom spots.

Shelves
VAZOO
The VAZOO bookcase is a modular structure based on characteristic turned solids. Turned elements resemble vases with their form, which lift the shelves, constituting a strong accent of the furniture. For contrast and counterweight, powder-coated rods have been used, creating a delicate openwork. VAZOO can have the form of a low three-shelf rack and a tall six-shelf rack.
Go to