Manual
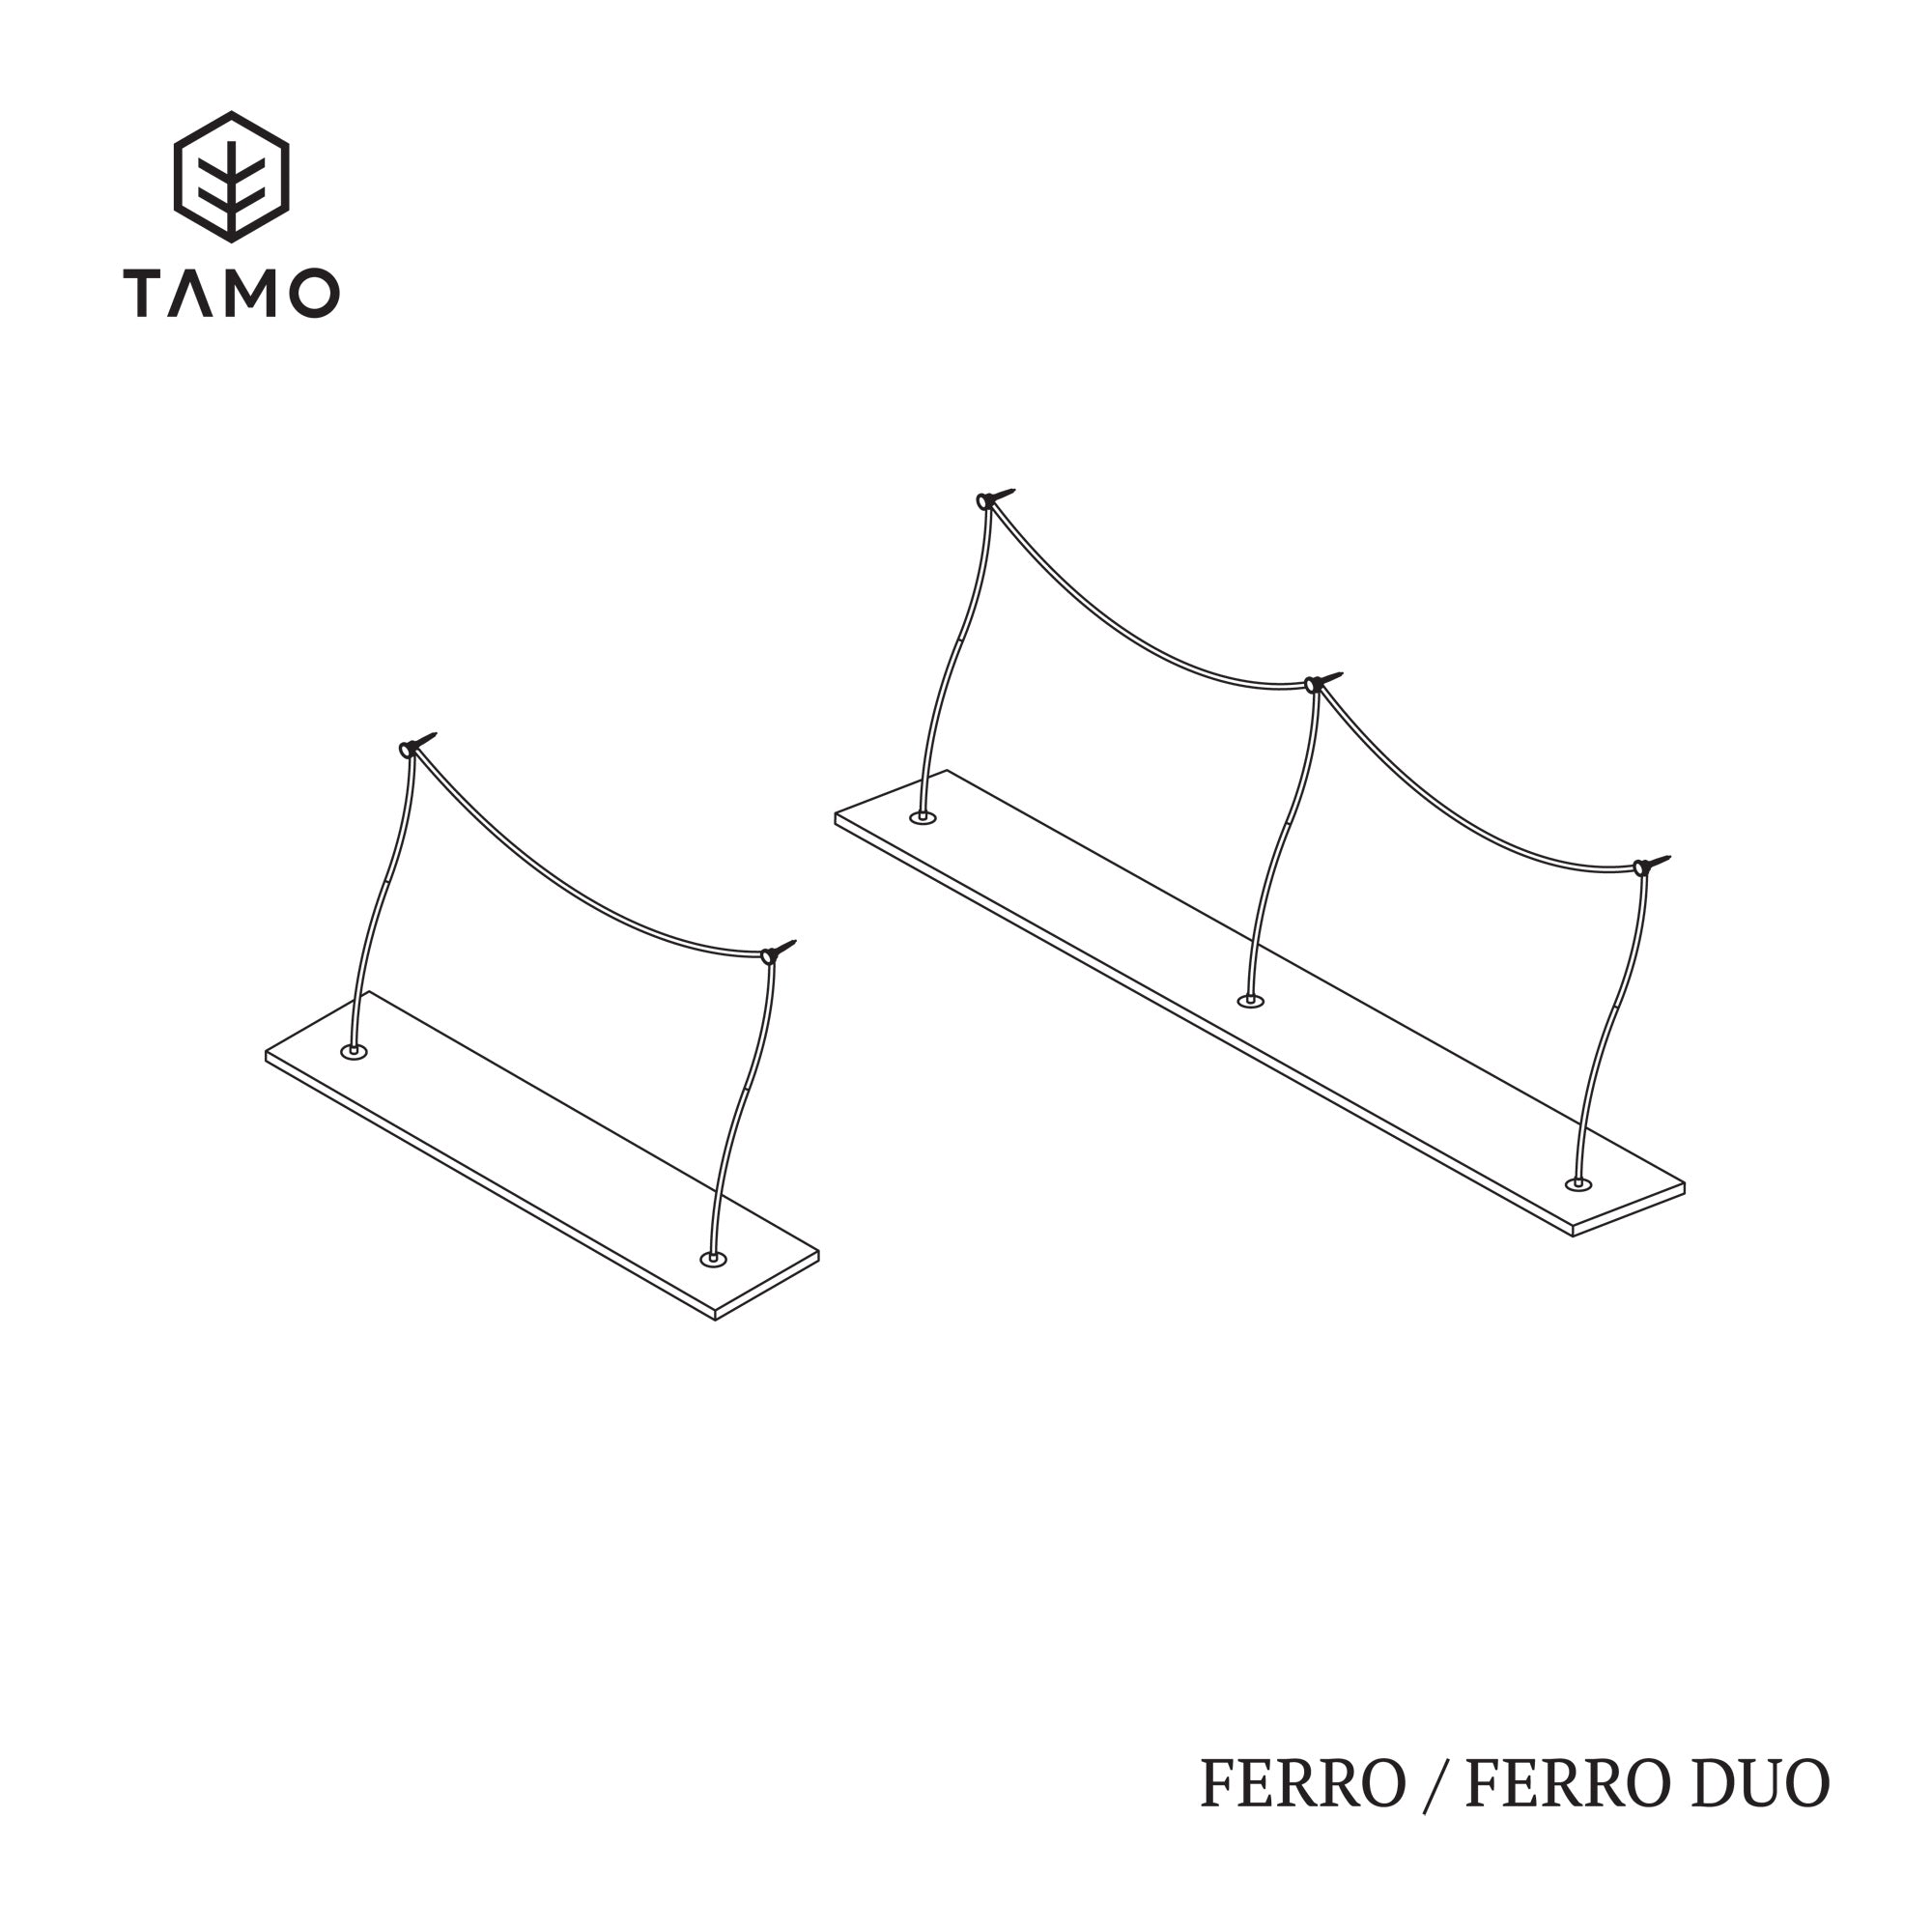
Ferro / Ferro Duo
Follow the instructions below.
START
Prepare a place to assemble the FERRO shelf. This instruction will guide you step by step on how to easily mount the shelf on the wall.
STEP 1
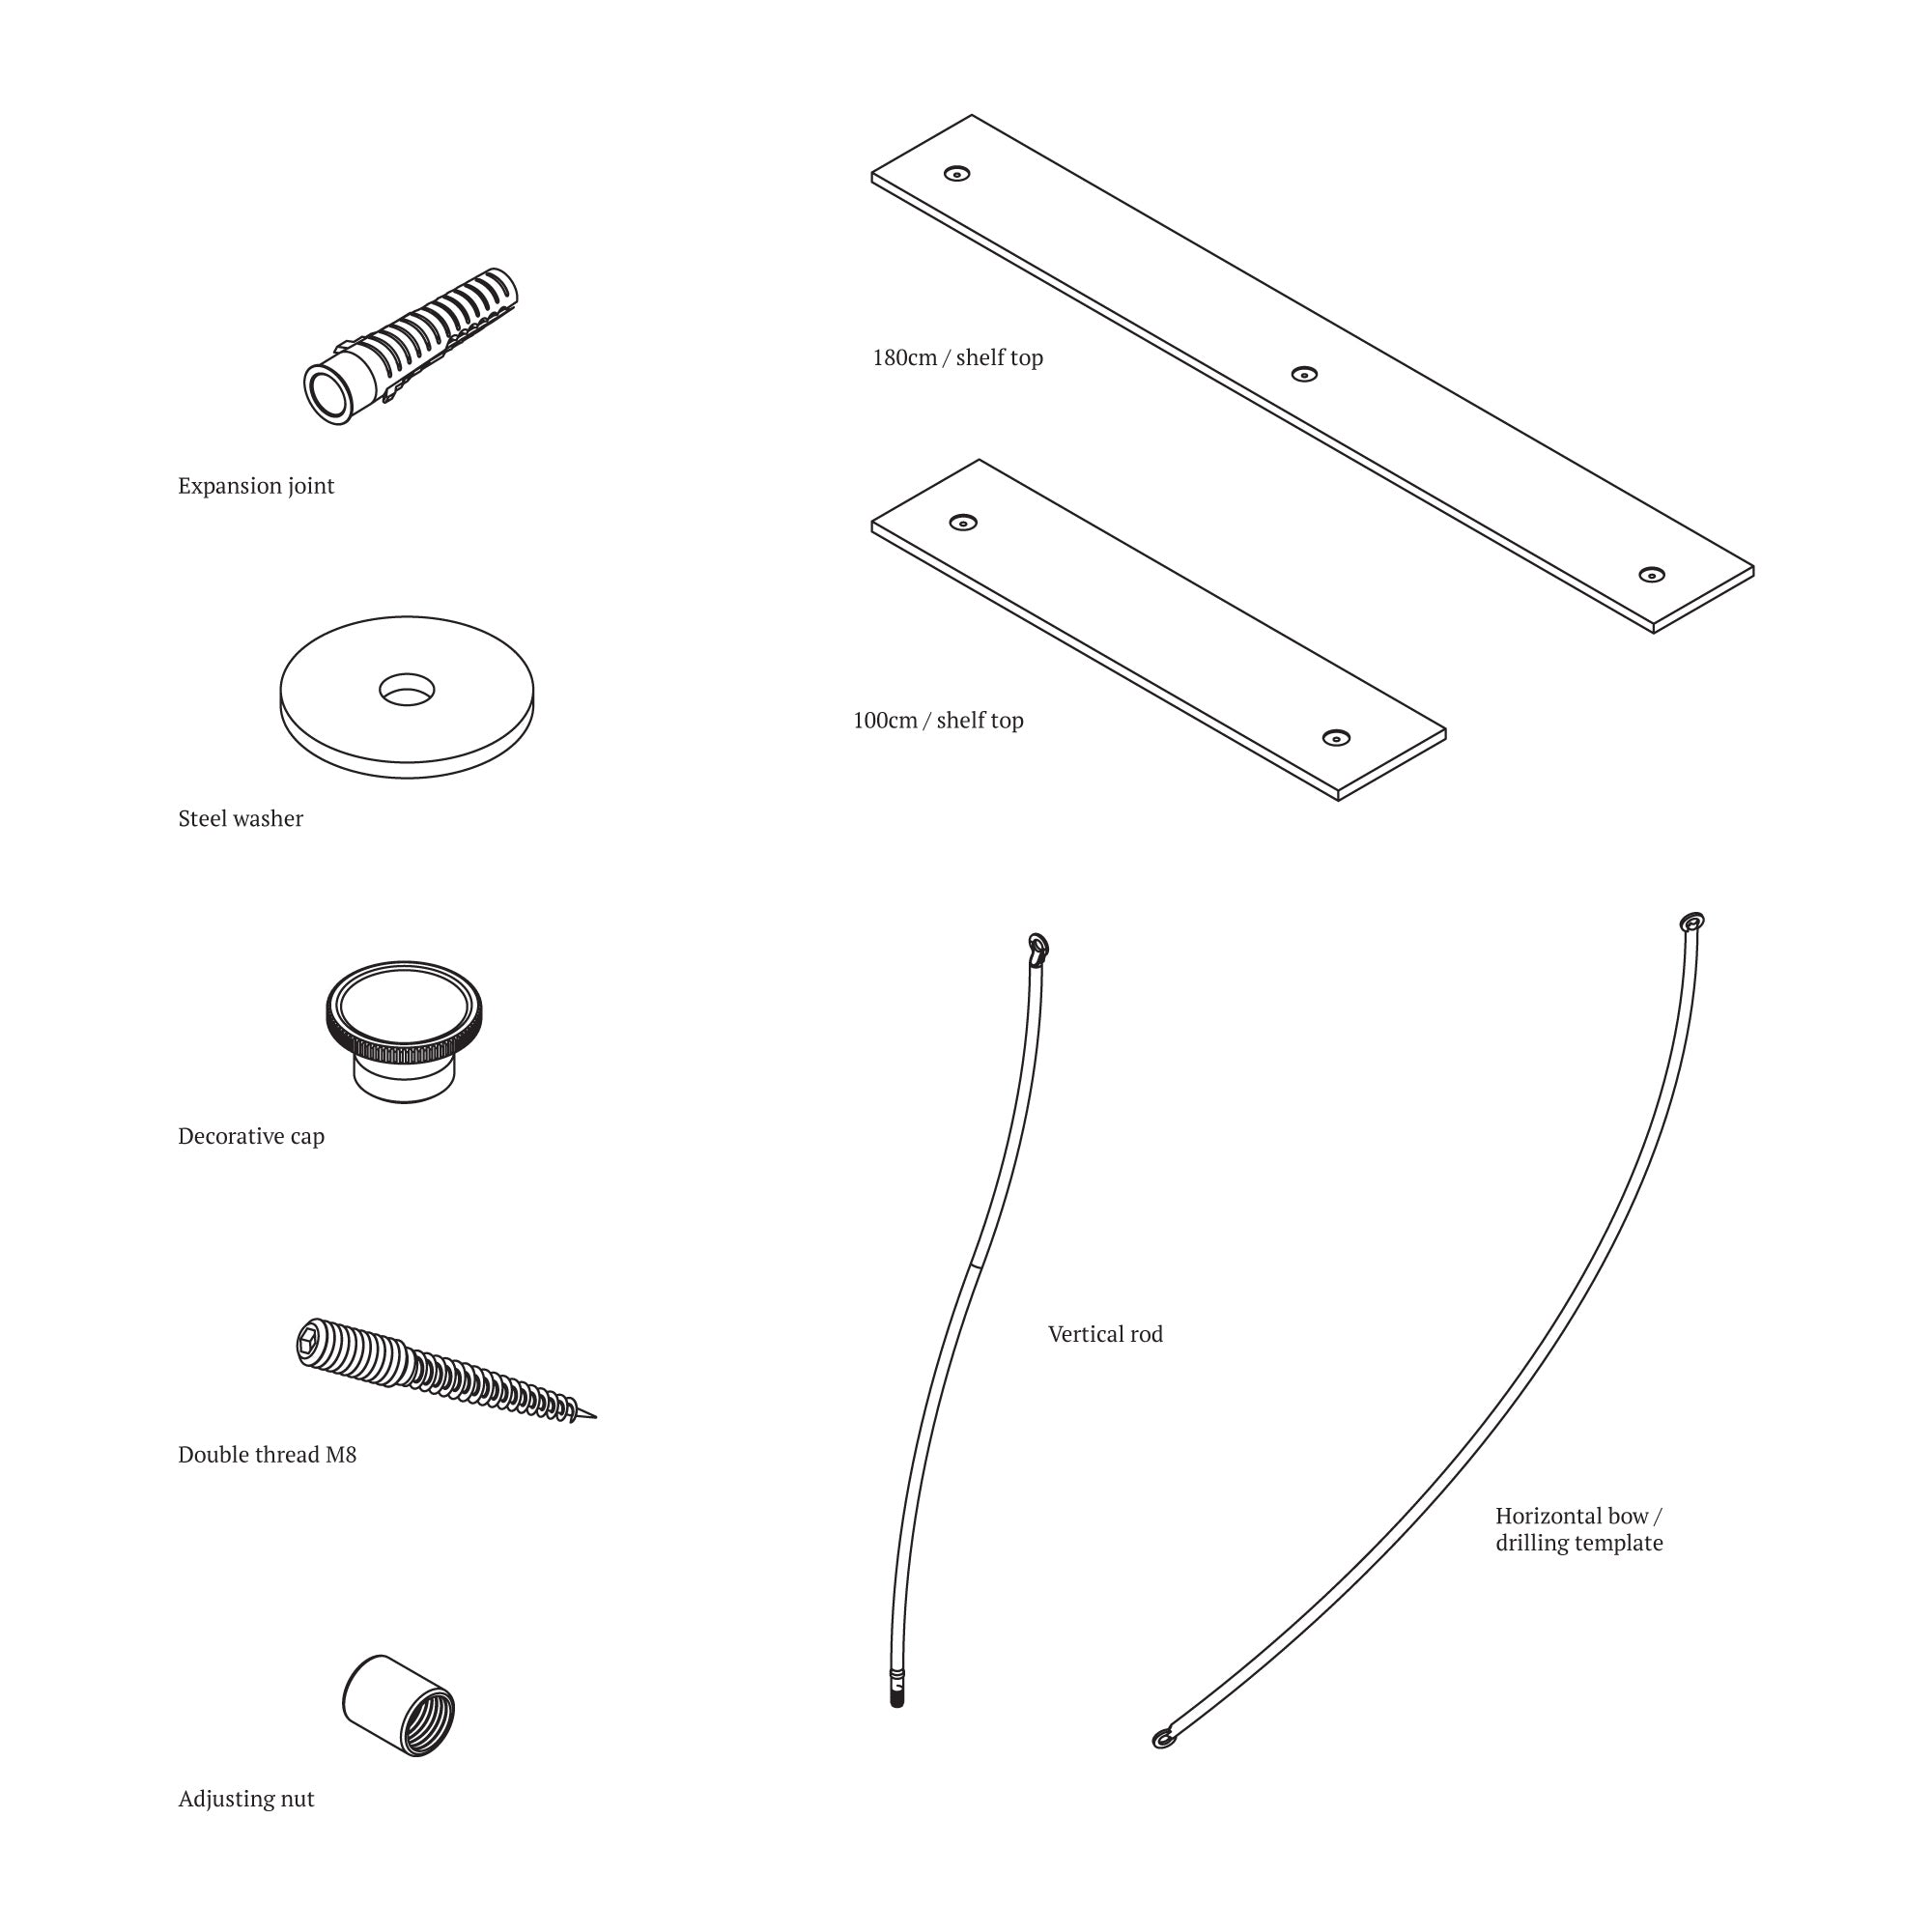
Let's start with an overview of the shelf parts. The Ferro Duo version should have a shelf measuring 180 cm. For the standard Ferro version, we should get a shelf 100 cm long. Please refer to the parts included in the package.
STEP 2
The shelf we will install in the instructions is the Ferro Duo version. Proceed similarly and in the same order when assembling the FERRO shelf version 100.
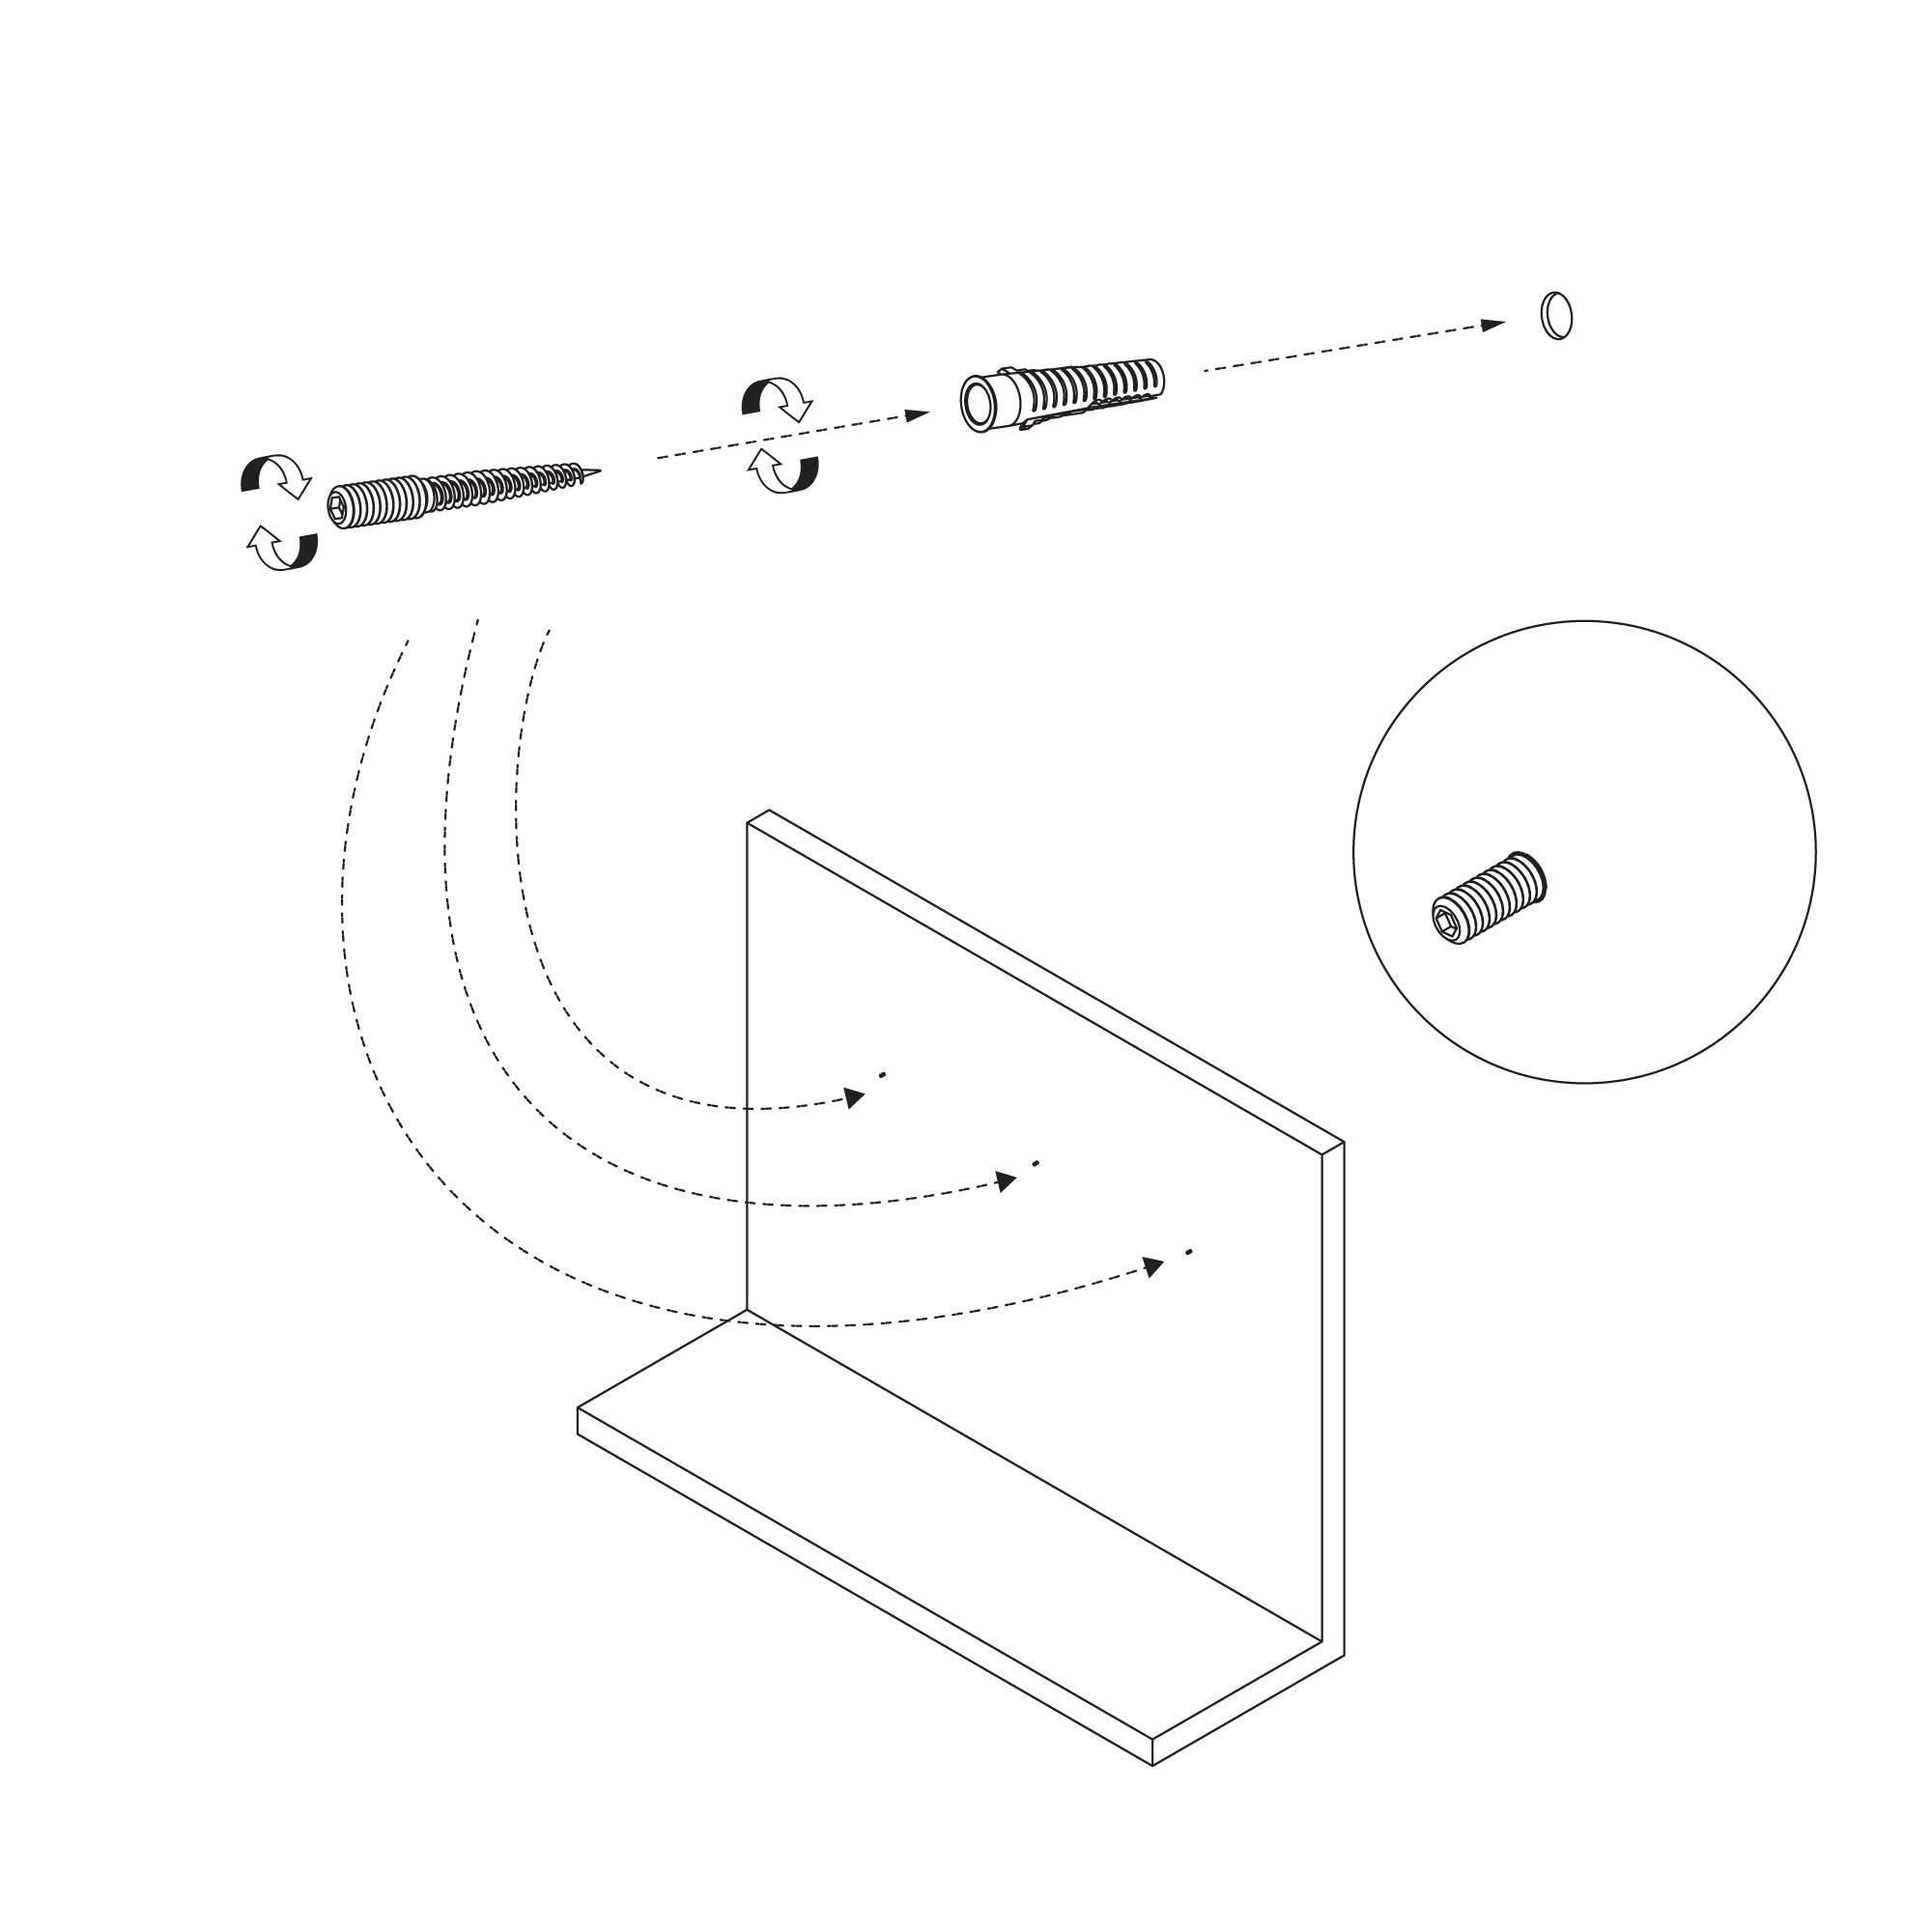
STEP 3
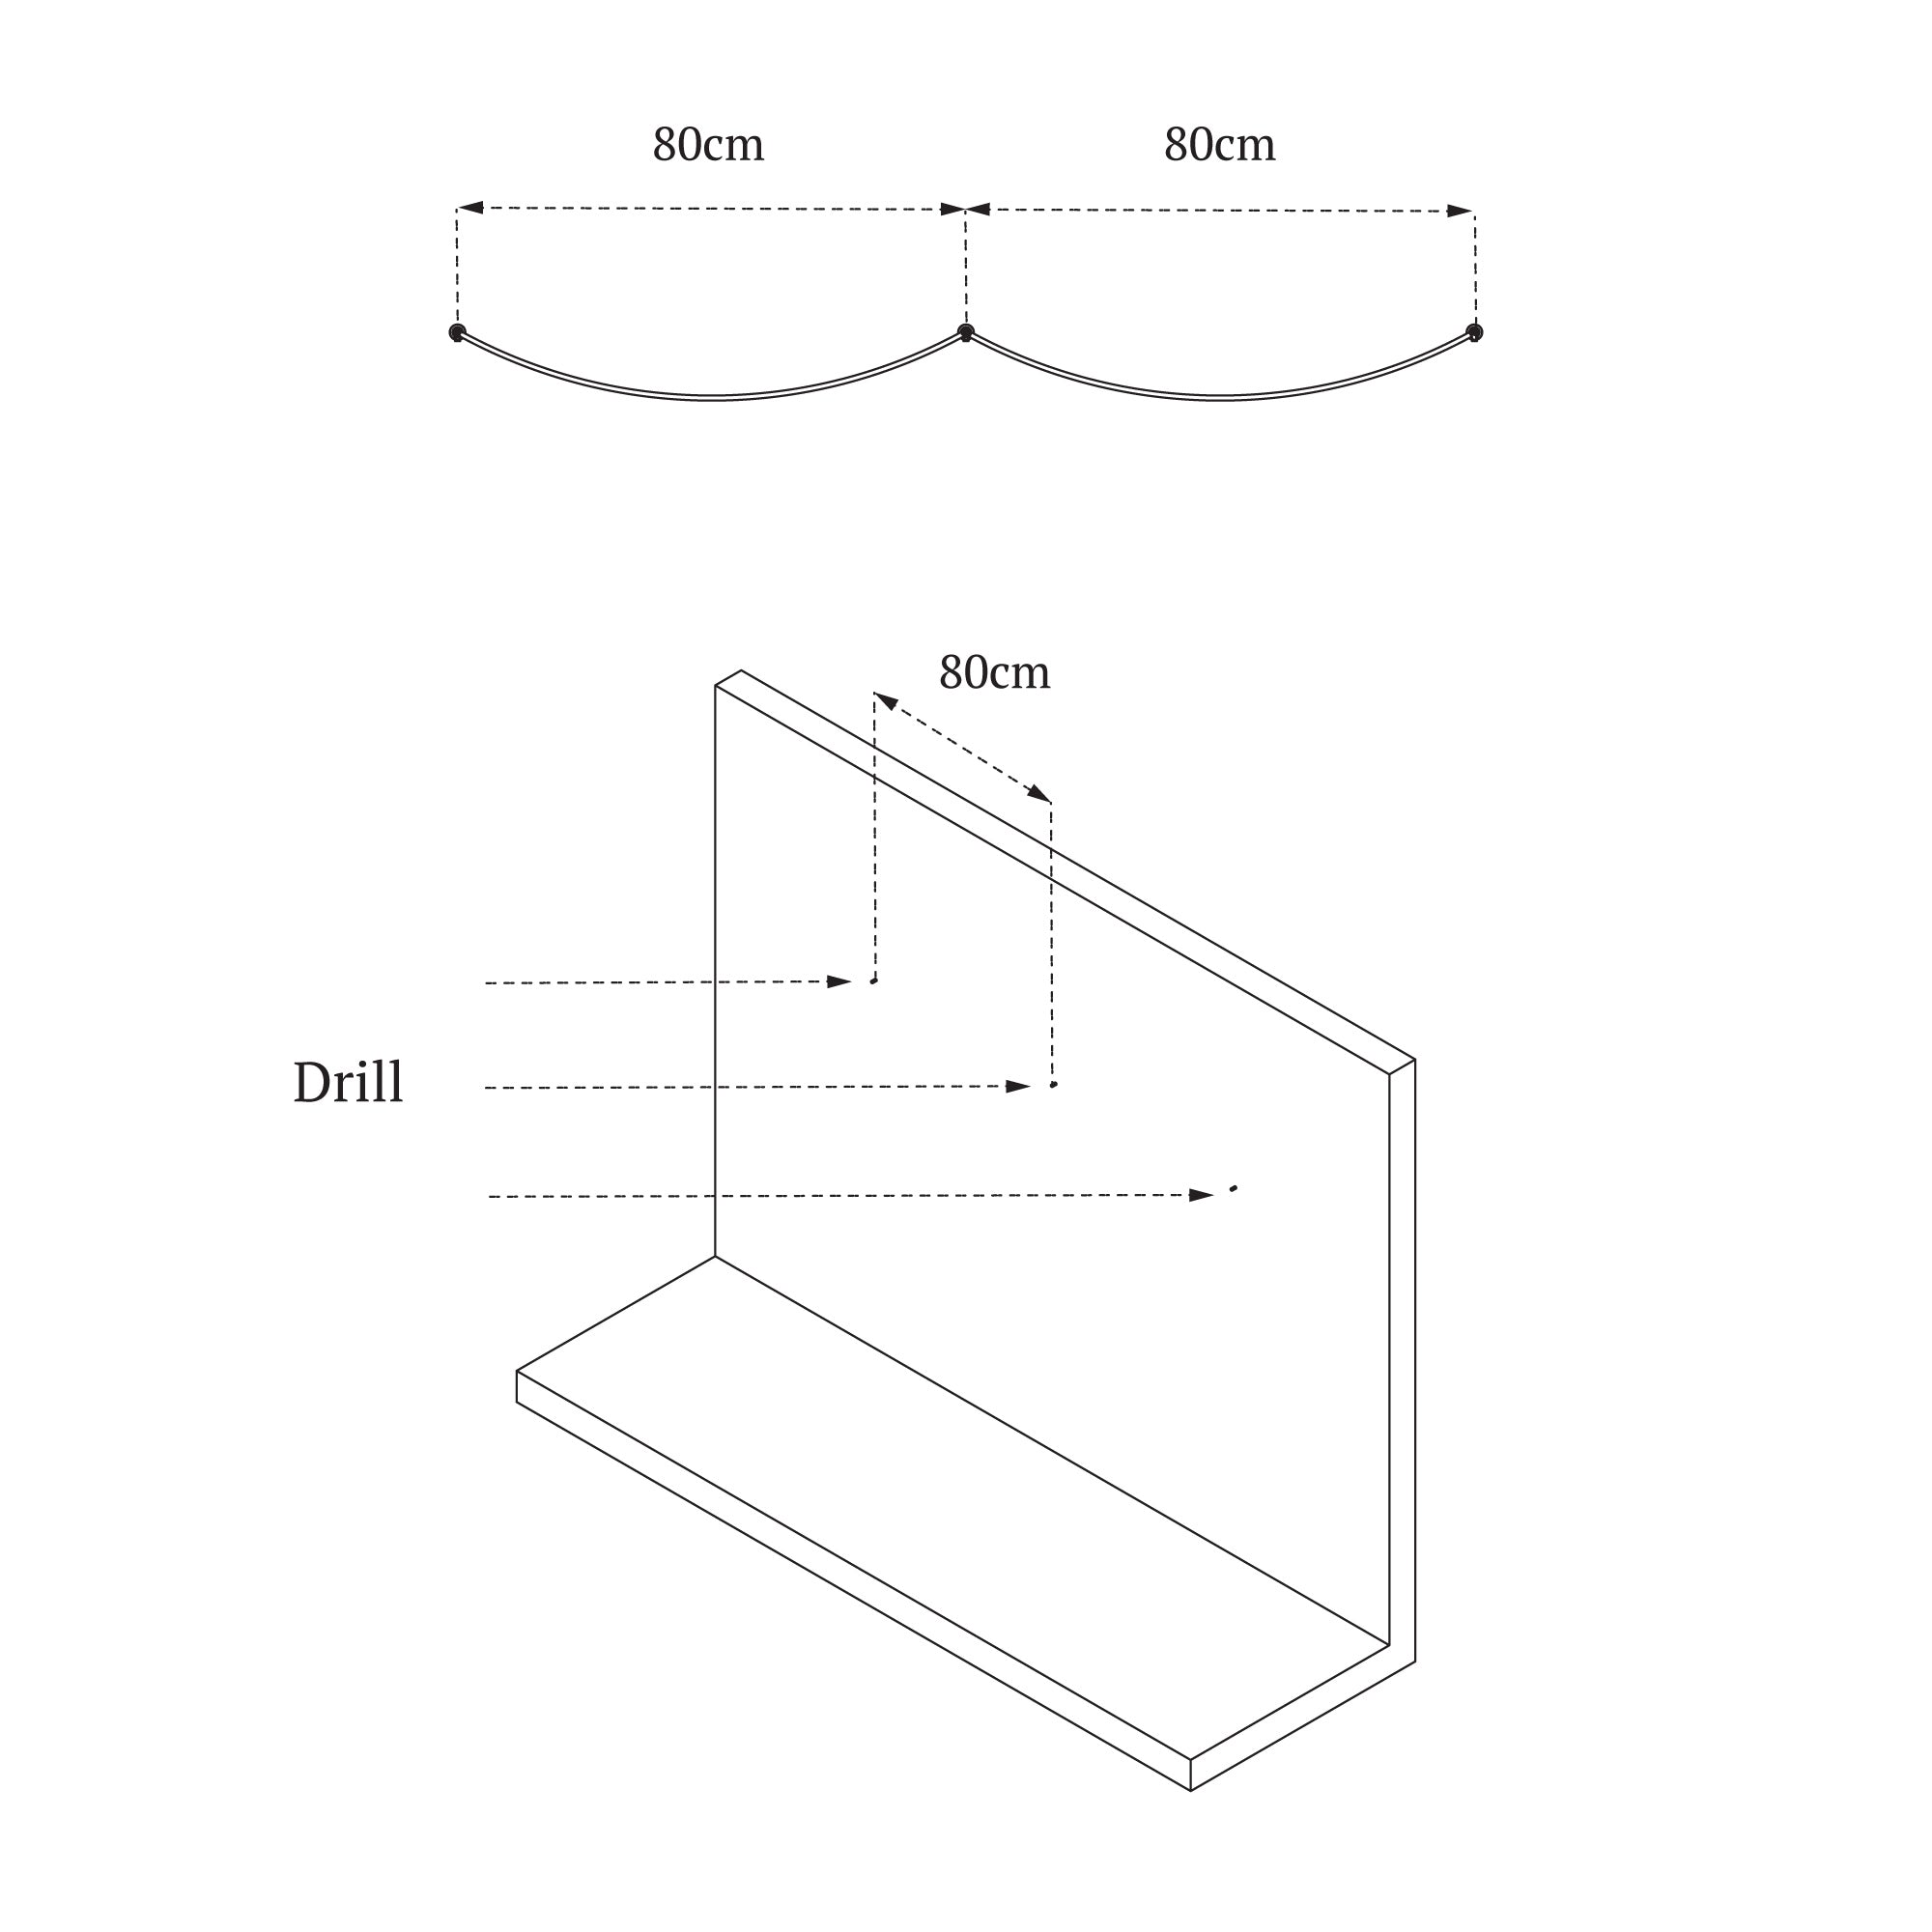
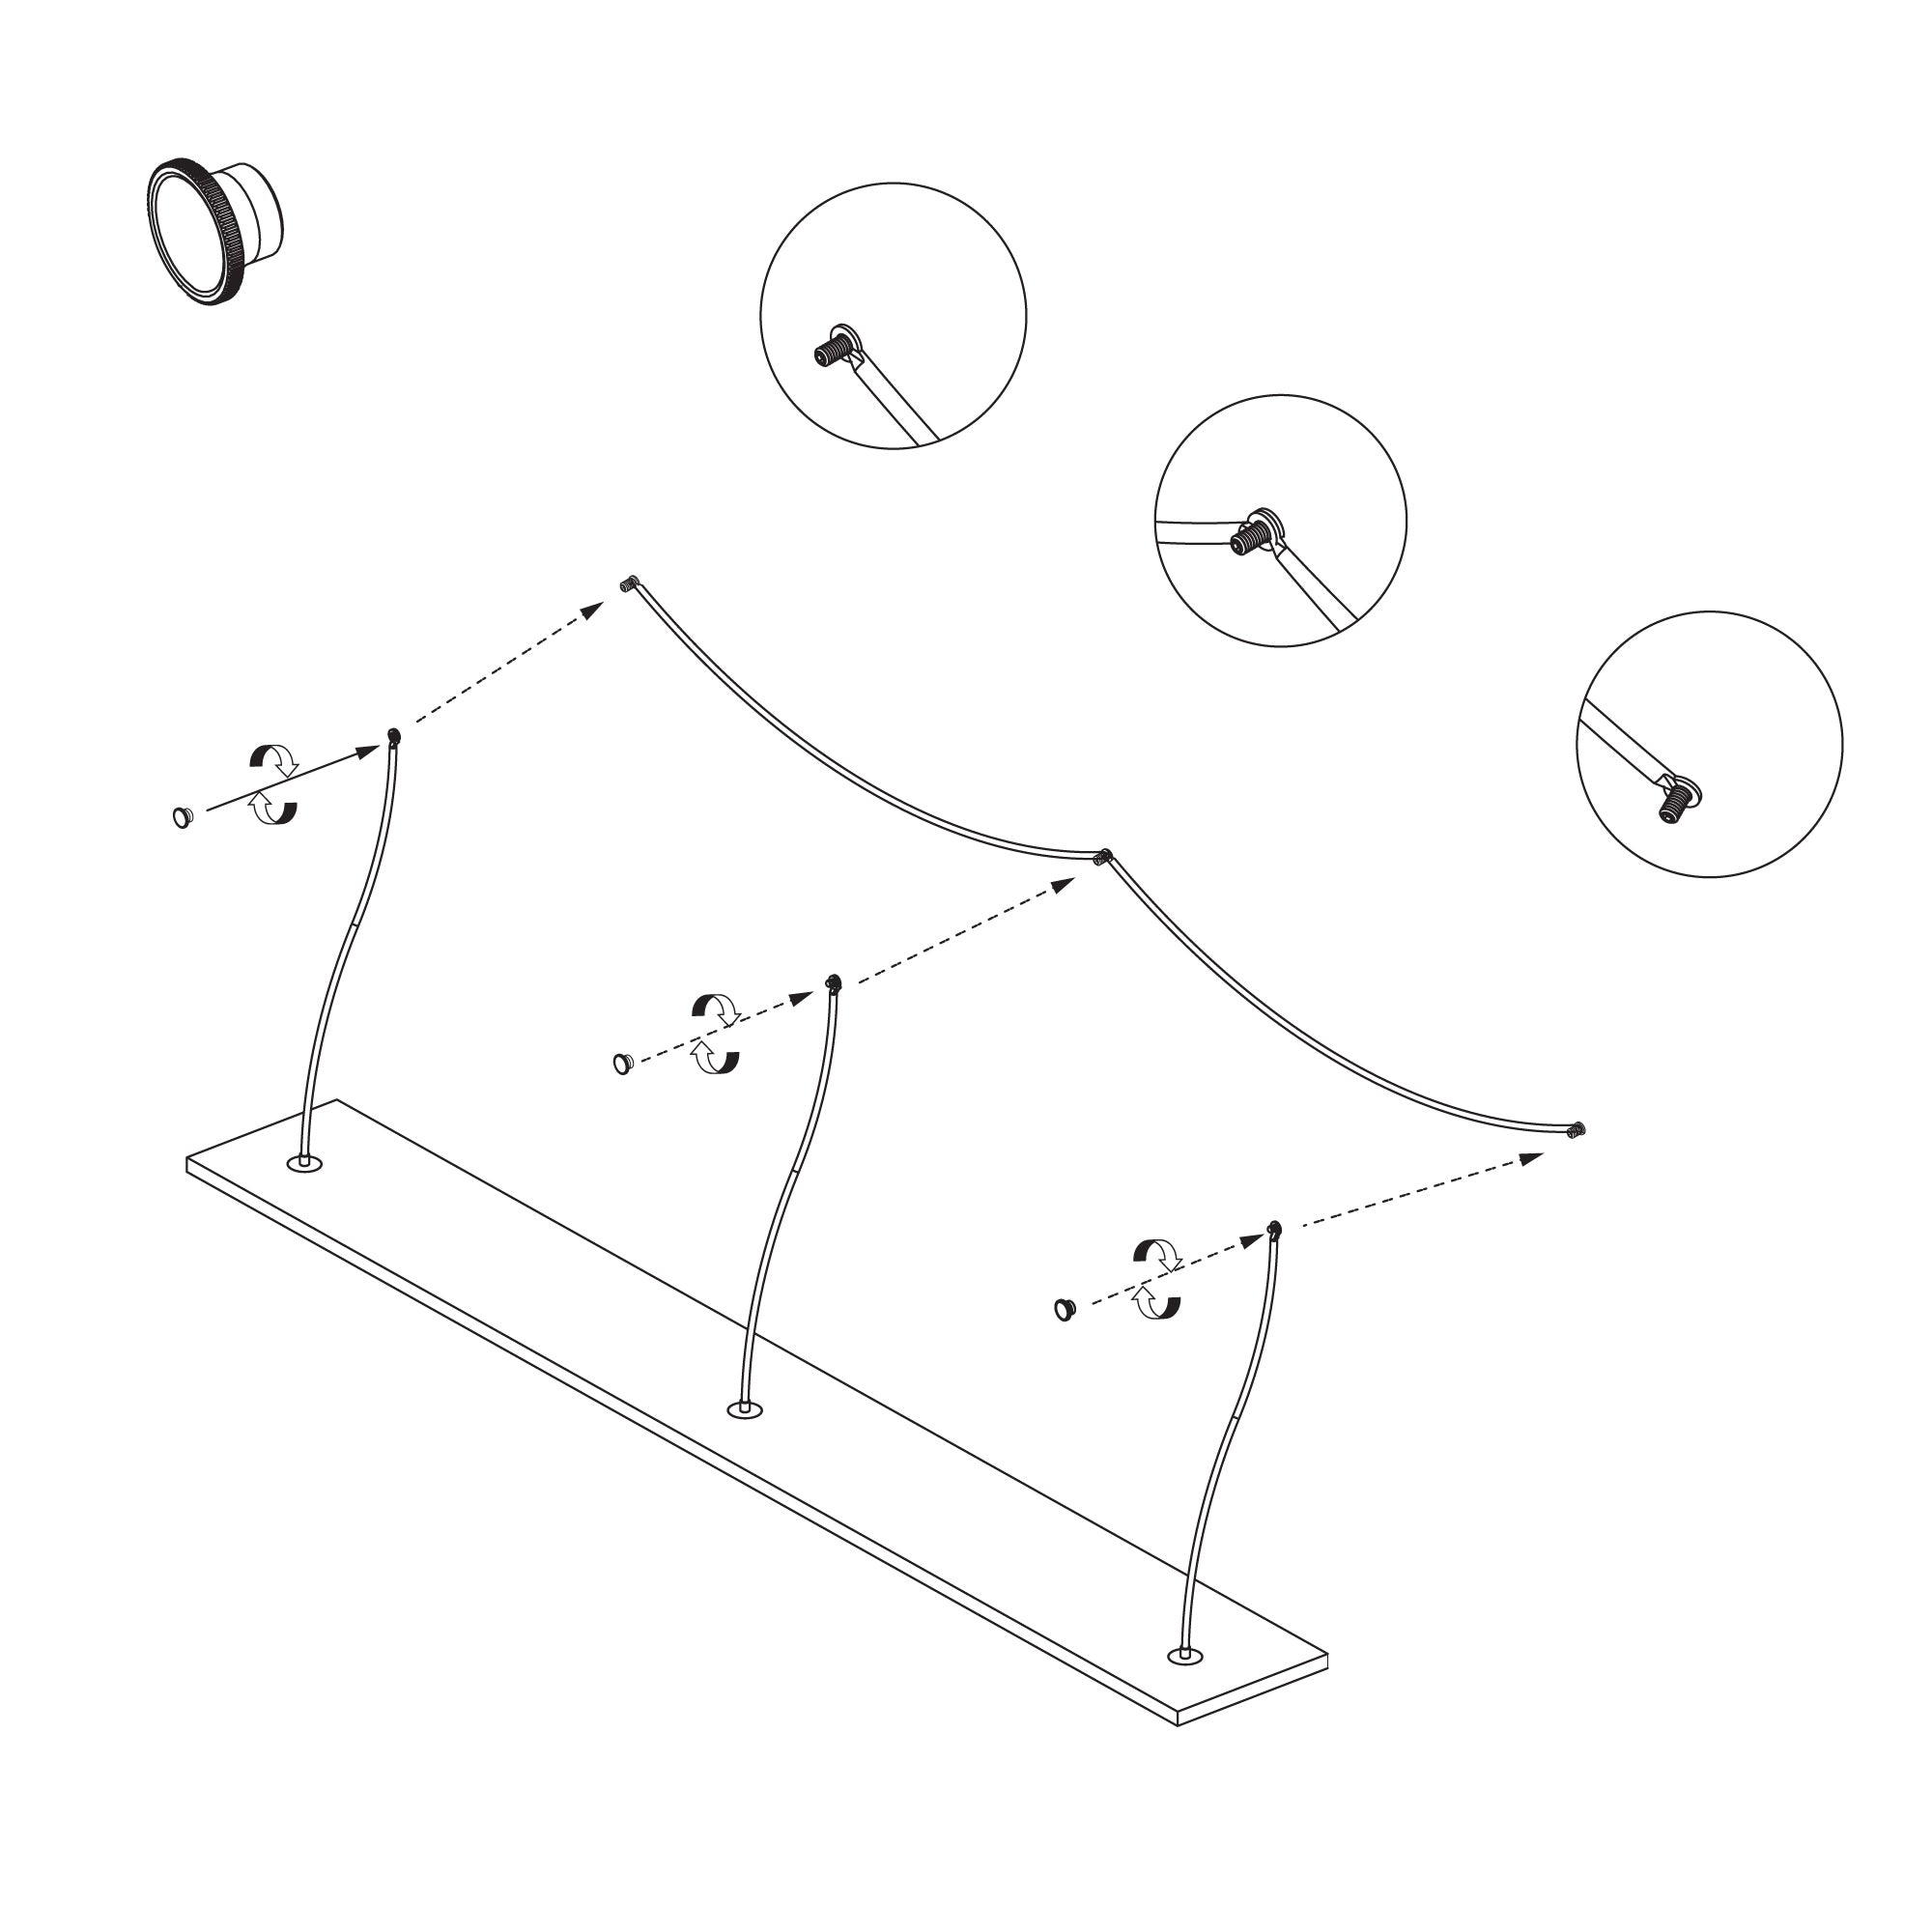
Use the arched rod piece as a template. Choose a suitable place, place a steel element to mark drilling points. To maintain the appropriate level, use a leveling tool. Mark the points where you will drill. According to the illustration, the spacing of the holes in the wall should be exactly 80 cm. The hole in the wall should match the depth and diameter of the expansion plug included in the kit. Remember that the provided expansion plugs are for solid concrete or brick walls. For other types of walls, you must select the appropriate type yourself.
STEP 4
After drilling the holes, insert the expansion plugs into the holes and then screw in the double-threaded M8 ends. The threads should protrude from the wall by no more than 20mm.
STEP 5
Now is the time to prepare the shelf. Pay attention to the position of the holes in the shelf. They are not located in the shelf axis. The distance of the hole from the wall should be greater than from the edge of the shelf. Insert round steel washers into the recesses of the shelf. Then screw the regulator onto the rod on the threaded side and insert the rod with the regulator into the holes. Threads will appear on the other side of the shelf.
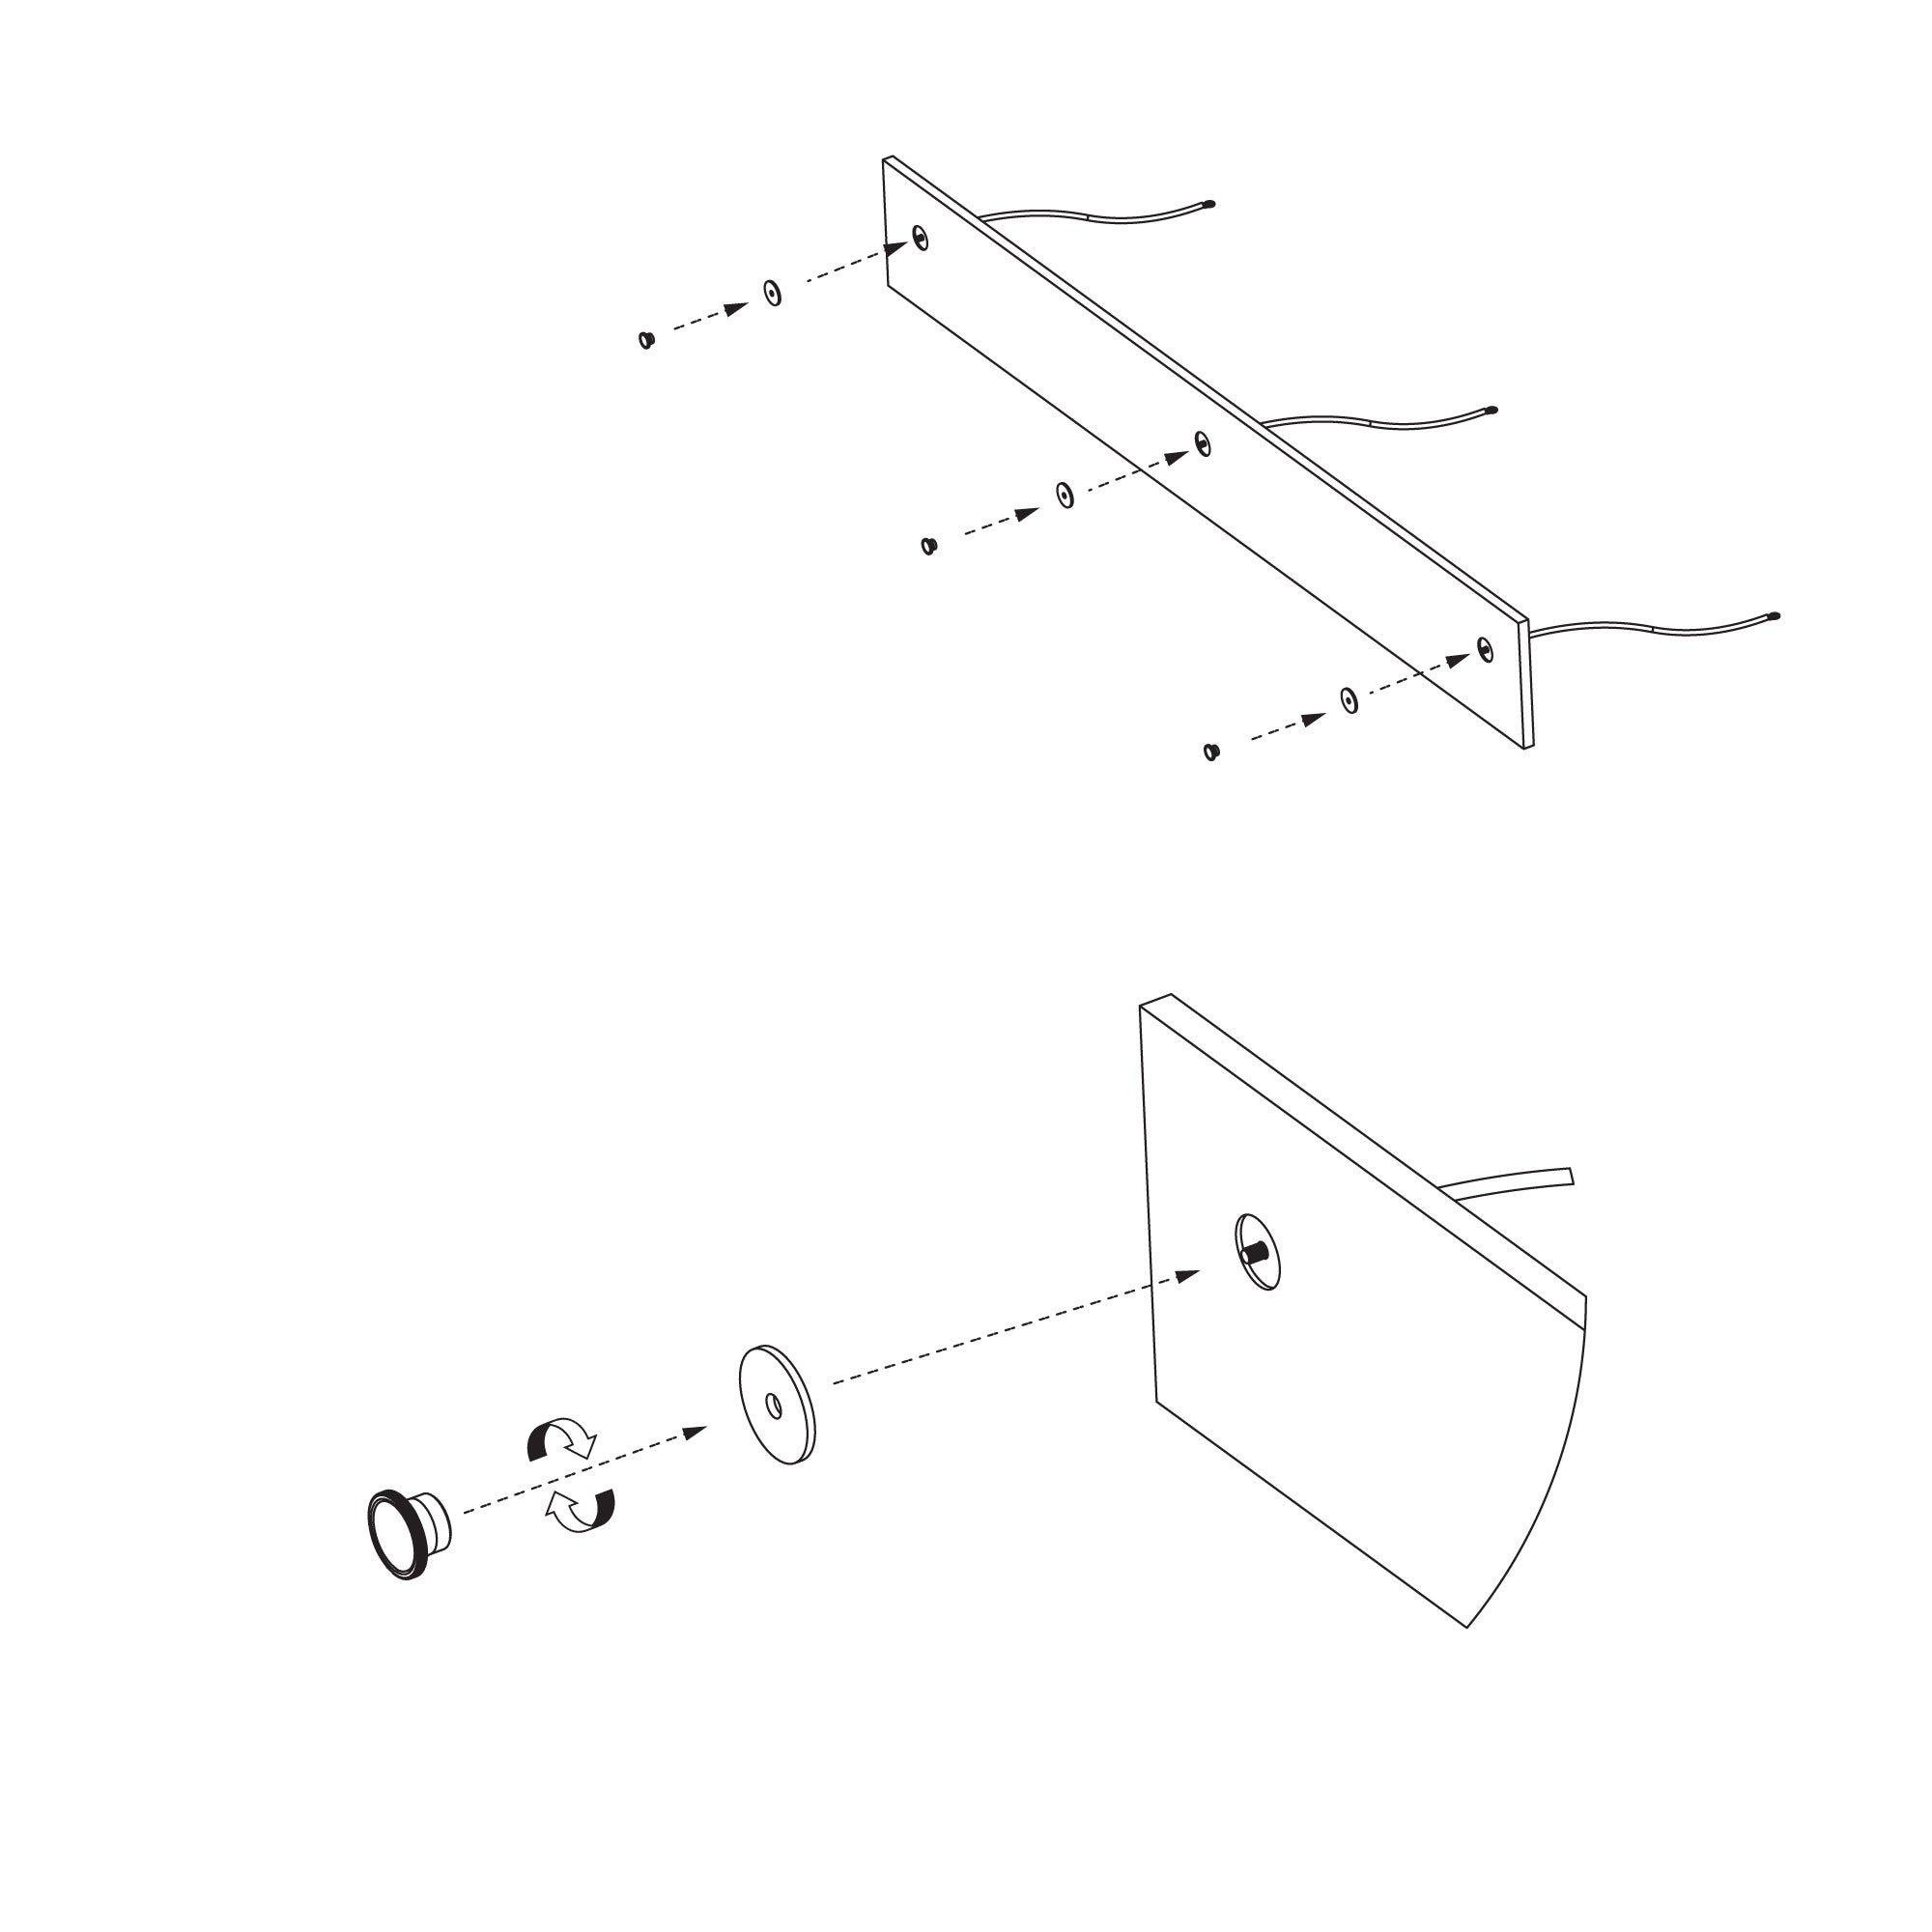
STEP 6
Place a round steel washer on the threads protruding from the recesses and screw on a decorative nut. You can tighten the nut by hand. The surface of the nut is knurled, so you can do it easily.
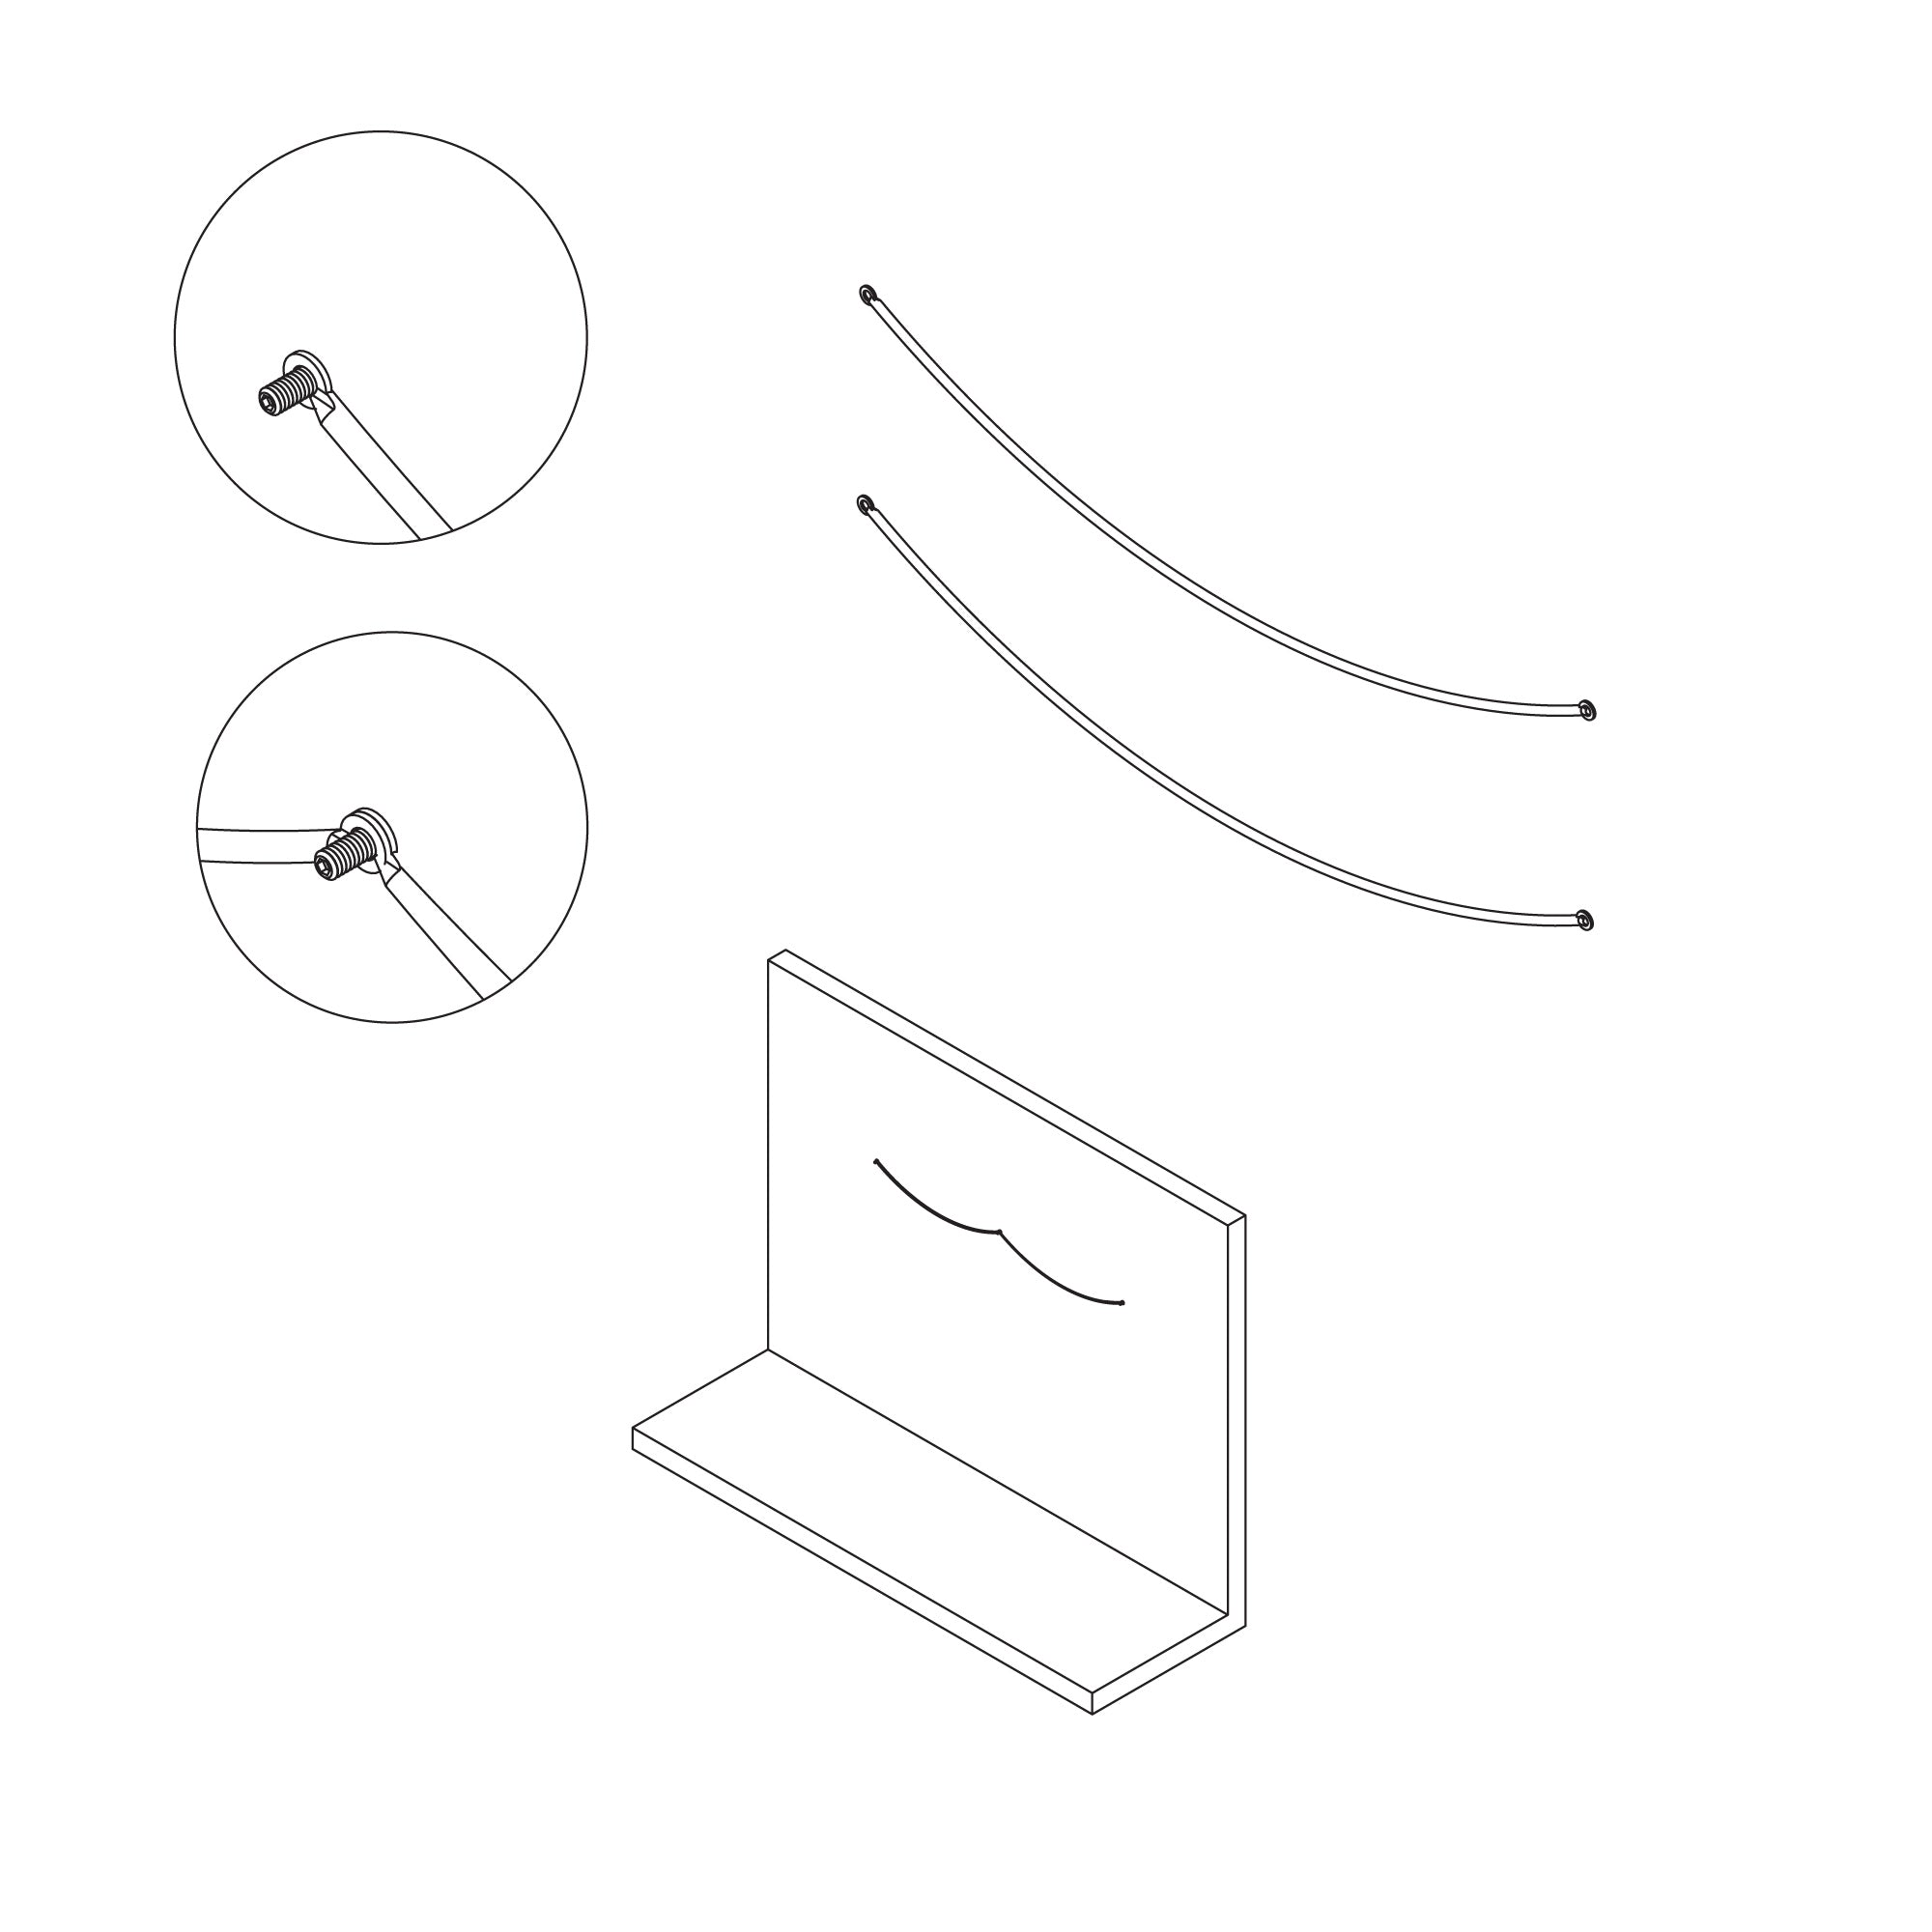
STEP 7
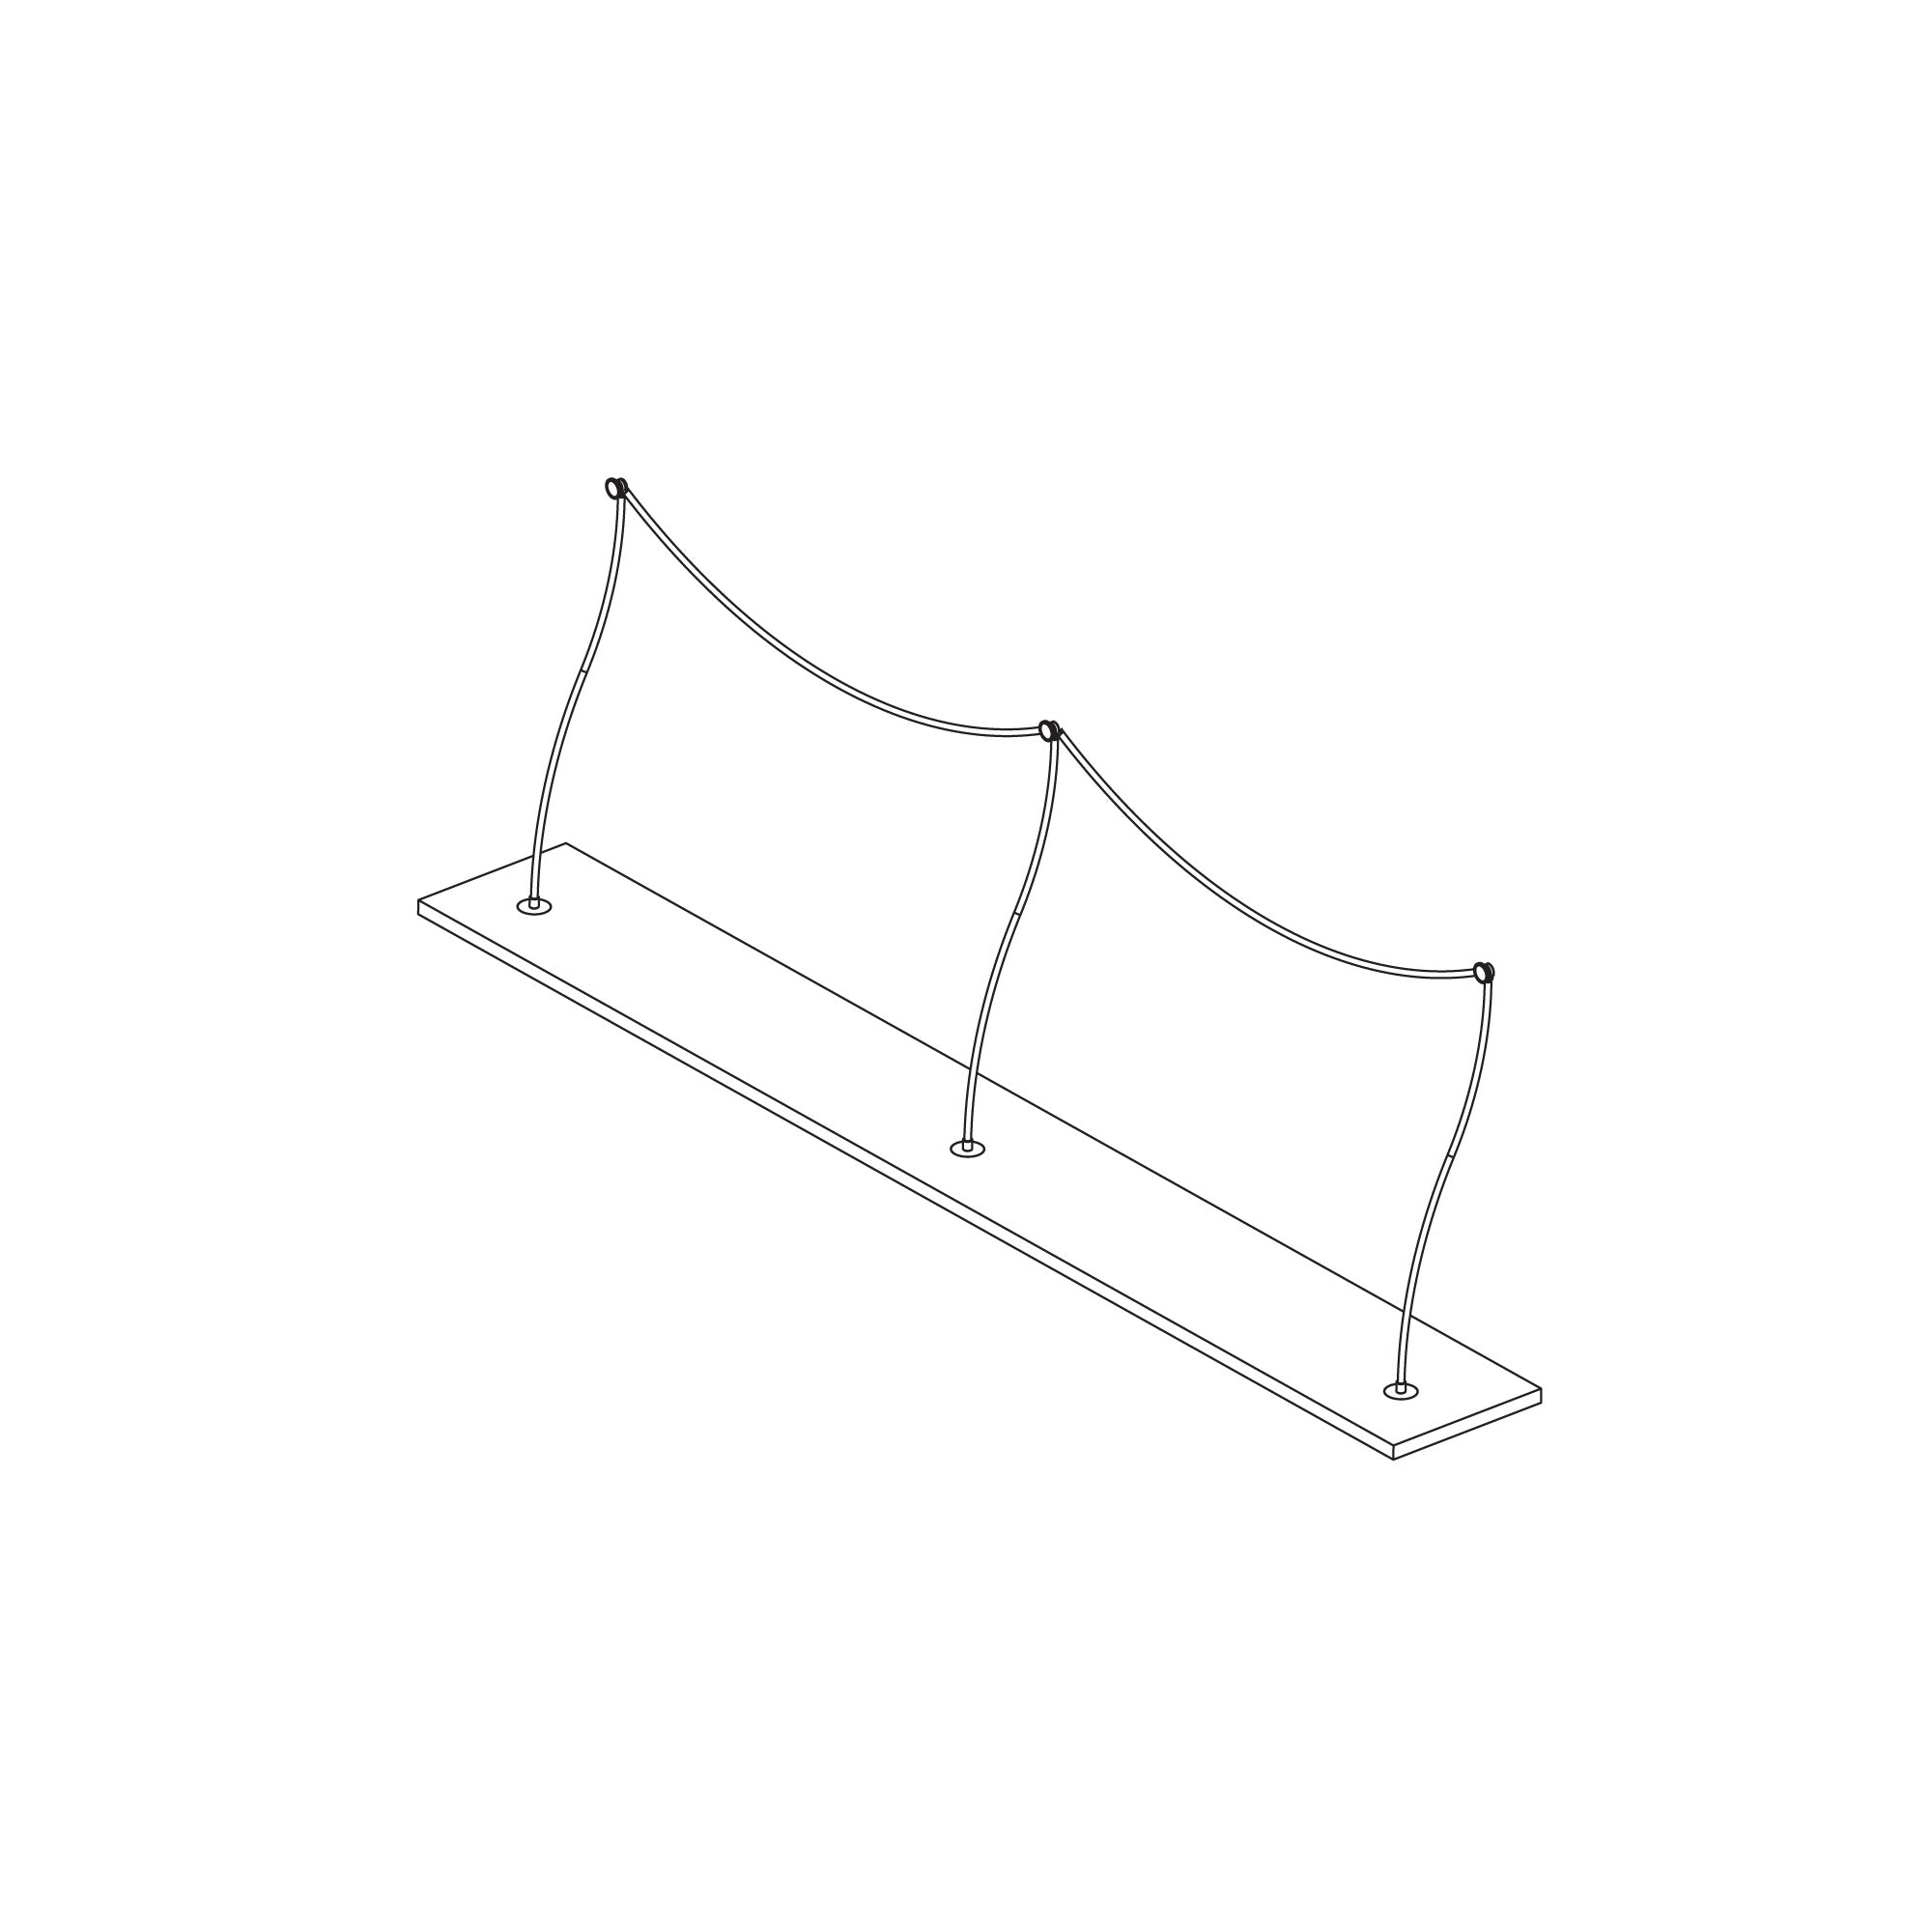
To mount the shelf on the wall. Place arched rods on the threads protruding from the wall. Perform the operation as shown in the illustration. Do this carefully so that the bends do not slip off the threads.
STEP 8
Now hang the previously prepared shelf with bars on the protruding threads. You can immediately screw decorative nuts onto the threads while hanging.
STEP 9
Make sure the shelf hangs securely on the hangers and each decorative nut is tightened. You can start using the shelf. Remember that its permissible load is 10 kg and may depend on the material the wall is made of. Thank you for your attention. Your shelf is ready to use.
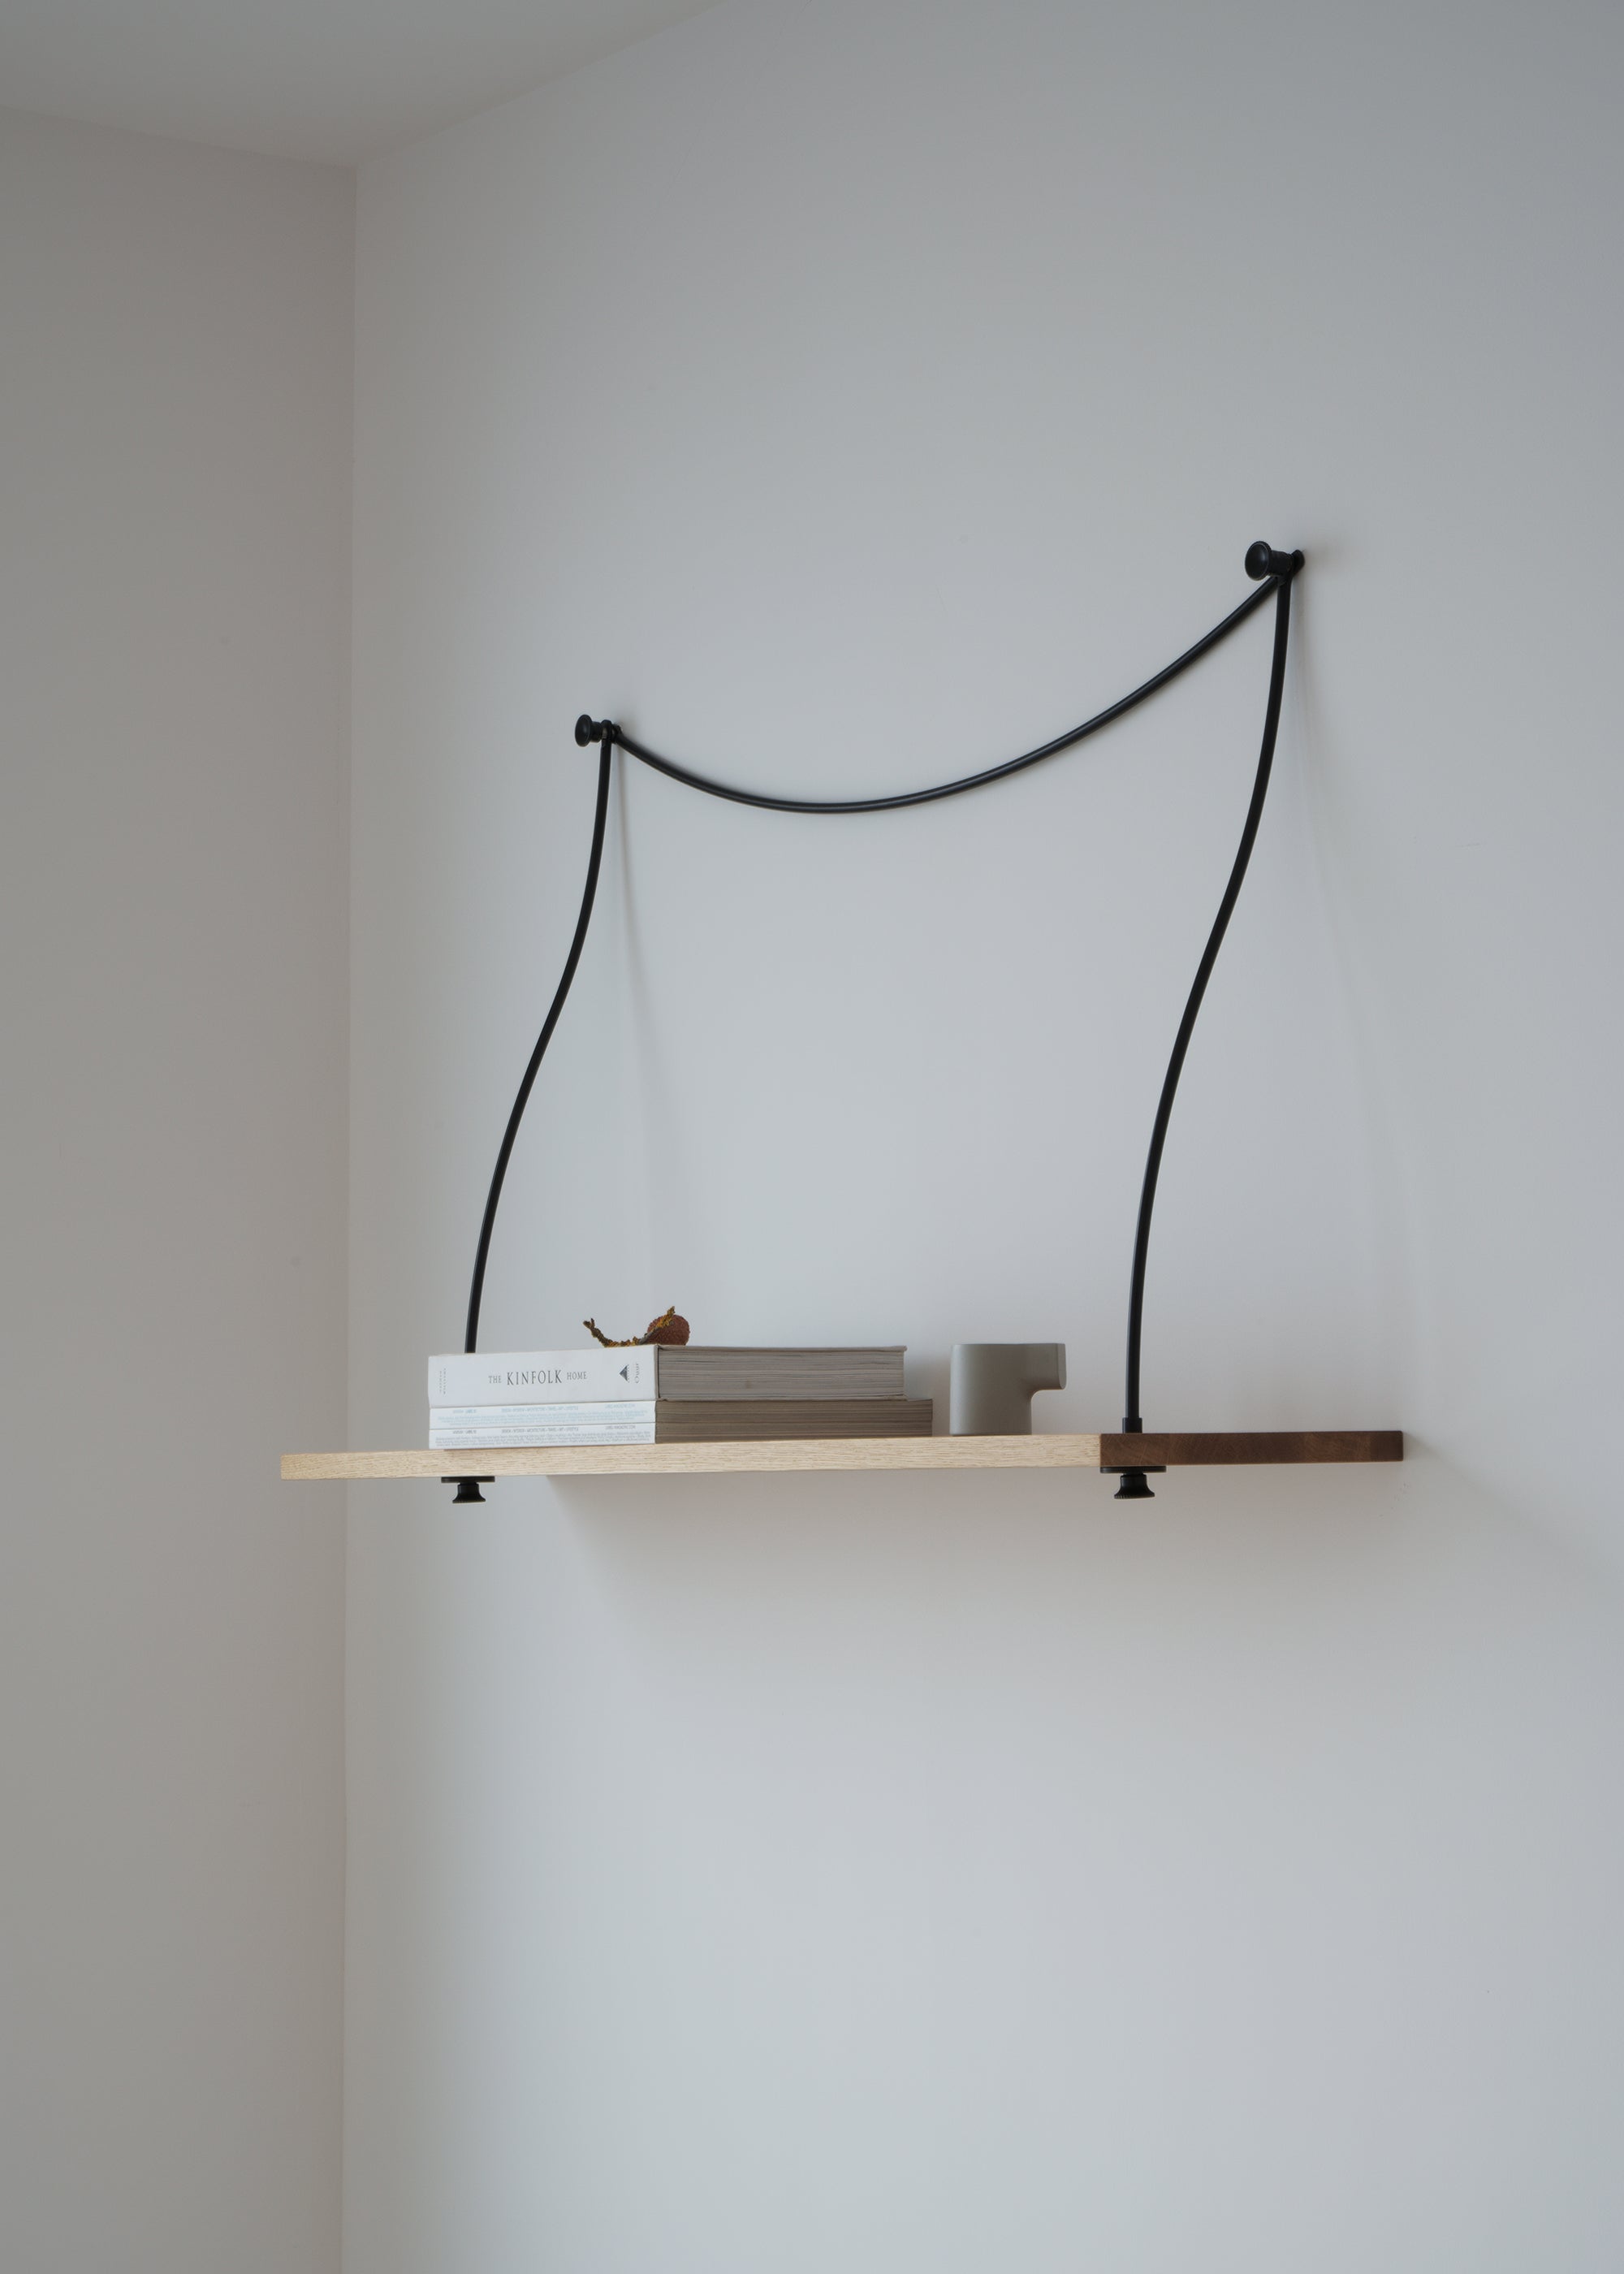
FERRO Shelf
VIEW