

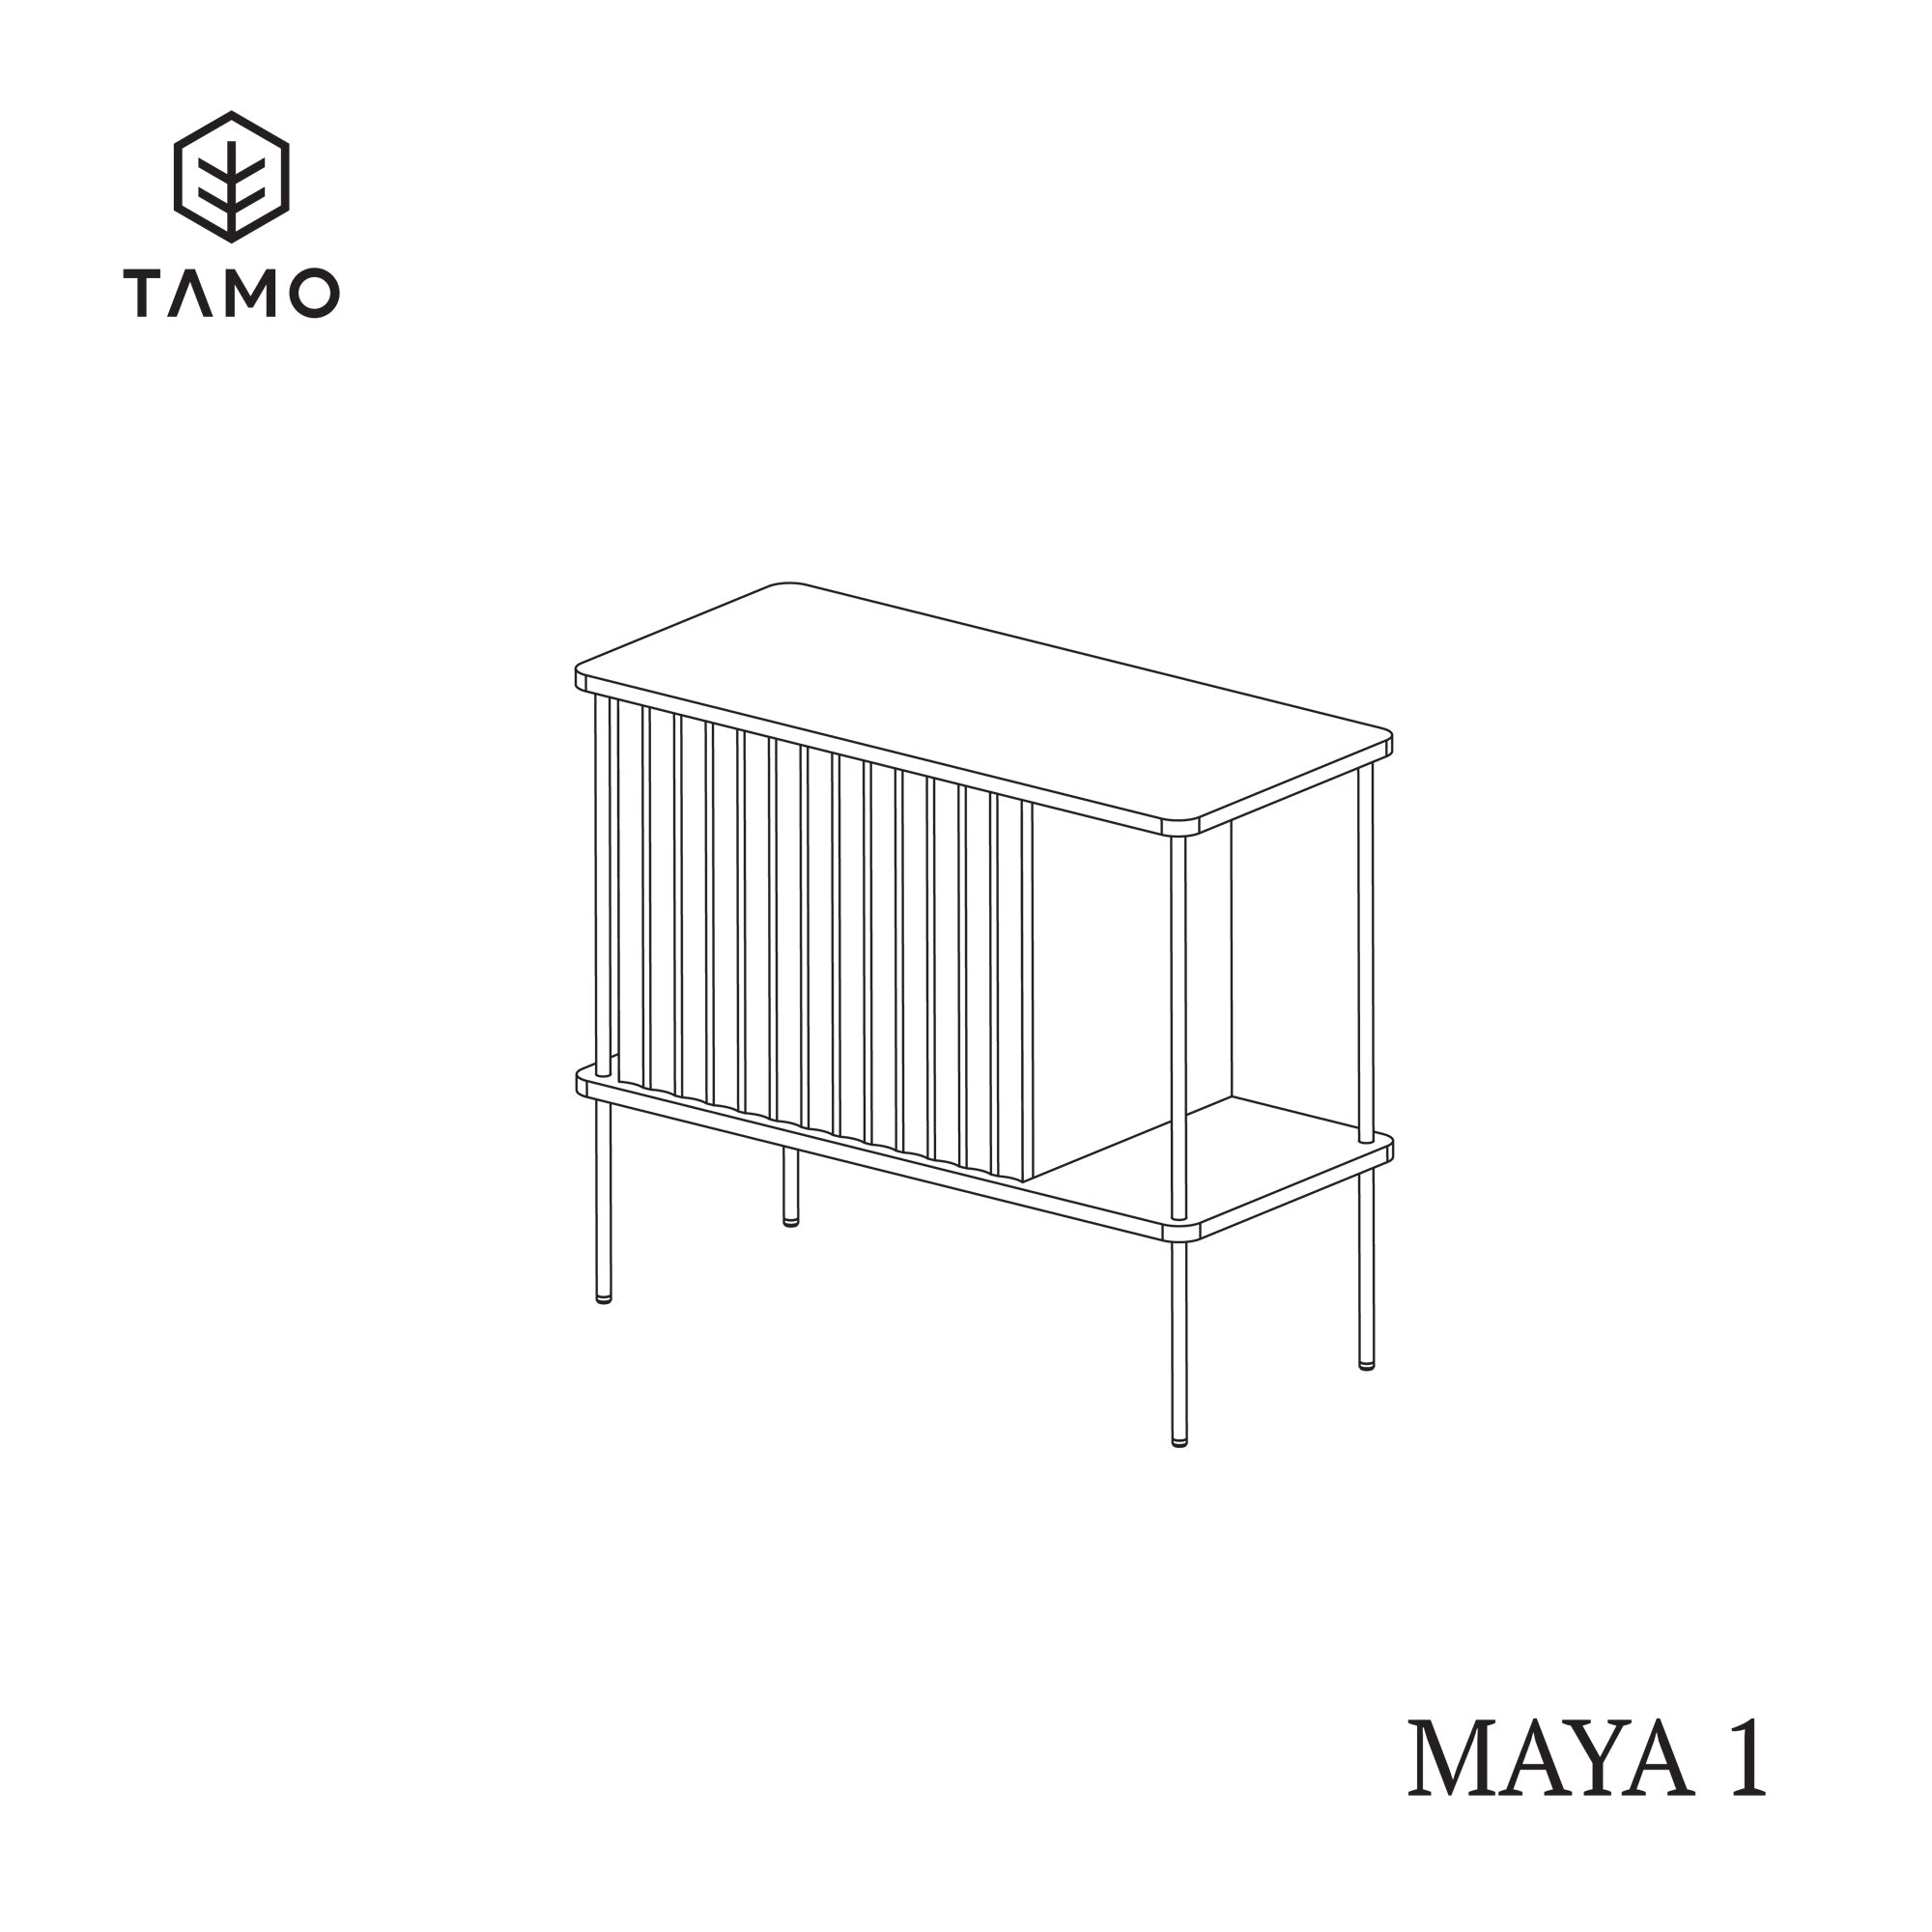
manual
Maya
Follow the instructions below.
START
Prepare a place to assemble the MAYA cabinet. Make sure you have enough
room to turn comfortably and the surfaces you will be using are clean.
We recommend using a carpet or blanket on which the parts can be safely
assembled.
STEP 1
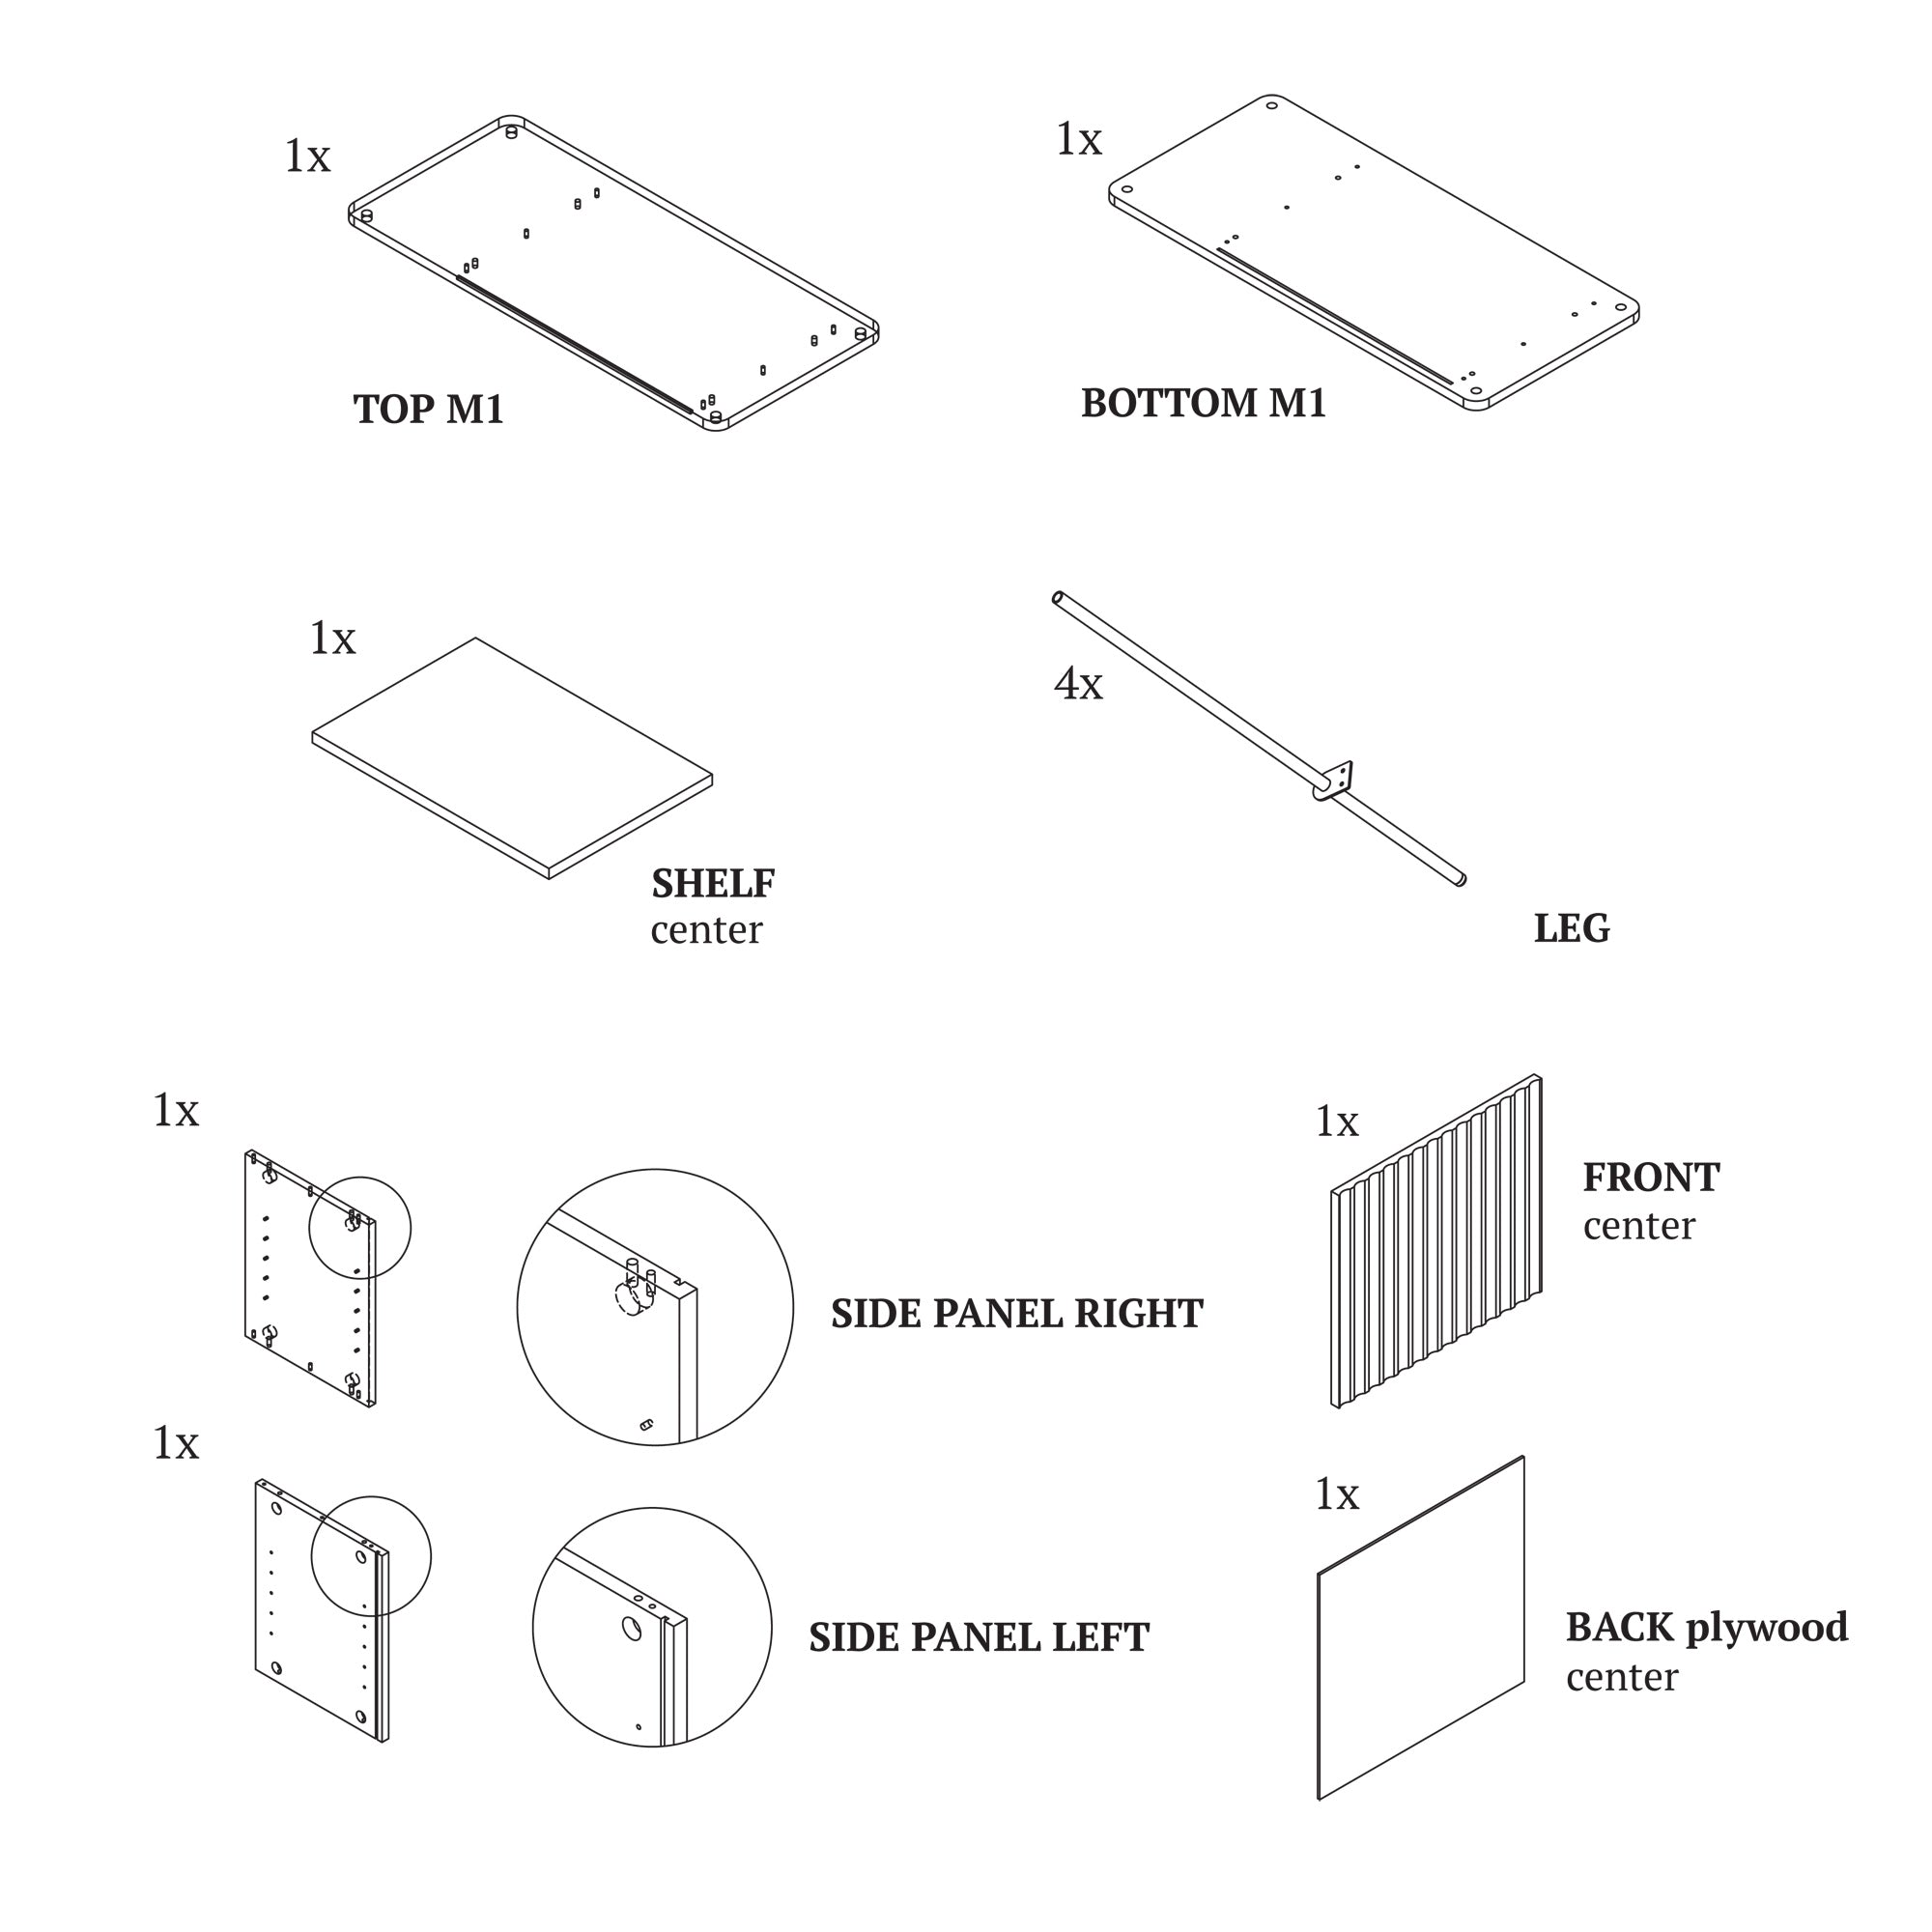
Unpack all parts. Check the number of parts included in the shipment.
STEP 2
If the quantities specified in the last two slides are correct, you can start assembling the furniture.
STEP 3
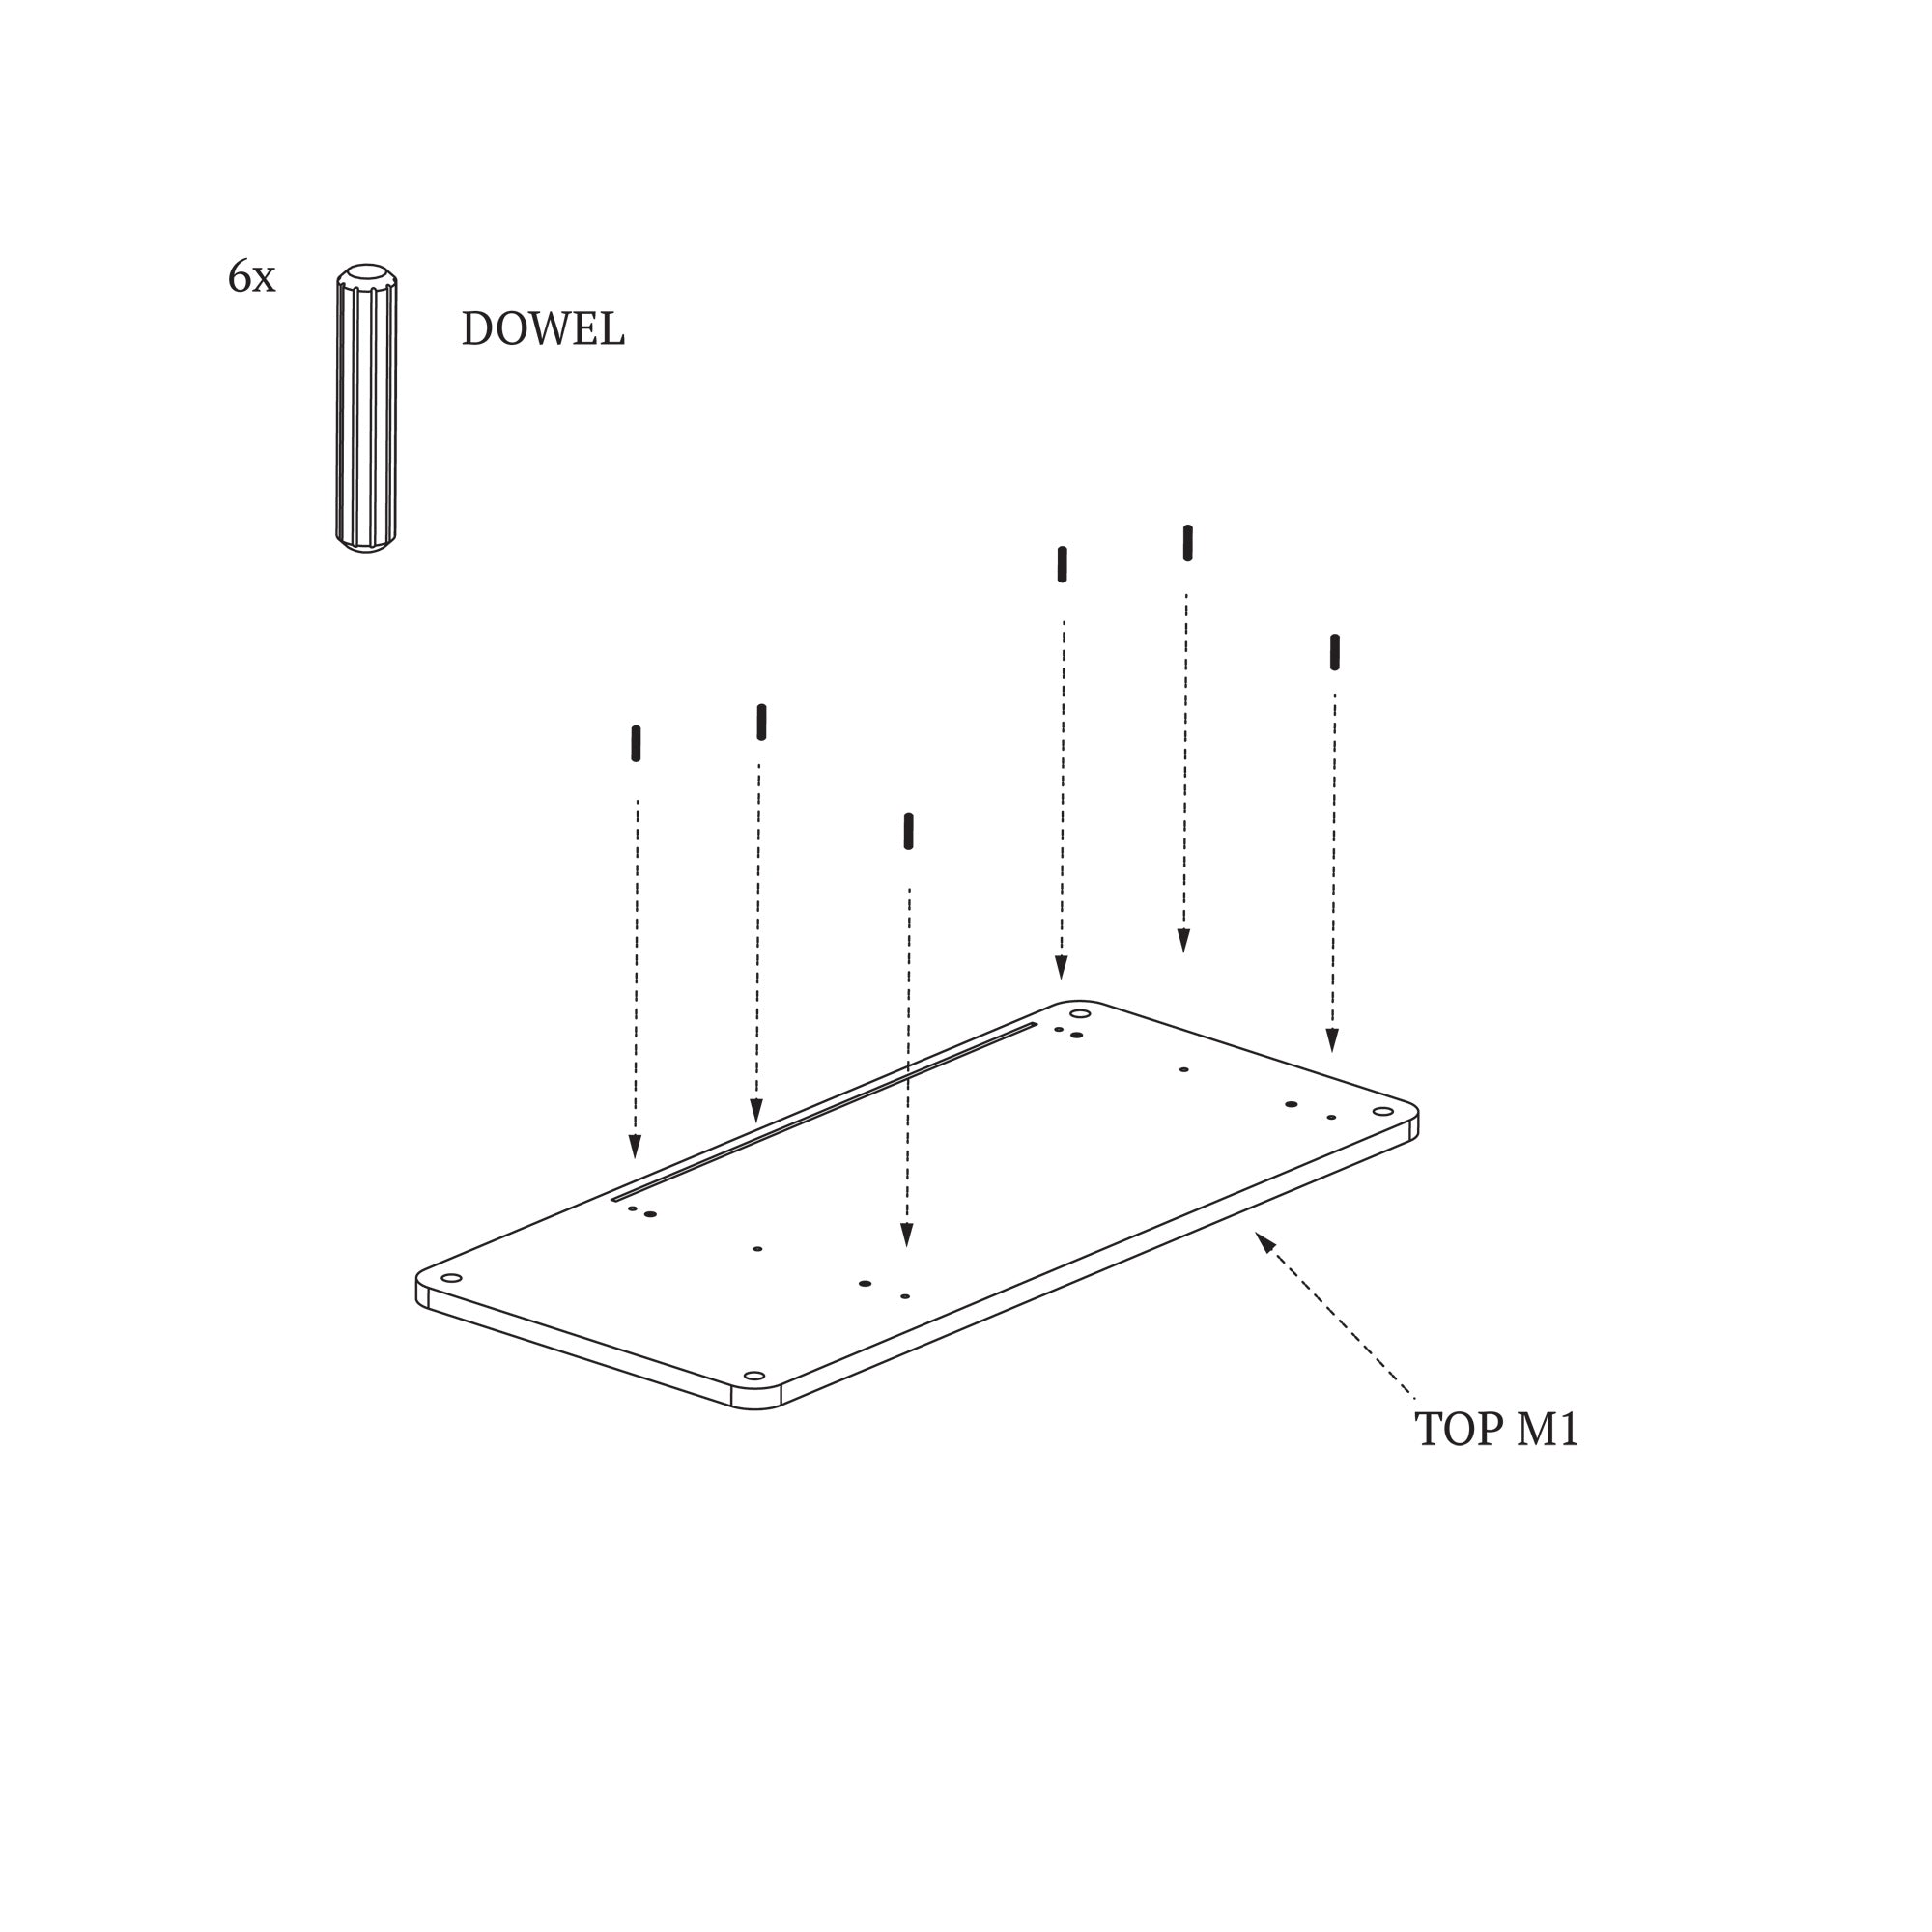
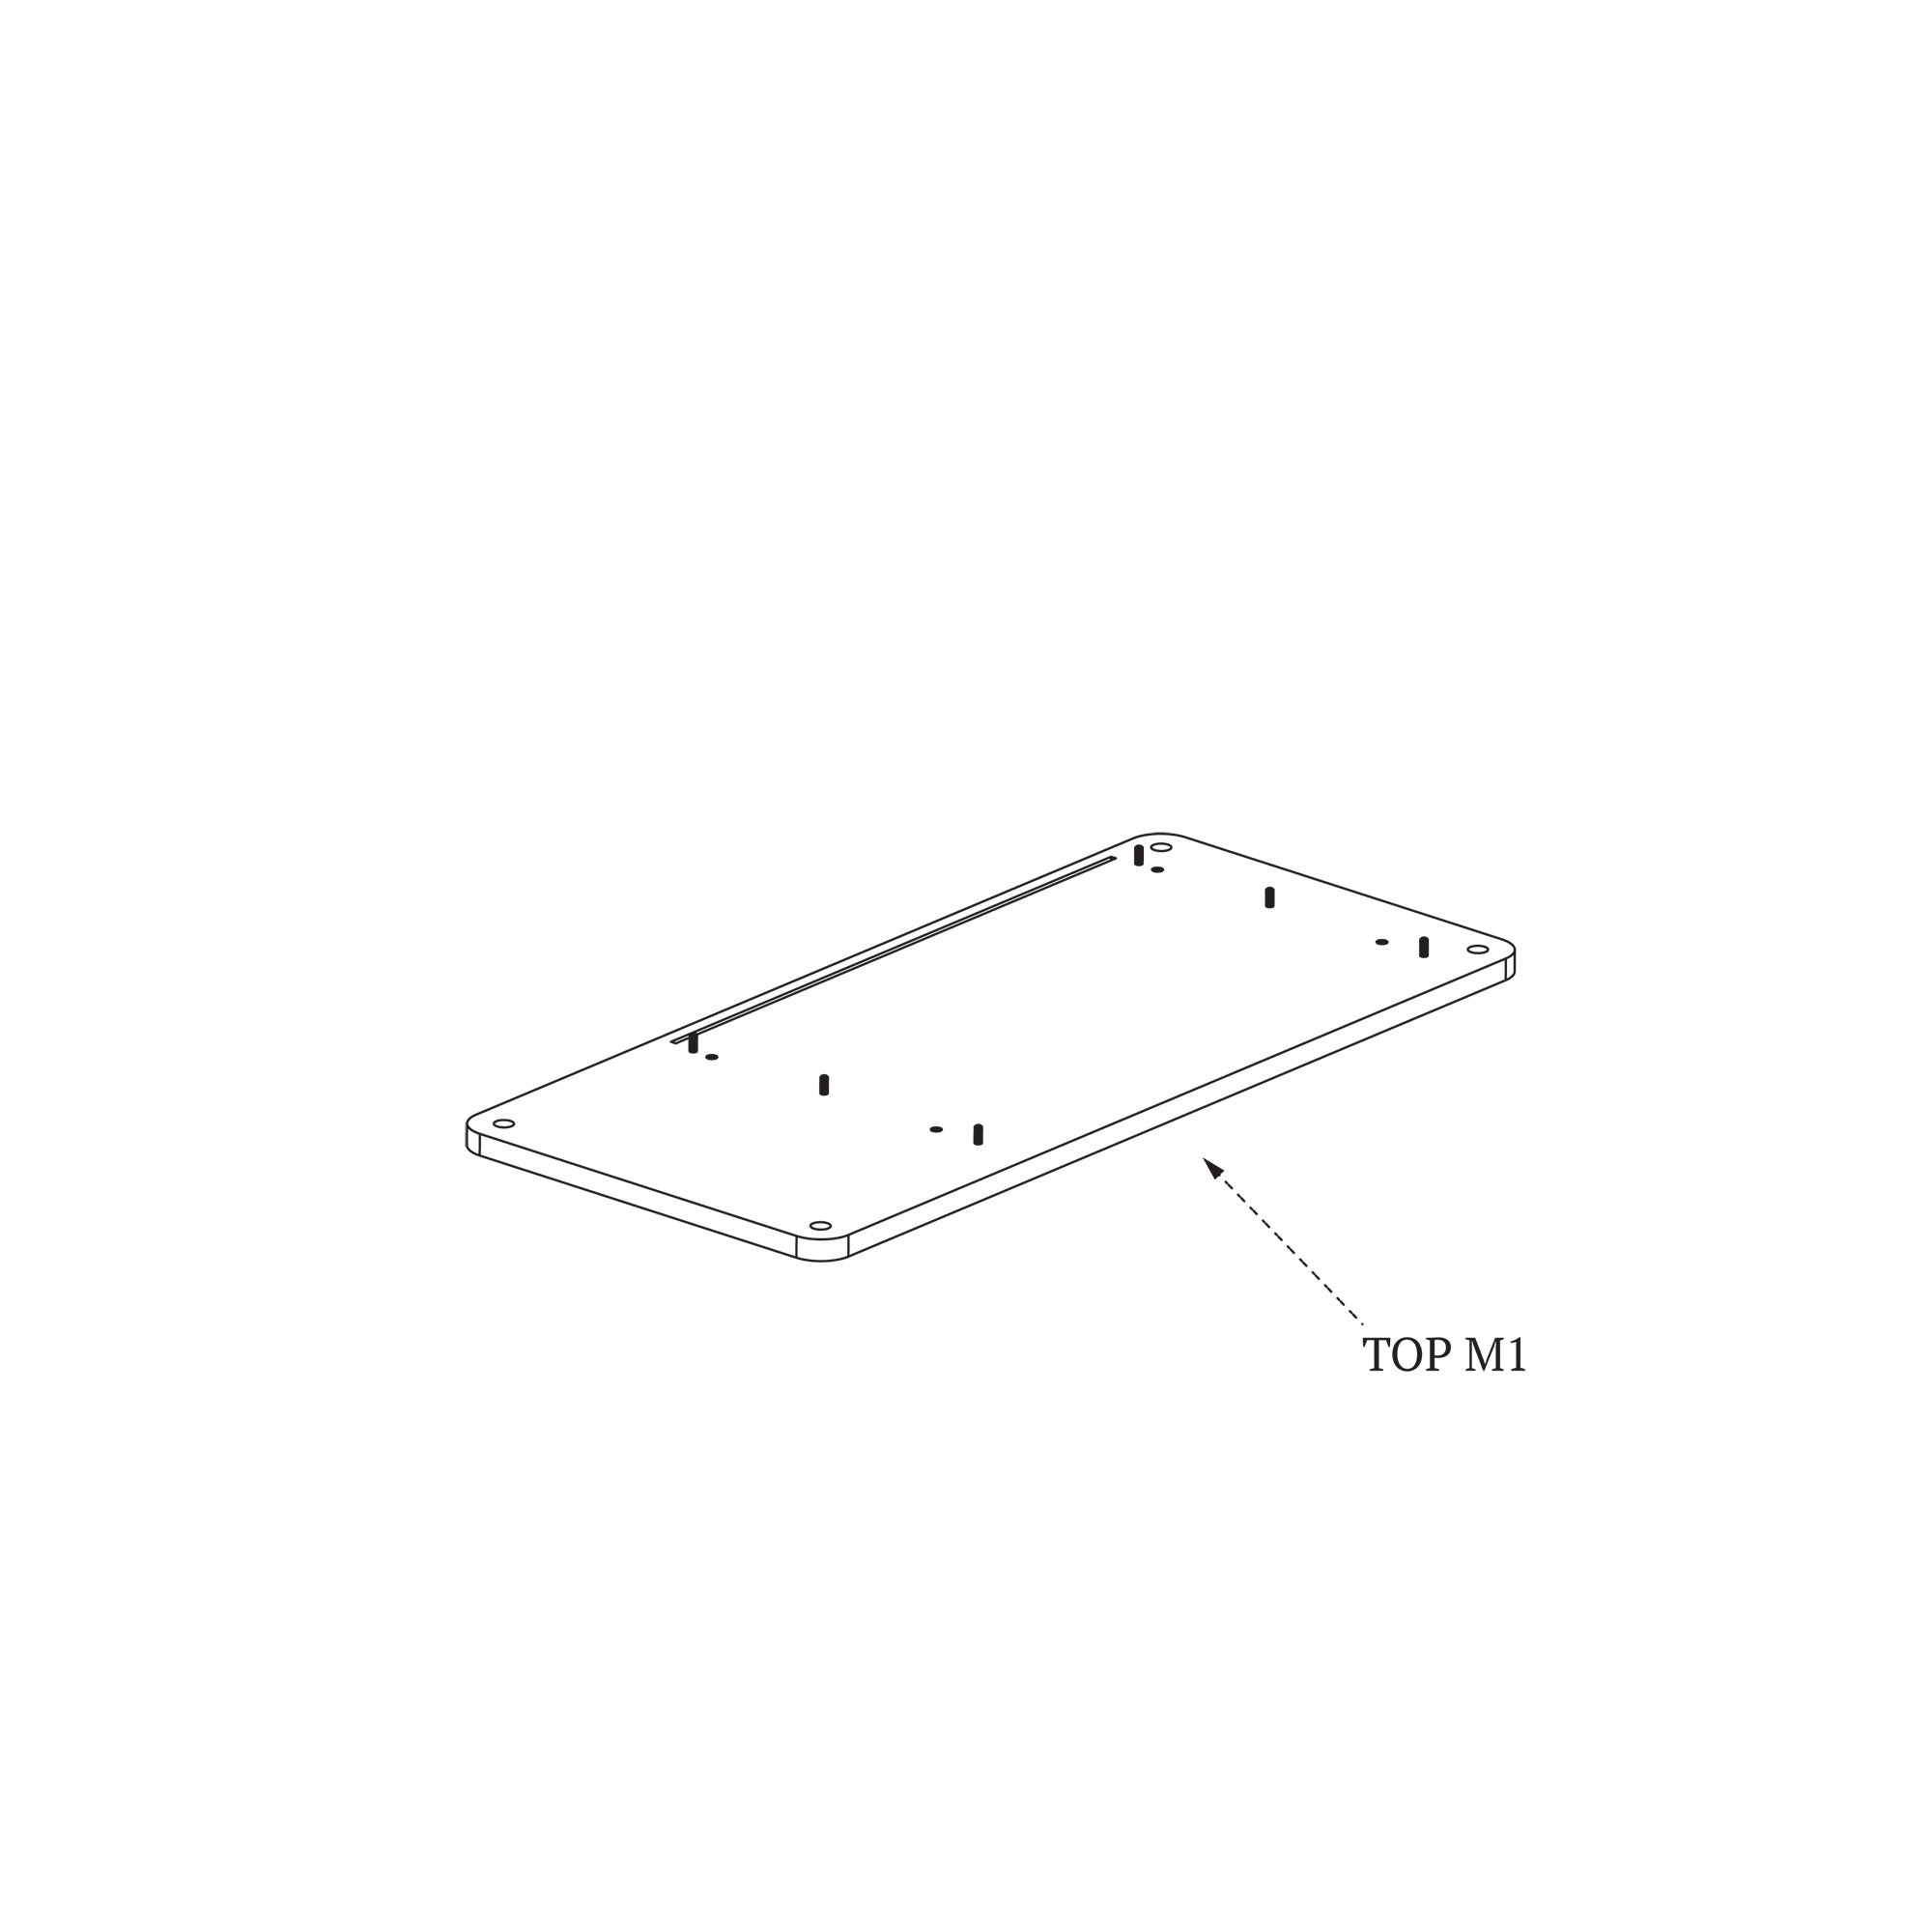
Start with the part that will be the top of our cabinet. Let's call it
TOP M1. Place the table top with the holes facing up on a flat surface
and prepare carpentry pegs to insert them into the indicated holes.
STEP 4
The dowels should be inserted to the end of the hole and protrude an equal distance from the countertop.
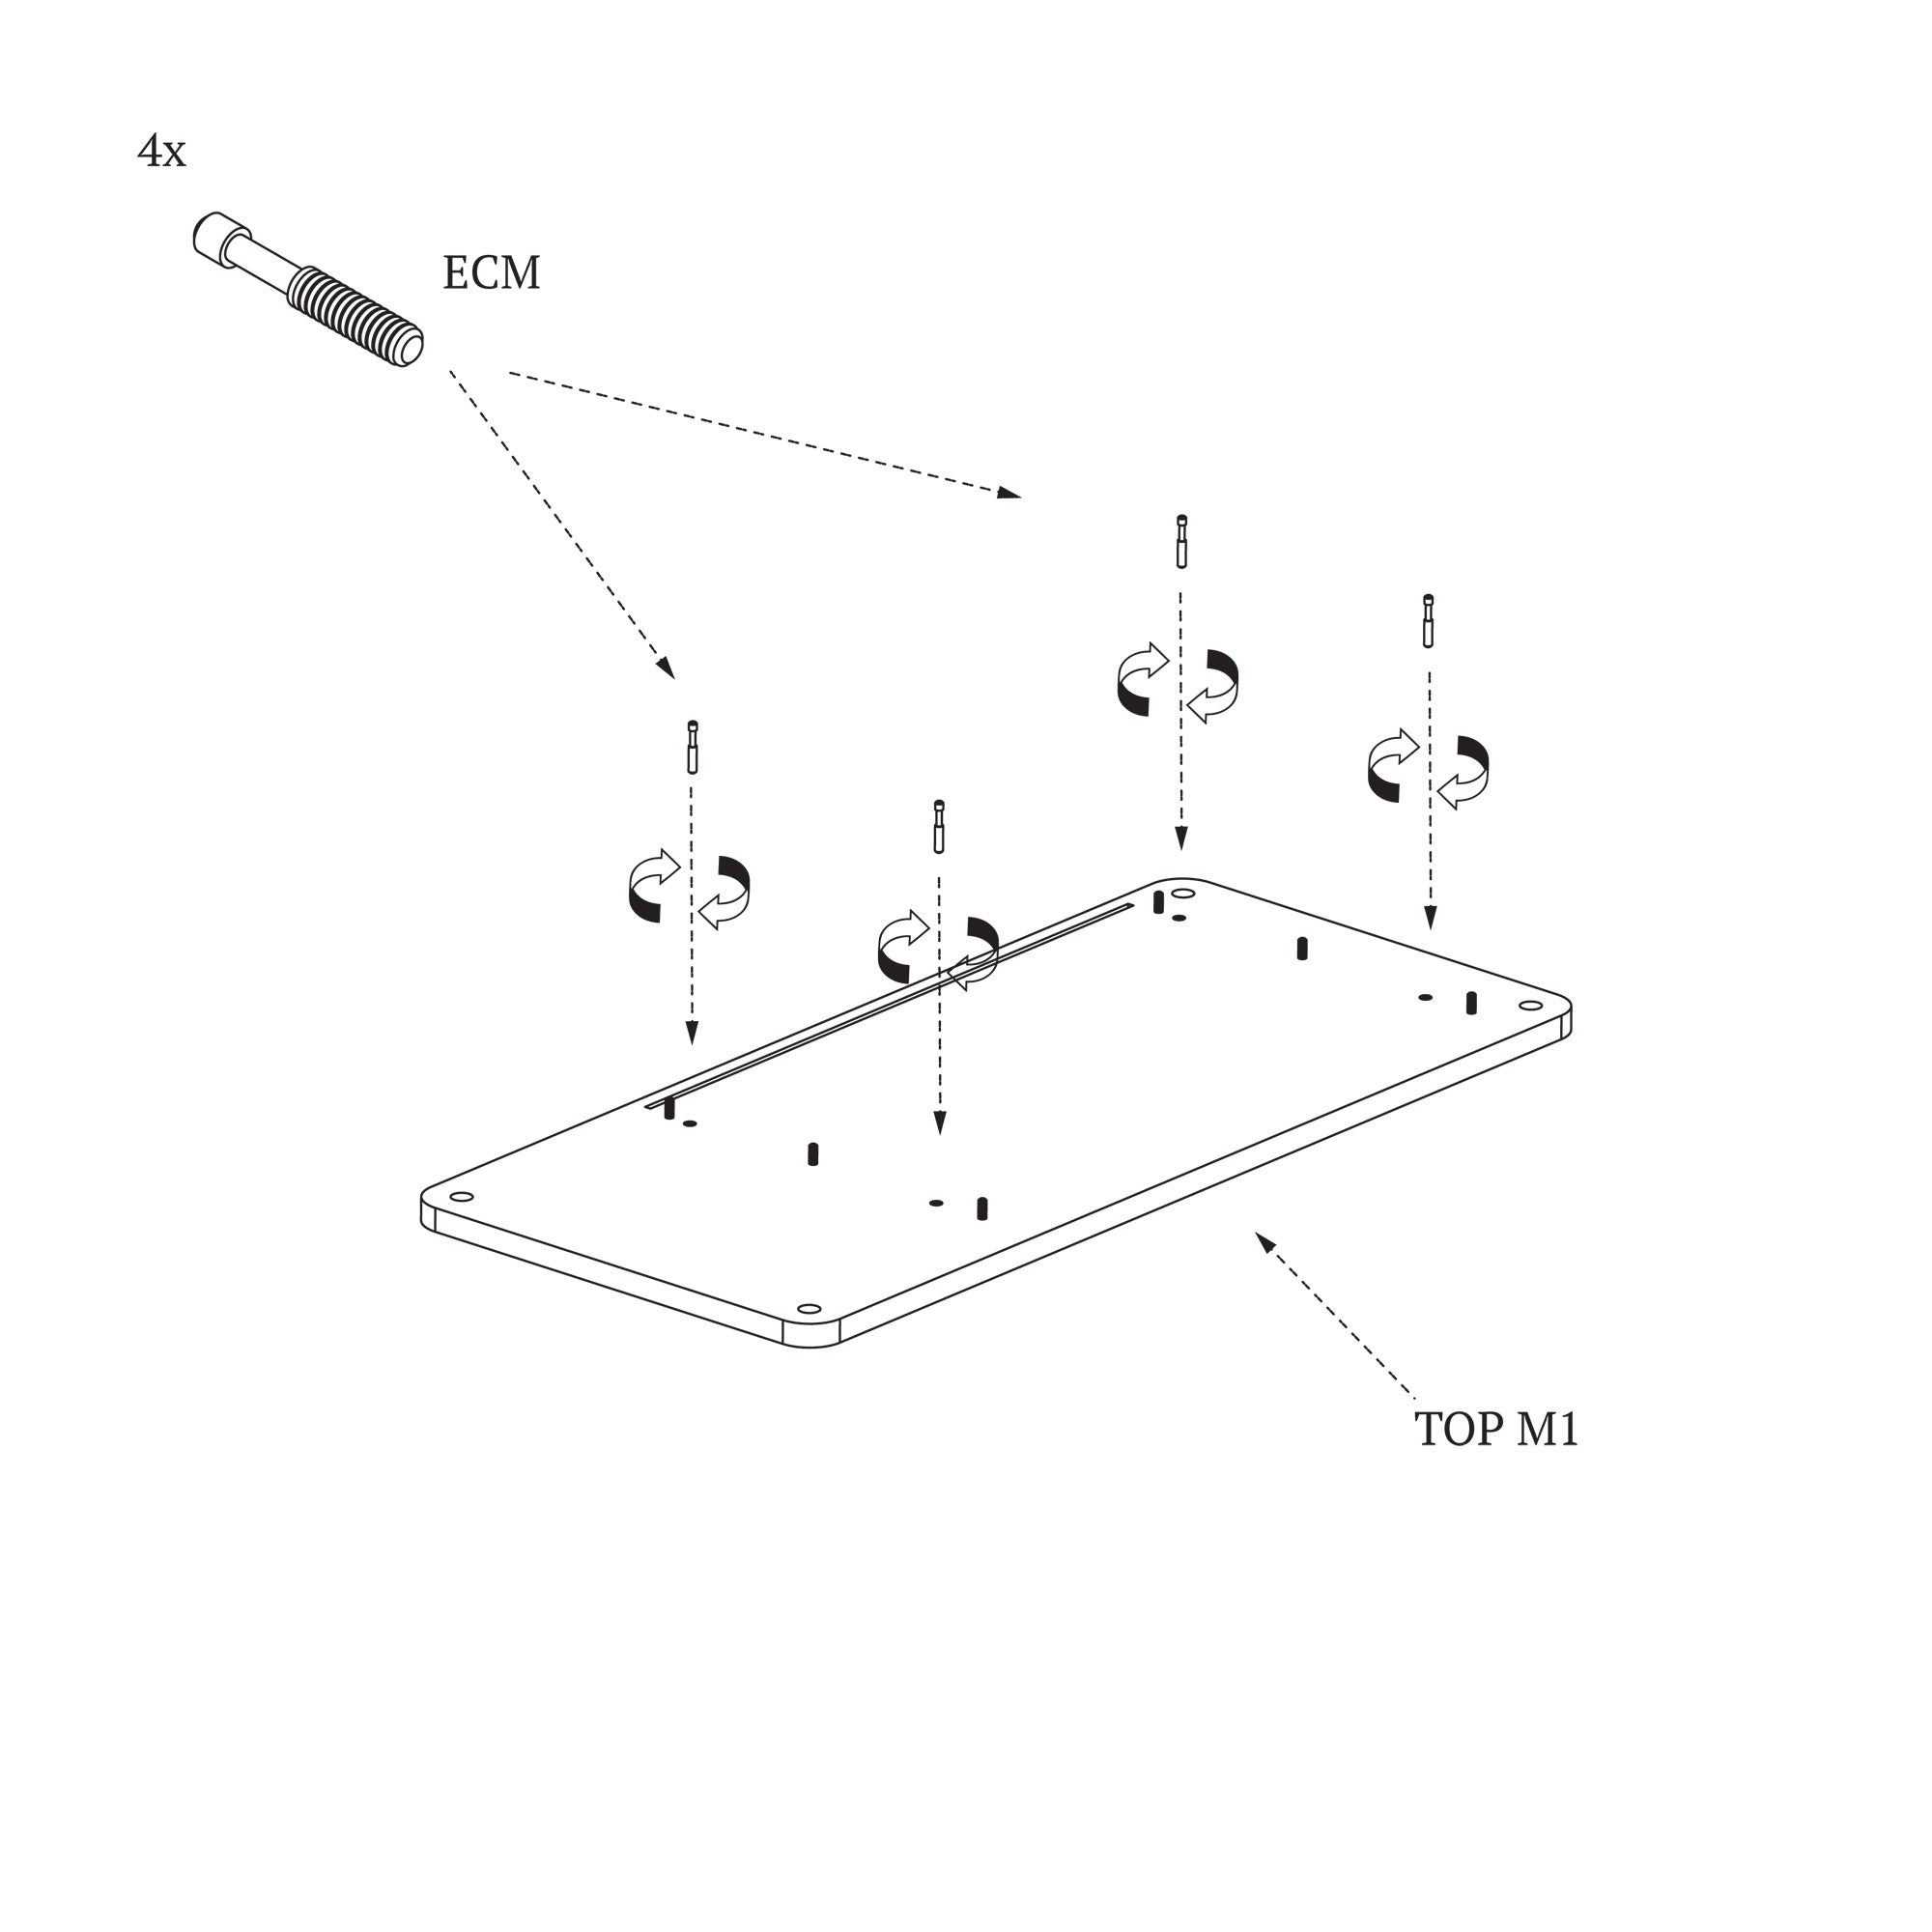
STEP 5
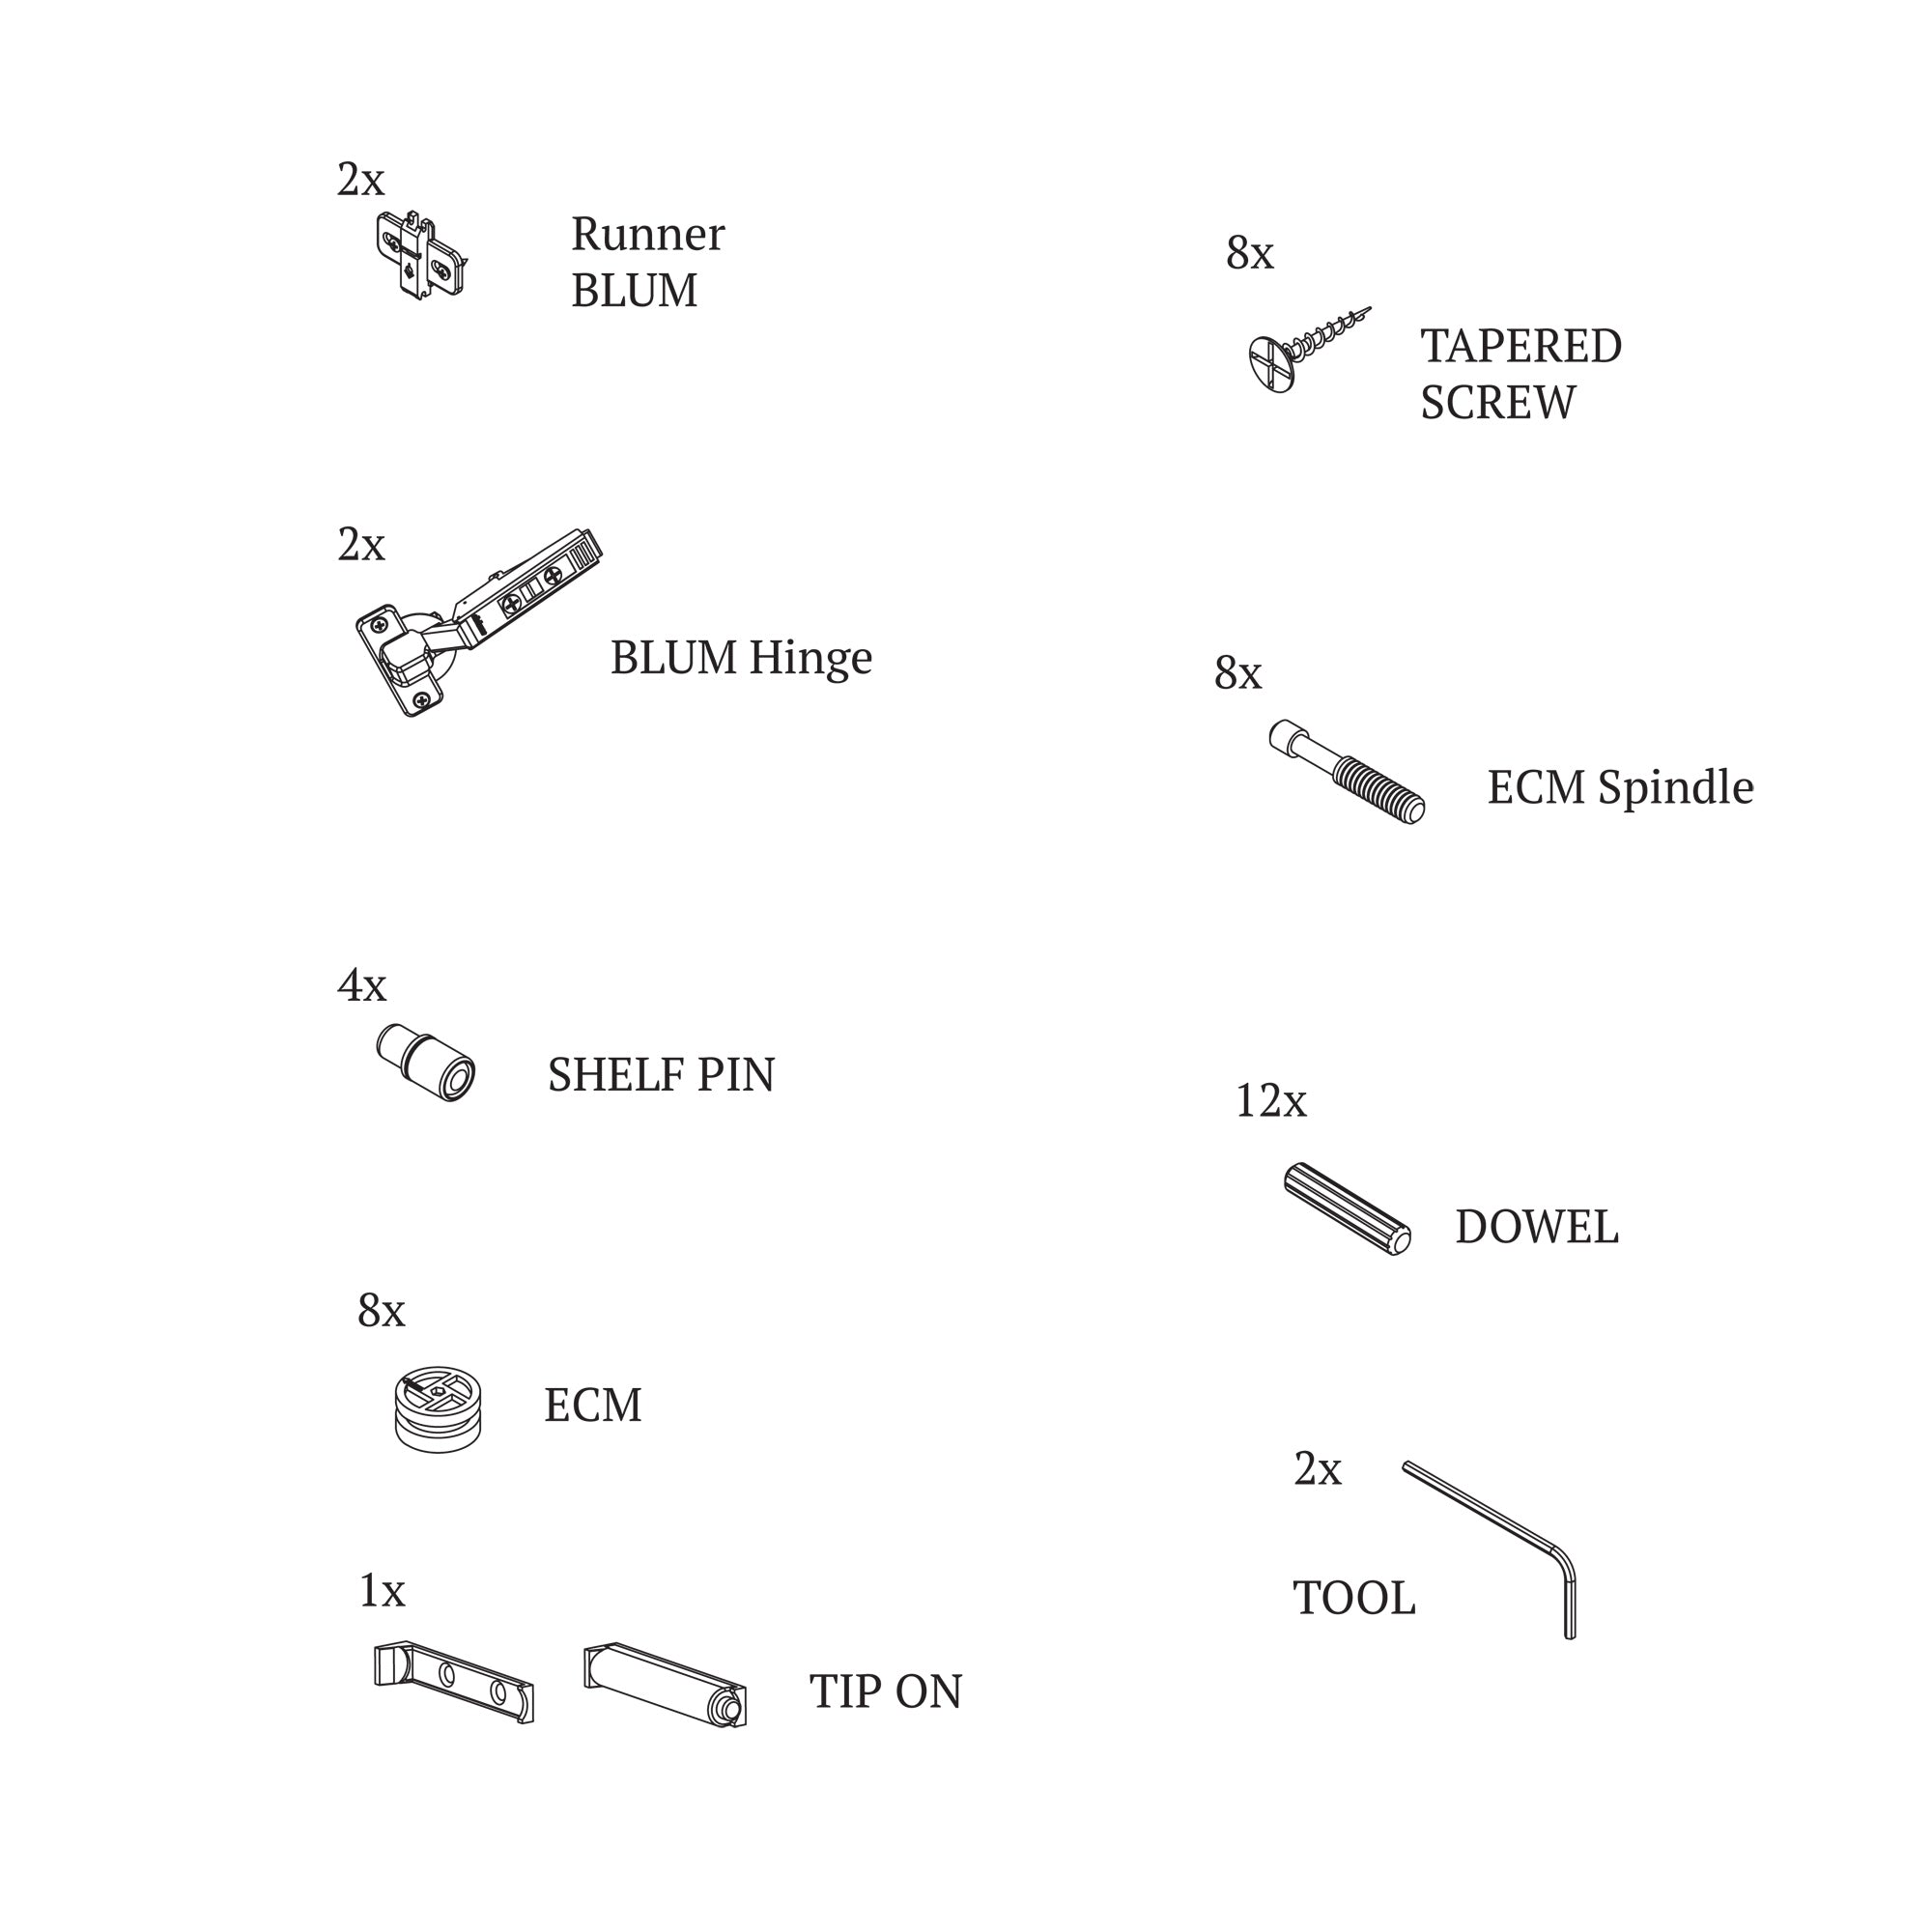
Then place the ECM pins in the threaded sockets in the countertop. You
can screw them in by hand. In case of difficulty, use the tool.
STEP 6
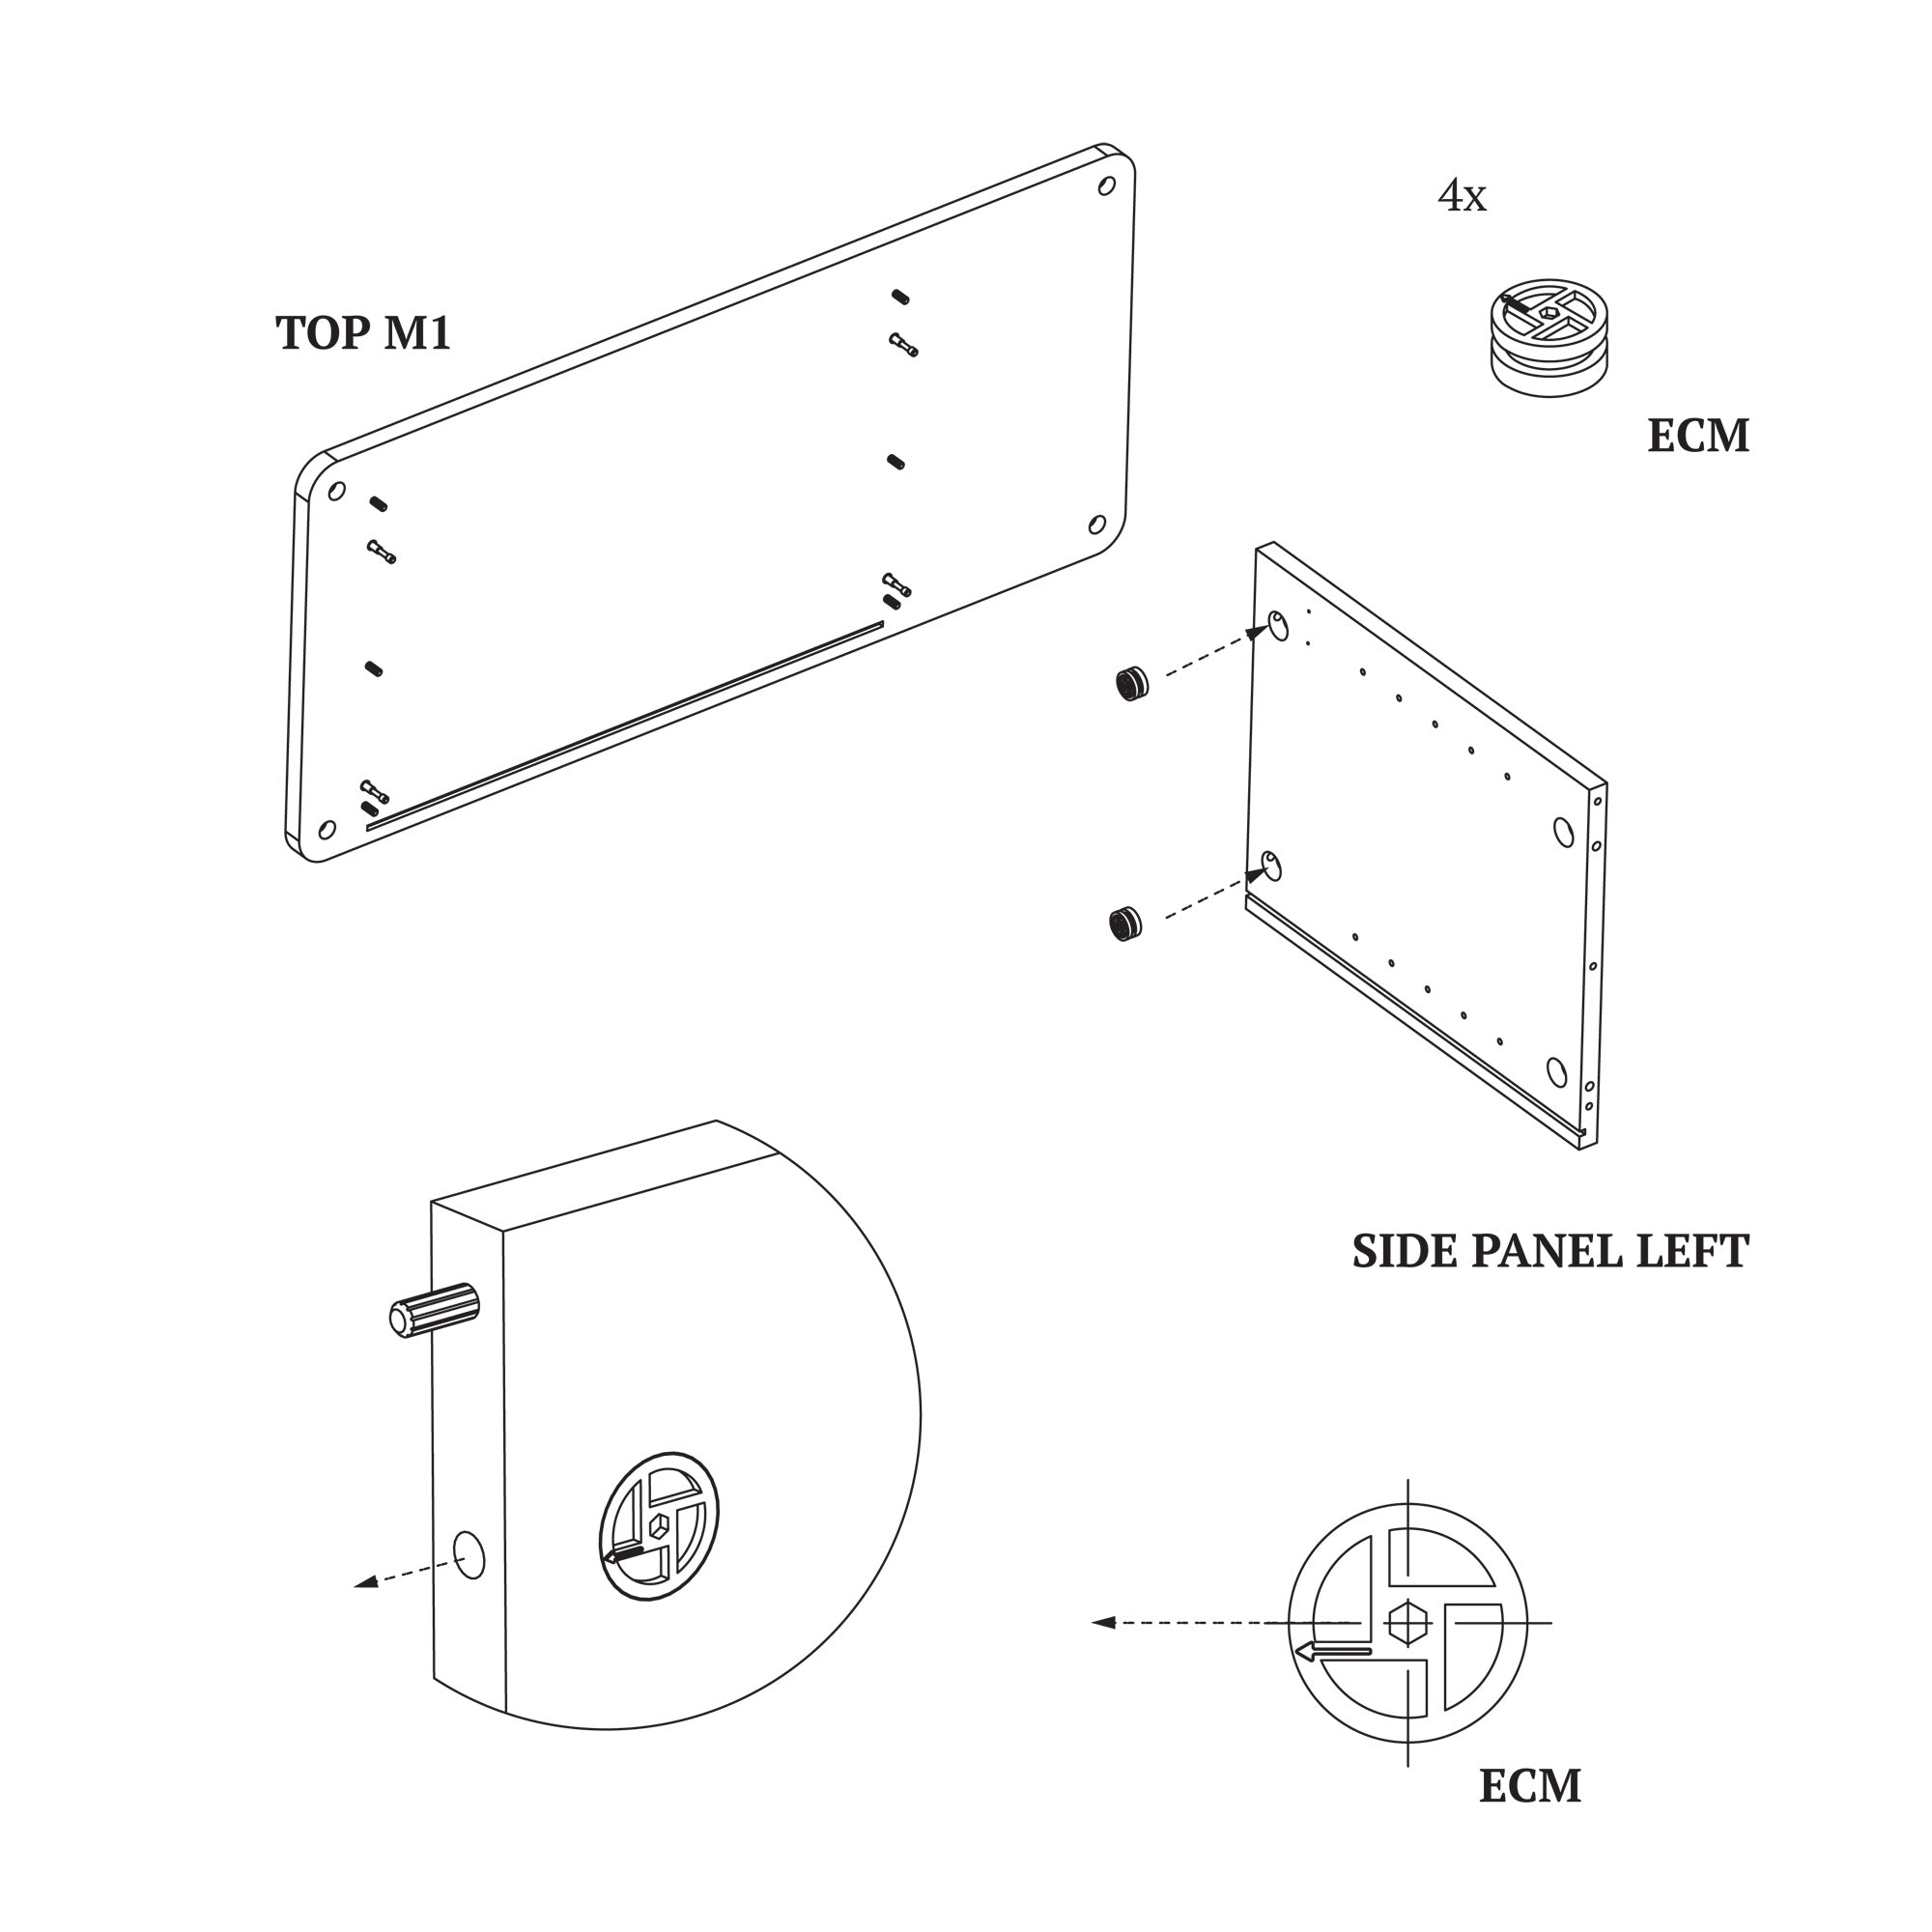
The next step is to mount the ECM discs in the holes in the side walls.
Each ECM eccentric disc has an arrow on its surface. Place the disc so
that the arrow is visible and points in the direction of the pin hole.
Only then will you be able to slide the wall onto the pins.
STEP 7
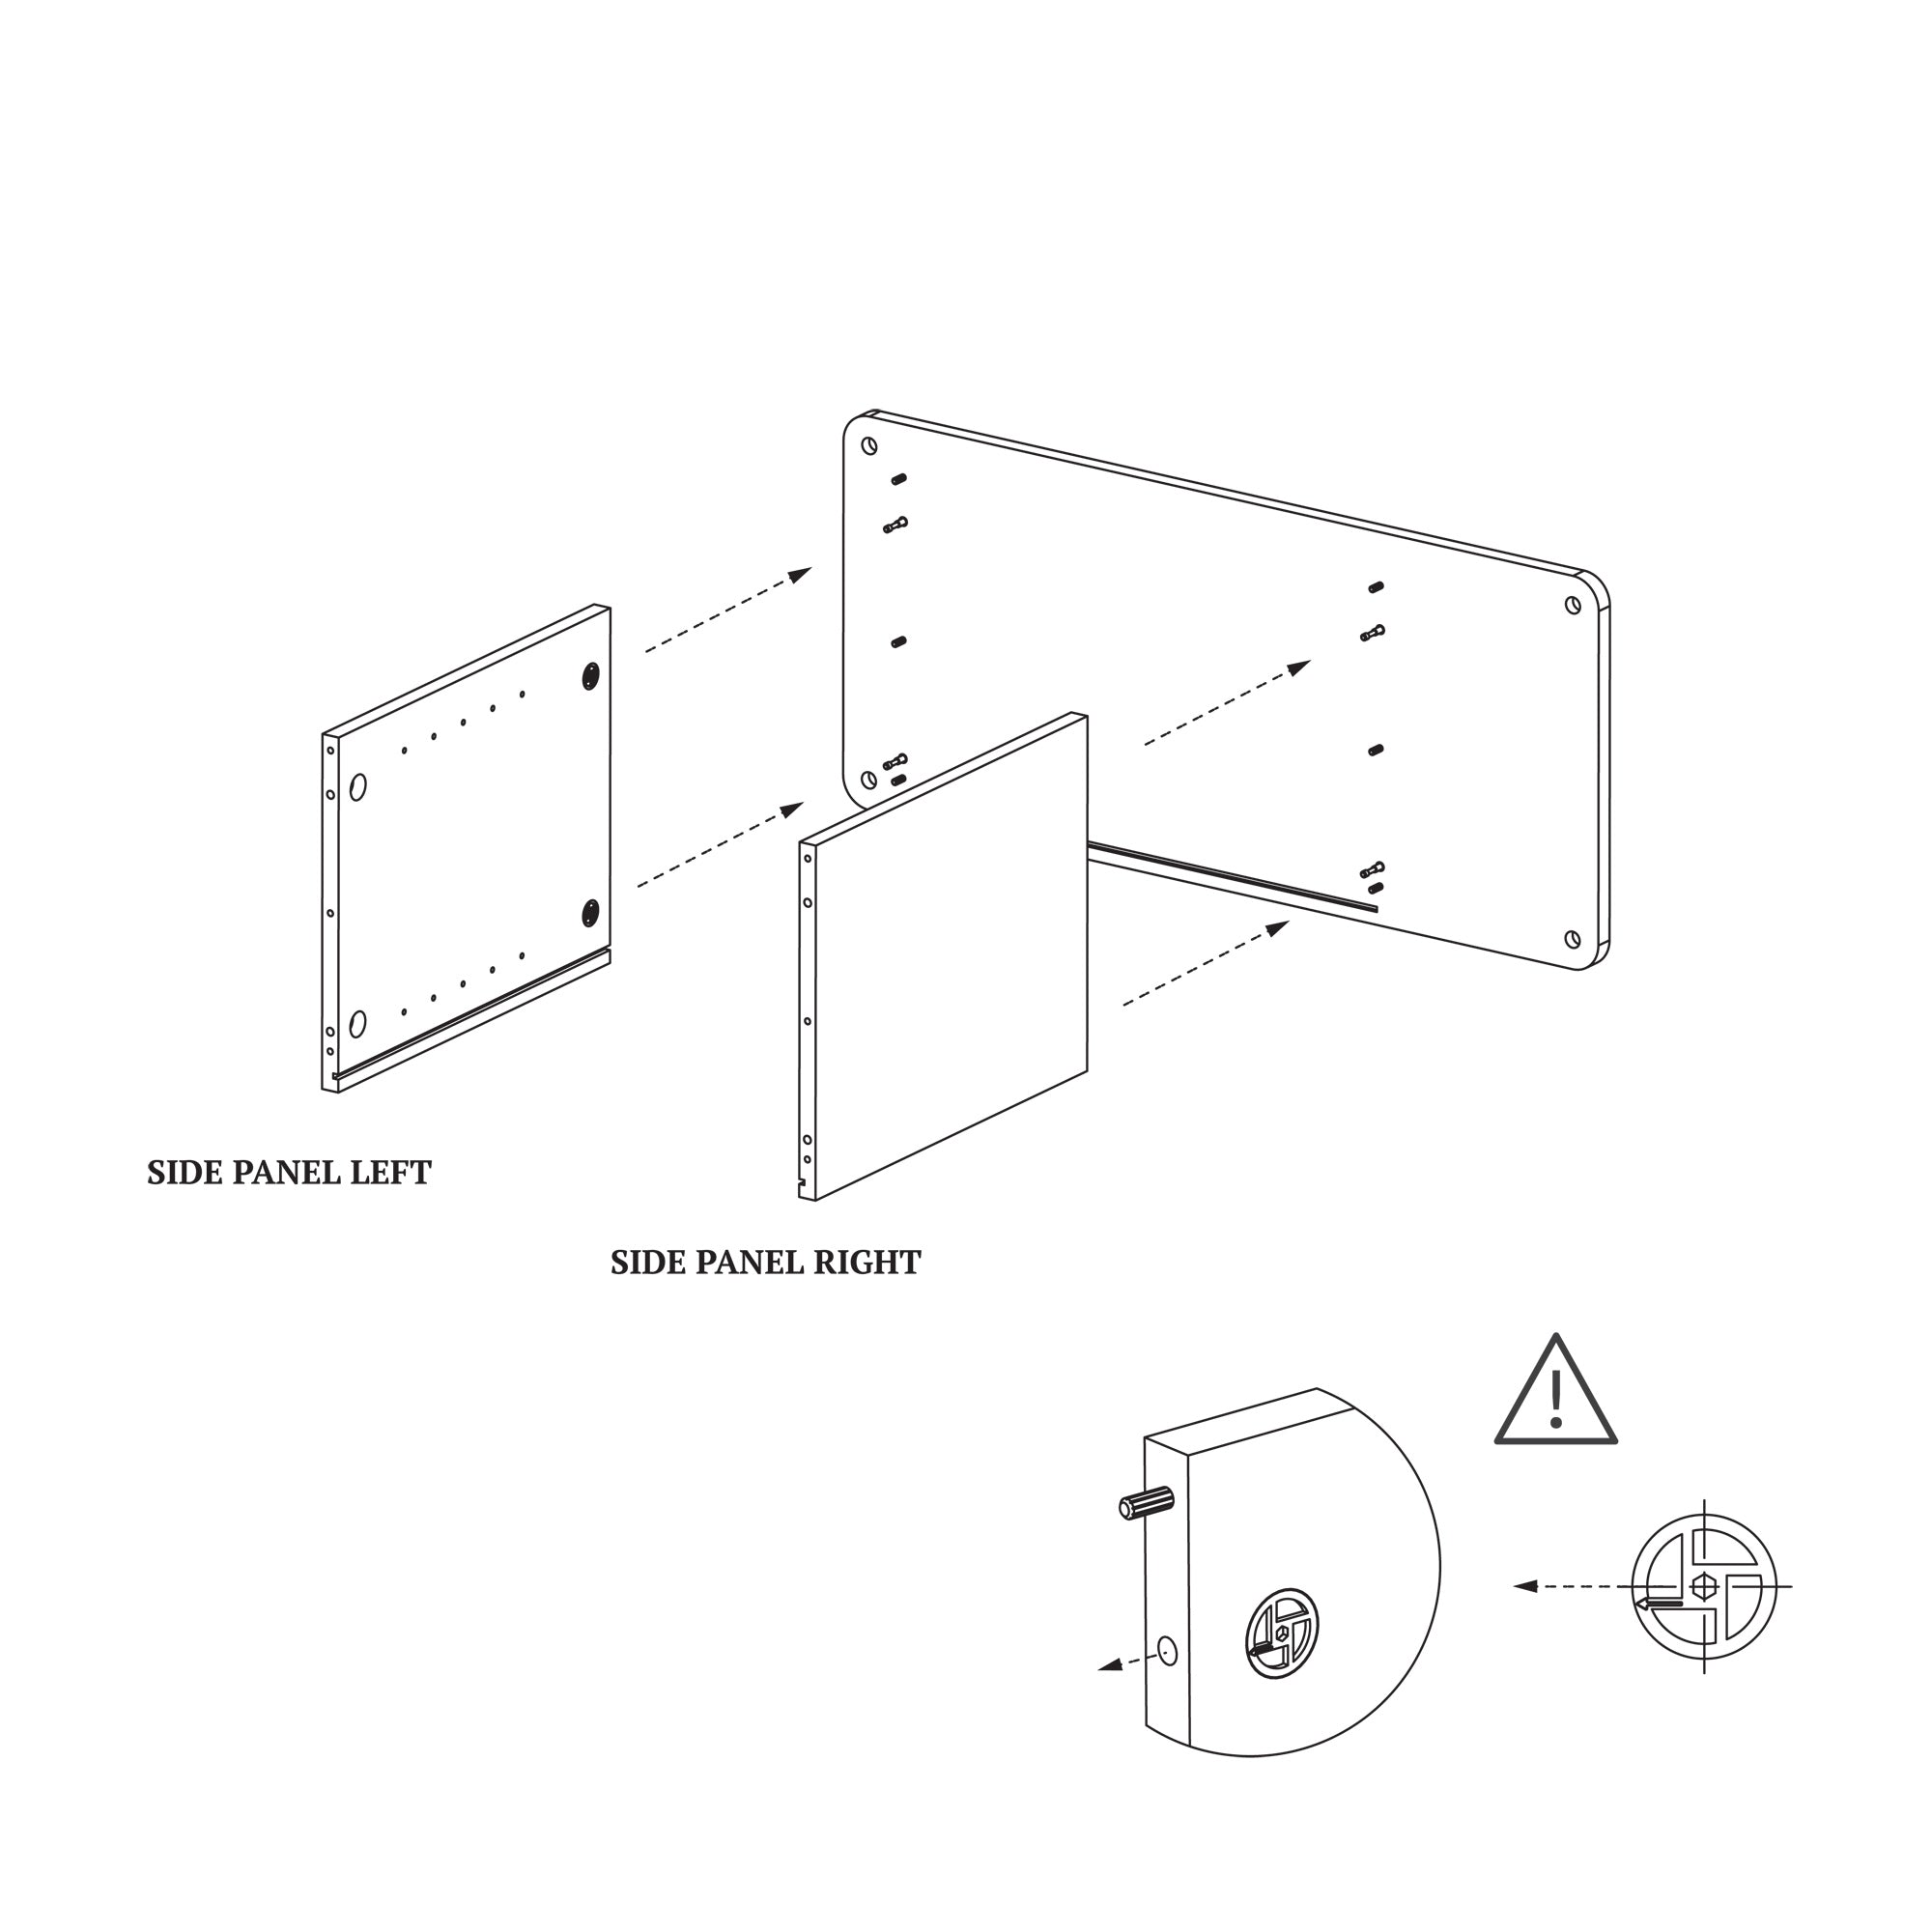
Both walls, the so-called Side Panel Left/Right, left and right with
embedded ECM eccentrics can be slid onto the pins. It is important that
the rebate, i.e. the gap on the walls, is located on the side of the gap
on the countertop to which we are adding the walls. After pushing the
walls in, use the tool to tighten the eccentrics, which will tighten and
connect the walls with the countertop. Use the Allen key included in
the package to do this.
STEP 8
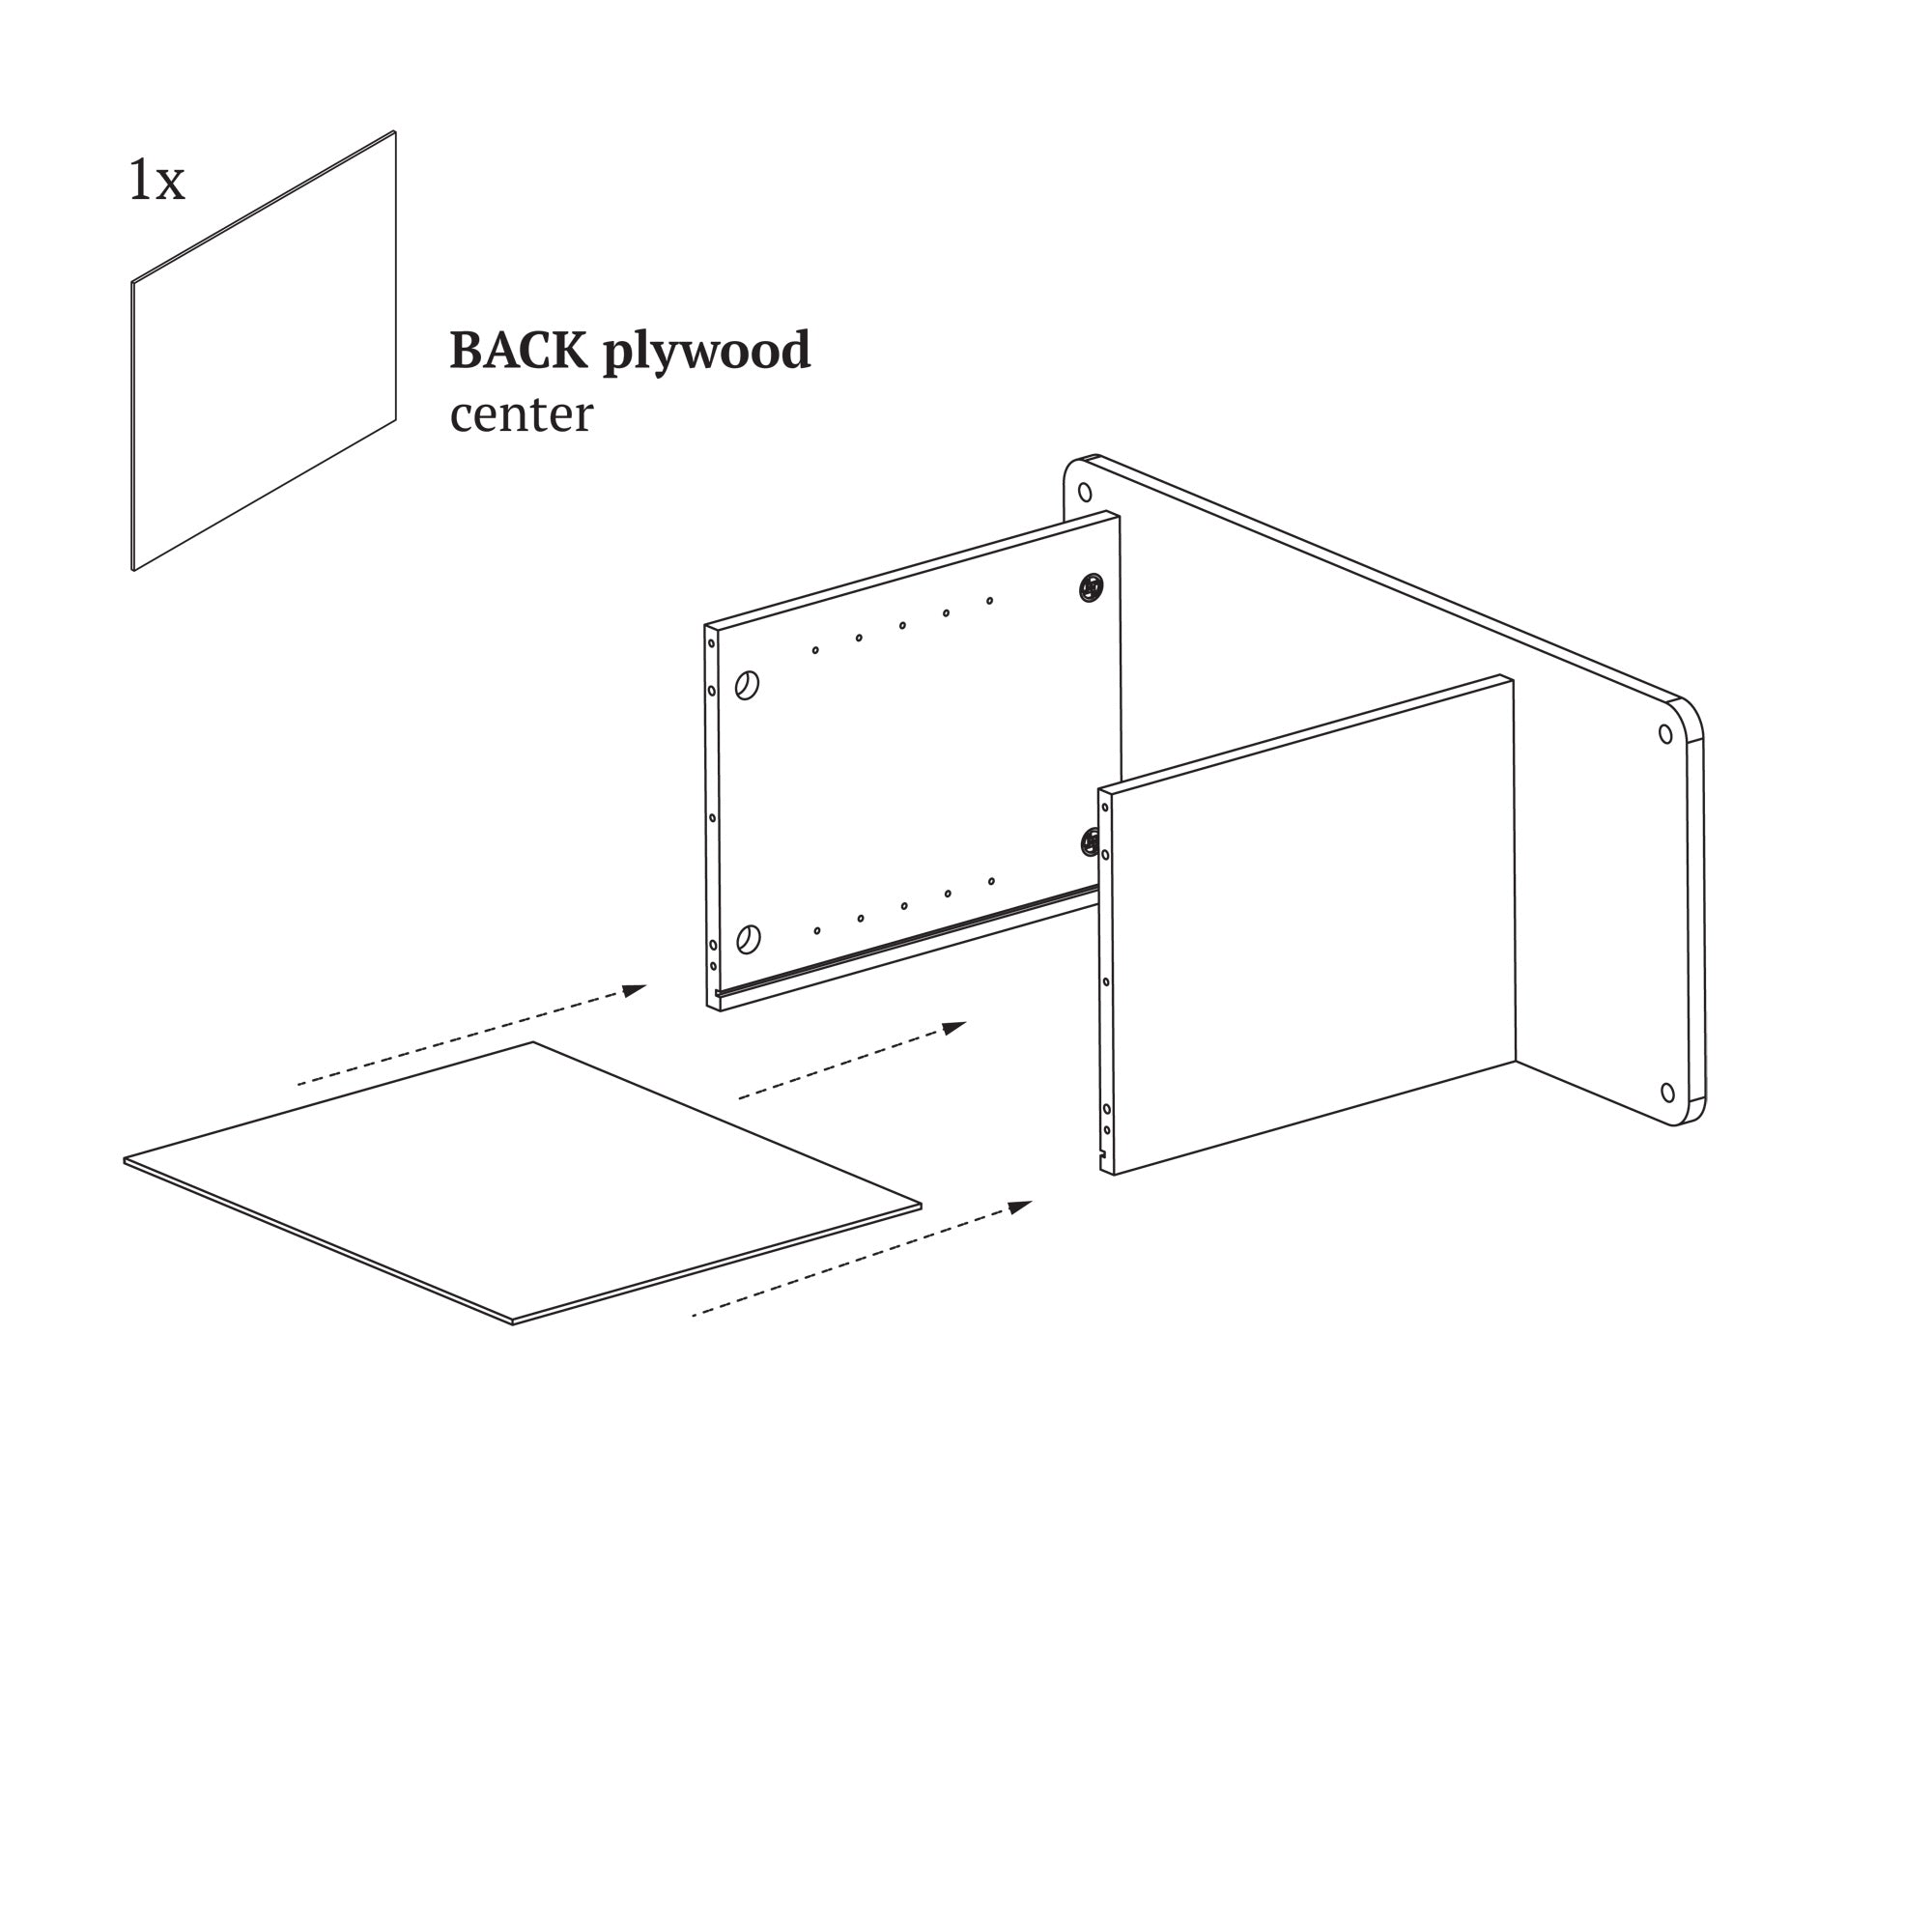
At this stage, we can place the back of the furniture (back plywood
center) in the wall gaps. Insert the plate into the slots and press so
that its edges also hide in the slot in the countertop. TOP M1

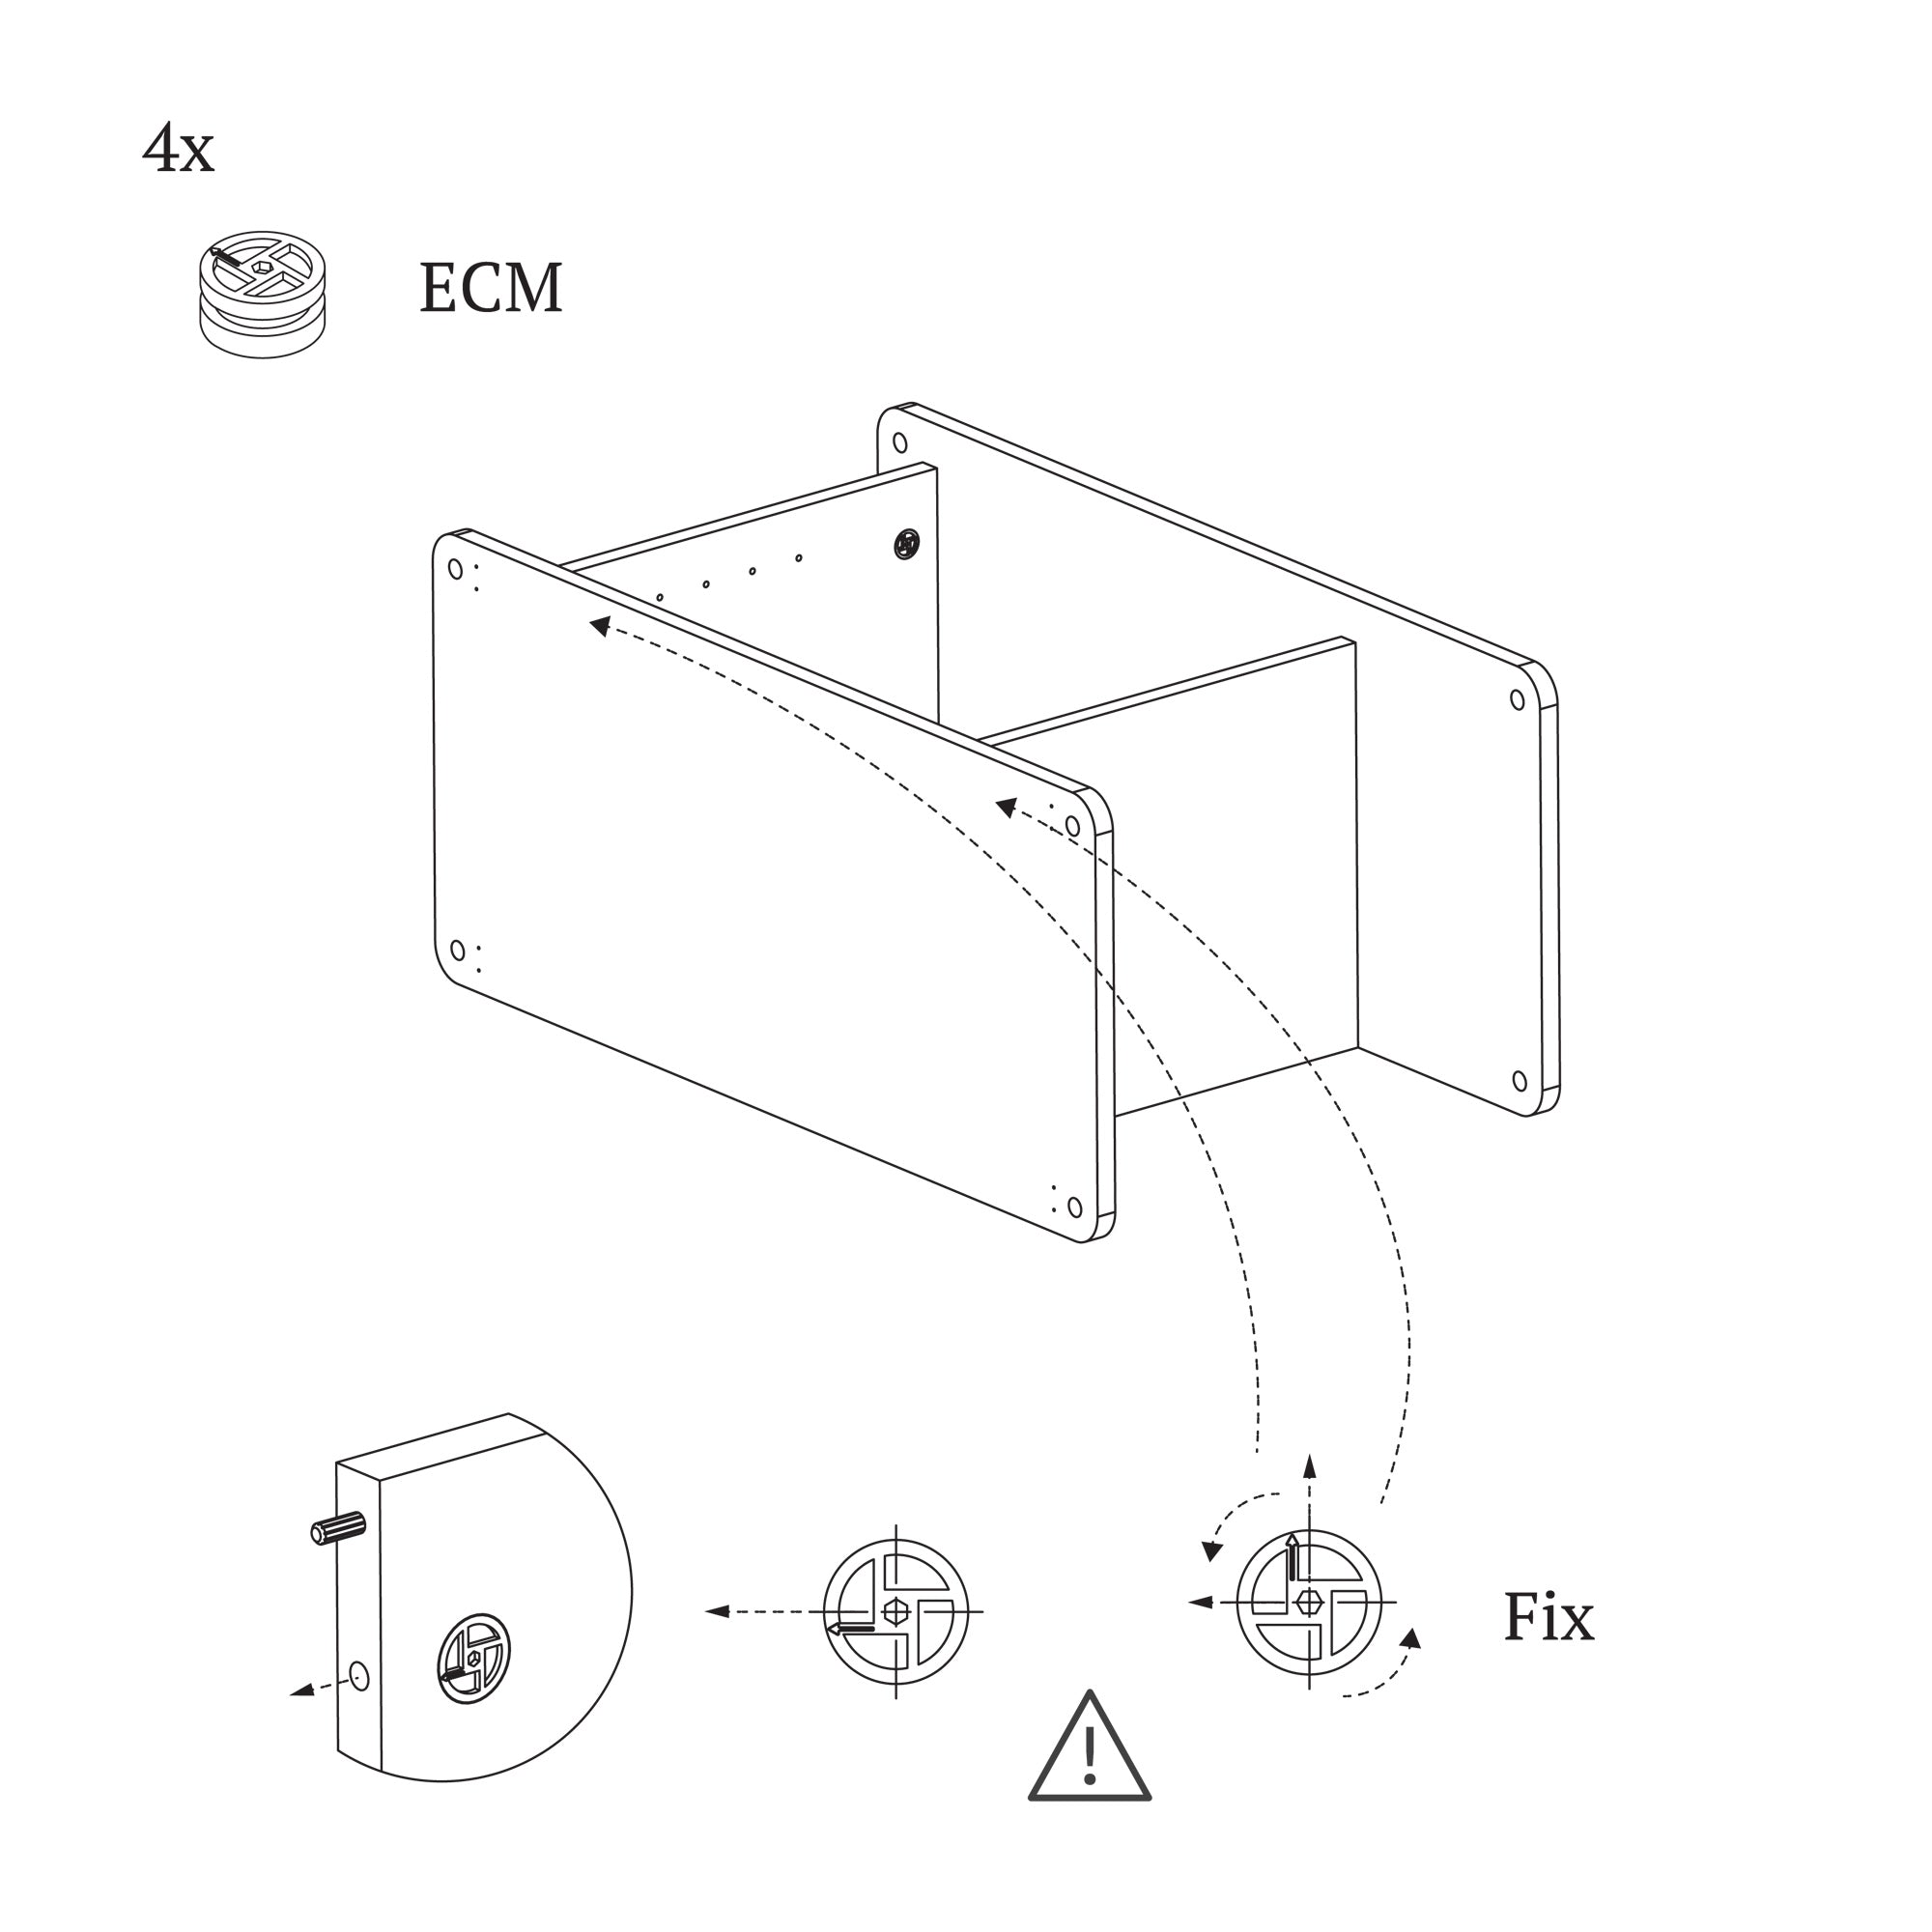
STEP 9
Now insert further carpentry pins (6 pcs.) and ECM eccentric discs (4
pcs.) into the side walls. Remember that, as before, the arrows on the
eccentrics point towards the hole.
STEP 10
It's time to assemble the bottom tabletop, i.e. the base of the
furniture. Place the base plate on the eccentrics. Press the board so
that it fits evenly onto the pins. After placing the plate on the pins
and pins of the eccentric, we can tighten the eccentrics by pulling the
plate to the structure. Make sure each eccentric is properly tightened
and there is a noticeable offset during tightening.
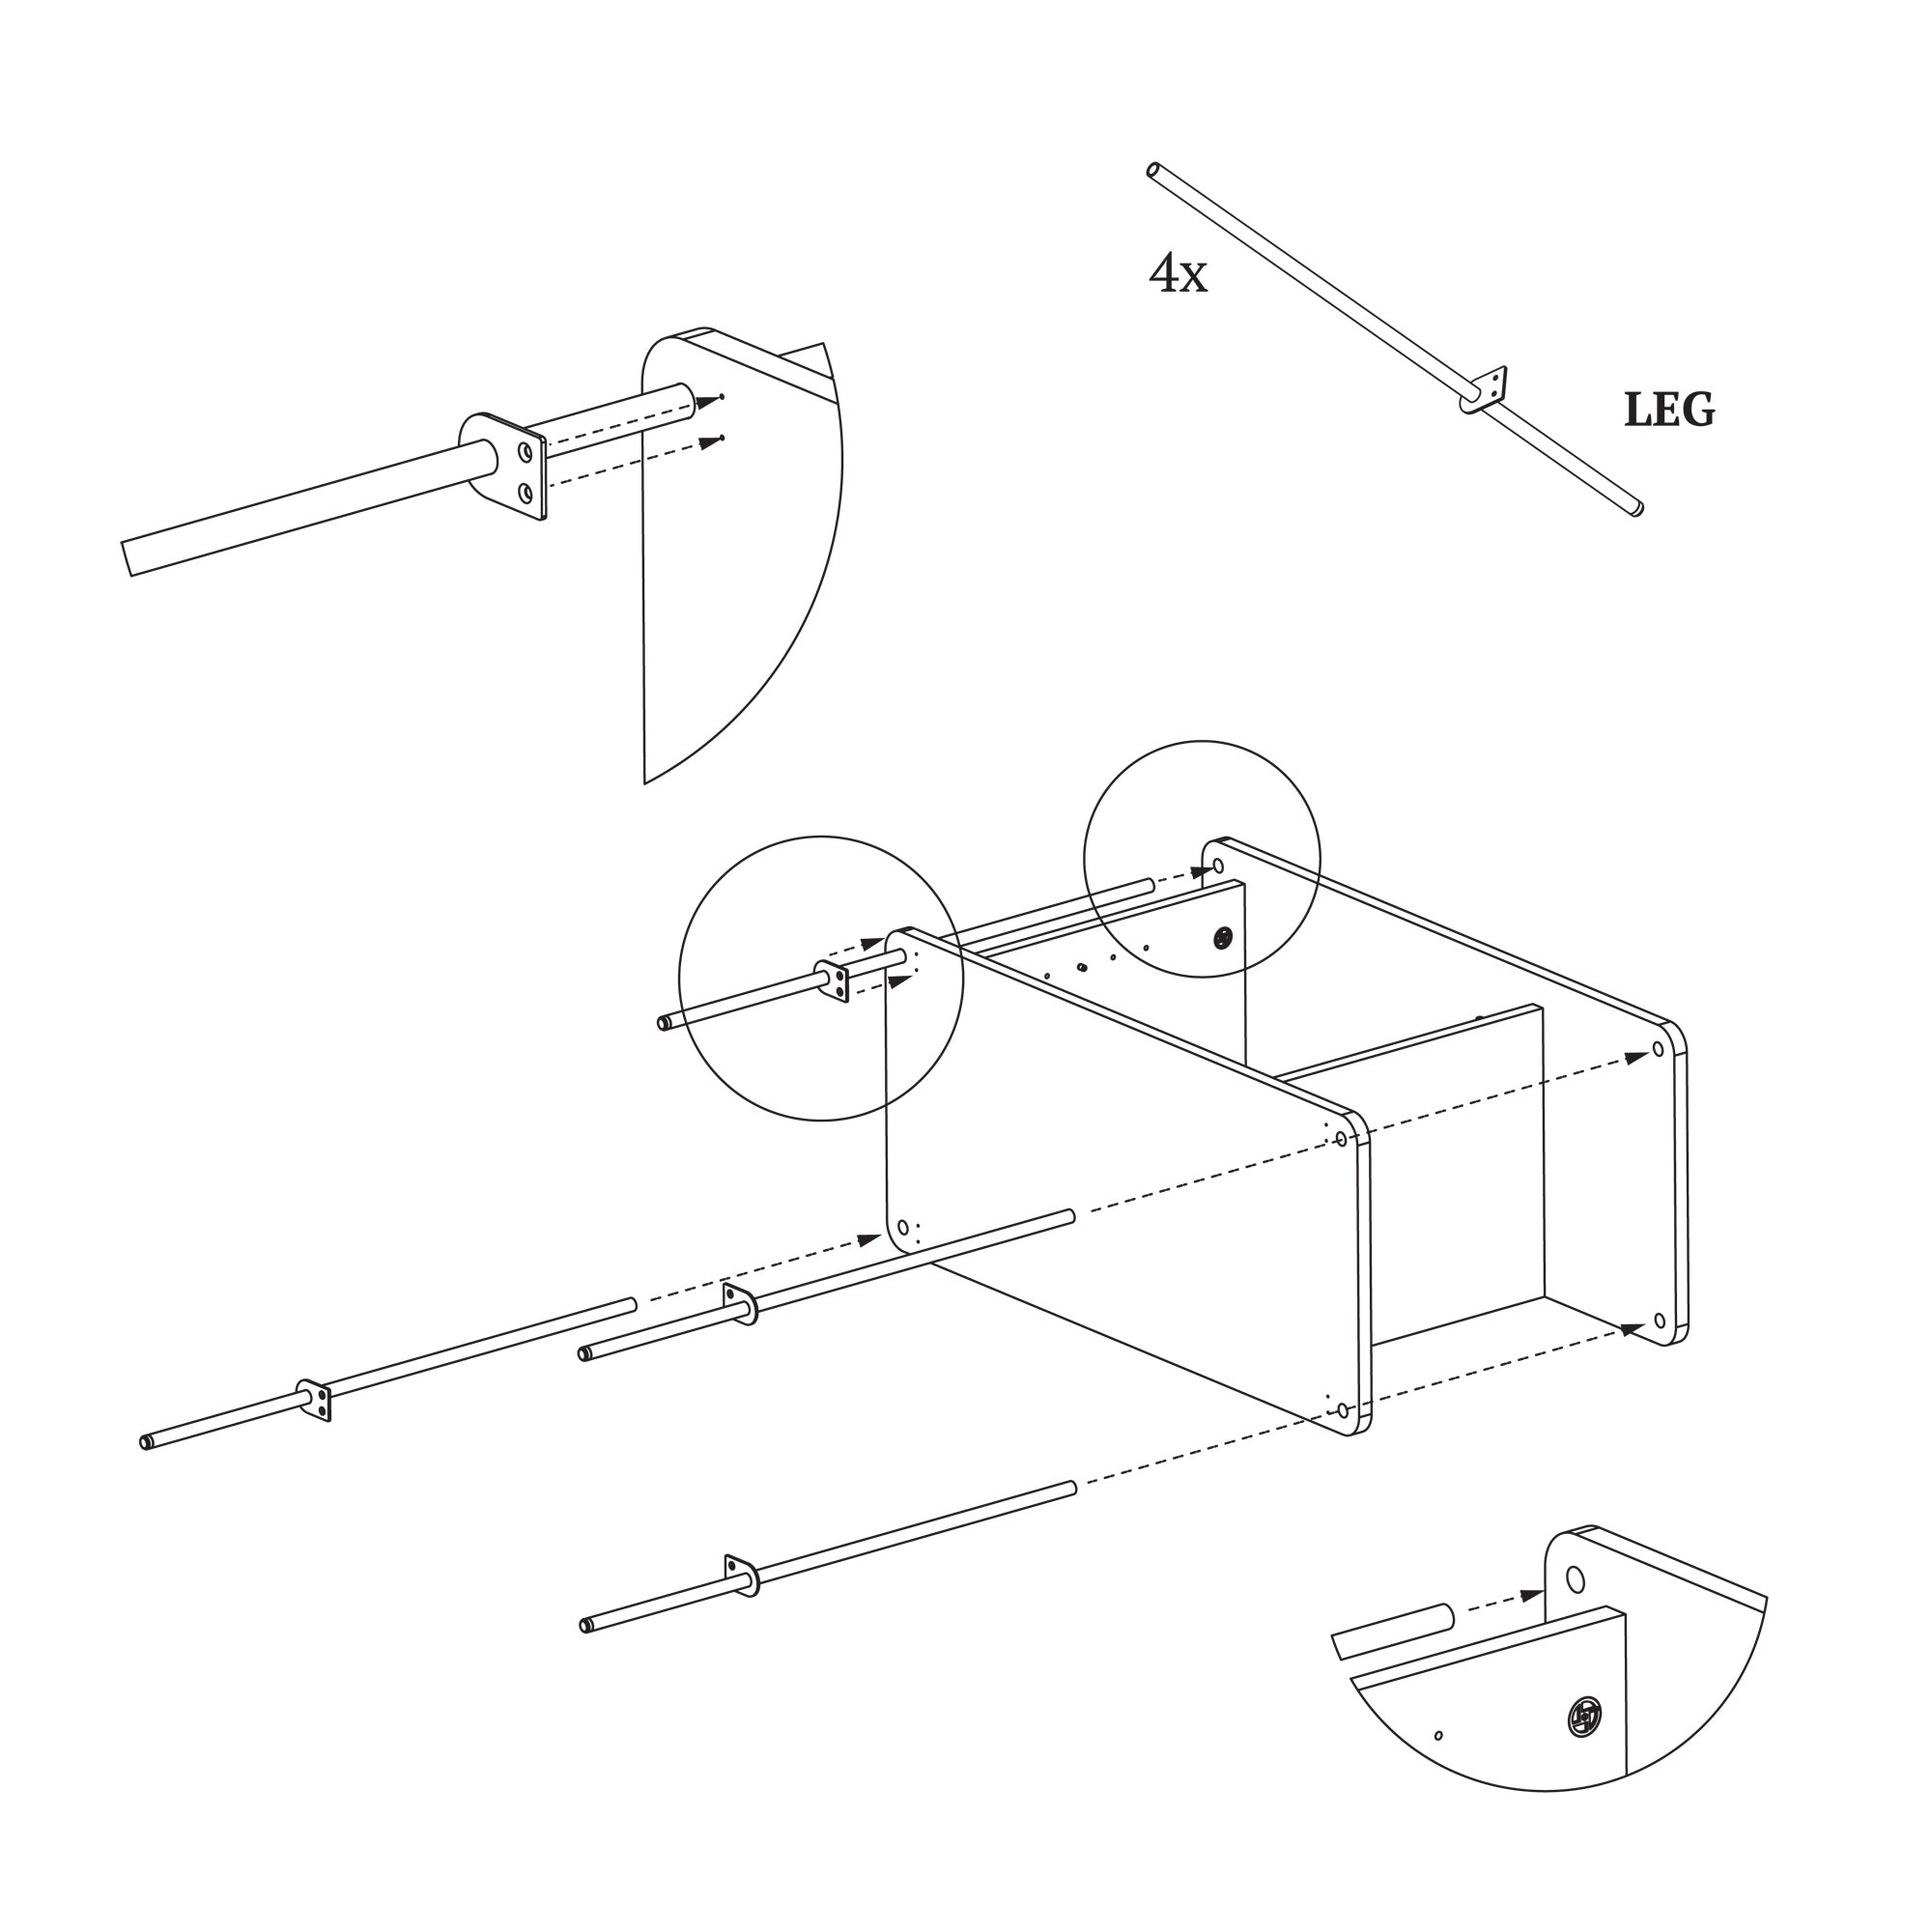
STEP 11
Carefully insert the steel legs into the holes in the boards. Insert the
legs one by one, trying not to scratch the painted surface of the legs.
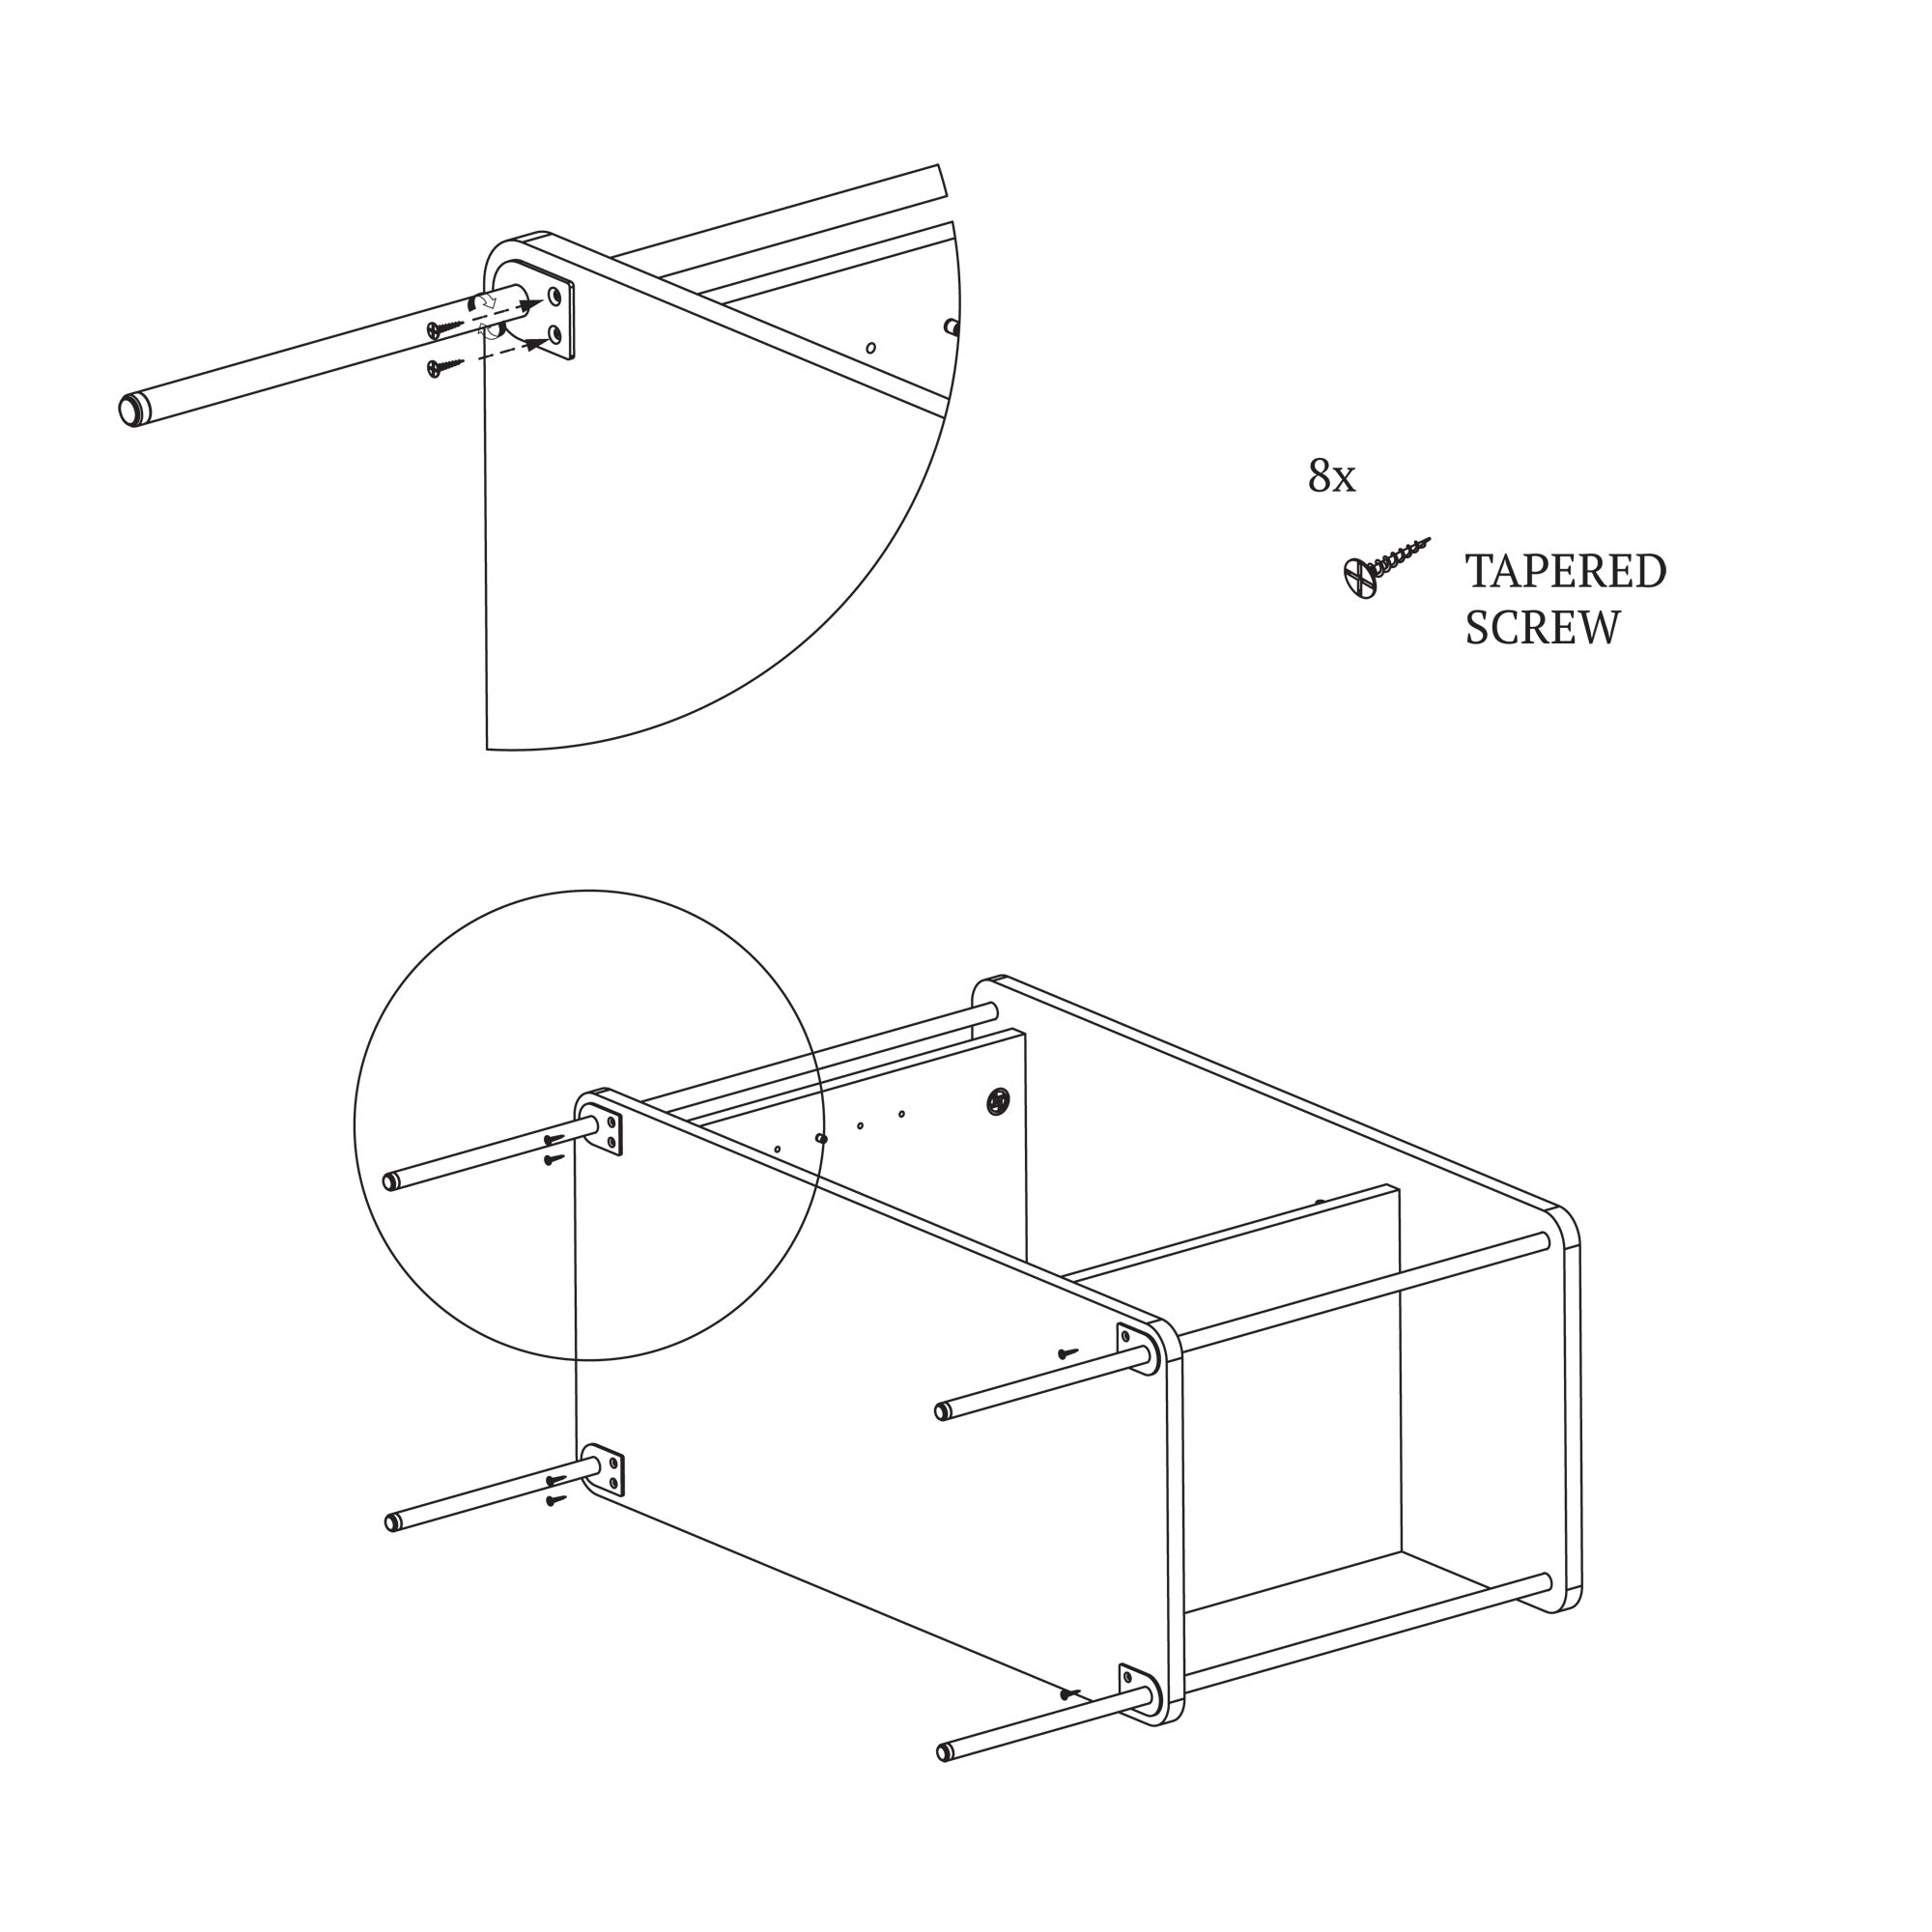
STEP 12
Tighten the legs with screws. Make sure there are feet at the base of each leg.

STEP 13
Turn the furniture upright by placing it on its legs. Be sure to ask someone for help.
STEP 14
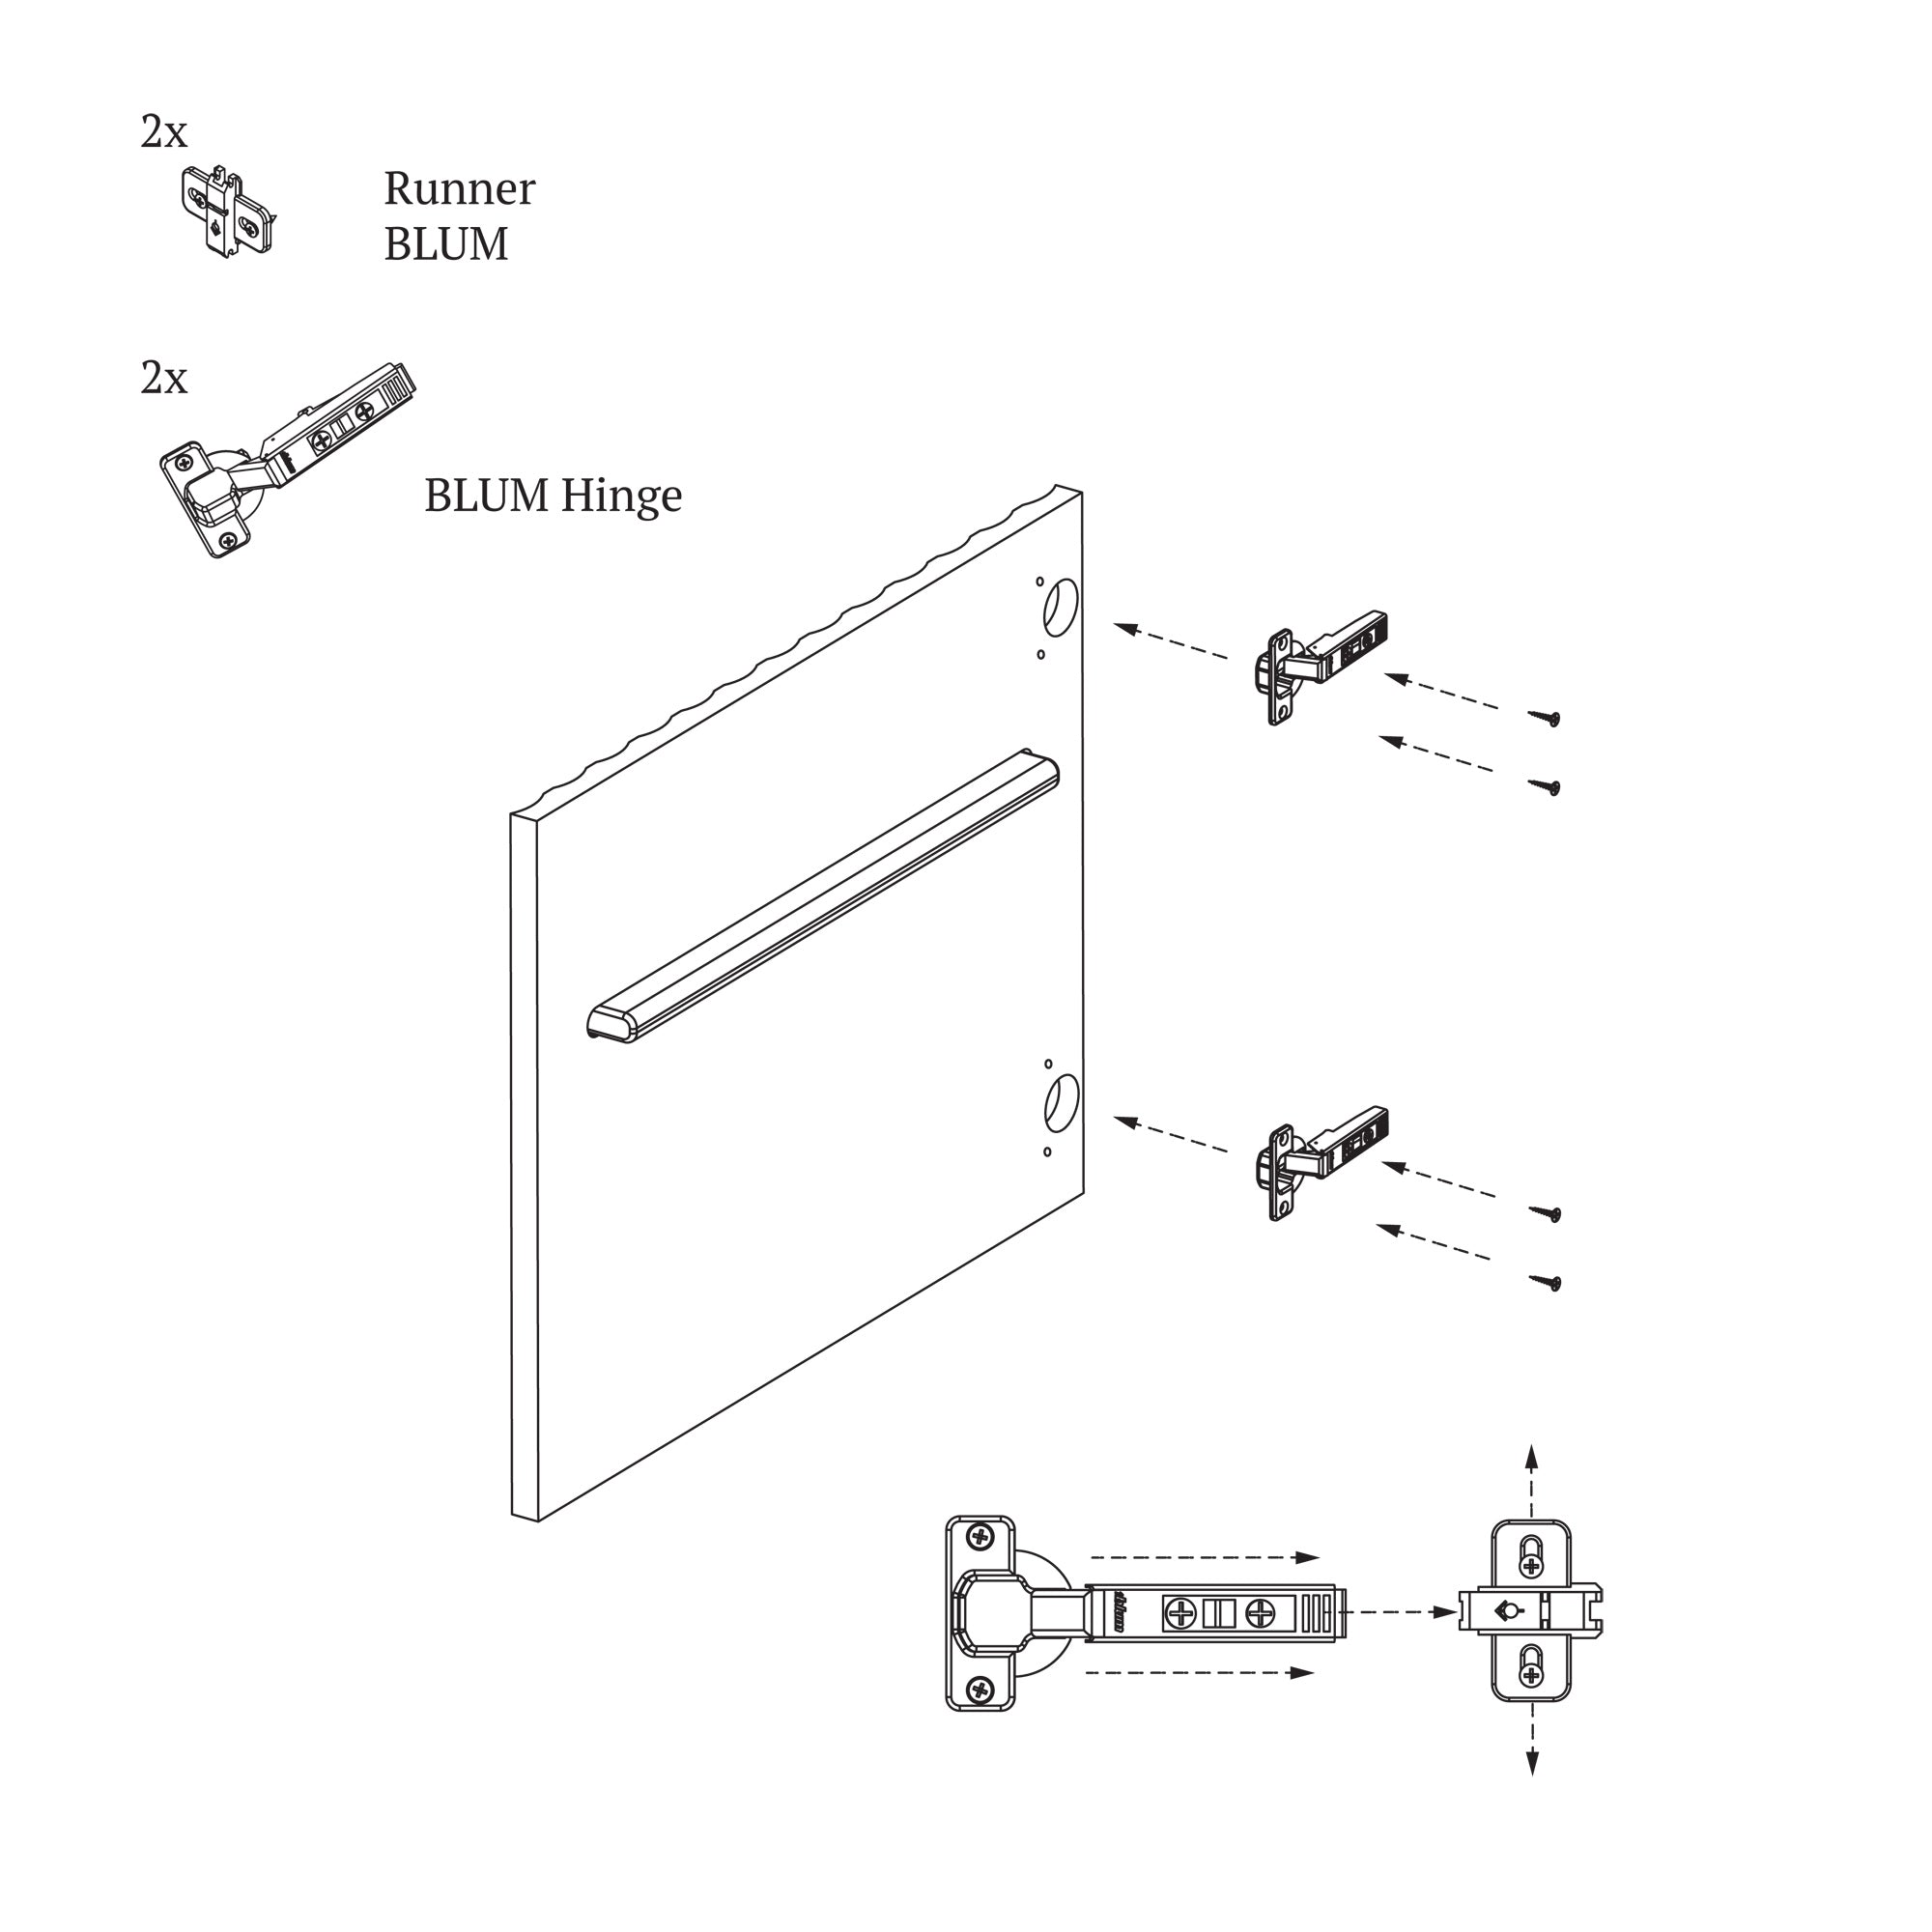
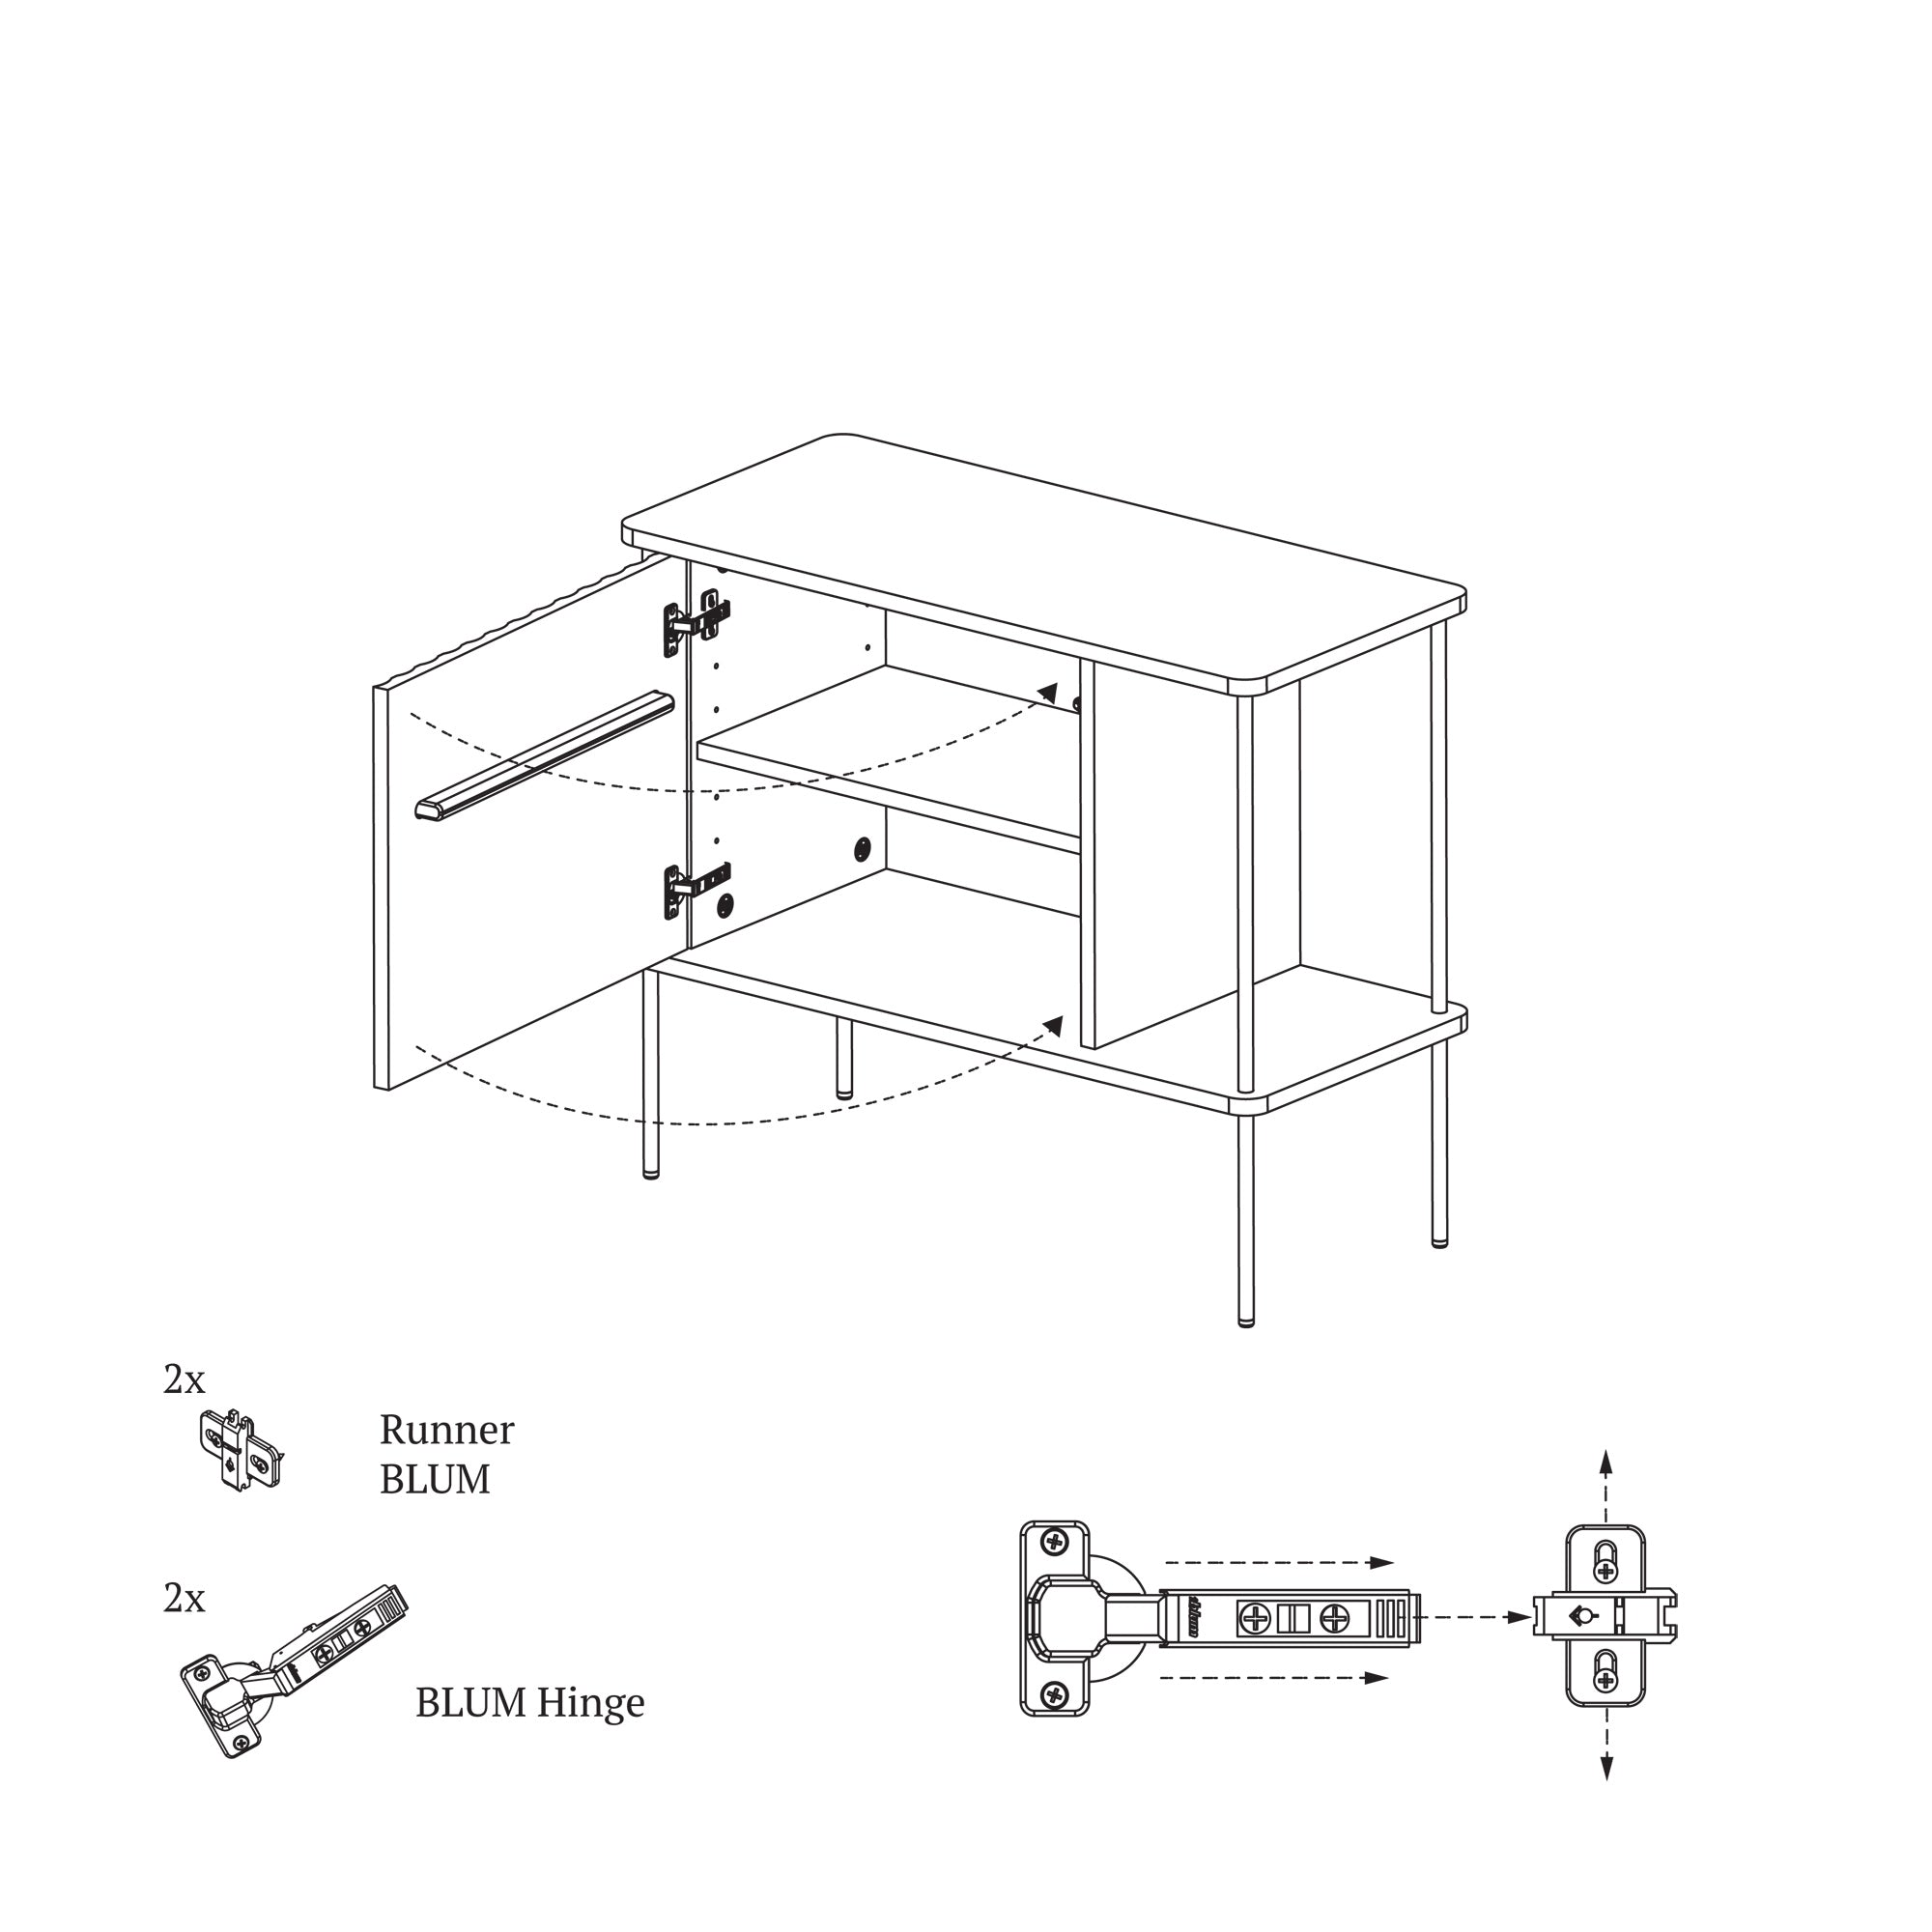
You probably already received furniture fronts with embedded hinges.
However, if this did not happen, screw on the hinges according to the
instructions in the illustration. This larger part is placed in the
front openings. the guide should be placed on the wall of the furniture
body.
STEP 15
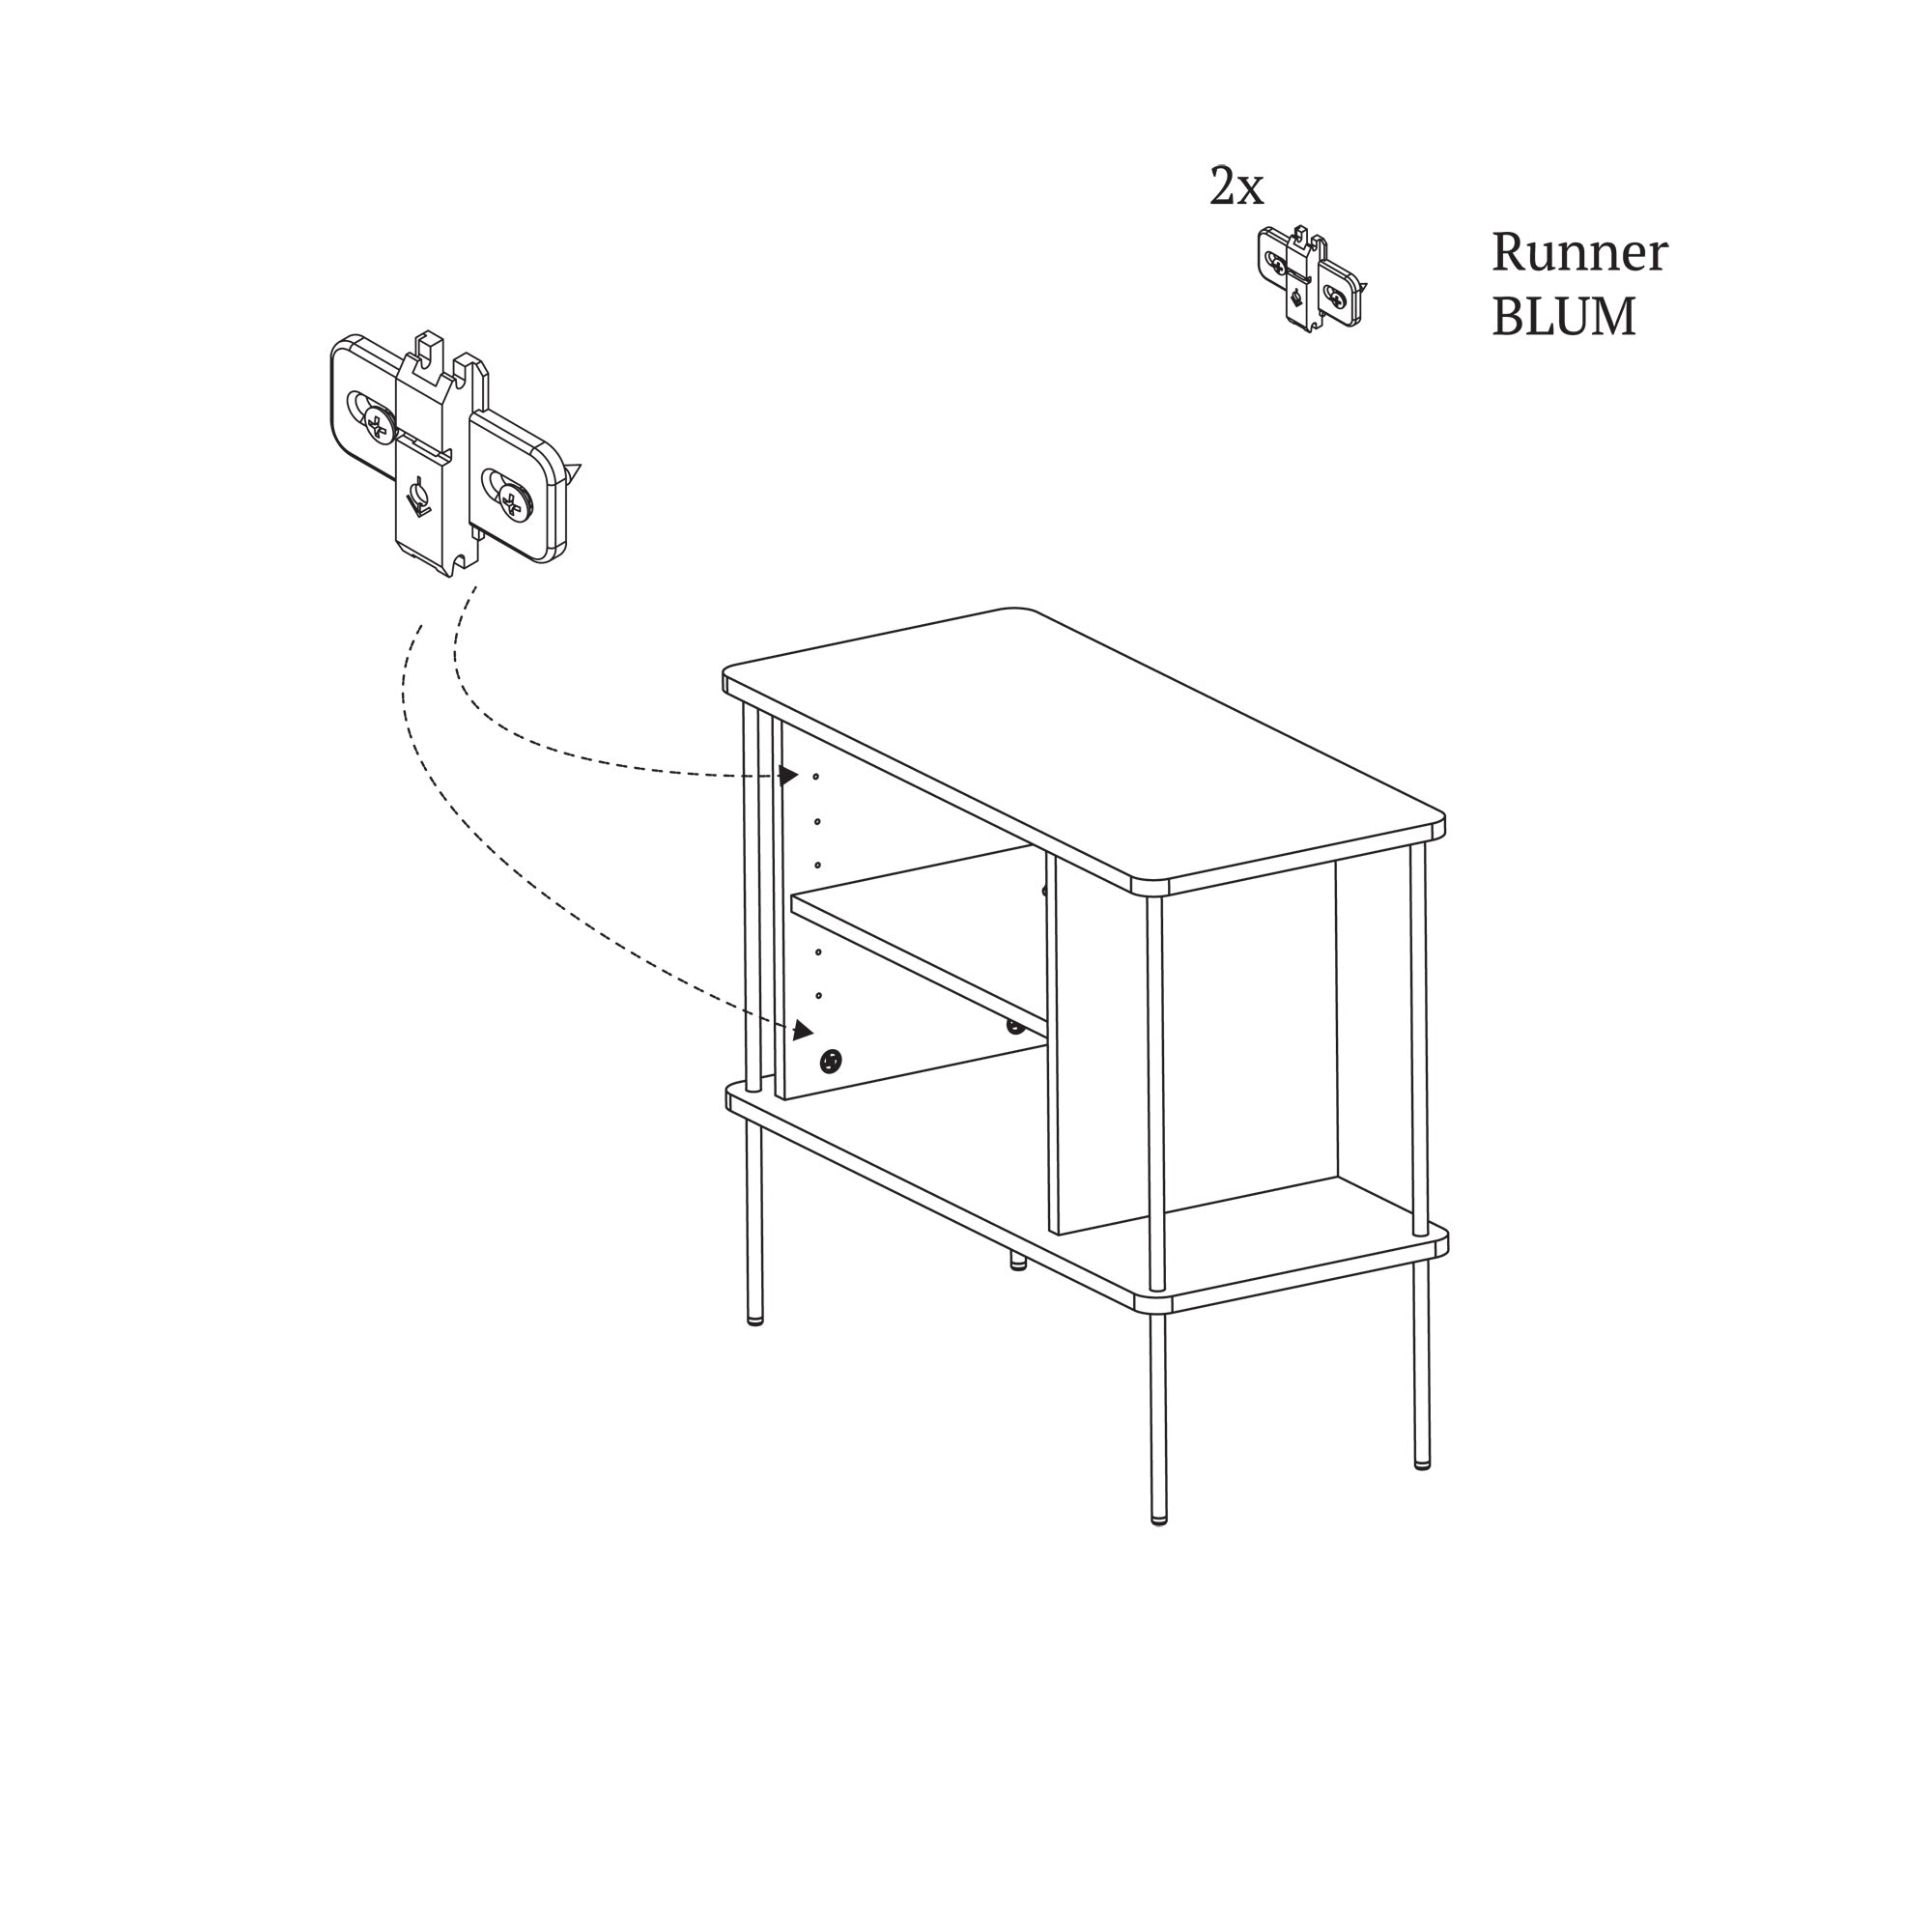
The side walls of the furniture have holes drilled for mounting guides (runner).

STEP 16
We still have TIP-ON to install. First, place its base on the wall in
the indicated place. Secure it with the screws included with TIP-ON.
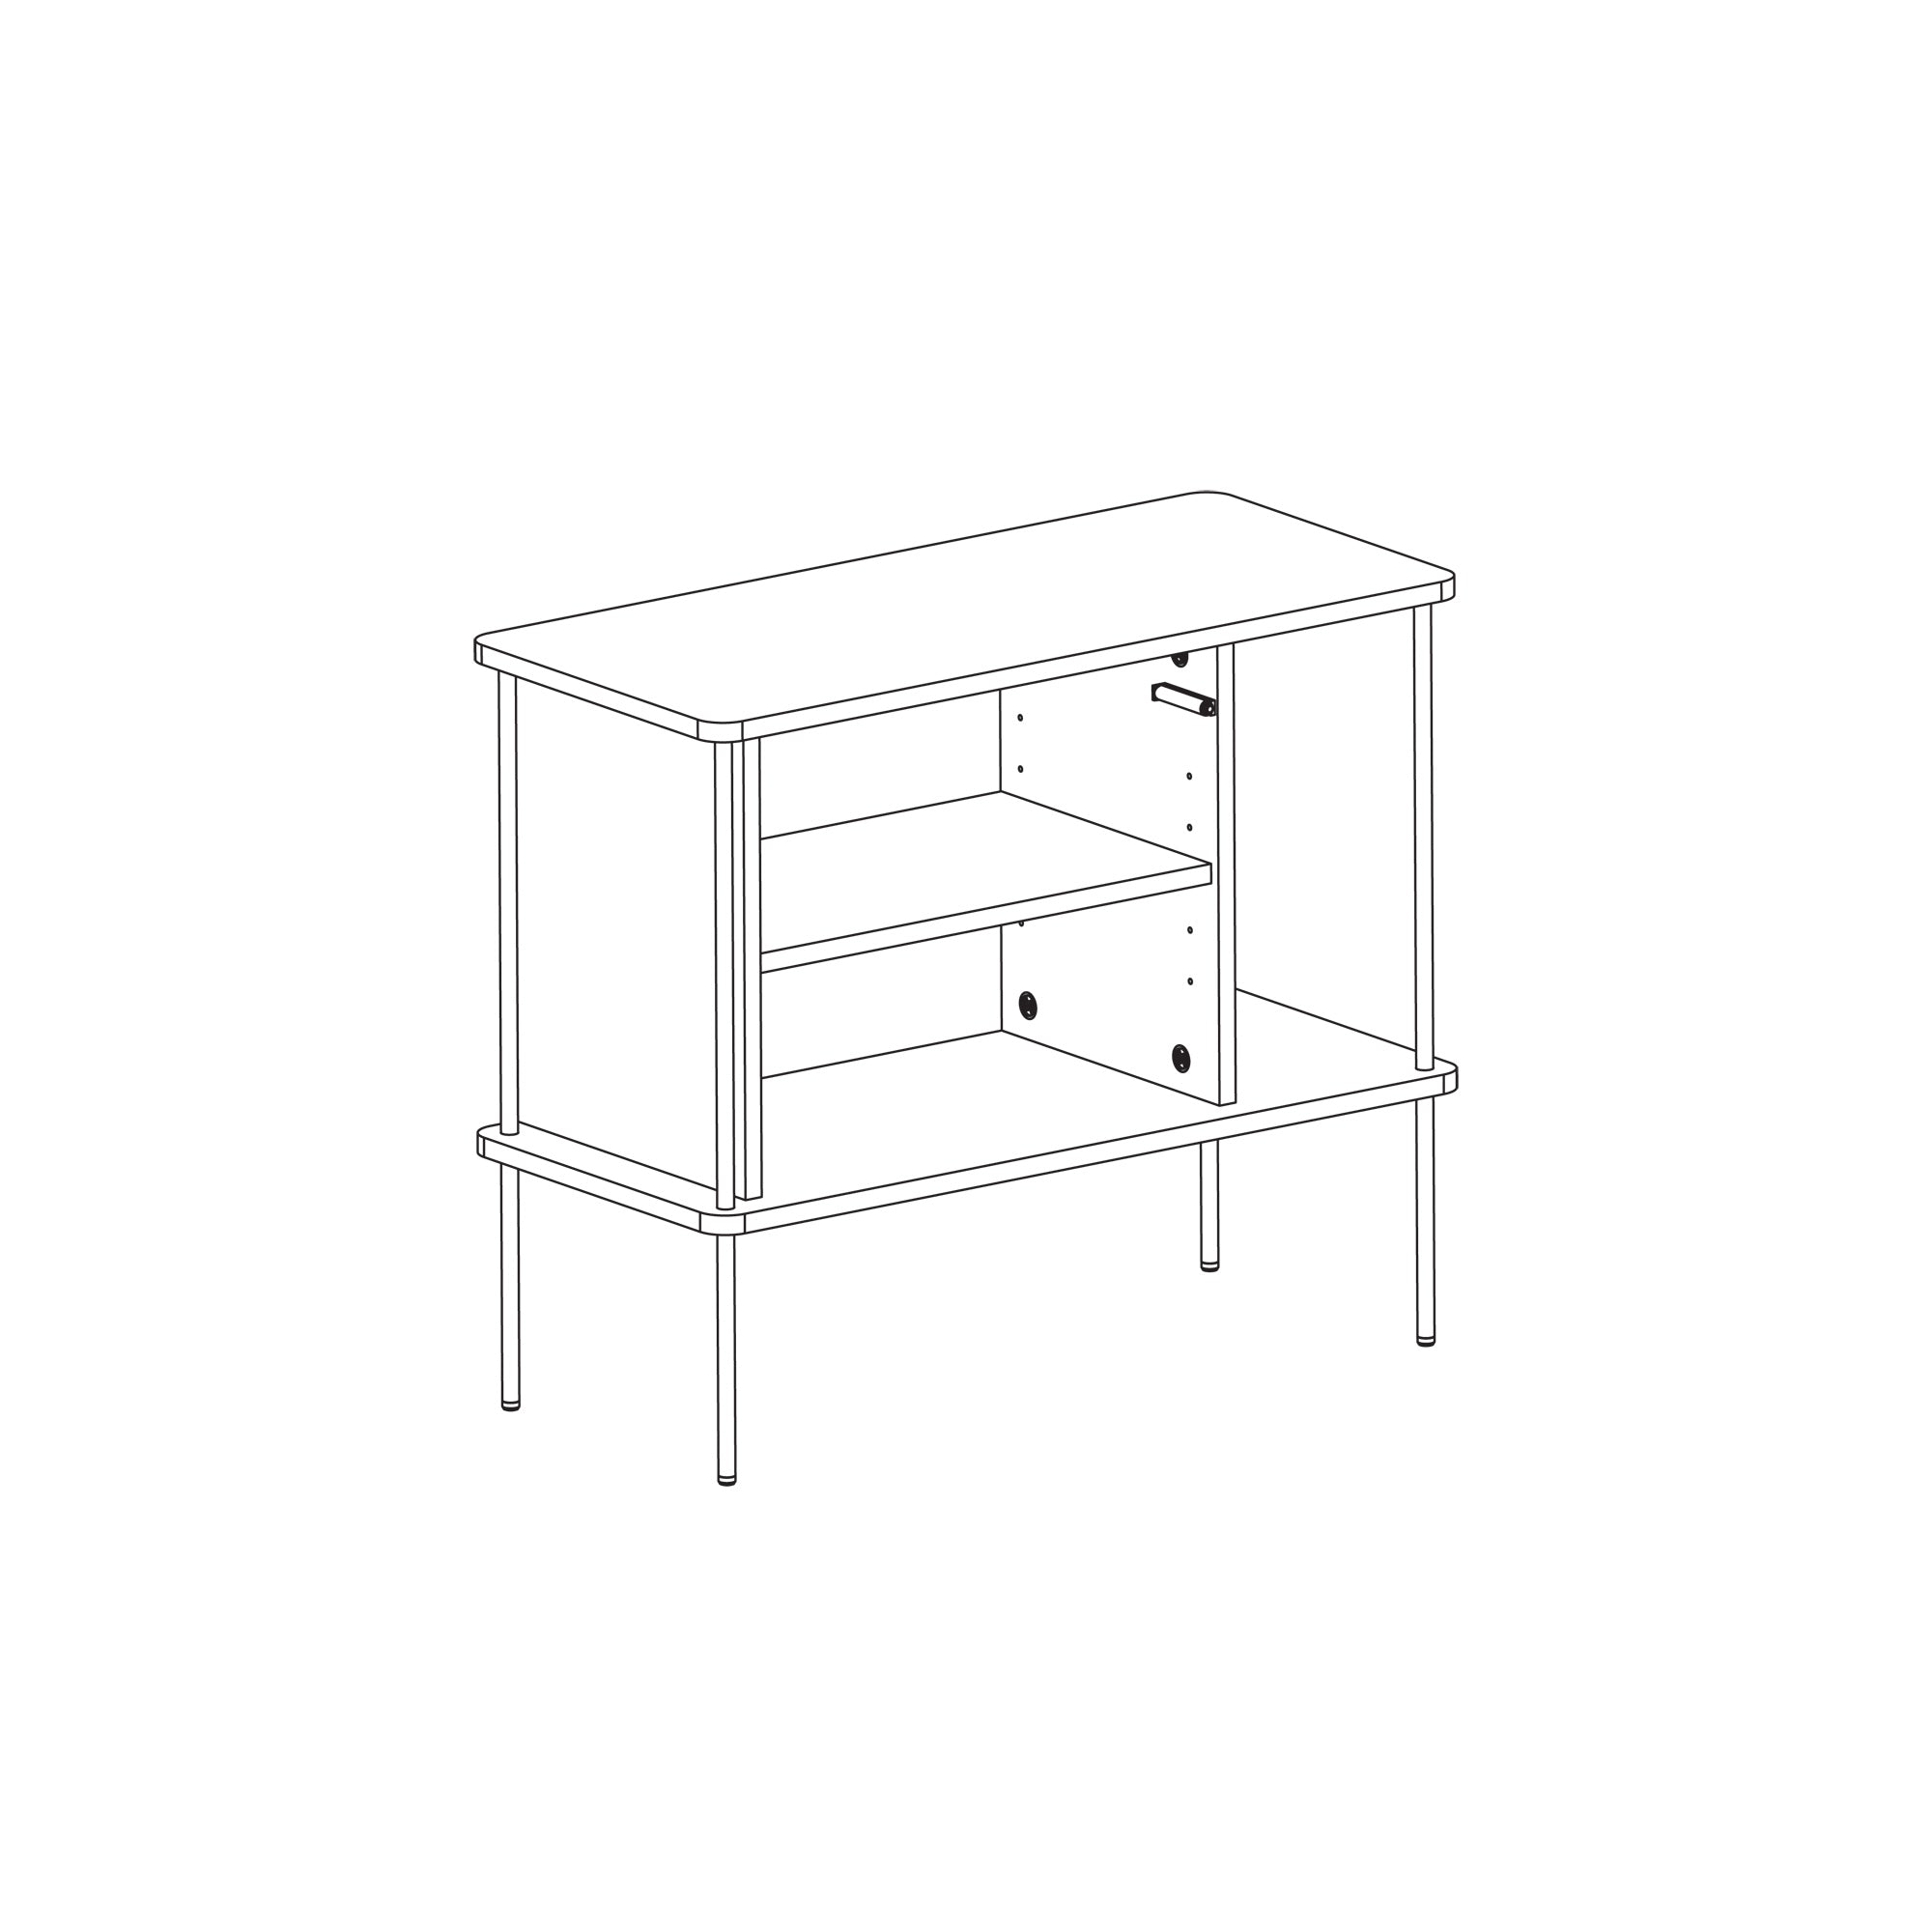
STEP 17
The body standing on legs is ready for mounting fronts. For the moment
of mounting, you can remove the shelf from inside the body.
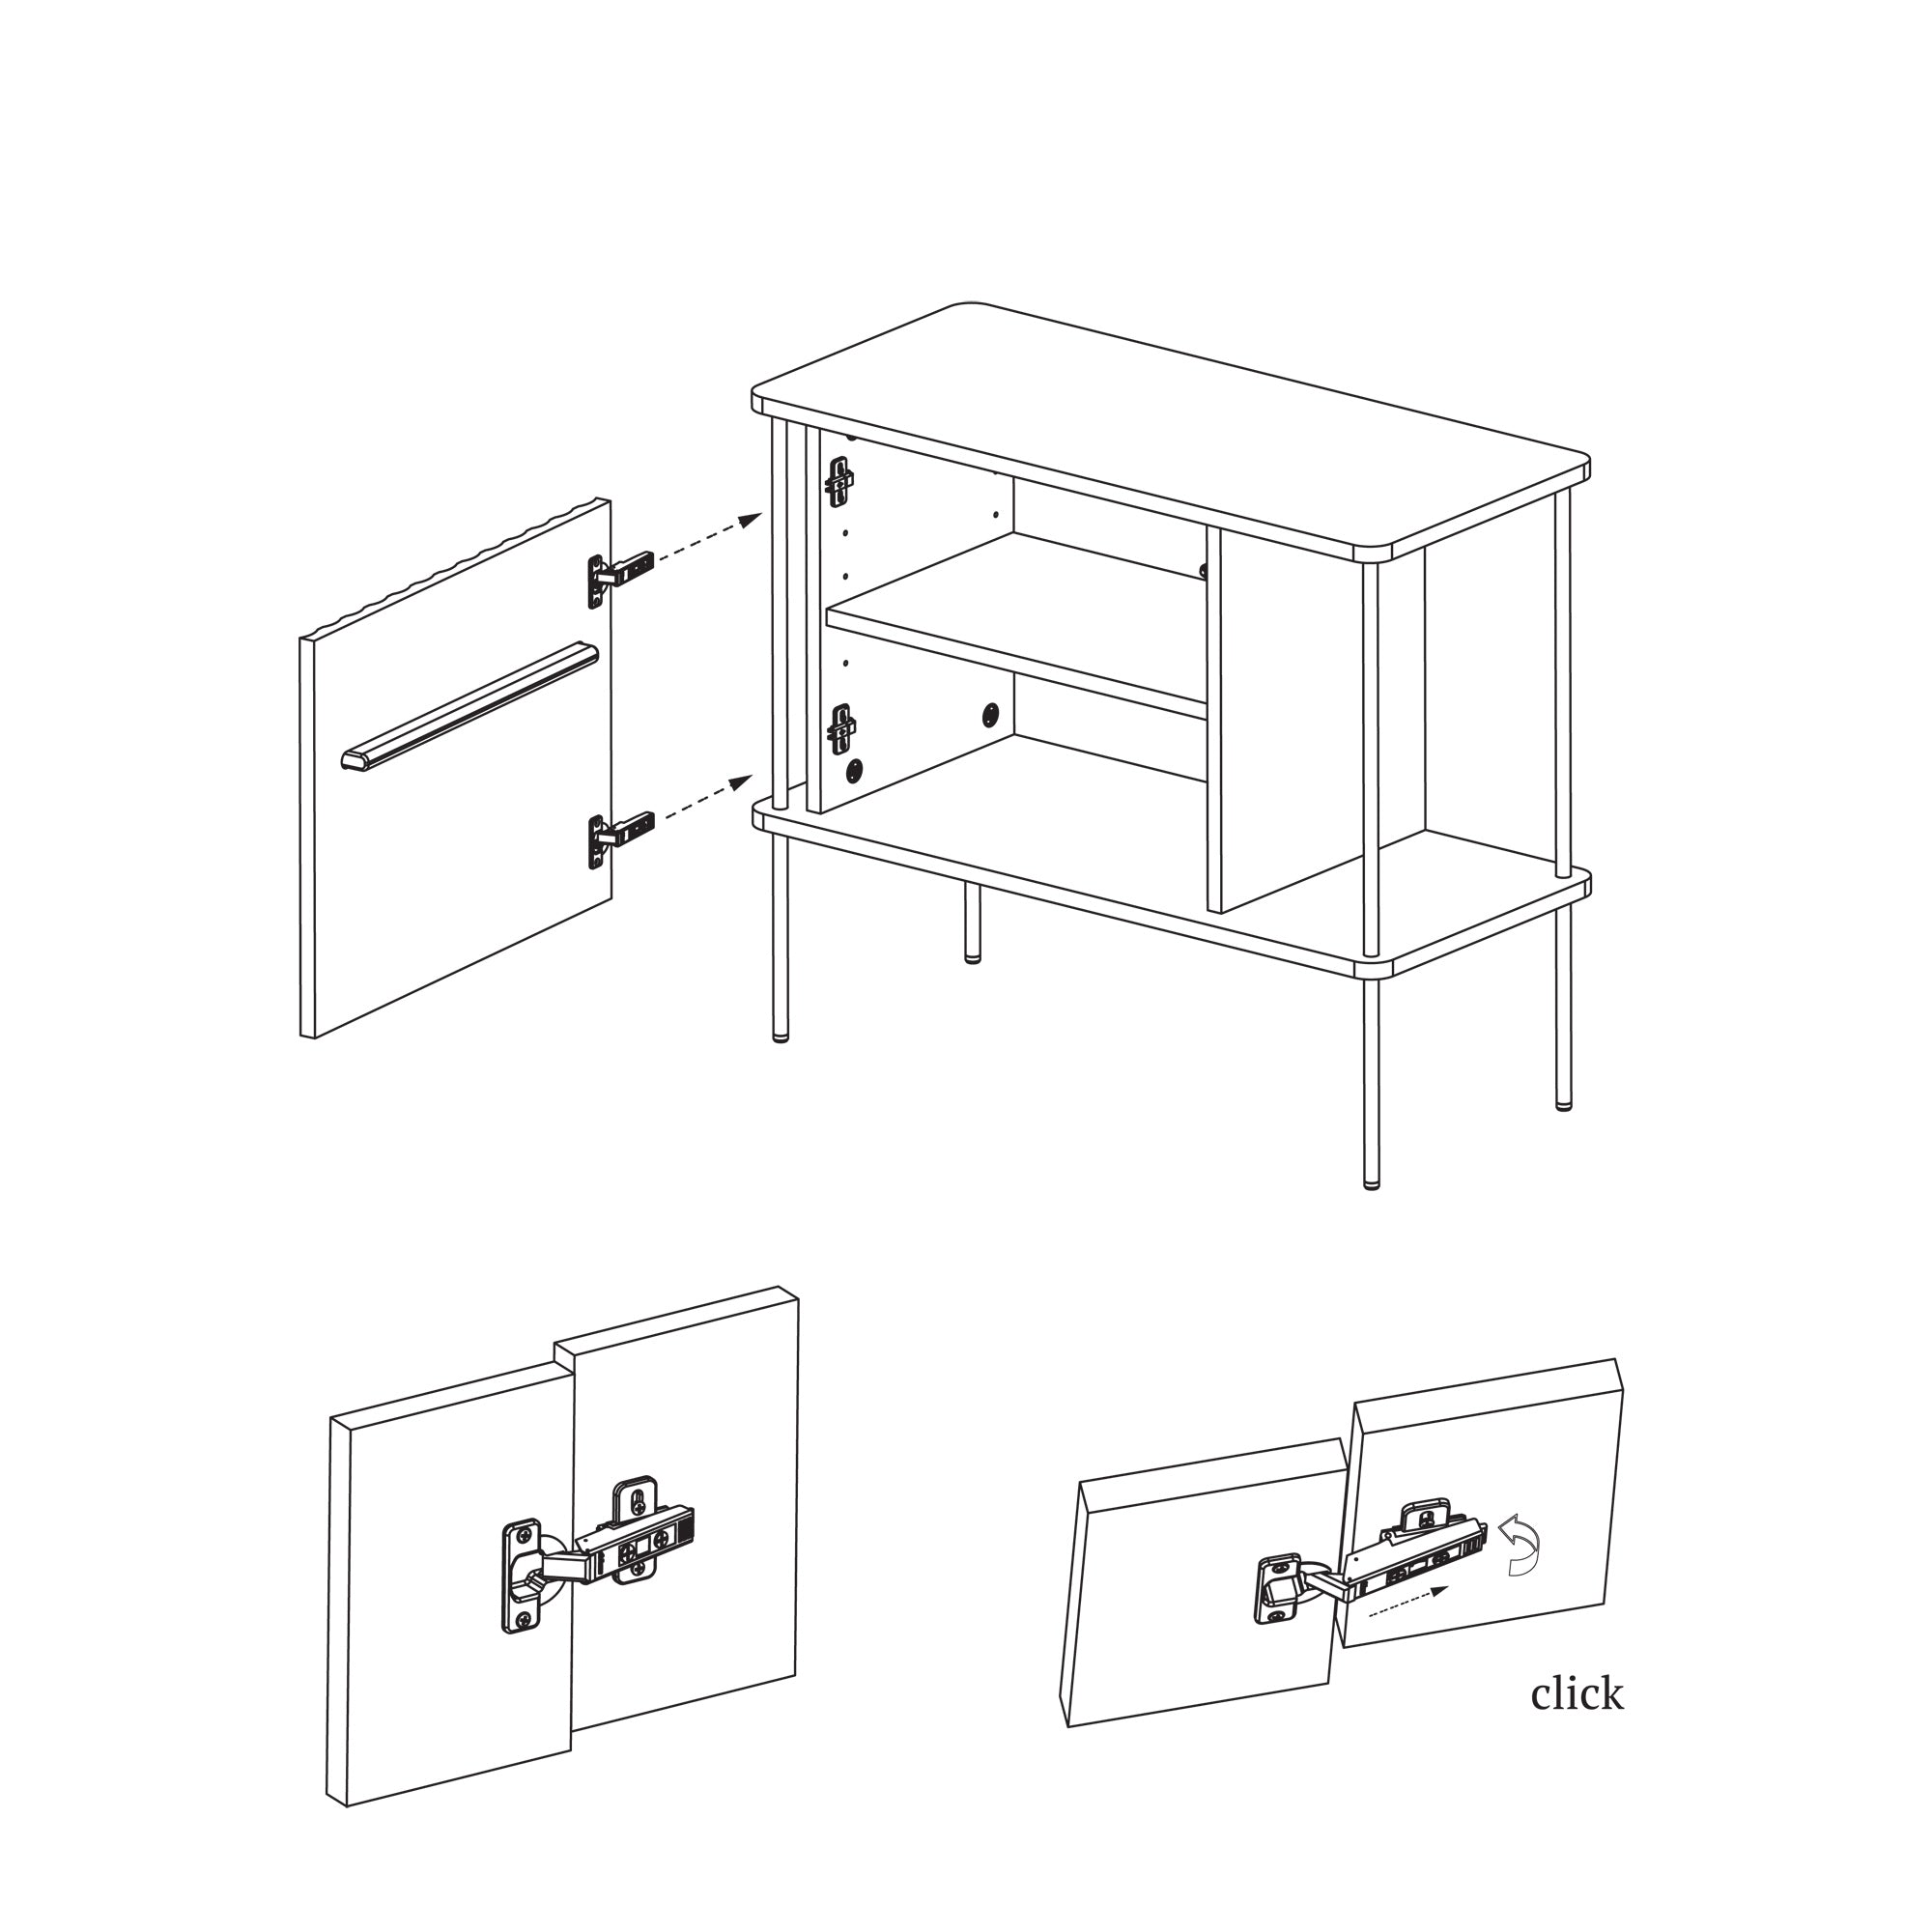
STEP 18
It's time to assemble the fronts. Make sure the runners are not screwed
on too tightly and you can move them up and down on the protruding
screws. Place the hinges on the guides. The guides have a special hook
that facilitates the installation of the hinge. First, slide the front
with hinges parallel to the guide and then, after meeting resistance,
press the hinge perpendicularly. You will hear a characteristic click.
This is a sign that the hinge is installed correctly. Do this for each
hinge. After installing them, determine the height at which the front
should be so that the gaps between the front and the body are the same.
Then tighten the screws in the guides. You can make further corrections
by adjusting the BLUM hinge.
STEP 19
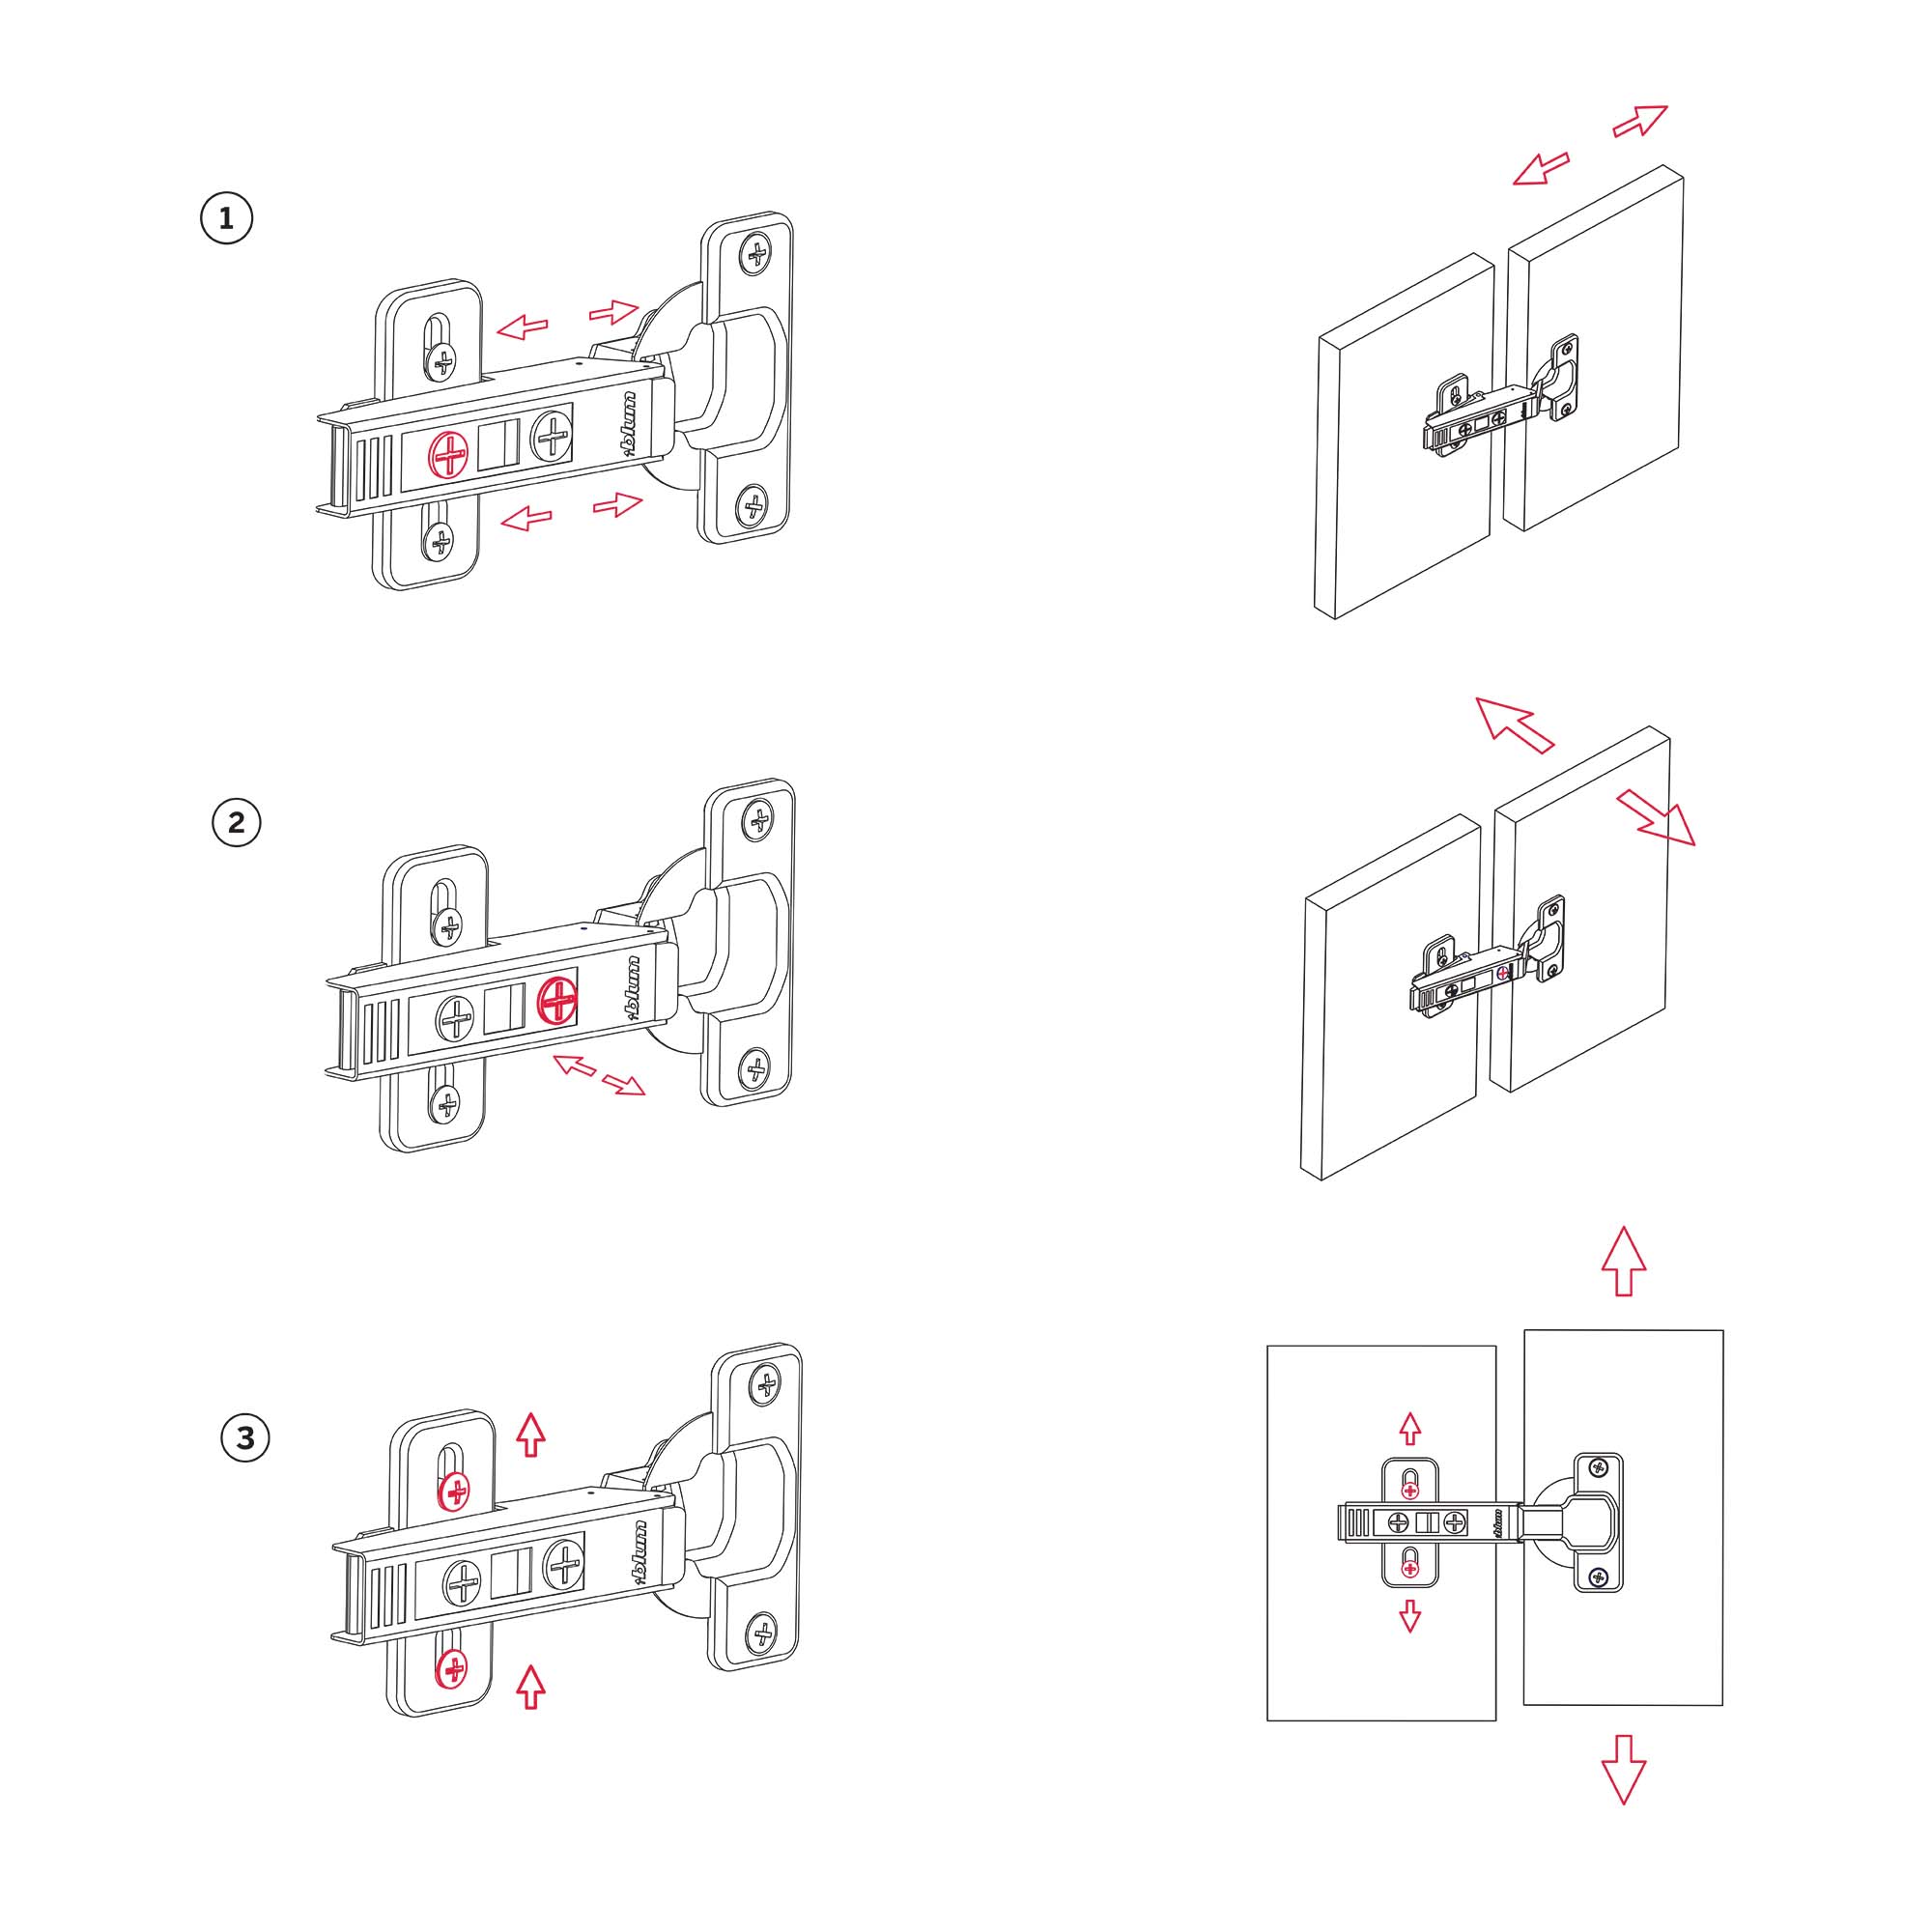
STEP 20
Adjusting the front on BLUM hinges is very simple. Follow the
instructions above to set the fronts in the right position. Incorrect
front adjustment may result in the cabinet not closing properly and the
fronts rubbing against each other.
STEP 21
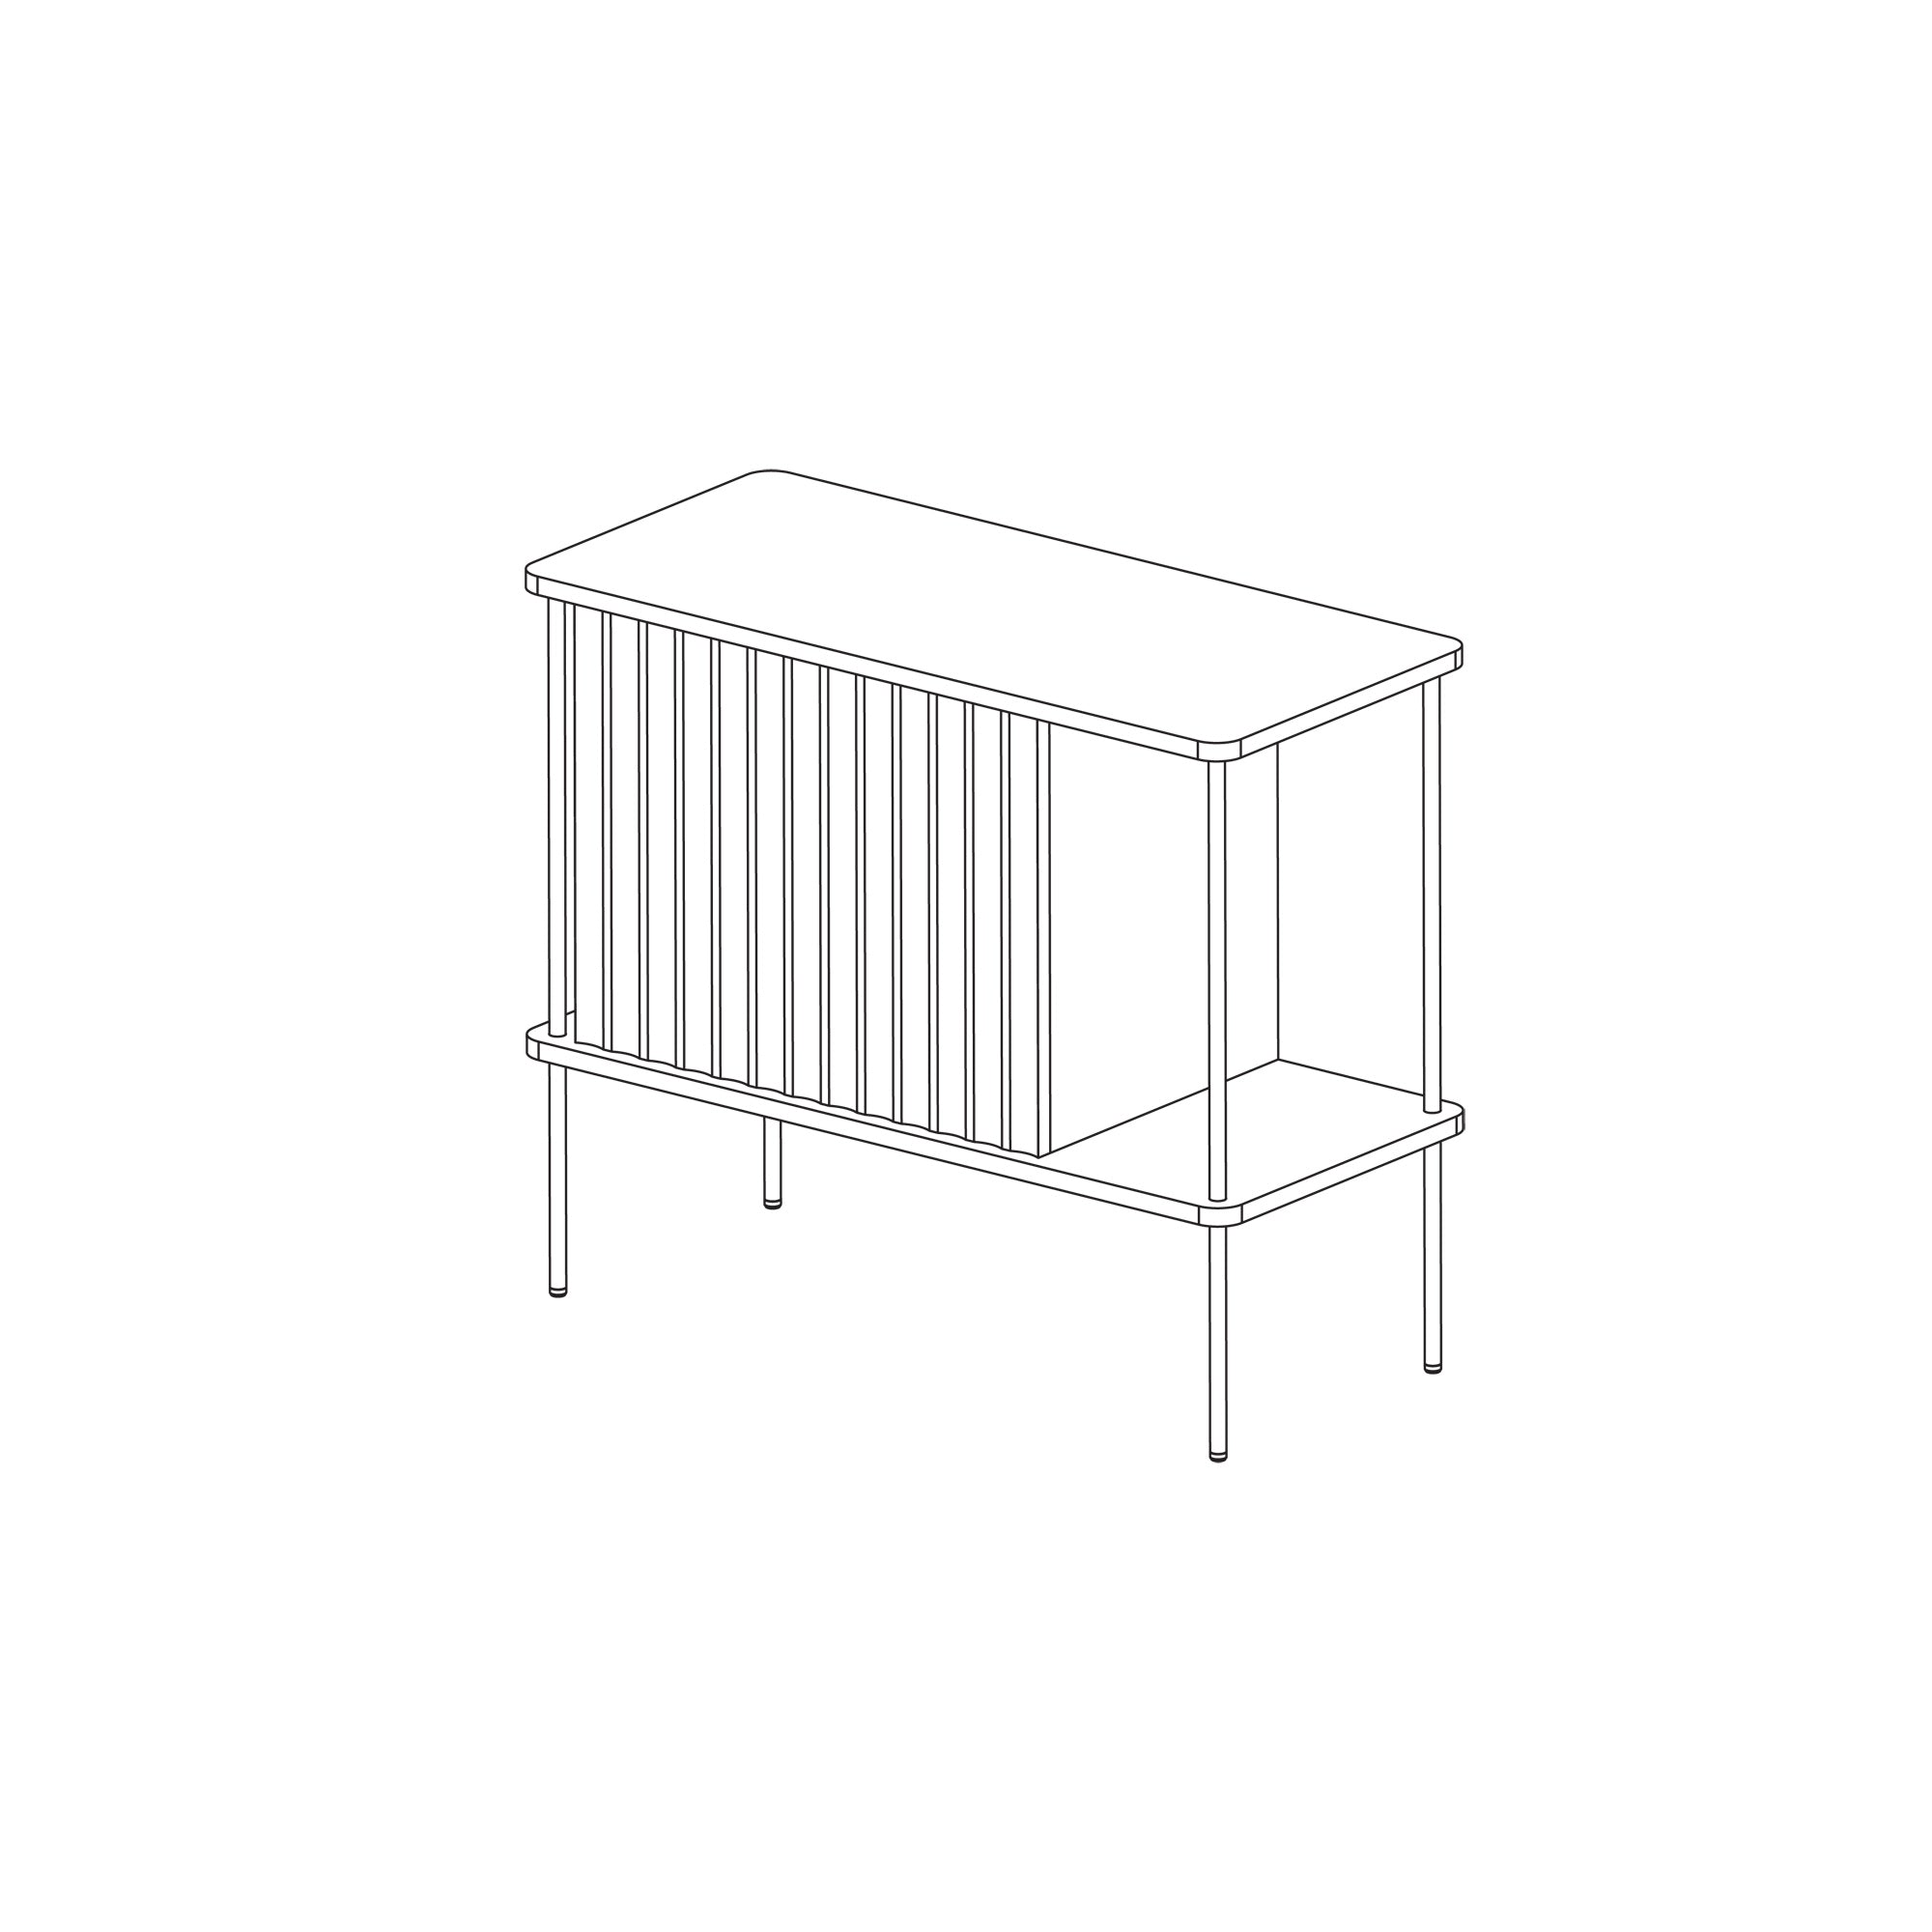
After adjusting the front and inserting the shelf that should rest on the Pins, the furniture is ready for use.