

manual
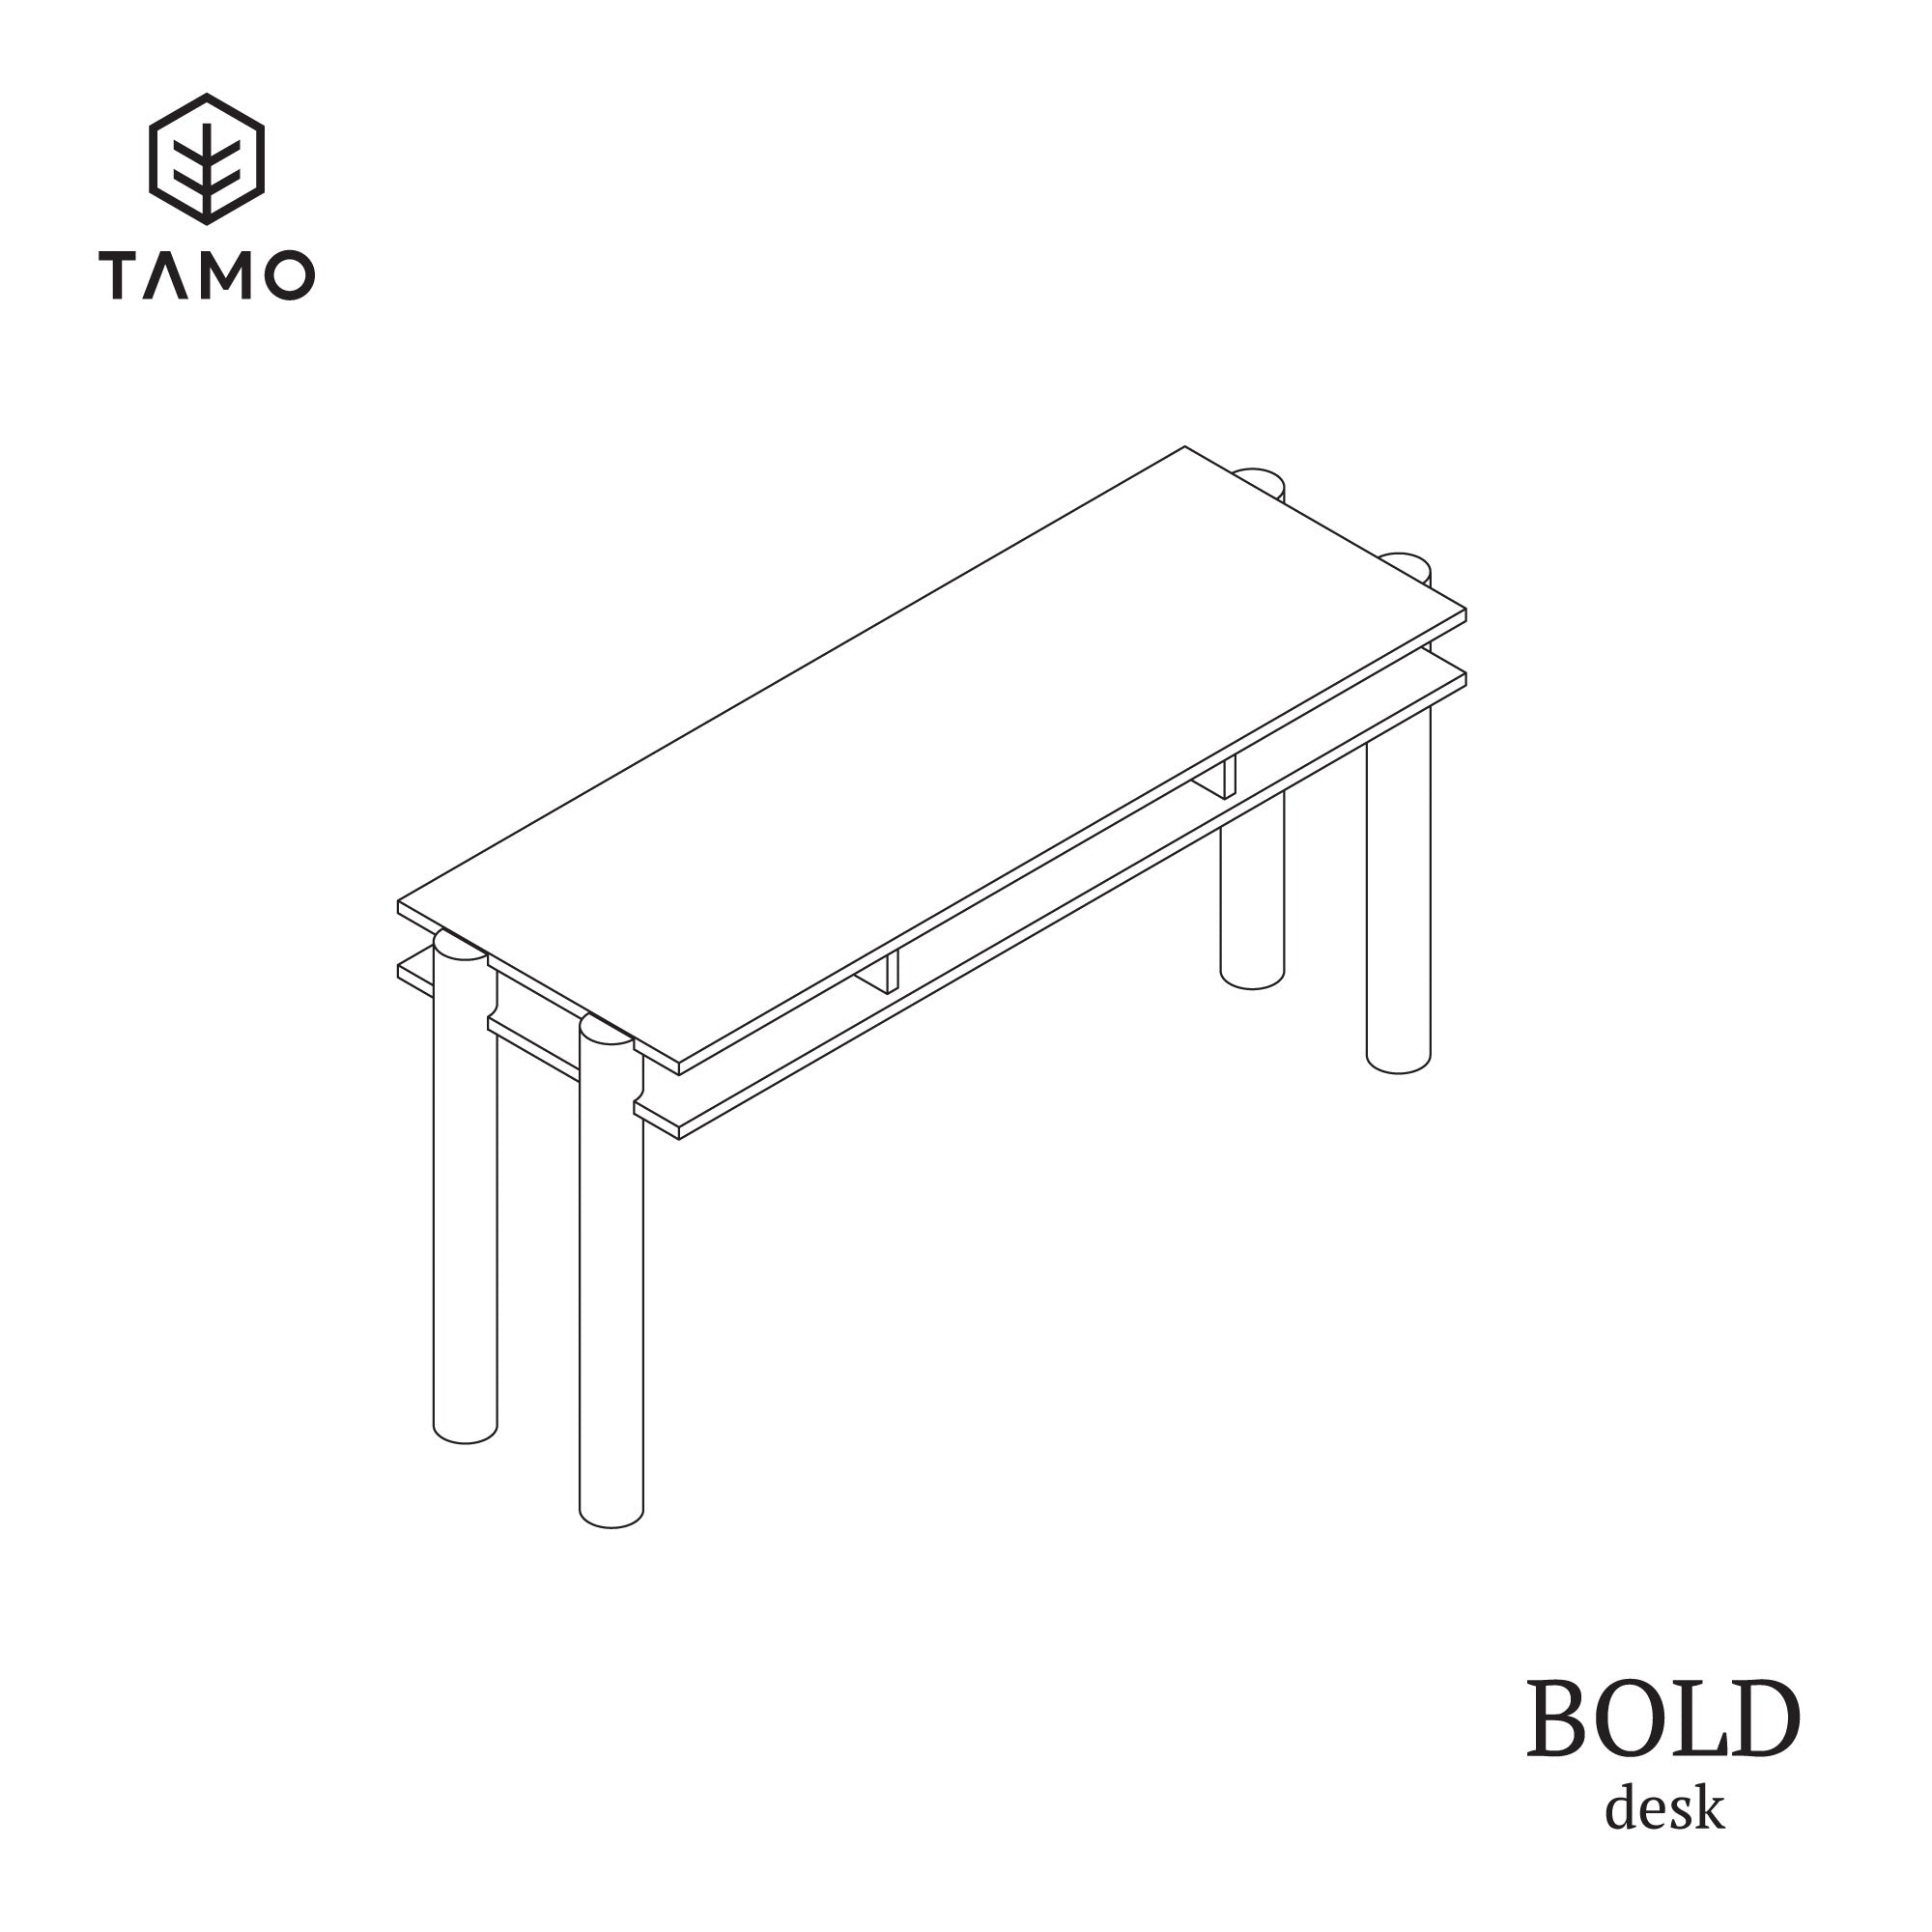
BOLD desk
START
Prepare a space to assemble the BOLD desk. Make sure you have enough room to work comfortably, and that the surfaces you’ll use are clean. We recommend using a rug or blanket to safely lay out the parts during assembly.
STEP 1
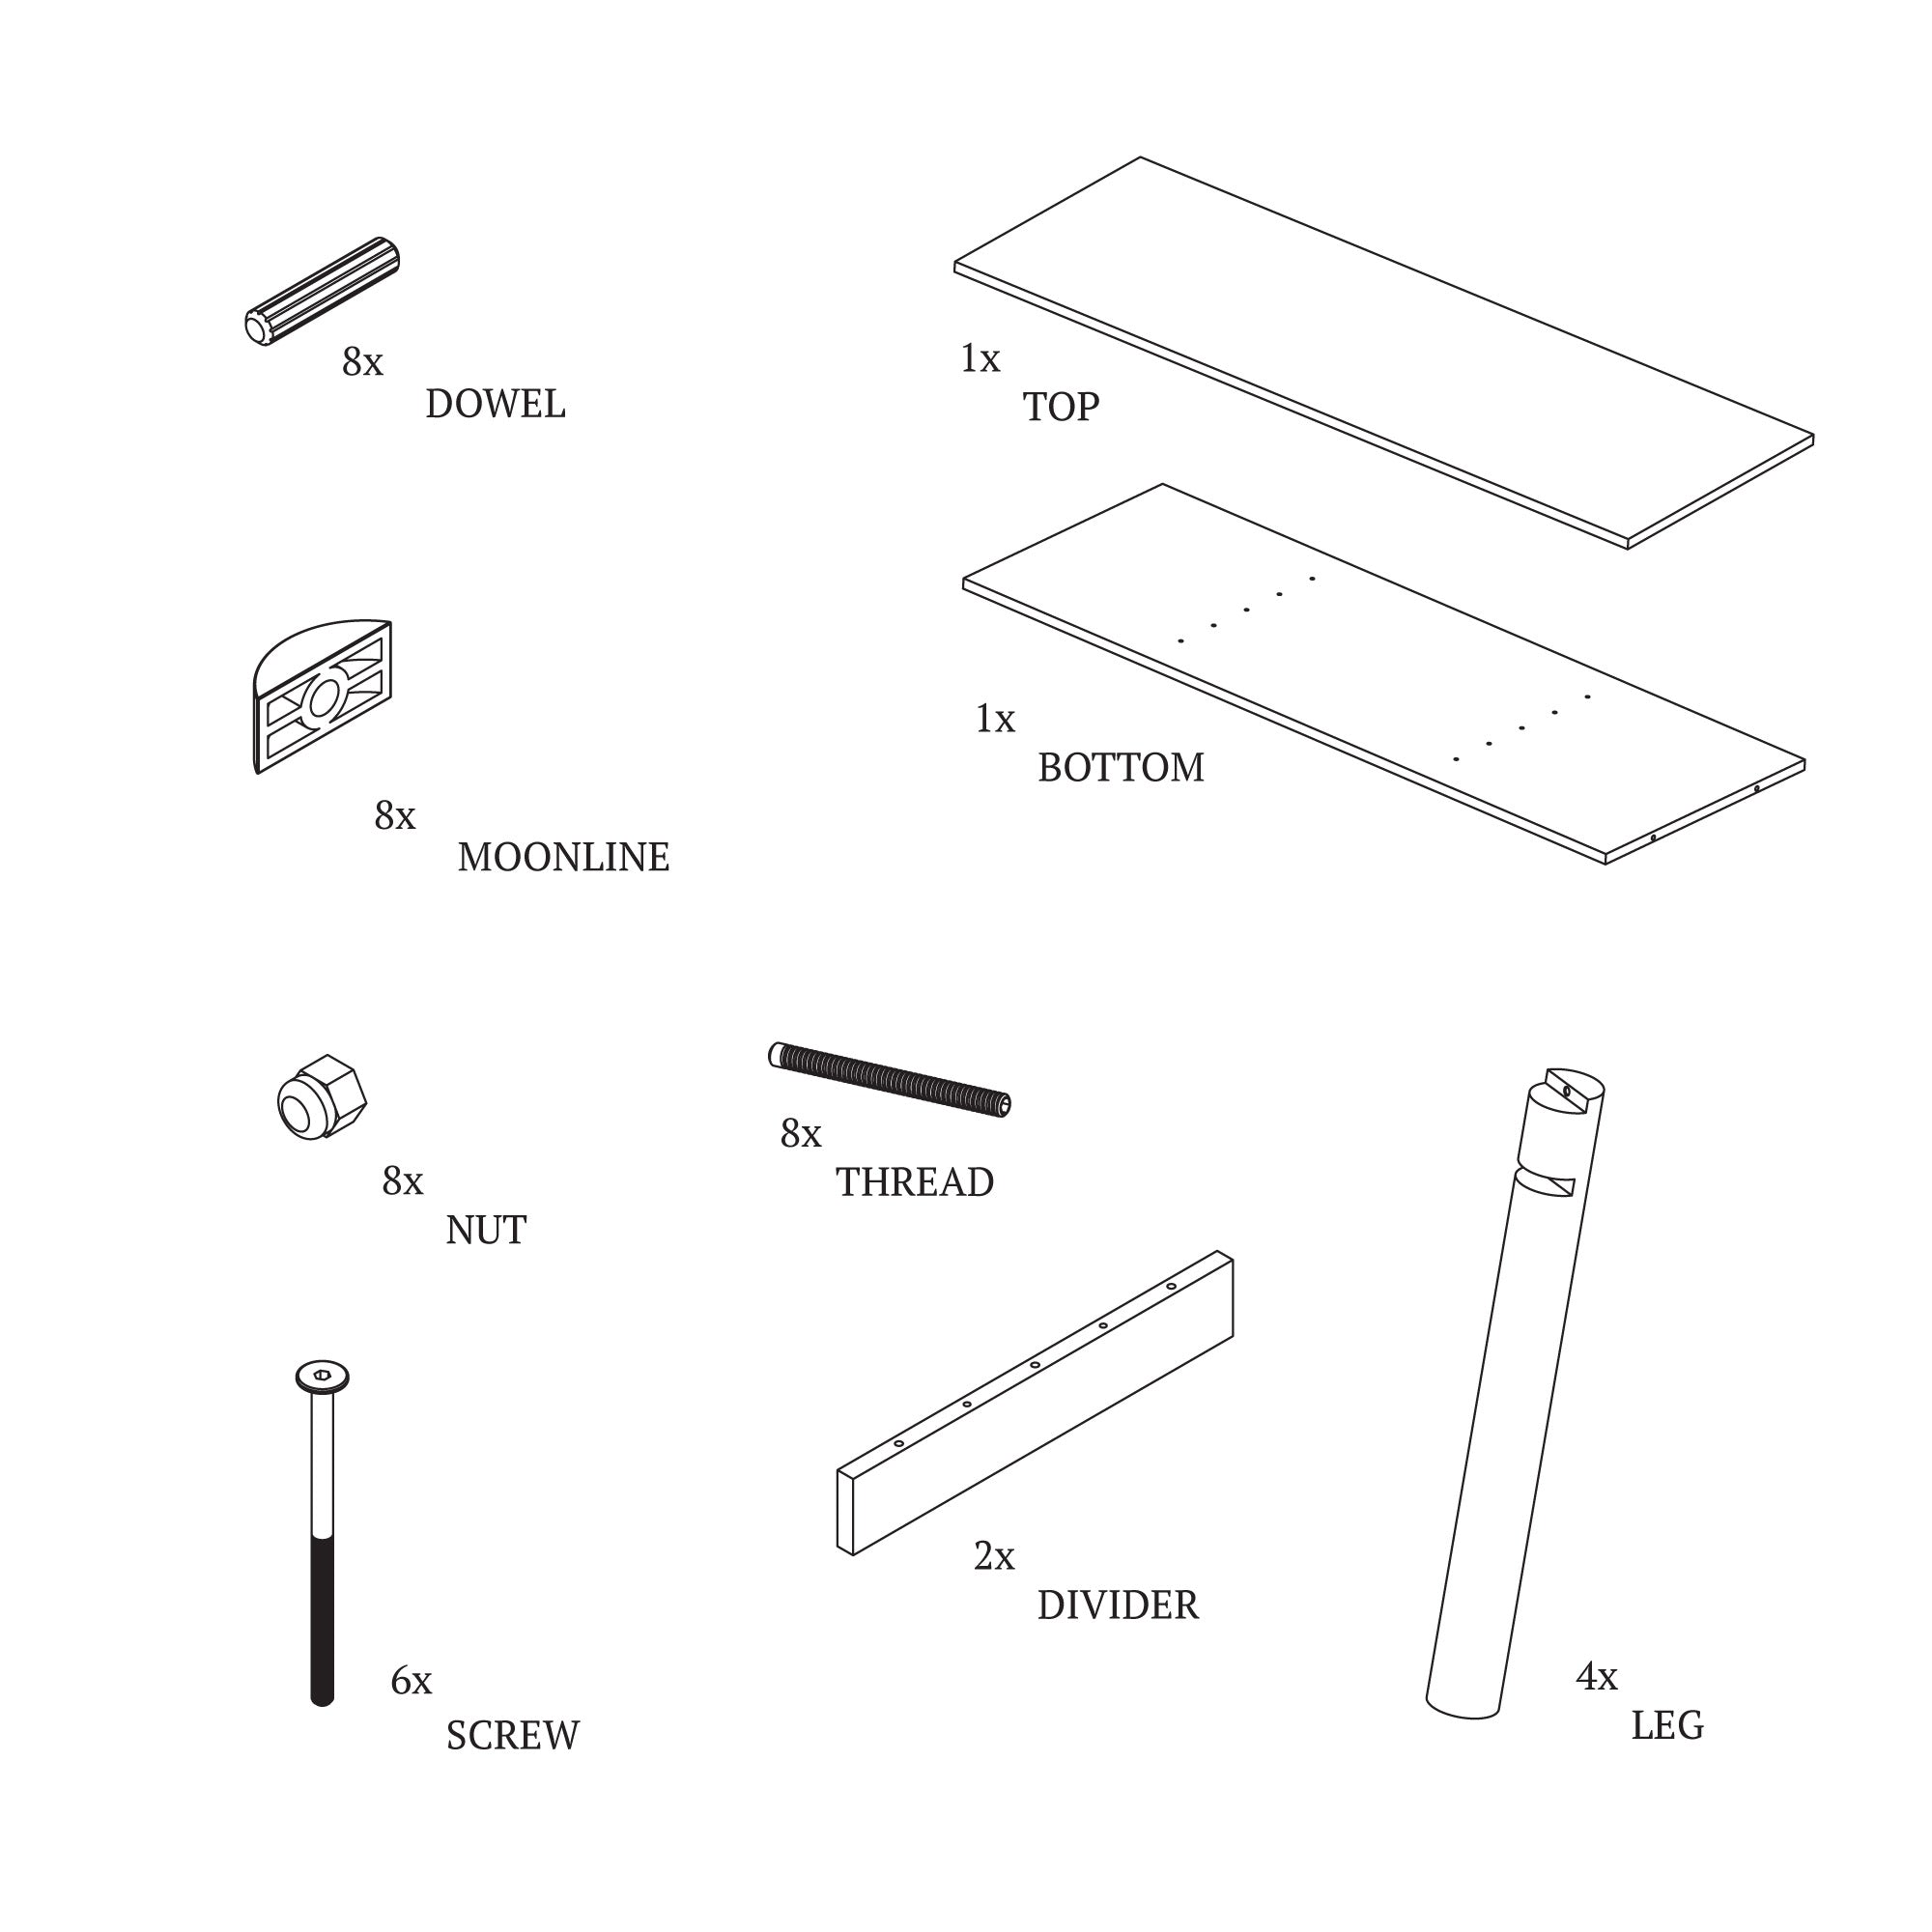
Unpack all parts. Check the quantities against the packing list to ensure everything has been delivered.
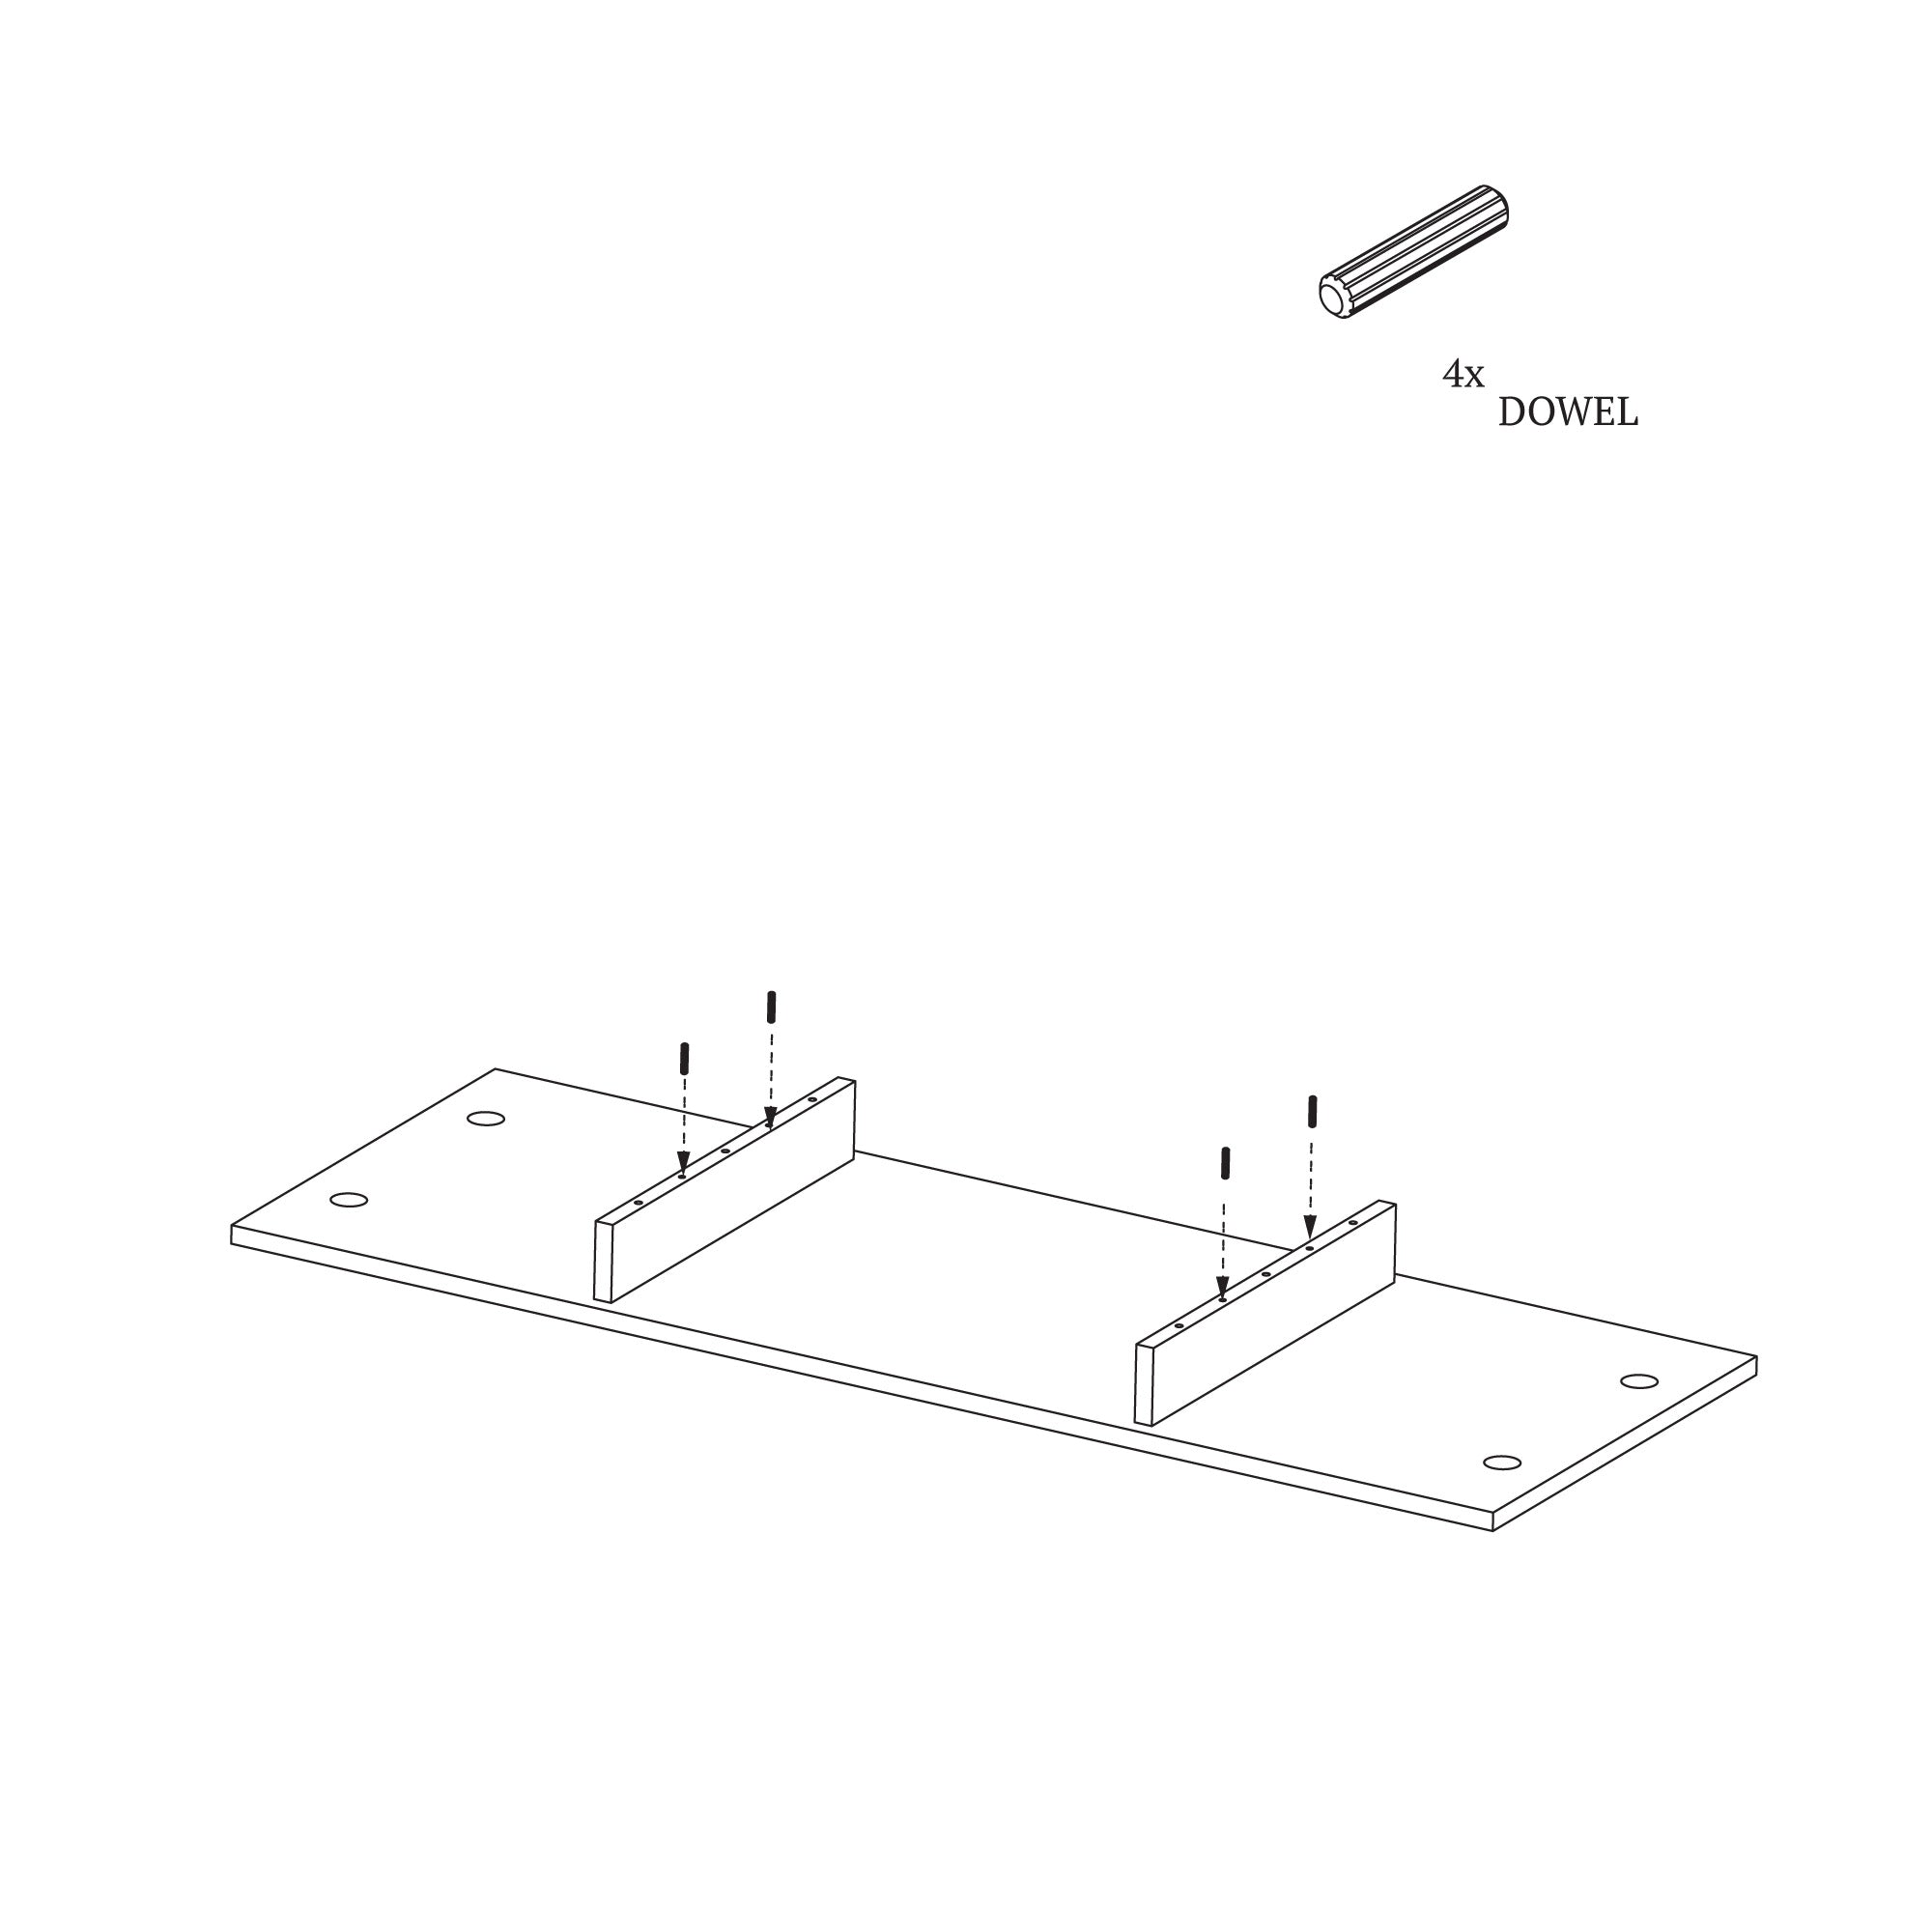
STEP 2
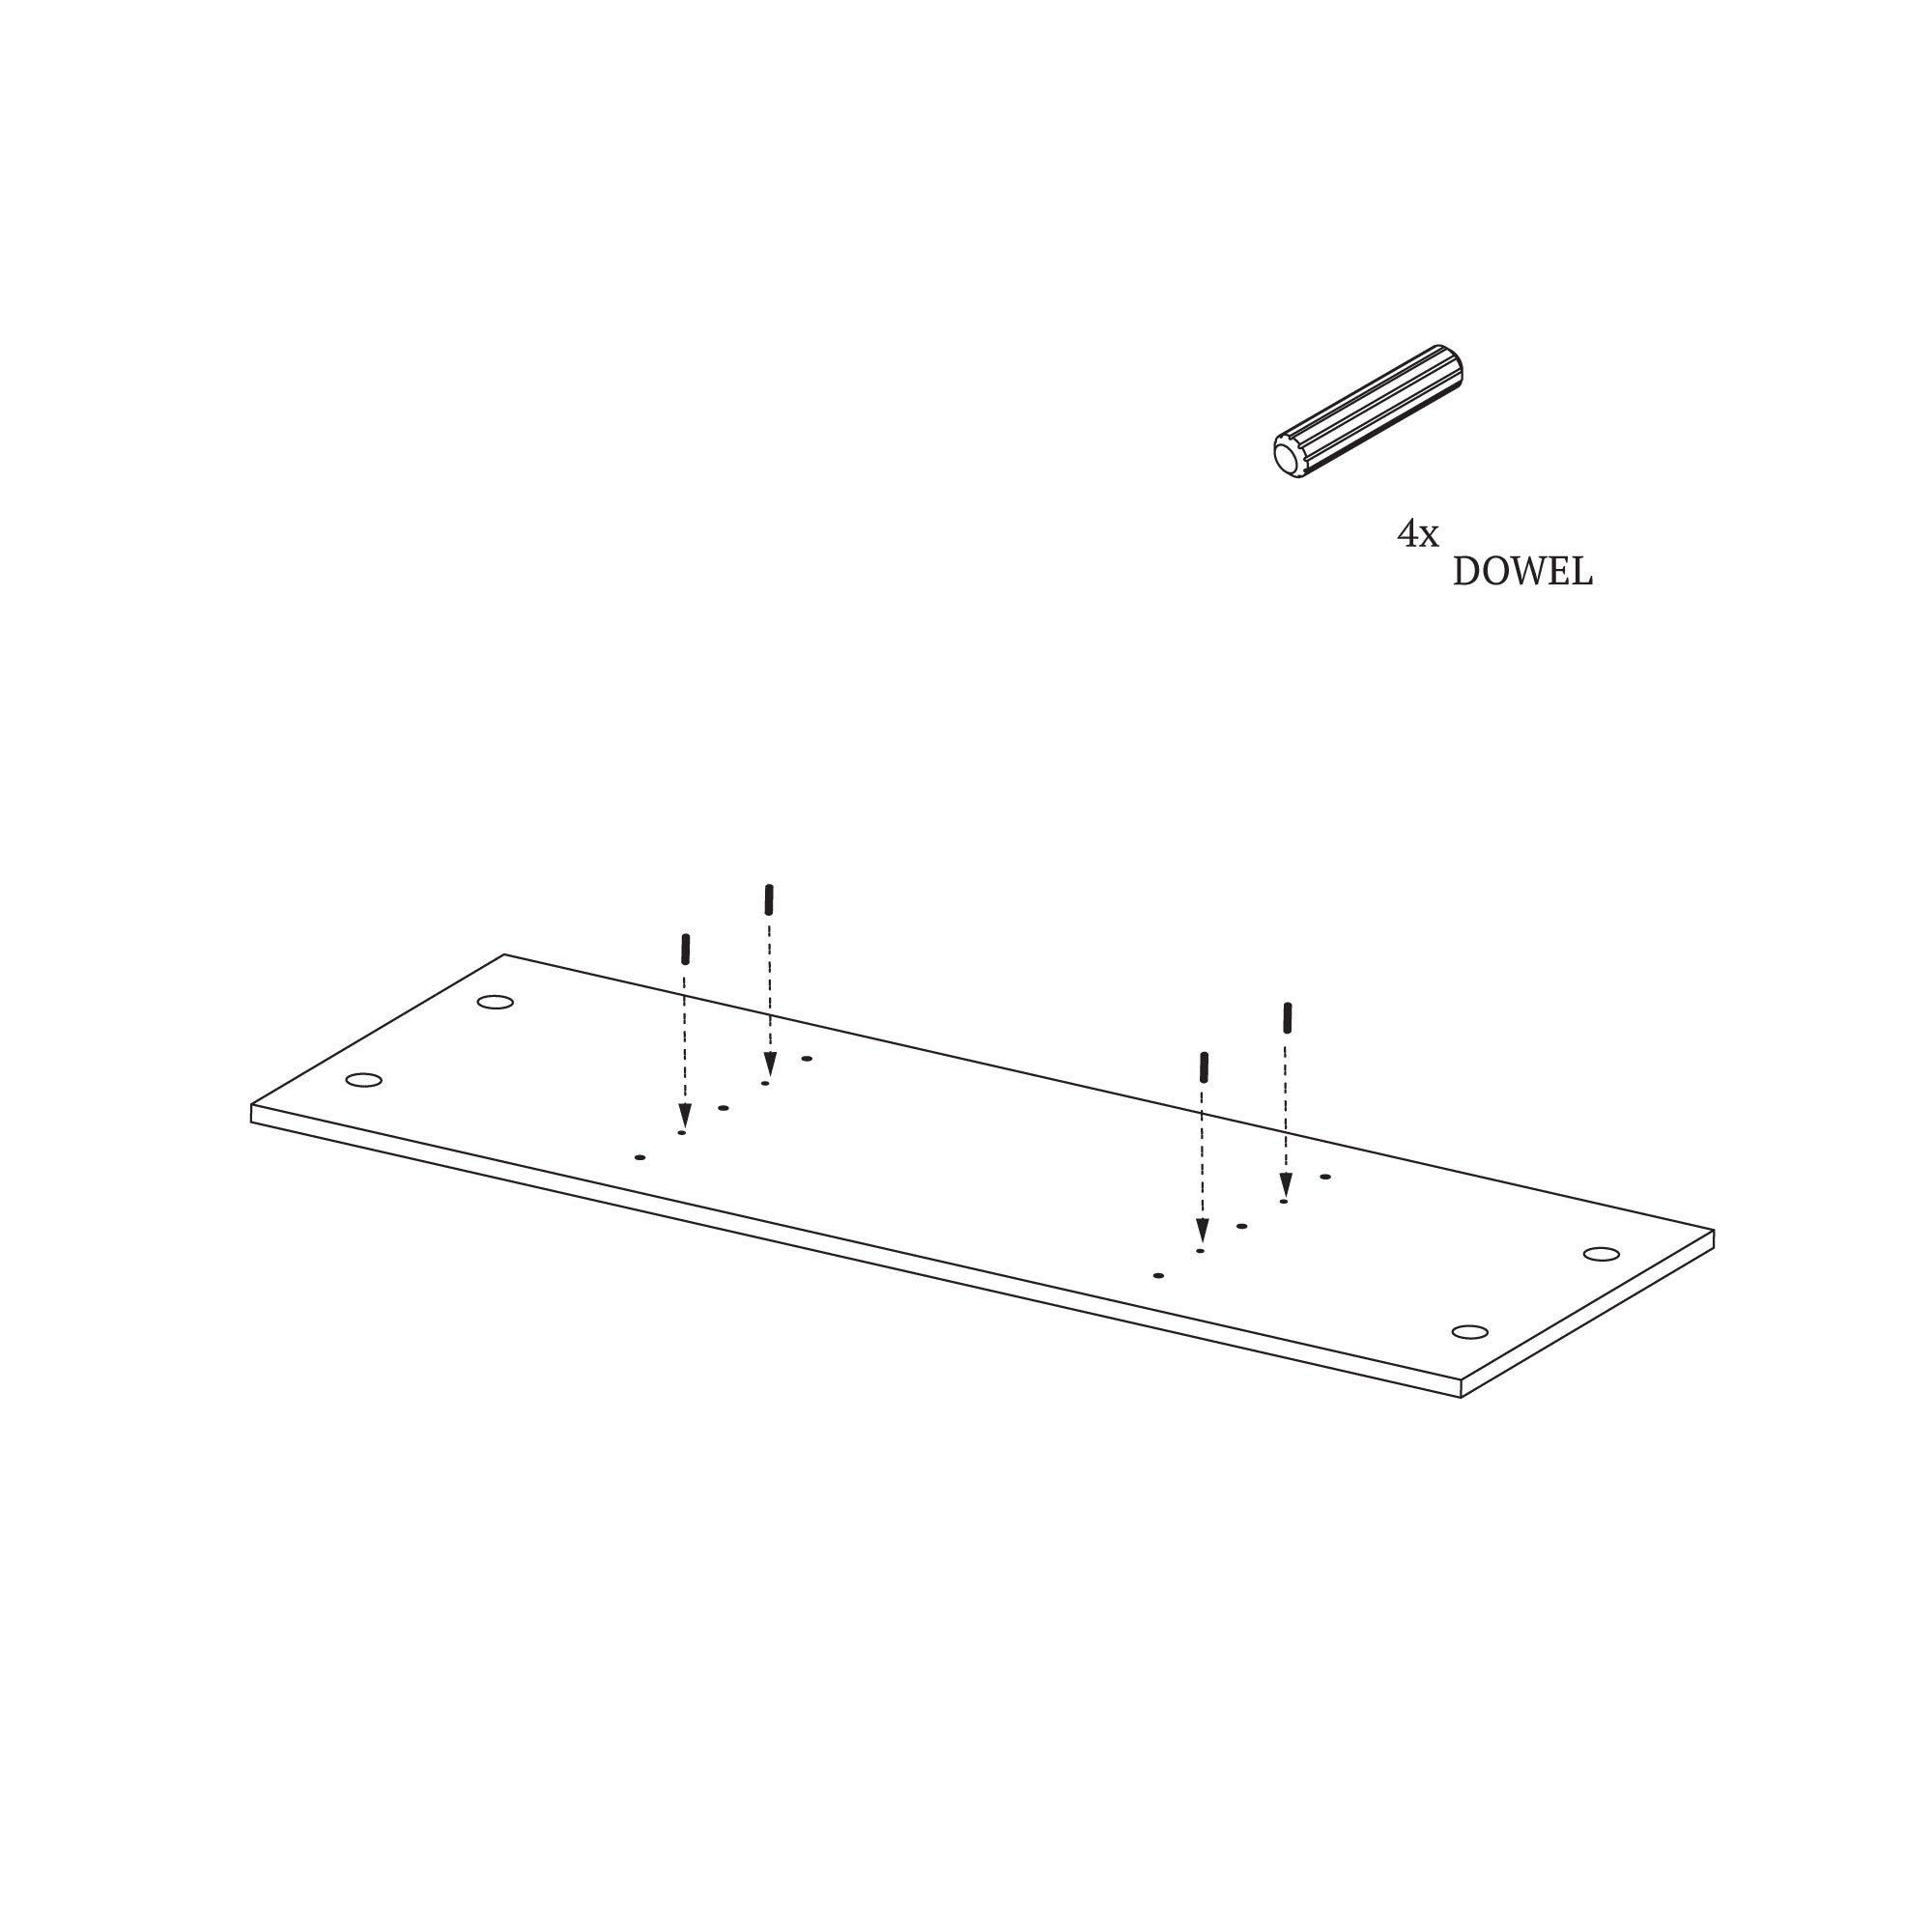
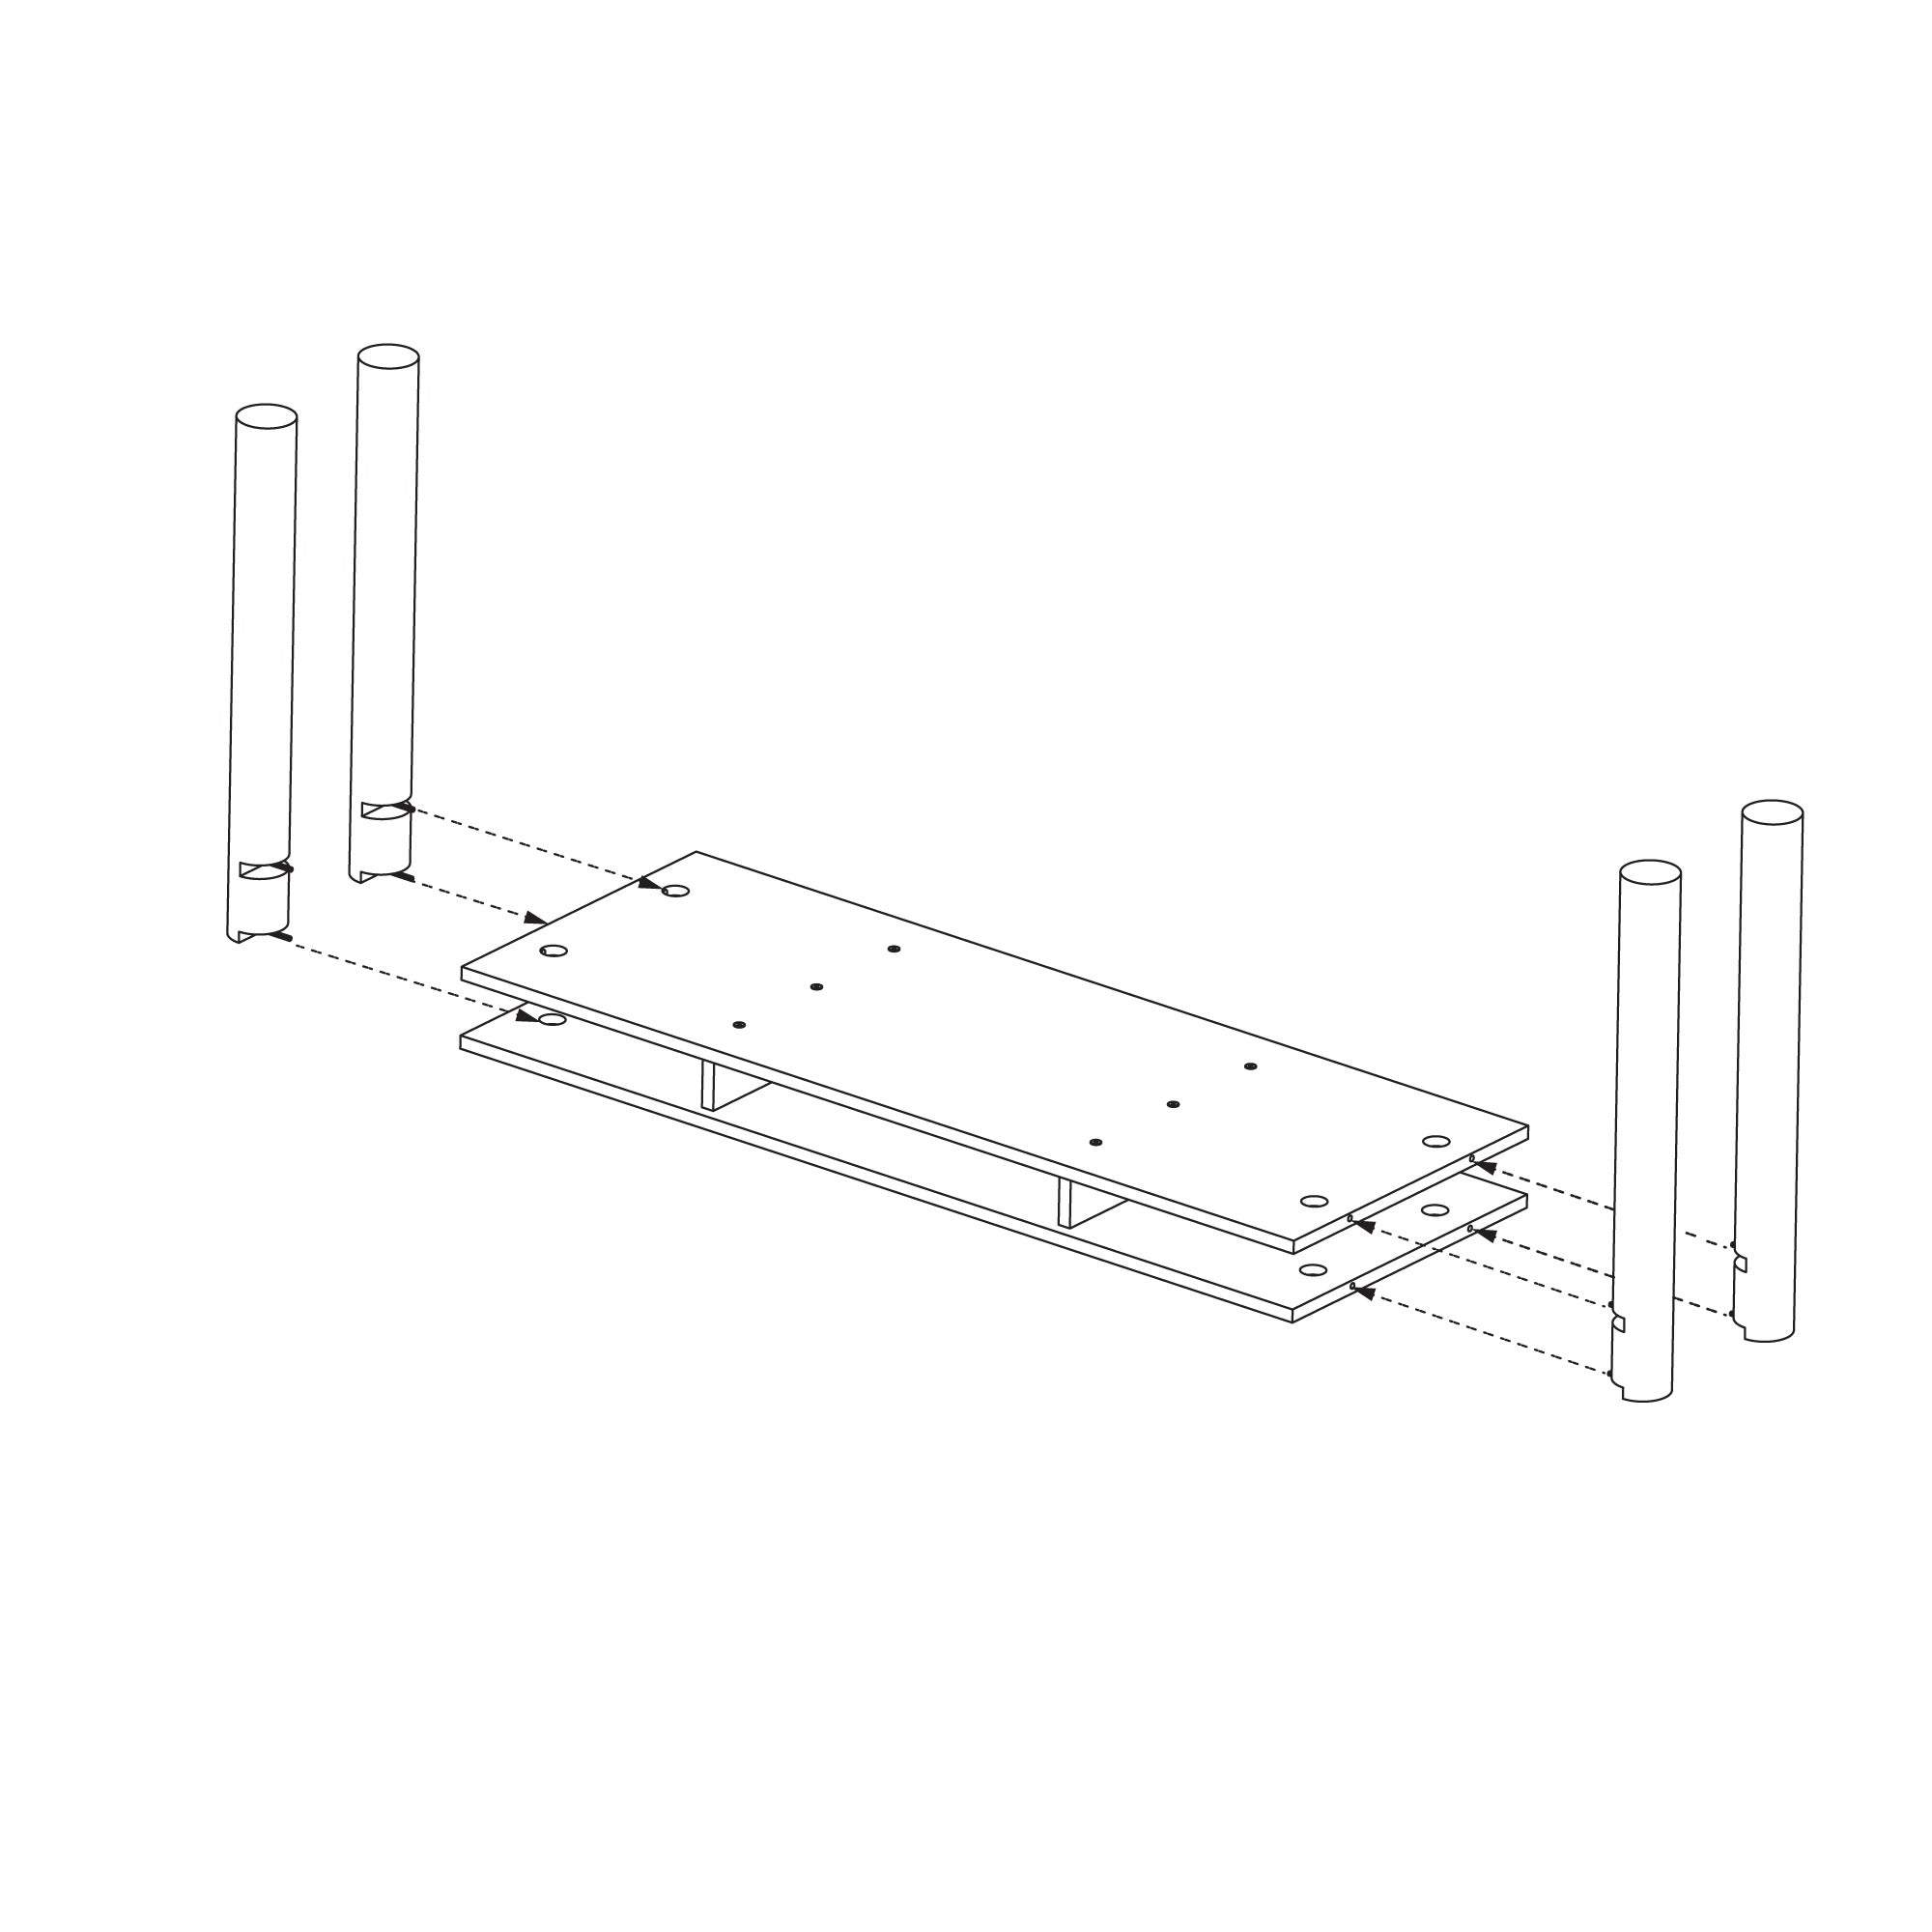
Place the tabletop on a flat surface with the mounting holes facing up—exactly as shown in the illustration. Insert the dowels into the holes as indicated in the diagram.
STEP 3
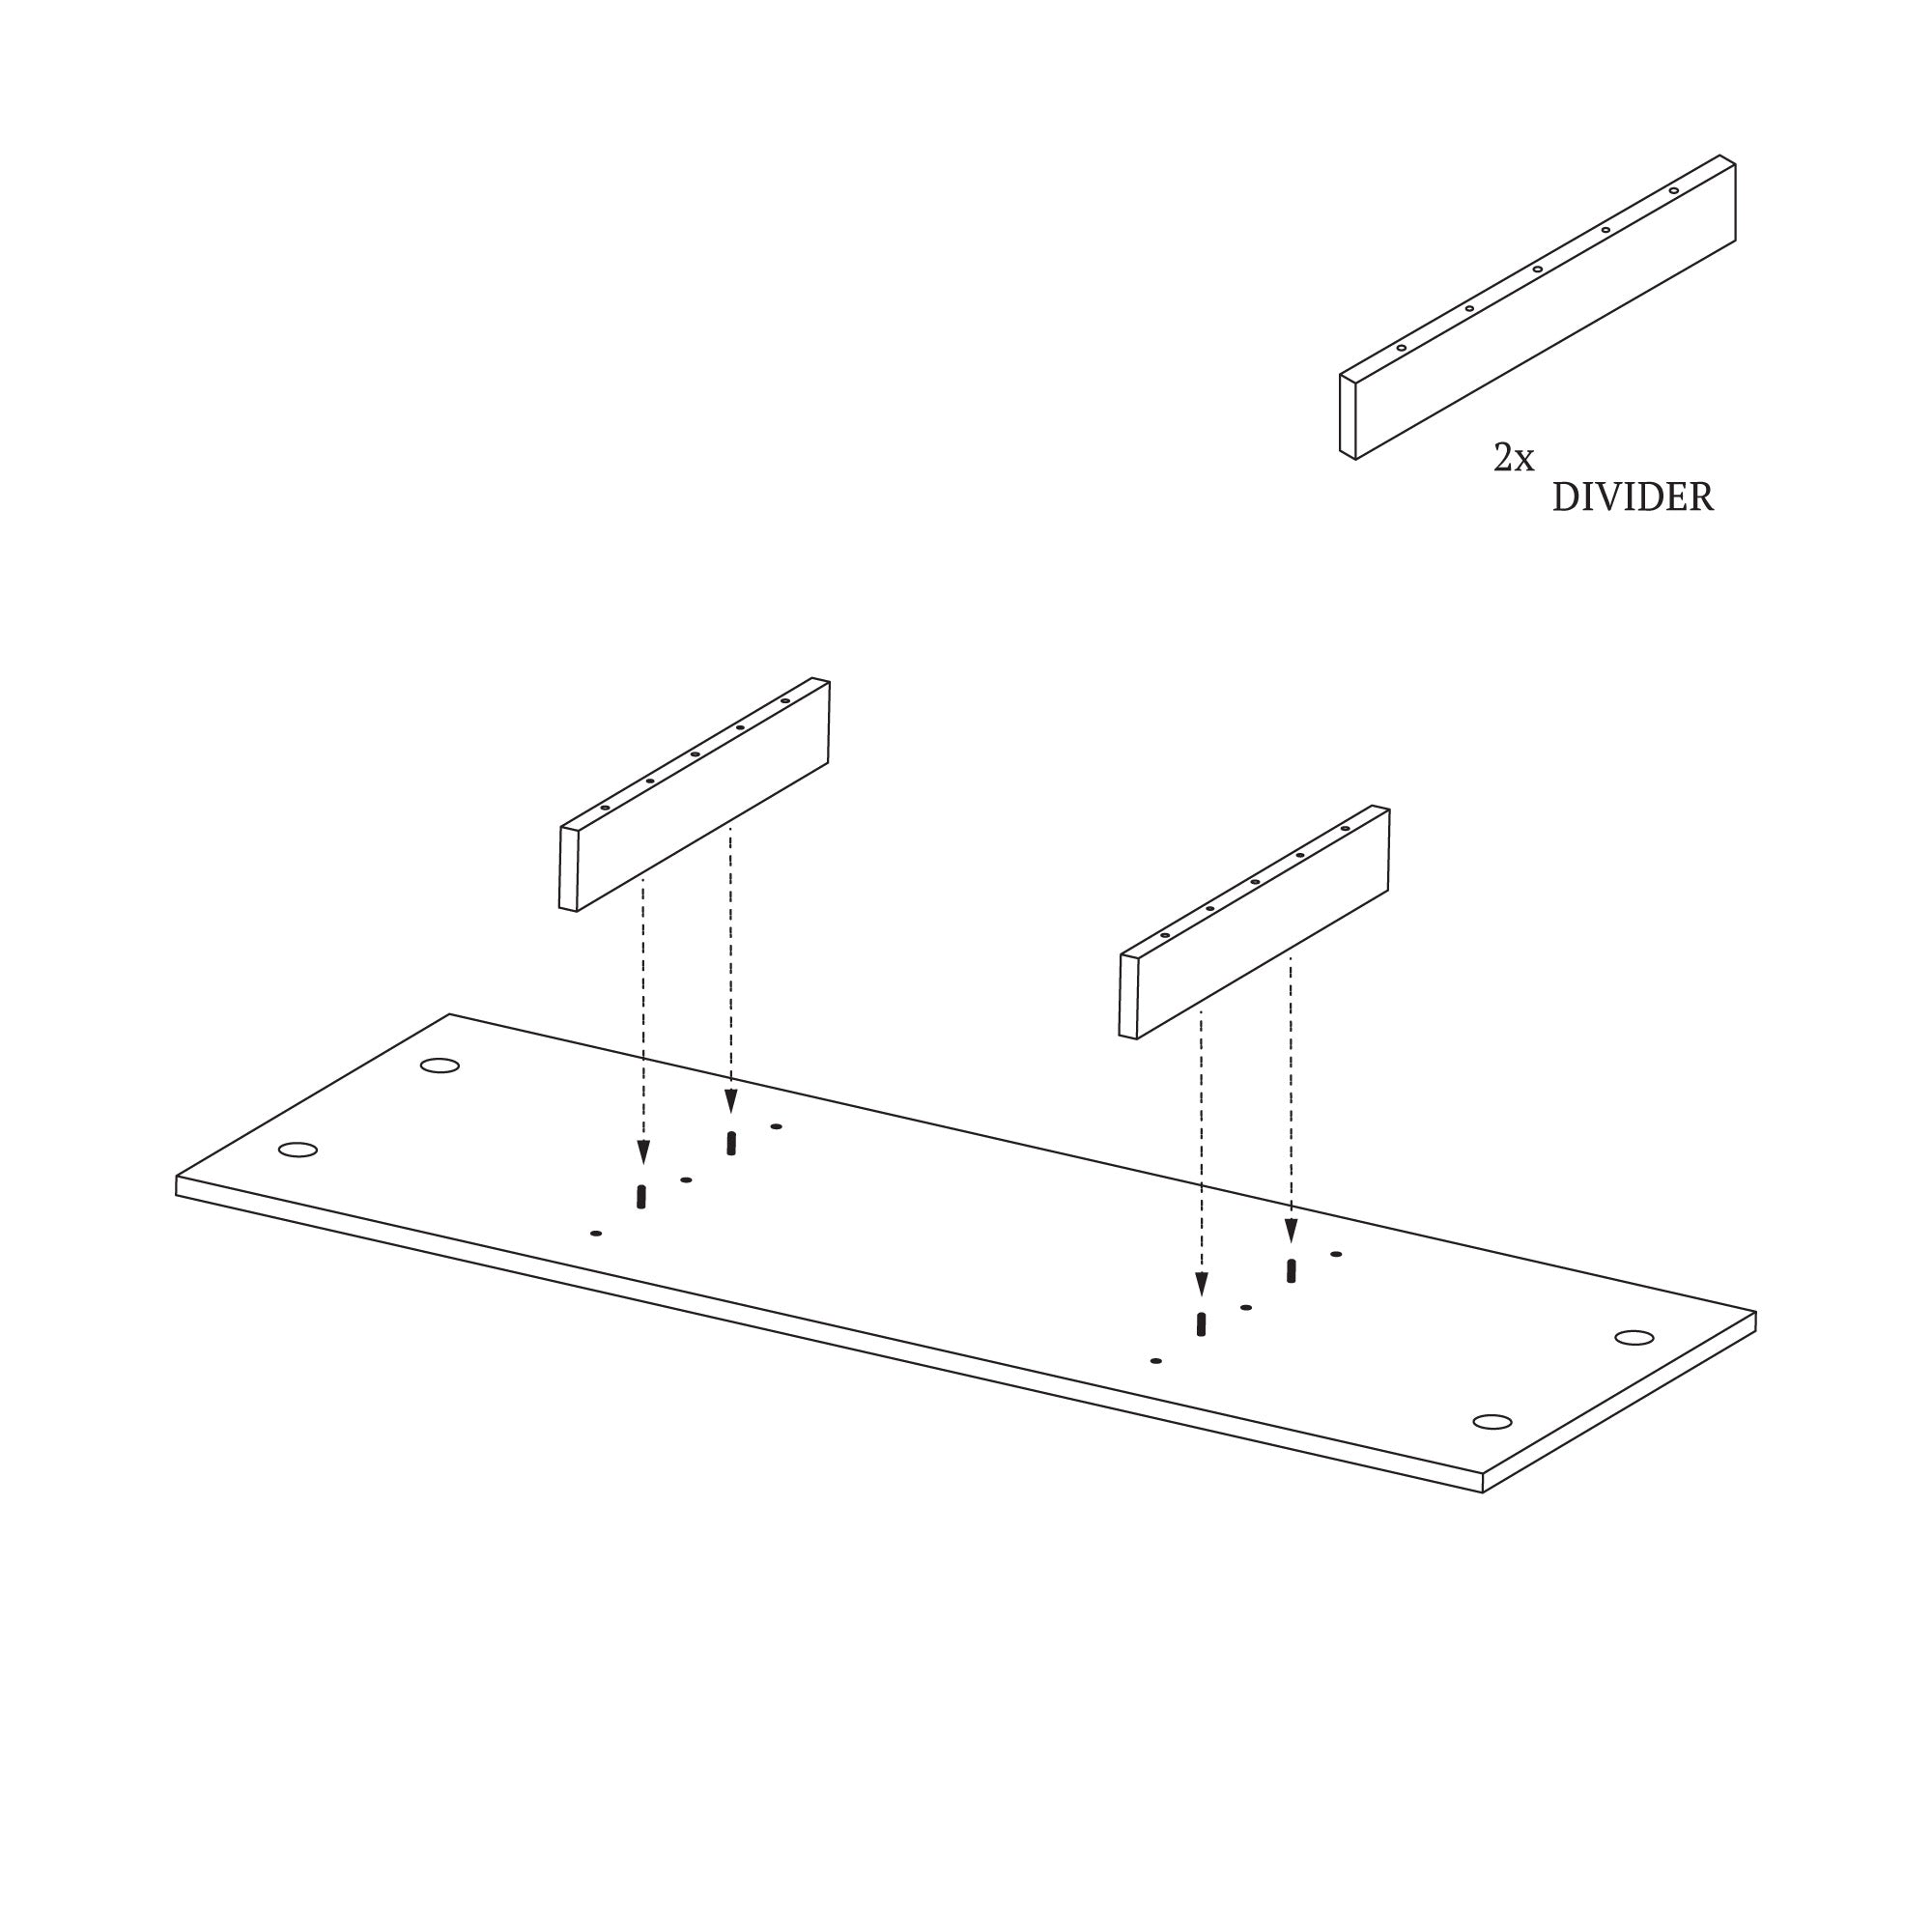
Proceed with assembling the connecting panels. Place the panels onto the dowels protruding from the tabletop.
STEP 4
Next, insert additional dowels into the holes in the panels. The through-holes in the panels will be used for screws, so be careful to insert the dowels only into the blind (non-through) holes.
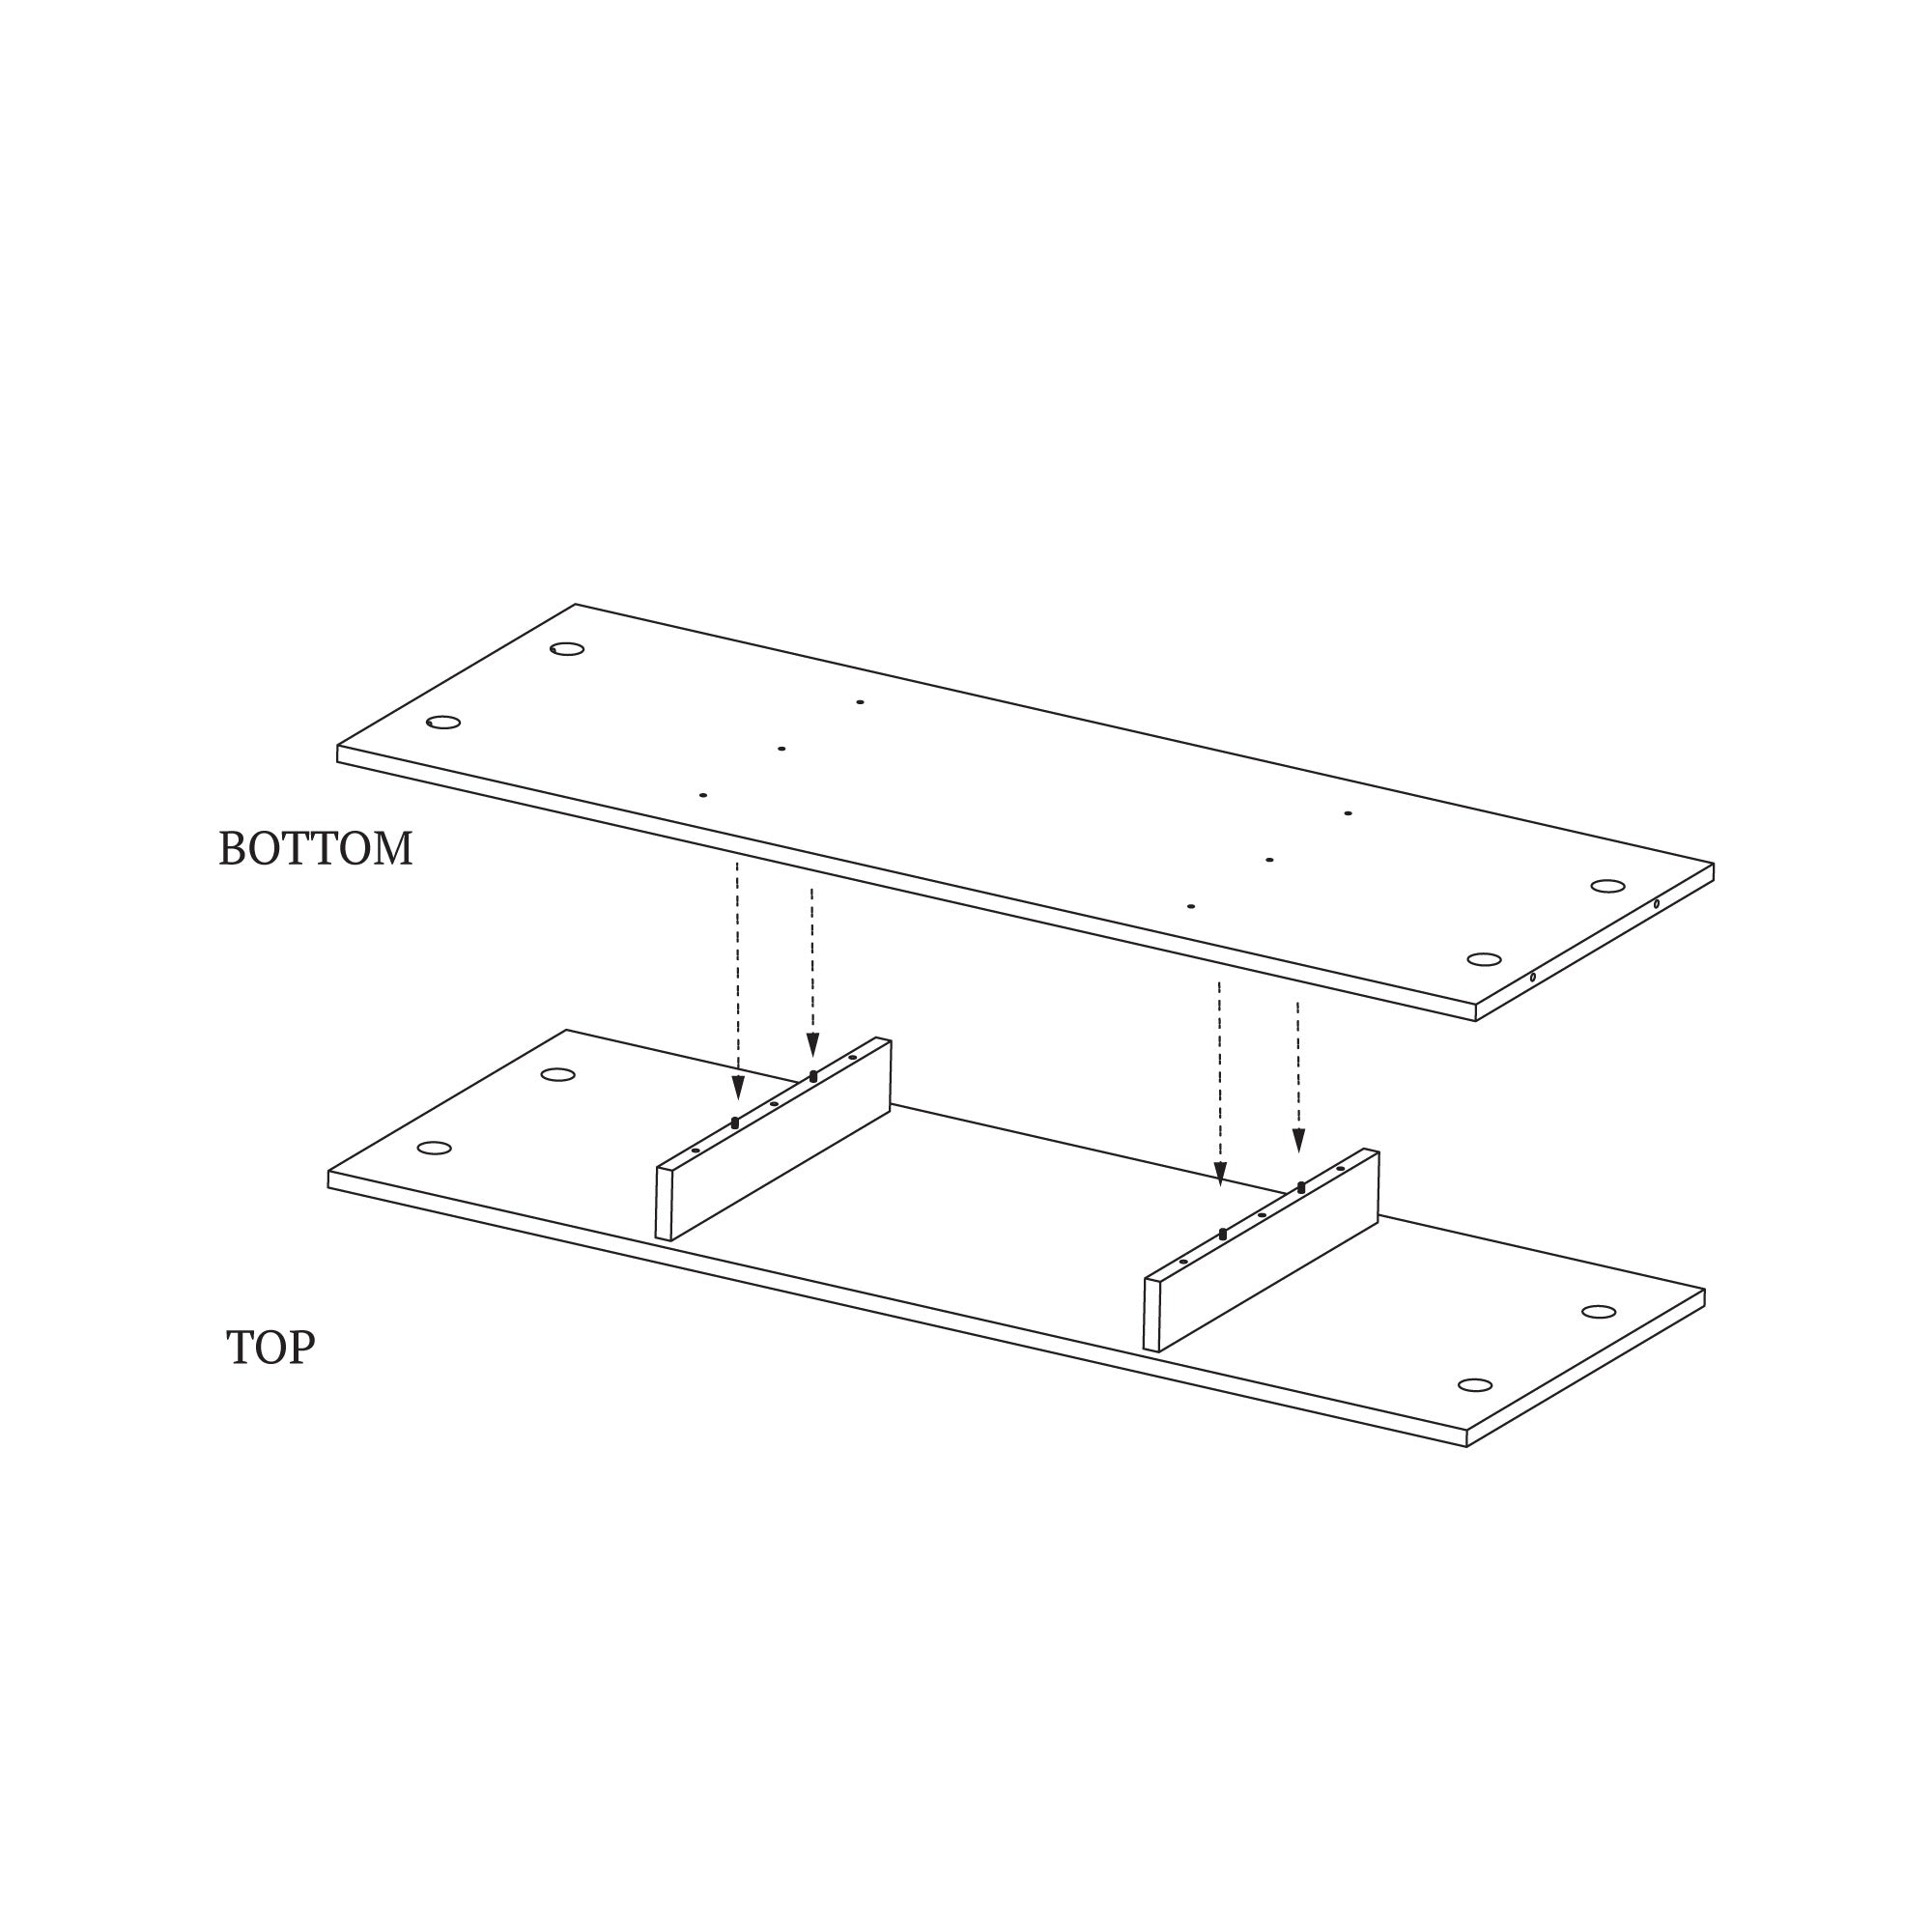
STEP 5
Time to connect the tabletops. Place the bottom tabletop onto the protruding dowels. Make sure to position it exactly as shown in the illustration.
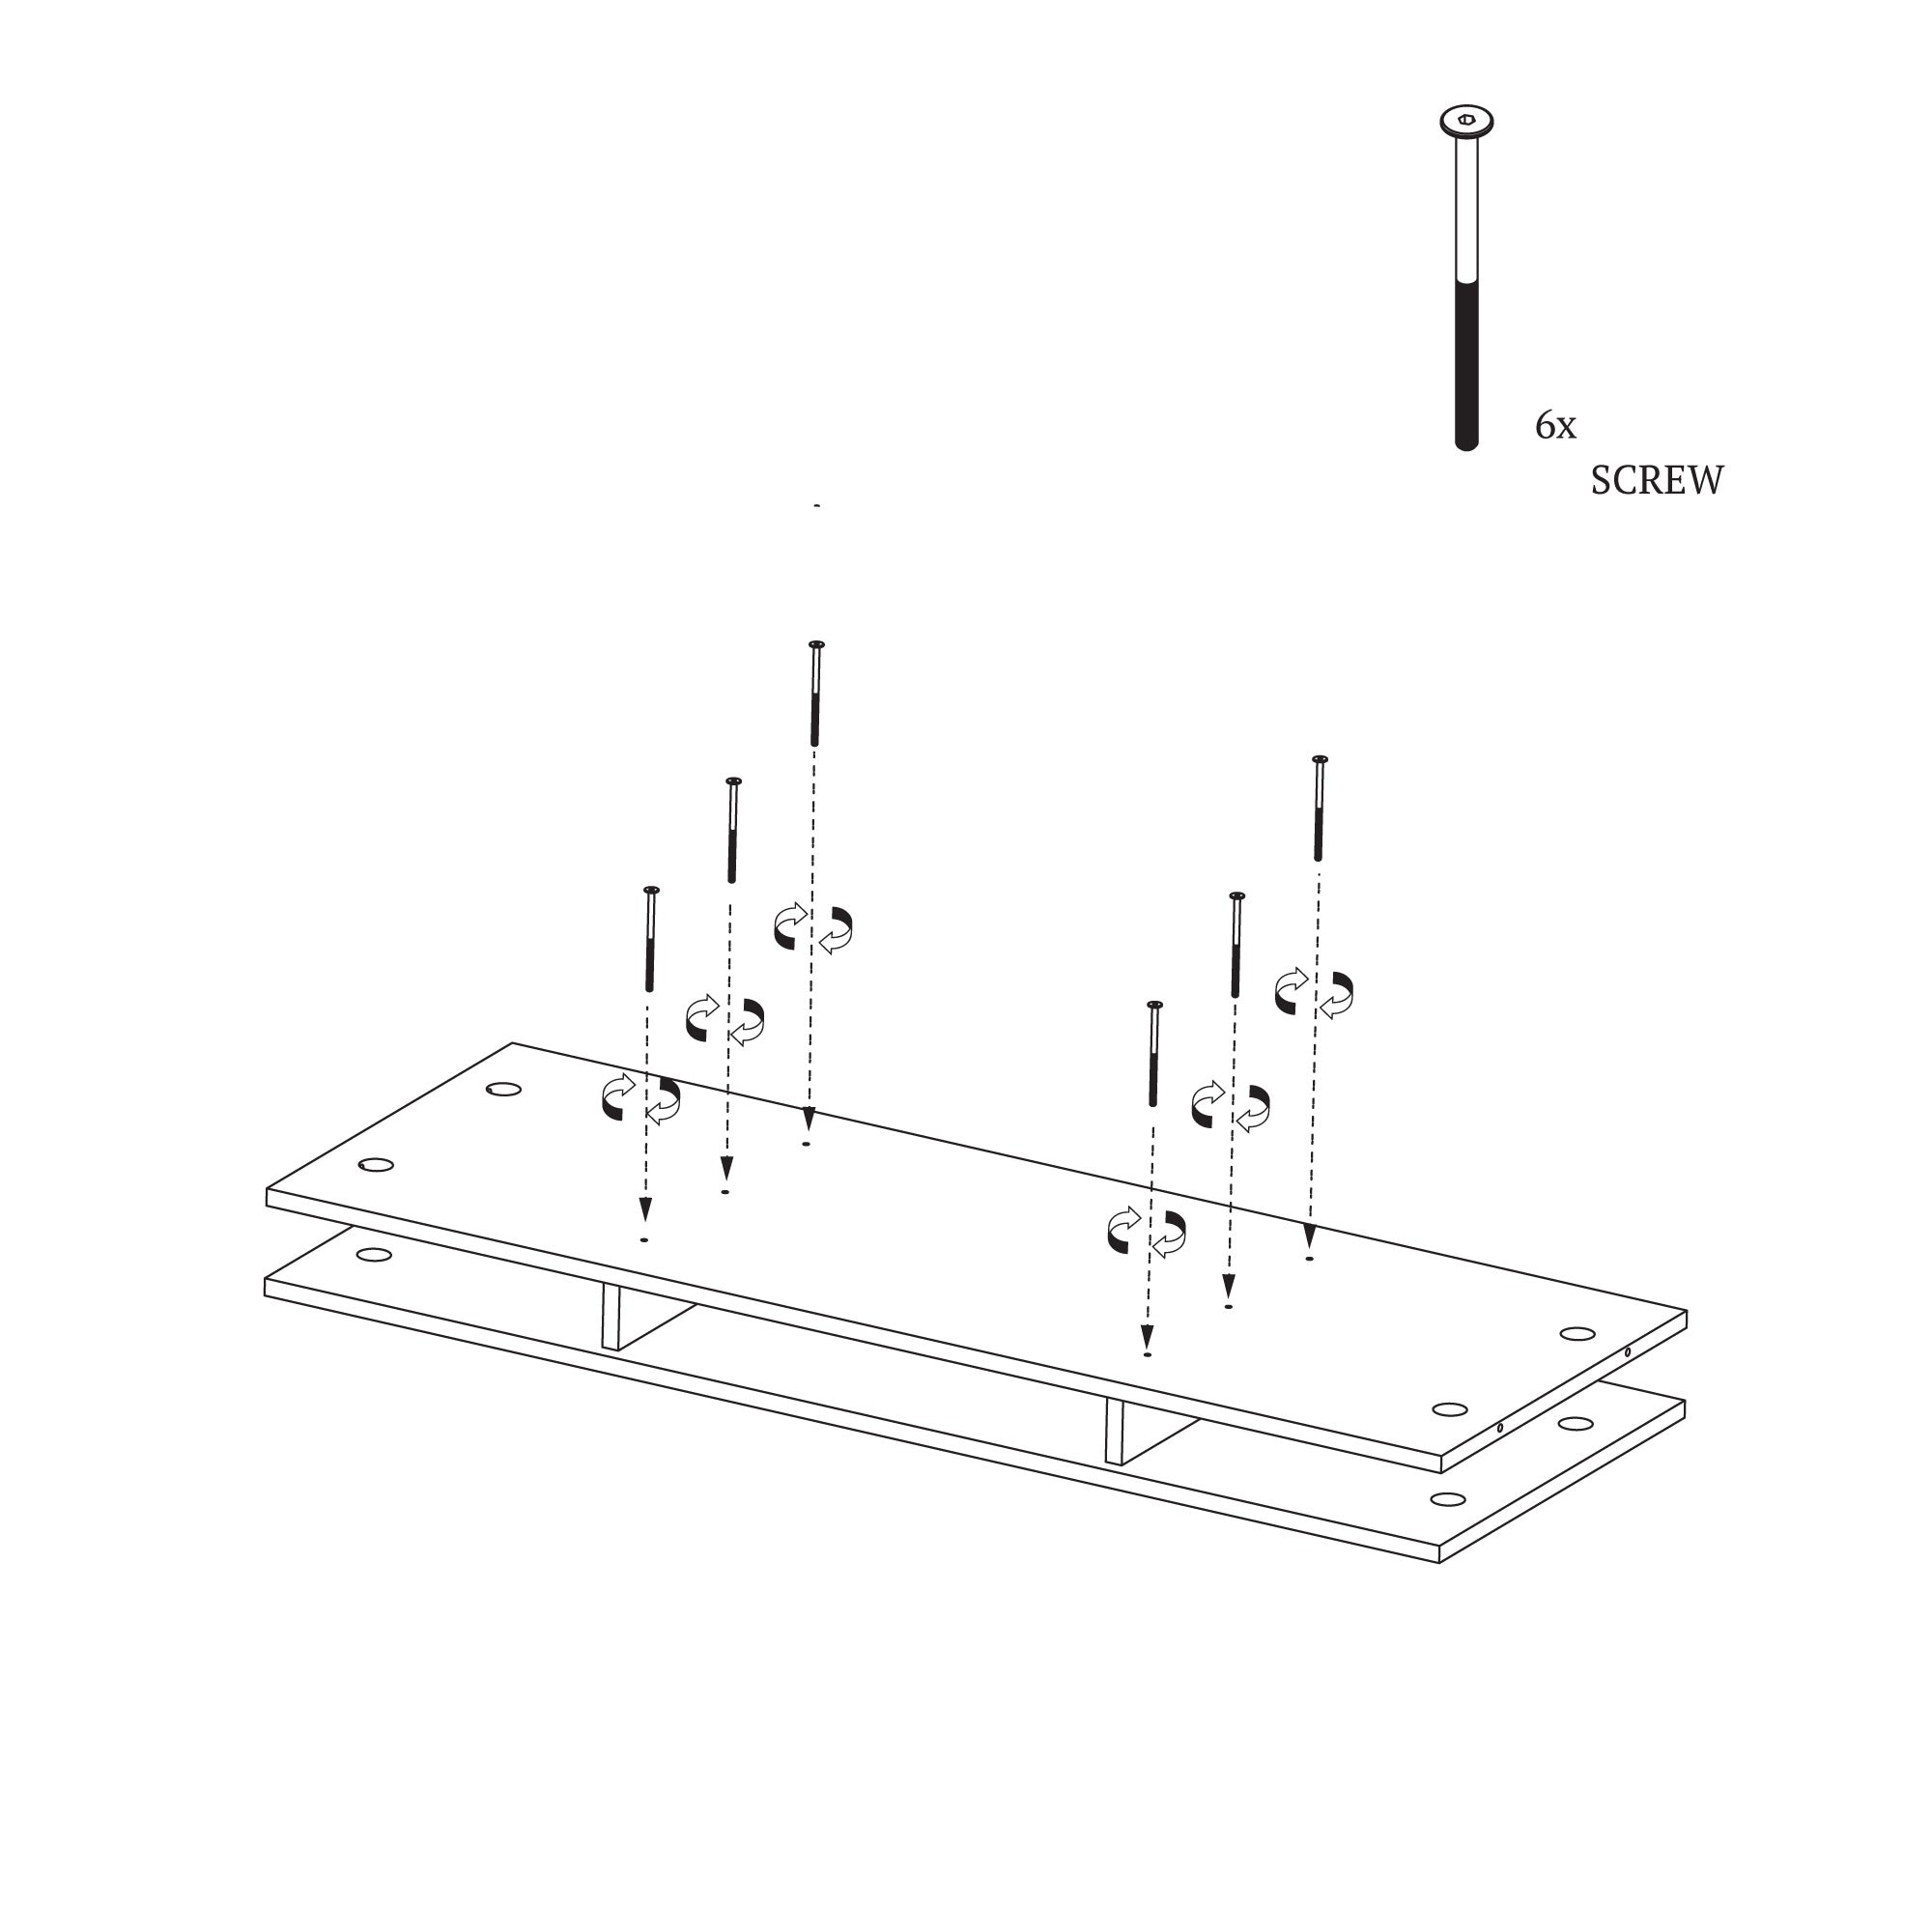
STEP 6
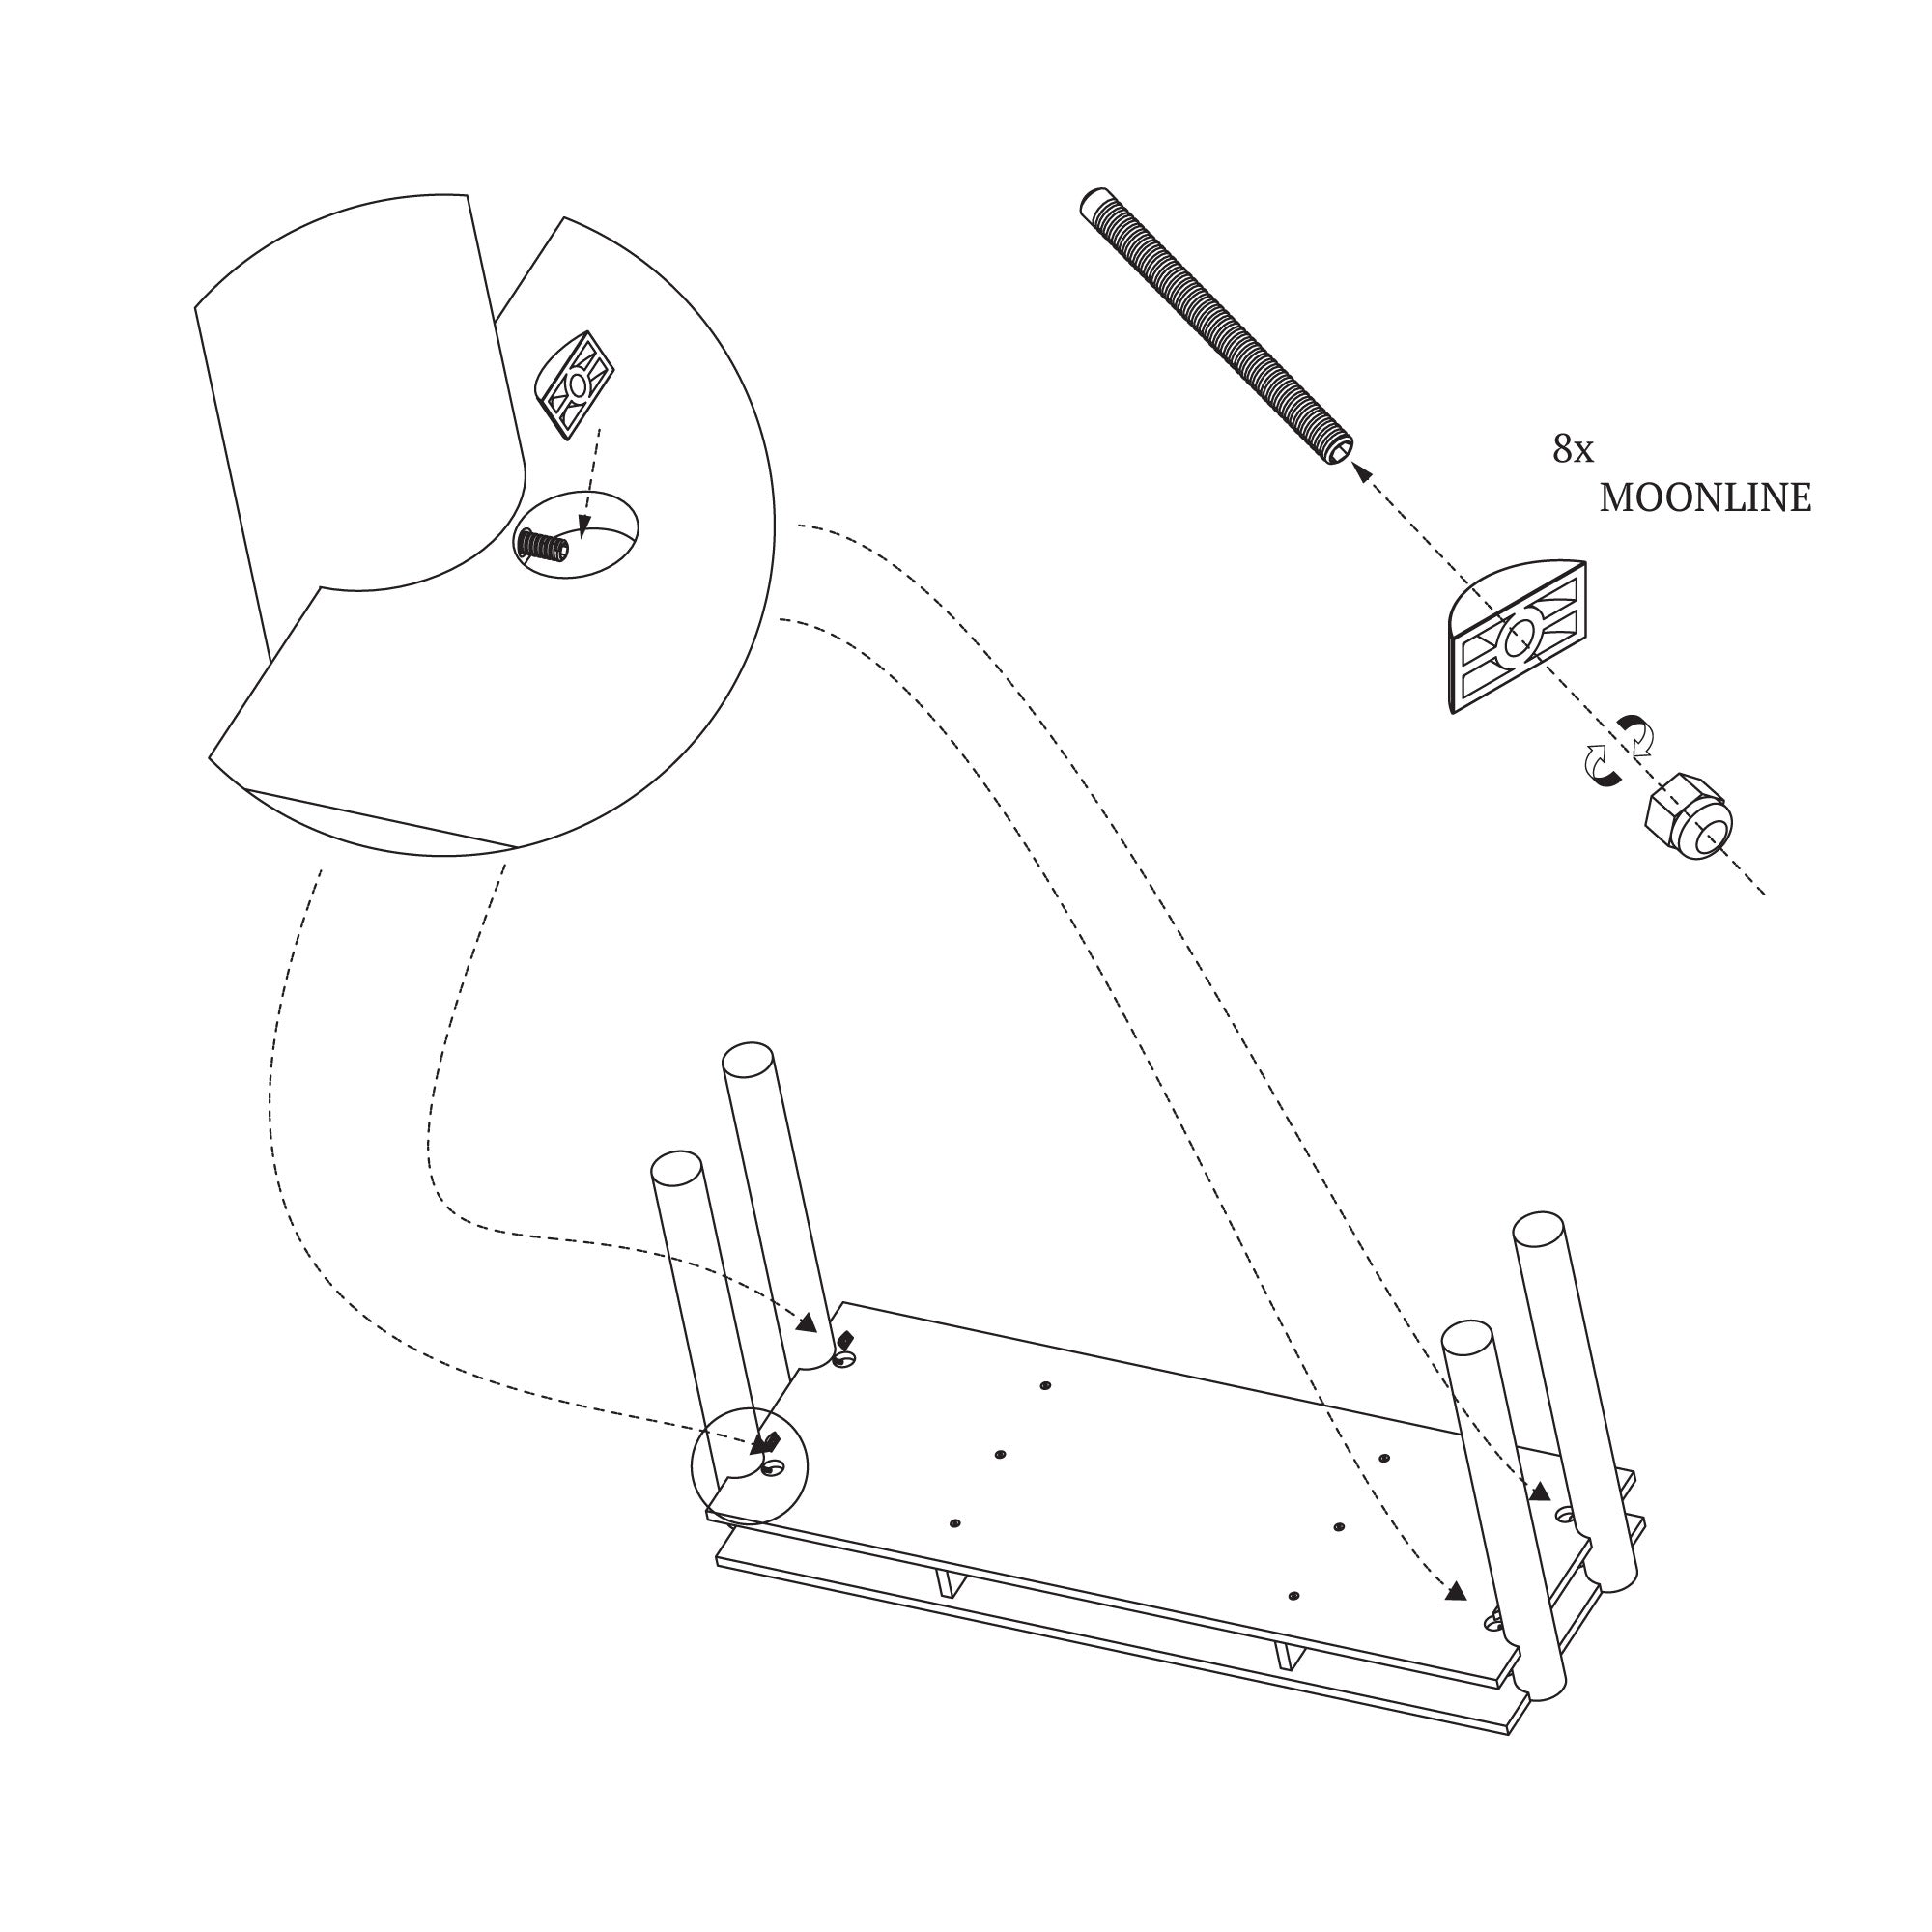
After placing the bottom tabletop, use the long screws to secure it. Insert the screws into the designated holes and tighten them to ensure the tabletops and side panels are firmly pressed together.
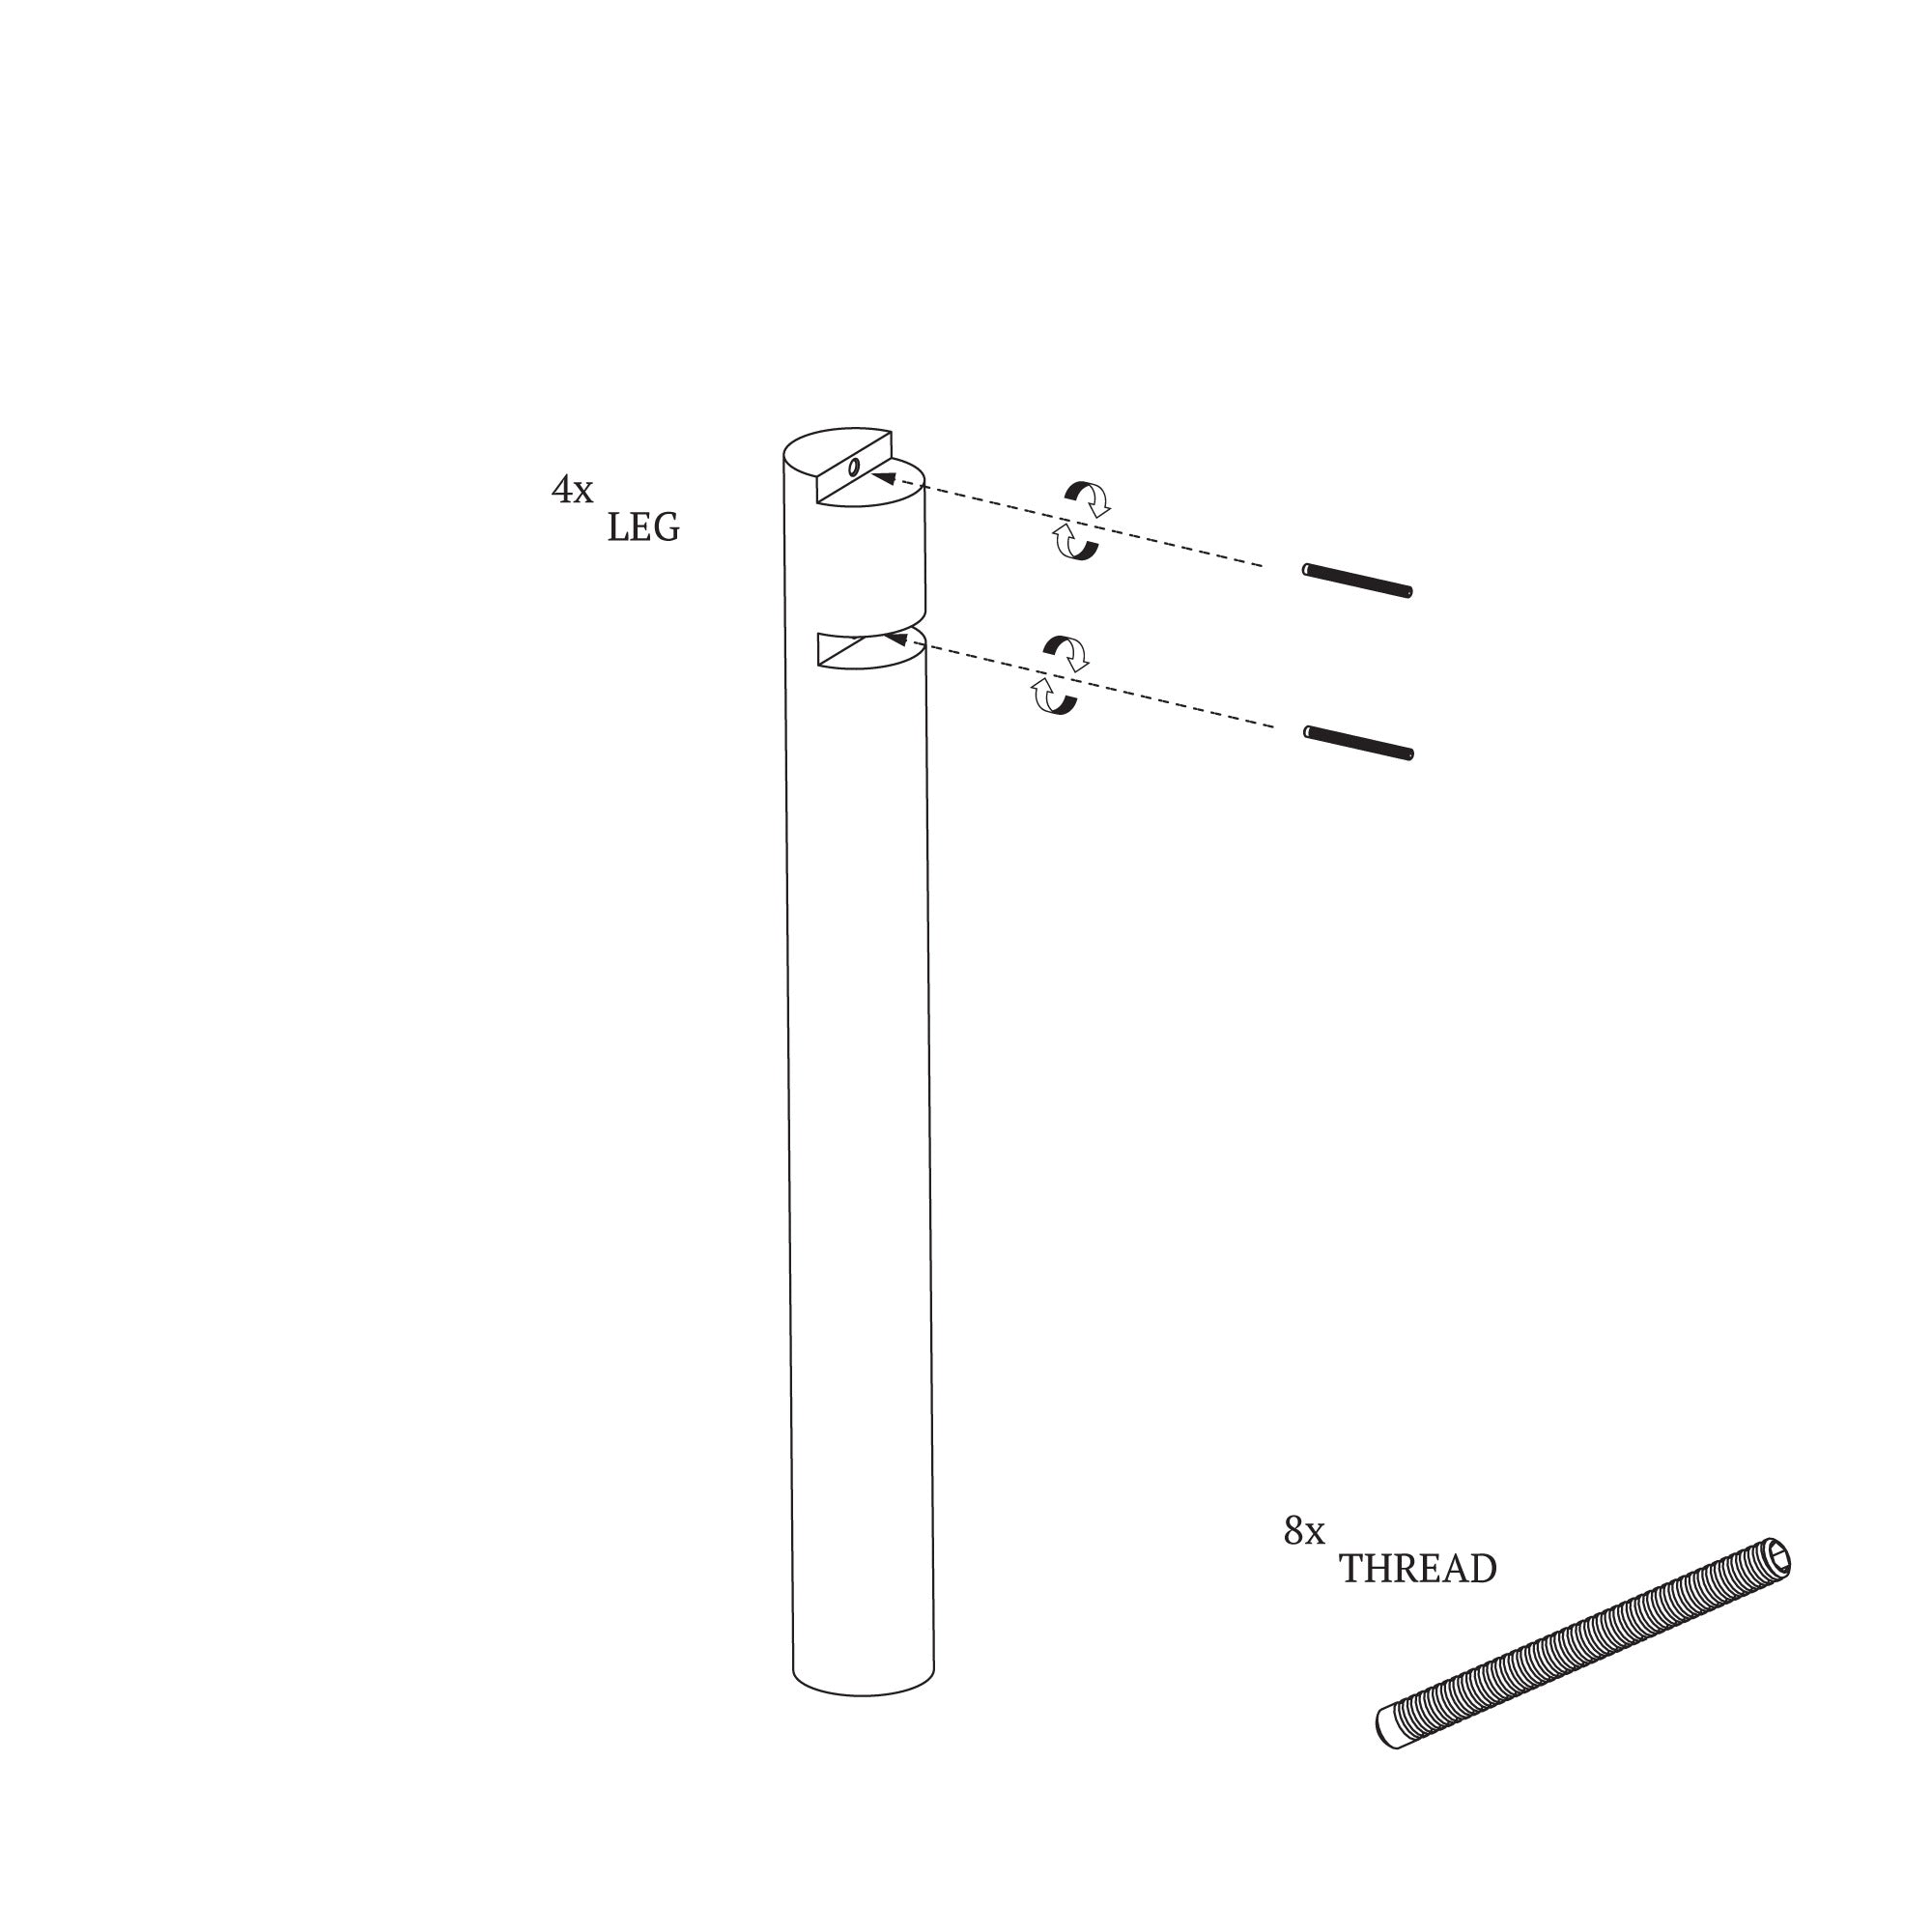
STEP 7
Prepare the legs. Screw the threaded rods into the threaded holes in the legs. Tighten them fully until they are secure. Repeat this step for all four legs.
STEP 8
Place the legs with the protruding threaded rods against the side of the previously assembled tabletop. Insert the rods into the holes located on the sides of the tabletop.
STEP 9
Please note that the threaded rods should now be visible in the recesses of the tabletop. Now, place the Moonline connectors onto the protruding rods, as shown in the attached illustration.
STEP 10
Next, screw on the nuts to secure the Moonline connectors tightly to the tabletop surface. Use the wrench included in the set. Repeat this step for each leg. Remember that both the top and bottom tabletops must be tightened in the same way.
STEP 11
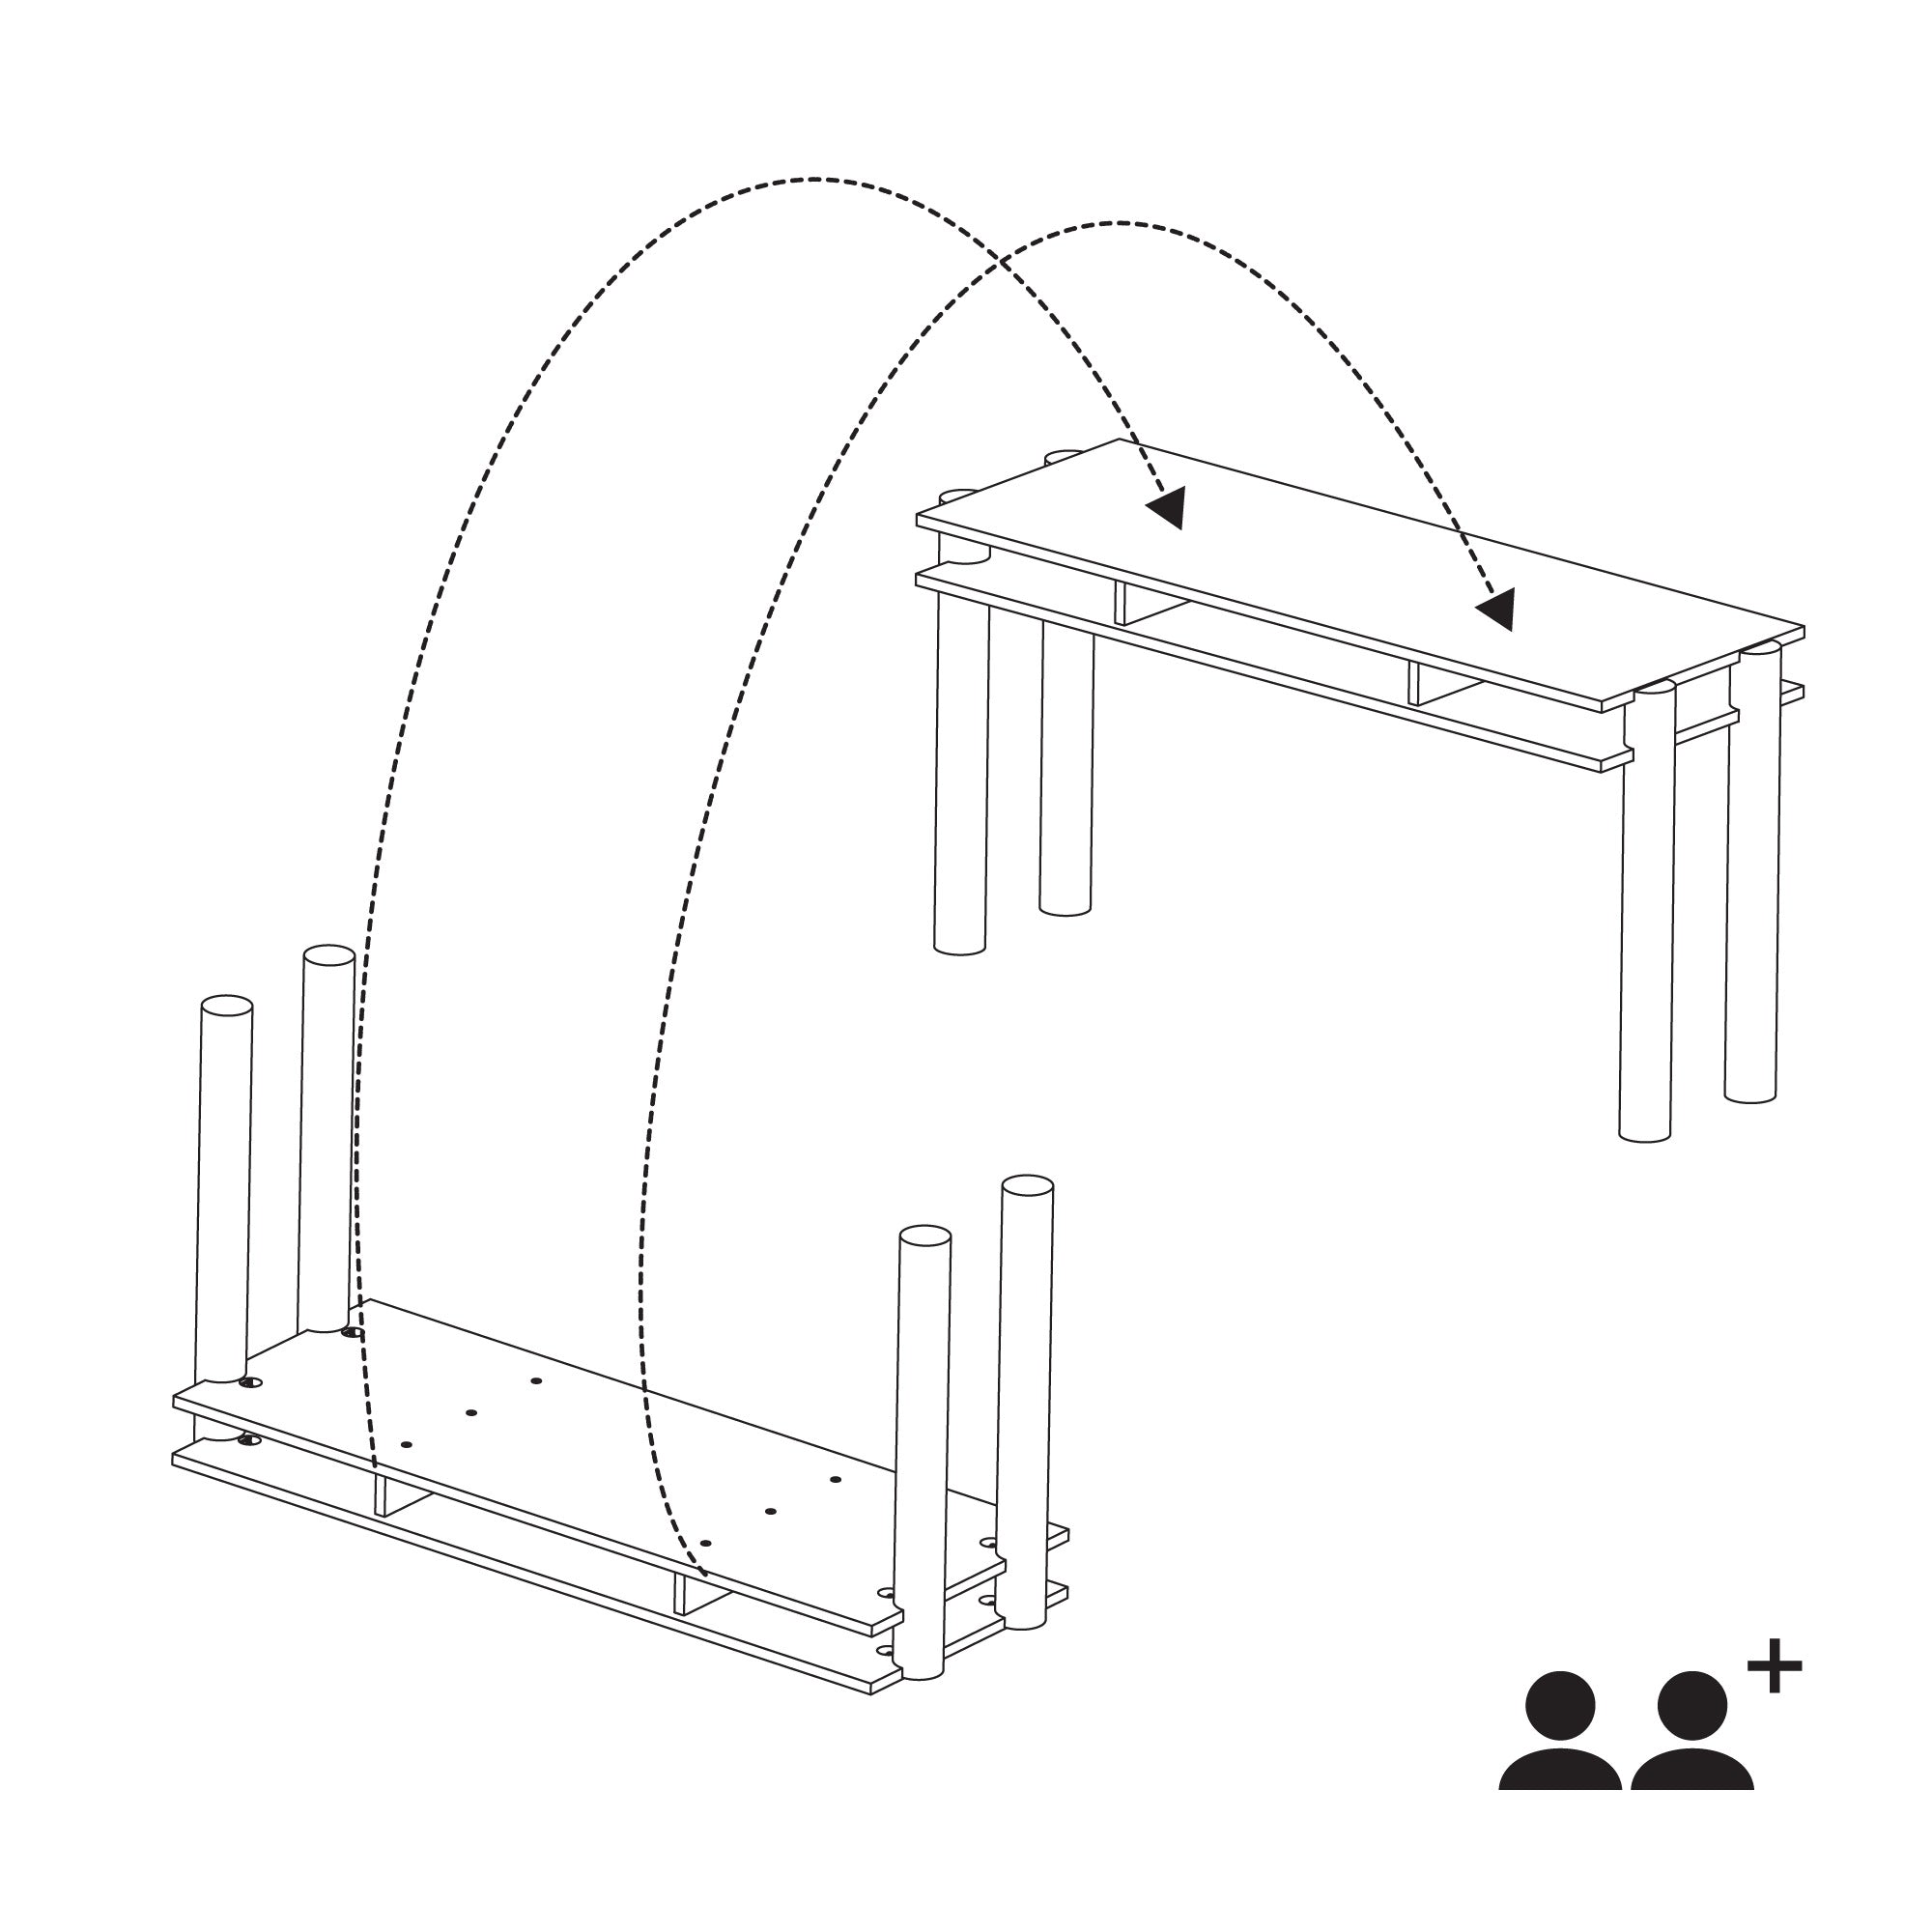
Ask someone for help and carefully turn the desk upright so that it stands on its legs. Remember not to lift the desk on your own — it can be dangerous and may lead to injury. The desk, including the legs, weighs around 28 kg.


